
Easy Homemade Japanese Glass Floats
Easy Homemade Japanese Glass Floats: Whether you’re styling a beach themed party or a Ocean side cottage. Adding these Easy Homemade Japanese Glass Floats is a must! They add a touch softness and sparkle to the decor.

These homemade versions cost under $10 for Four! Store bought versions are around $15 each and if you were to purchase vintage floats that would cost you an average of $30-50 per float! So you see it makes sense that with a little effort and time it’s totally worth making your own!
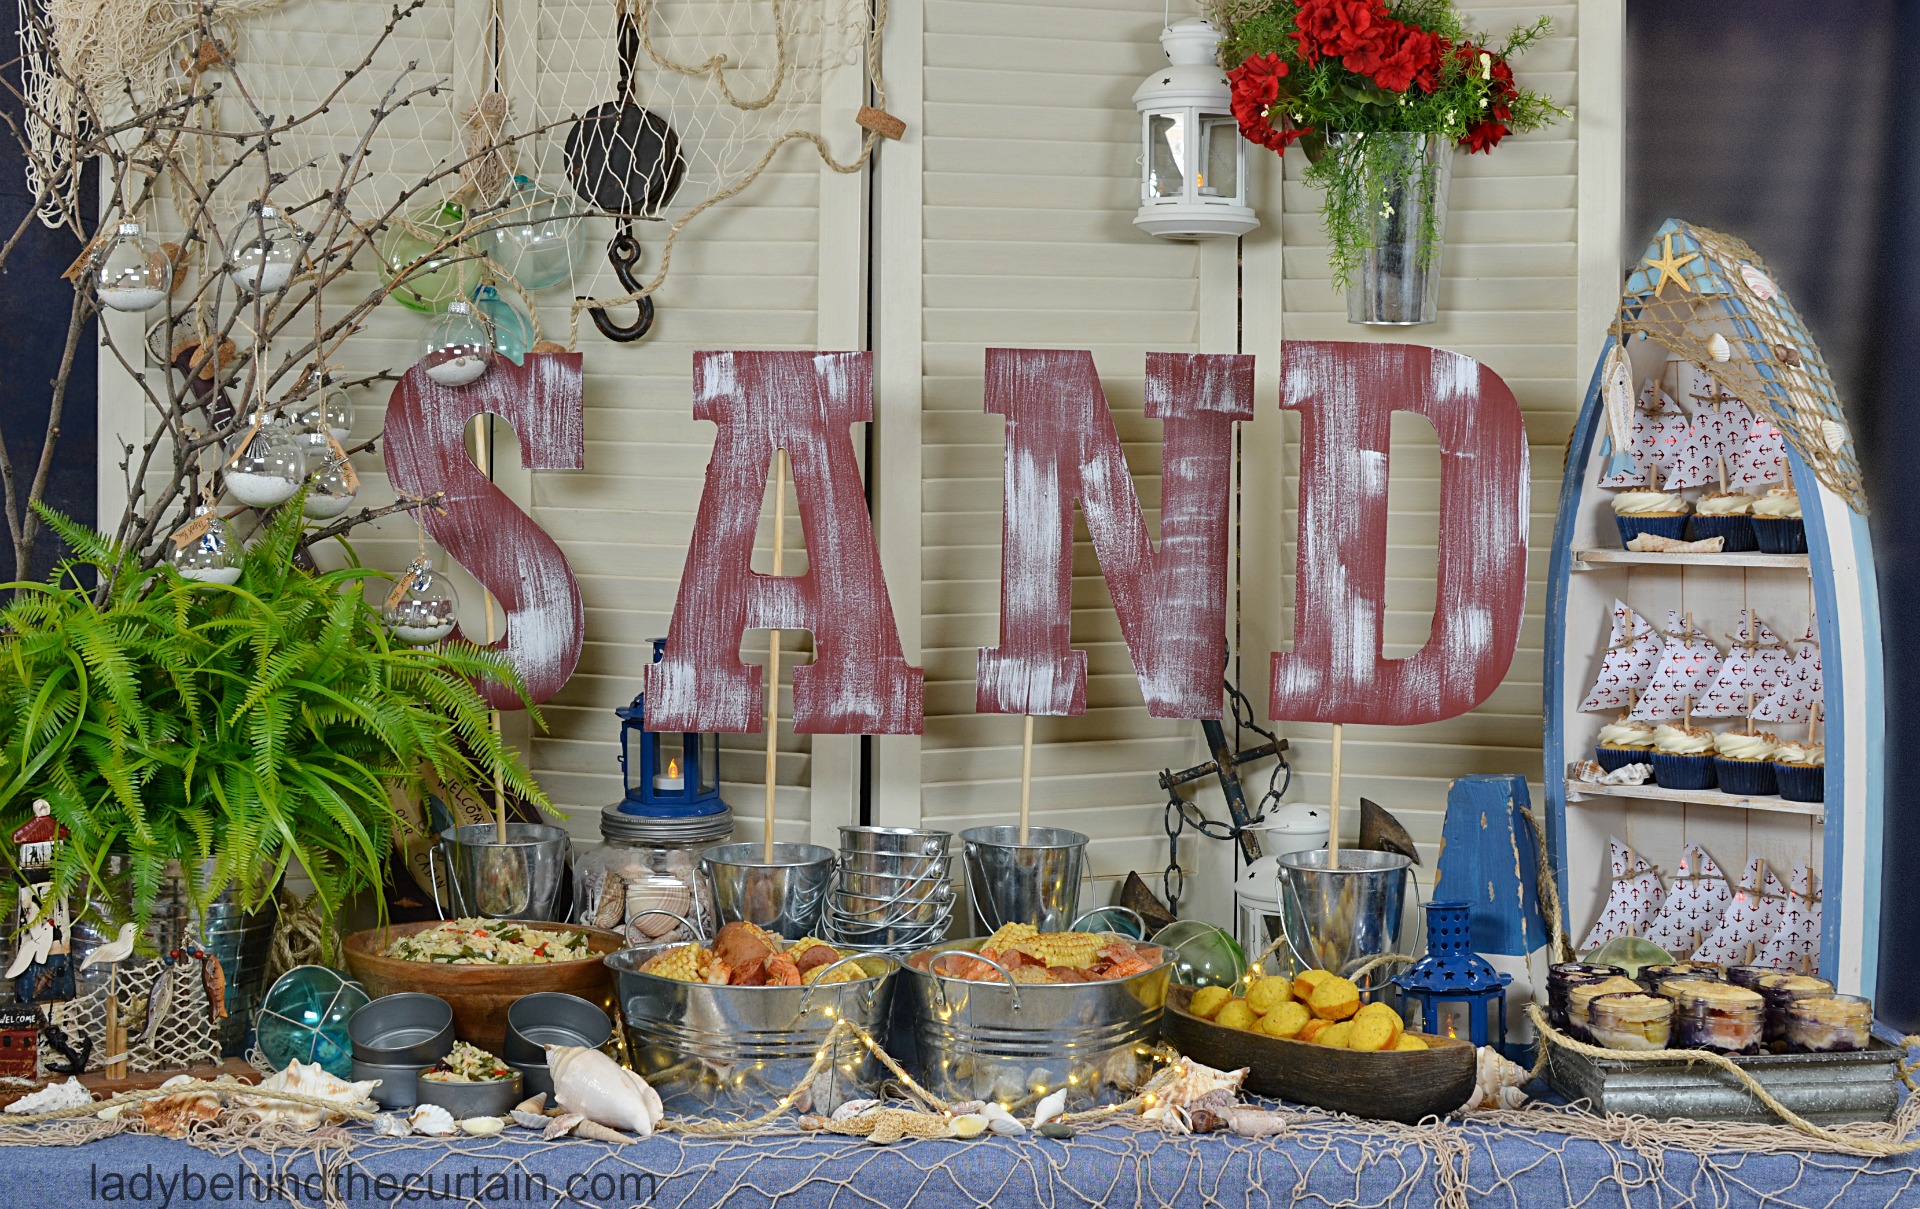
COUNTRY SHRIMP BOIL PARTY
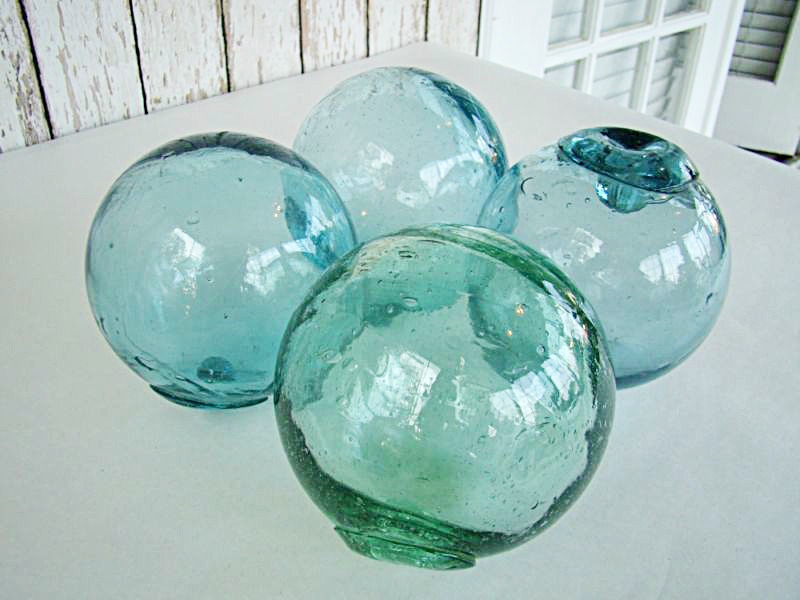
A little history lesson about Glass Floats: Large groups of fishnets were strung together (sometimes 50 miles long) and set adrift in the ocean. Supported near the surface by hallow glass balls. These glass floats are no longer being used by fishermen, but many of them are still afloat in the world’s oceans, primarily the Pacific. Even though most remaining glass floats originate in Japan (because of the large deep sea) they originally came from Norway in 1844 where glass floats were on gill nets in the great cod fisheries in Lofoten. By the 1940’s glass had been replaced with wood or cork. This picture below is of vintage glass floats.
All you need for this fun project is Mod Podge, food coloring, a cheap dollar store fish net and large clear glass ornaments (mine are from Michael’s).
Click here to view the whole party—>>>COUNTRY SHRIMP BOIL PARTY.
How to Make Easy Homemade Japanese Glass Floats
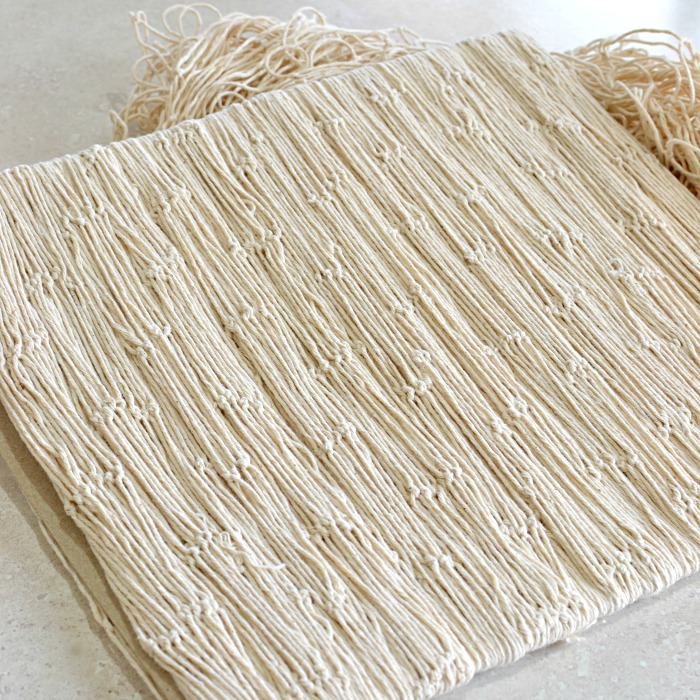
THE NETTING
It’s super easy to give the netting a “used” look. Start by bringing a pot of water to a boil, add 5 black tea bags and the netting. Why black tea? Because it will give out a nice dark color. Let the netting sit in the tea for at least 30 minutes. Remove the netting from the tea, place the netting under running cold water and wring out any remaining tea. Place outside to dry.

Japanese Glass Float Colors, Supplies, and Directions
Choose your colors. The colors you choose will dry darker then the original mixture. Combining the color with the Mod Podge will make your color more like a pastel. Remember the Mod Podge dries clear and the darker version will come through. I chose to use gel food coloring but you can also use the liquid drop type too. FULL PRINTABLE INSTRUCTIONS BELOW
Supplies:
1 (16 ounce) bottle Mod Podge (Michael’s)
gel food coloring (teal, leaf green and sky blue)
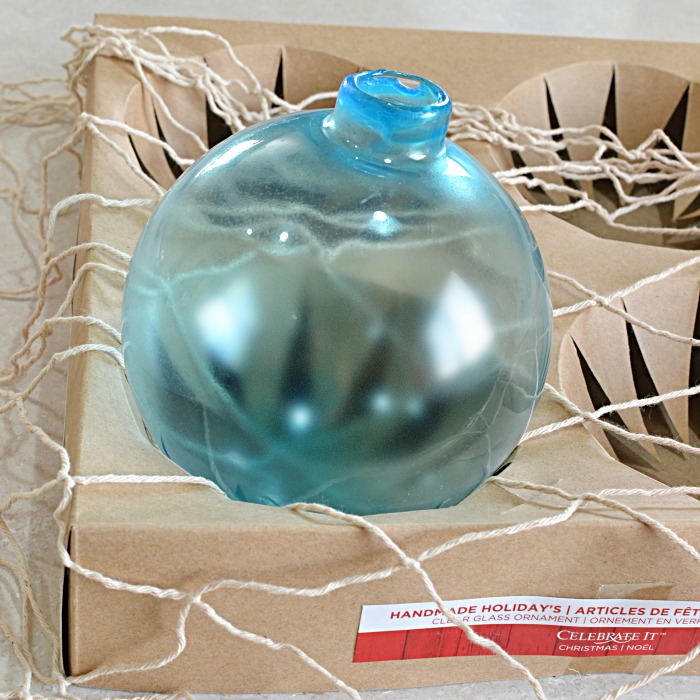
large clear glass ornaments (Michael’s)
toilet paper rolls ,cut in half around
disposable containers
popsicle sticks
parchment paper
fish netting
Directions:
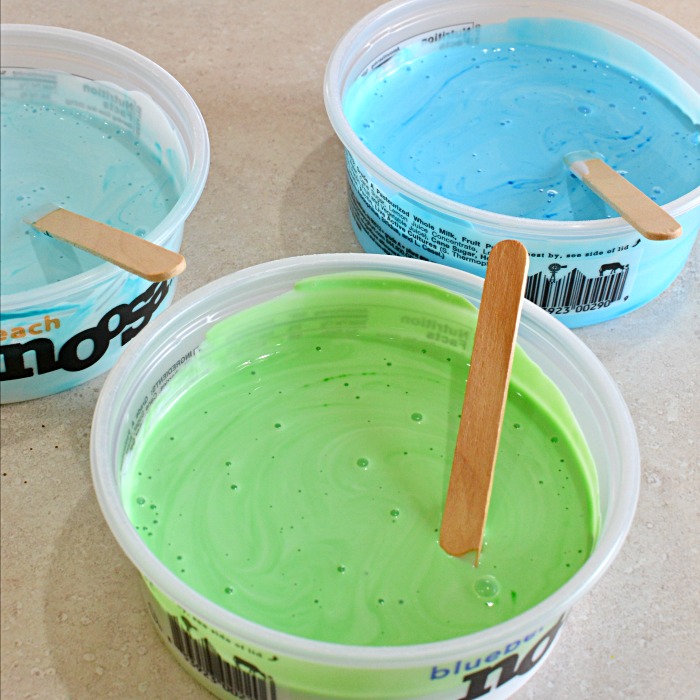
Divide Mod Podge equally into 3 disposable containers. Add a small amount of gel coloring , stir with popsicle stick.
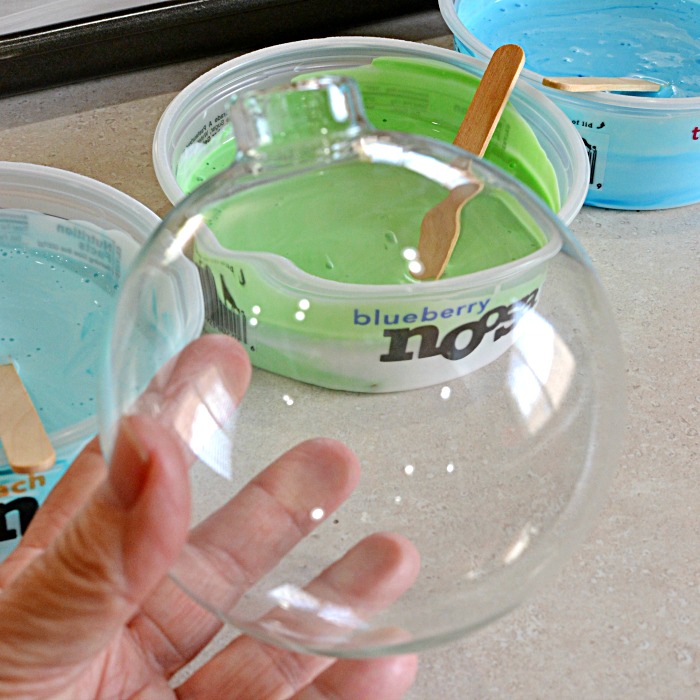

Pour 3 tablespoons of mixture into one ornament, swirl the mixture until inside is completely covered.
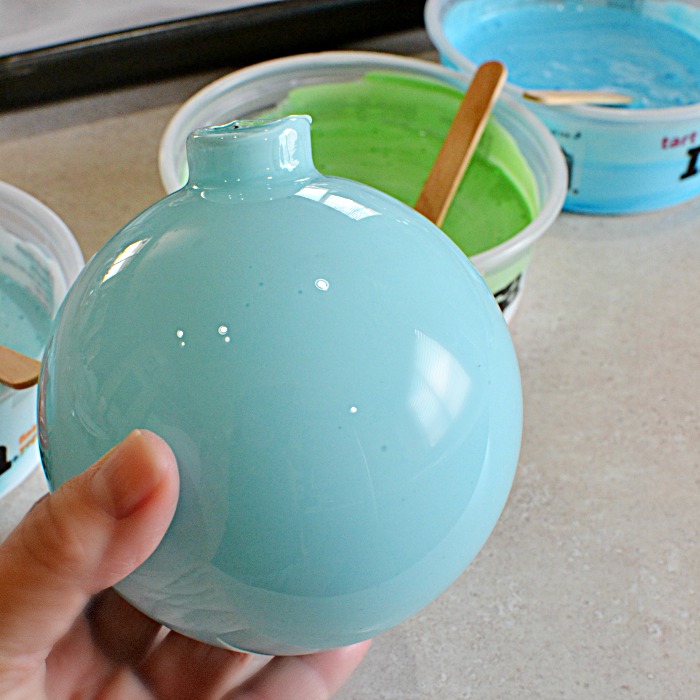

Shake excess into container, put up side down on a paper roll. Allow the ornaments to sit on the paper rolls one day. This will insure that most of the excess Mod Podge has run out of the ornament. Place elevated on the baking sheet making sure air can pass thru. I used a frame with chicken wire. For faster drying results place outside in a dry draft free area. Allow a week for drying. Depending on your area it could be as fast as 2 days. Repeat this process for all the ornaments.
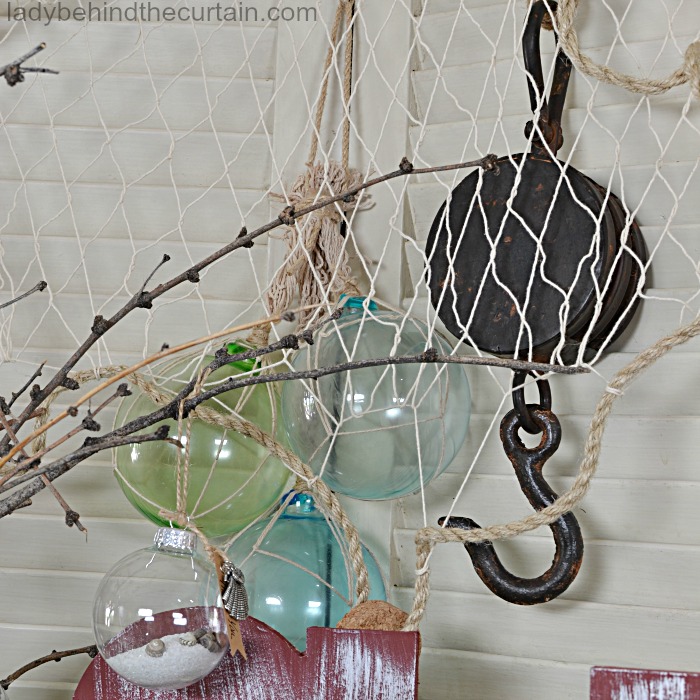
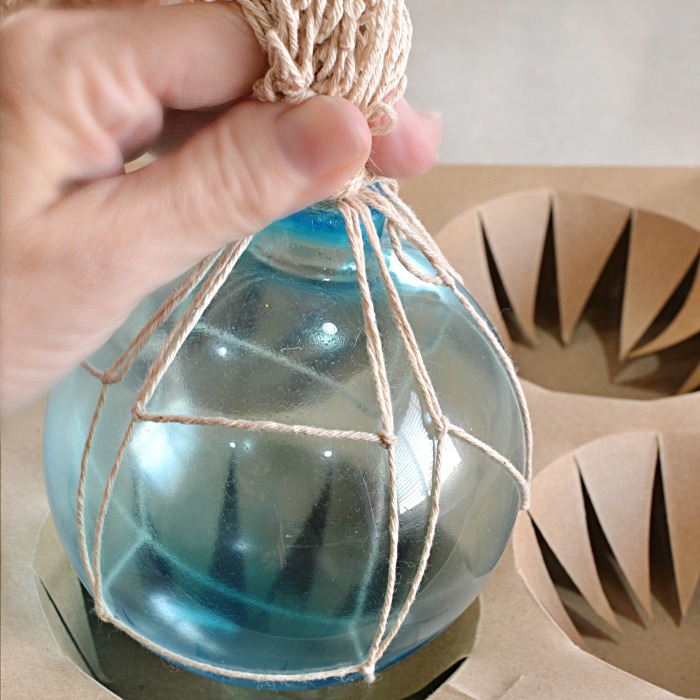
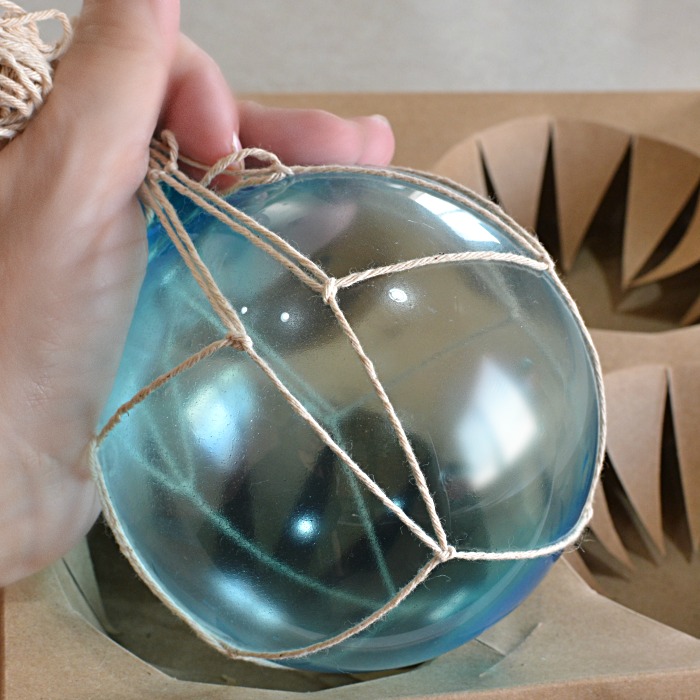
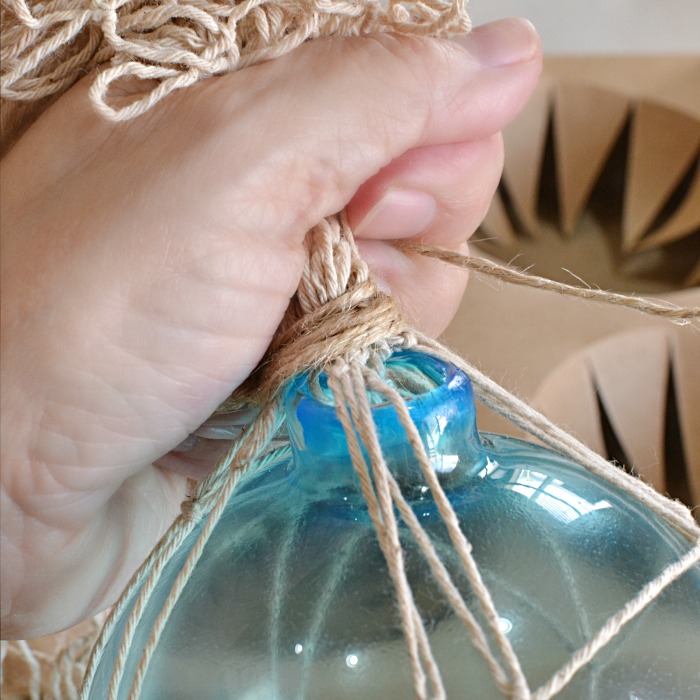
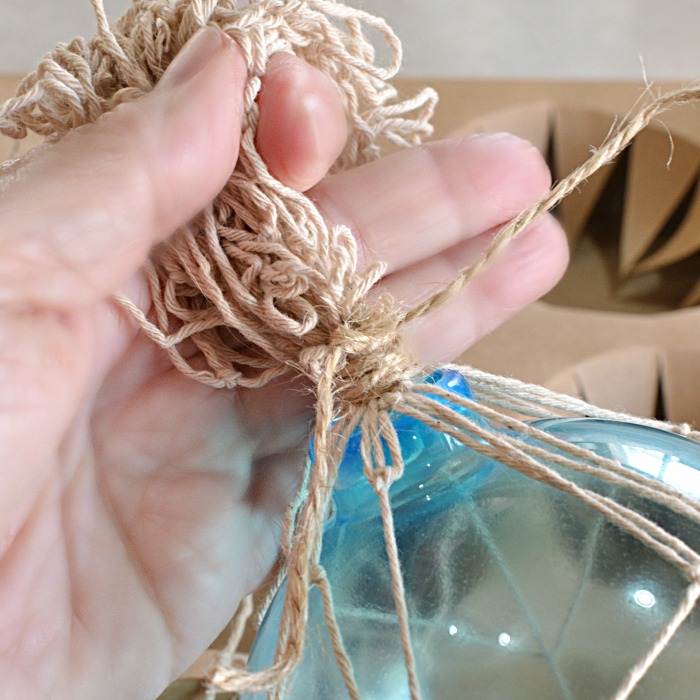
Wrapping the Glass Floats in Netting
Once the ornaments are completely dry and you feel good about them sitting upright you can cover them with the netting. Cut a piece of the netting that will not only cover the ornament but can be drawn up and tied closed with a piece of twine.
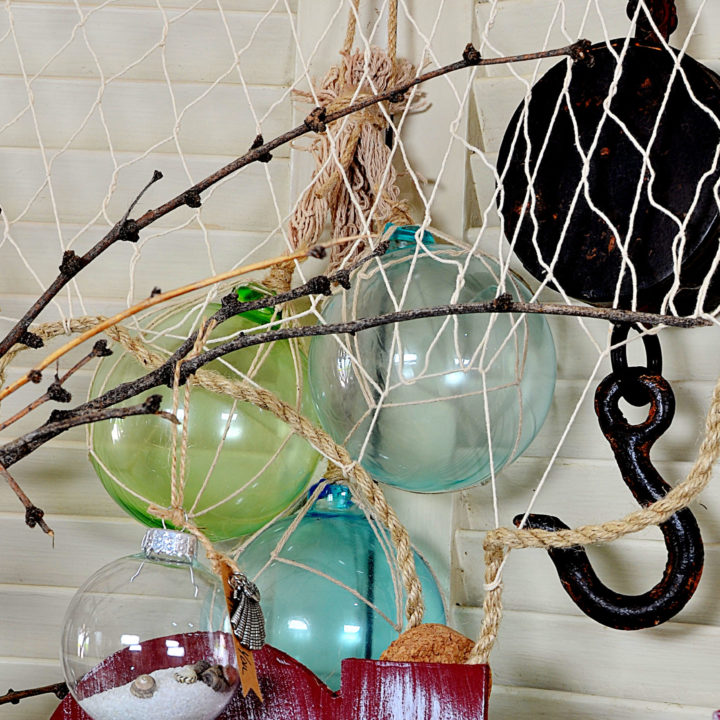
Easy Homemade Japanese Glass Floats
Amp up the Beach theme with these easy to make Japanese Glass Floats!
Materials
- fish netting (from the craft store)
- 5 black tea bags
- 1 (16 ounce) bottle Mod Podge (Michael's)
- gel food coloring ( I used teal, leaf green, and sky blue)
- large clear glass ornaments (Michael's)
- twine
Tools
- scissors
- large pot
- popsicle sticks
- parchment paper
- disposable containers ( I used empty yogurt containers)
- toilet paper rolls, cut in half rounds
Instructions
- Place a piece of parchment paper on a rimmed baking pan along with the paper rolls.
- Divide Mod Podge equally into 3 disposable containers. Add a small amount of gel coloring , stir with popsicle stick.
- Pour 3 tablespoons of mixture into one ornament, swirl the mixture until inside is completely covered.
- Shake excess into container, put up side down on a paper roll. Allow the ornaments to sit on the paper rolls one day. (This will insure that most of the excess Mod Podge has run out of the
ornament.) - Place elevated on the baking sheet making sure air can pass
thru. I used a frame with chicken wire. For faster drying results
place outside in a dry draft free area. - Allow a week for drying. Depending on your area it could be as fast as 2 days. Repeat this process for all the ornaments.
- Once the ornaments are completely dry and you feel good about them
sitting upright you can cover them with the netting. Cut a piece of the
netting that will not only cover the ornament but can be drawn up and
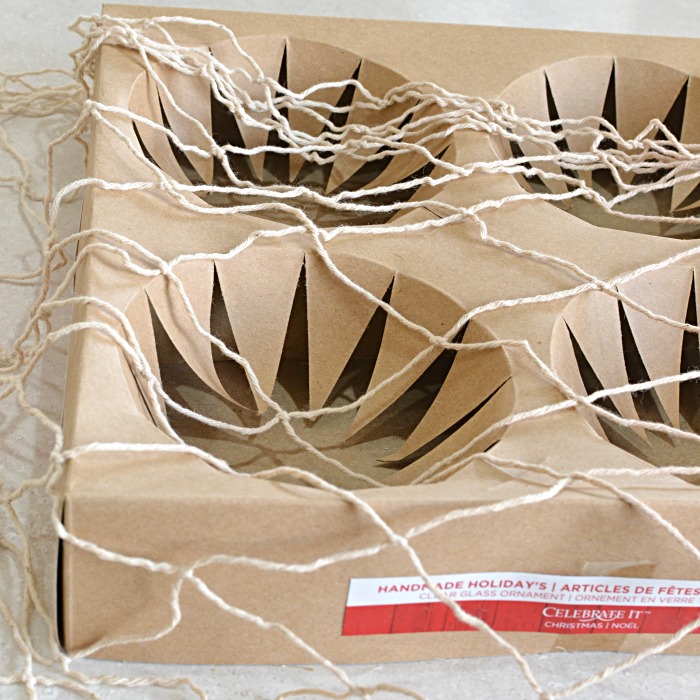
tied closed with a piece of twine. - Use the box the ornaments came in to help with the wrapping process.
- Lay the netting over the hole provided for the ornament, place the “glass float” on top.
- Bring the netting up around the glass float. Gather the excess netting at the top. Wrap with a piece of twine. Either cut the netting close to the top (above the tied portion) or leave it long to hang. This will be the bottom of the glass float.
SIGN UP FOR THE LADY BEHIND THE CURTAIN NEWSLETTER AND FOLLOW THE LADY BEHIND THE PARTY ETSY SHOP

NEWSLETTER: Receive (twice a month) seasonally themed newsletters full of recipes, tips and tricks. Sometimes even FREE gifts! ETSY SHOP: Did you know that Lady Behind the Curtain has an Etsy Shop? LADY BEHIND THE PARTY is a shop full of DOWNLOADABLE hand designed (by me) party supplies. Click here for the Newsletter→CURTAIN CALL NEWSLETTER Click here for the Esty Shop→LADY BEHIND THE PARTY
THANKS FOR VISITING♥
Great ideas!?
Hi Gloria, Thank You!