




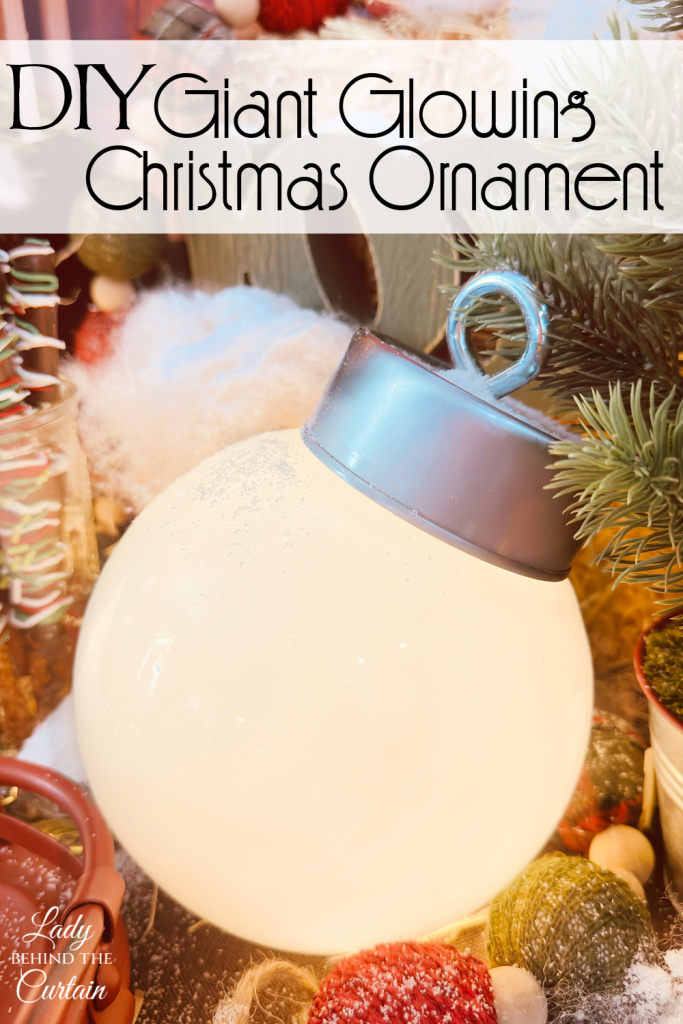
DIY Giant Glowing Christmas Ornament

One of my favorite parts of Christmas in July is dreaming about the holidays long before the hustle and bustle of December arrives. It’s the perfect time to slow down, gather inspiration, and create those special touches that make Christmas feel warm, welcoming, and unforgettable.
Throughout this year’s Christmas in July series, I’ve shared recipes designed to help you build a beautiful holiday dessert table. But every memorable display deserves a little sparkle beyond the sweets. That’s where this giant glowing Christmas ornament comes in. It’s an easy DIY project that adds height, warmth, and a magical glow to your holiday decorating without taking time away from baking.
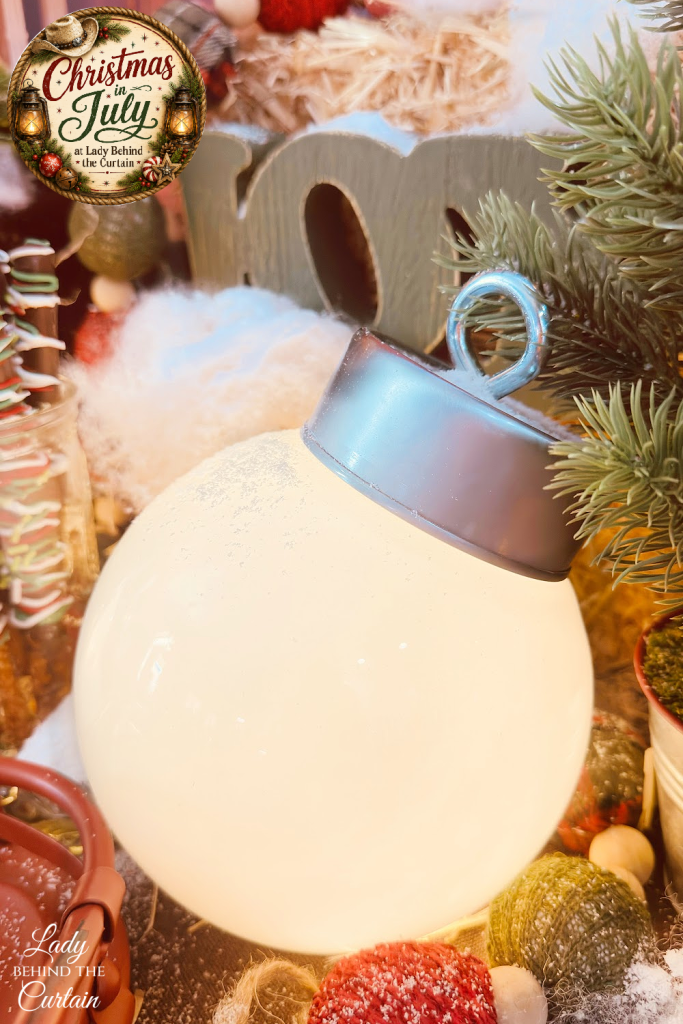
Soft glowing lights have a way of making a home feel cozier, a front porch more inviting, and a dessert table feel like the centerpiece of the celebration. While oversized illuminated ornaments have become increasingly popular in holiday decorating, they often come with a price tag that’s hard to justify when you want more than one.
This version uses only four inexpensive supplies, takes just minutes to assemble, and creates a decoration that looks surprisingly elegant. Whether you display it beside your Christmas tree, greet guests with it on your covered porch, or incorporate it into your Christmas dessert table, it’s one of those decorations people always seem to notice.
What surprised me most wasn’t how easy it was to make; it was how versatile it became. I originally created these ornaments for Christmas, but after changing the fairy lights to orange for Halloween, I realized they could be decorations I’d enjoy year-round. One simple change completely transformed the look, and before long I was imagining them glowing red for Valentine’s Day, green for St. Patrick’s Day, and even matching the color palette of birthday parties and baby showers.
If you’ve been following along with my Christmas in July series, think of this project as the finishing touch that ties everything together. Beautiful desserts may be the stars of the table, but a warm, glowing display is what creates the magical holiday atmosphere your guests will remember.
Why You’ll Love Making Your Own Oversized Ornament
One of the biggest advantages of making your own decorations is the freedom to customize them. Instead of settling for whatever colors or styles are available in the stores, you can create something that perfectly matches your decorating style.
This project is also ideal for anyone who loves decorating but doesn’t necessarily enjoy complicated crafts. There isn’t any painting, cutting intricate patterns, or waiting for glue to dry. Each supply serves a purpose, and once everything is assembled, the ornament is ready to display.
Another benefit is durability. Unlike many inexpensive plastic decorations, the glass globe has a substantial feel that gives the finished ornament a higher-end appearance. With careful storage, it’s a decoration you’ll enjoy bringing out year after year.
Perhaps my favorite reason for making these ornaments is how easily they fit into almost any decorating style. They look equally beautiful in a farmhouse Christmas display, a rustic woodland theme, a classic red-and-green holiday, or even a modern white Christmas filled with clean lines and simple elegance.
At a Glance
| Feature | Details |
|---|---|
| Skill Level | Beginner |
| Time Required | About 15 minutes |
| Number of Supplies | 4 |
| Special Tools | Drill and drill bit |
| Cost | Budget friendly |
| Indoor Use | Yes |
| Covered Outdoor Use | Yes |
| Reusable | Year after year |
What Makes This Ornament Look Store-Bought?
If you saw this ornament sitting on a holiday display, you would probably assume it came from a home décor boutique. The secret isn’t expensive materials; it’s choosing the right ones.
Many DIY versions use clear glass, plastic globes, or even painted ornaments. While those certainly work, they don’t create the same soft, luxurious glow. The magic comes from using a milky white glass globe.
Instead of allowing you to see every tiny light, wire, and battery pack, the frosted glass gently scatters the light throughout the globe. The result is a smooth, even glow that resembles professionally manufactured illuminated décor.
WOW! I NEVER KNEW THAT! Frosted glass works as a light diffuser. Rather than allowing light to travel in one direct path, it scatters the light in hundreds of different directions. That’s why lamps, light fixtures, and outdoor lanterns often use frosted glass instead of clear glass. The same principle transforms an inexpensive glass globe into an elegant glowing ornament.
This one simple choice makes all the difference. If you substitute a clear globe, you’ll see every wire and LED light inside. With a milky globe, the light blends together into one beautiful glow.
Why These Four Supplies Work So Well Together
I love this project because every single supply has a job to do. Nothing is decorative just for the sake of decoration. Together, these everyday items create an ornament that looks remarkably authentic.
| Supply | Why It’s Used |
|---|---|
| 6-inch Milky Glass Globe | Creates the body of the ornament and beautifully diffuses the fairy lights. |
| Tuna Can | Forms the ornament cap and gives the project its realistic appearance. |
| Eye Bolt with Nut | Mimics the hanging loop found on traditional Christmas ornaments. |
| Battery-Operated Fairy Lights | Provides the warm glow while eliminating the need for electrical cords. |
At first glance, using a tuna can may seem like an unusual choice. It’s probably the last thing you’d expect to find in a Christmas craft! However, once the eye bolt is attached, it suddenly looks exactly like the metal cap found on oversized ornaments sold in retail stores. Sometimes the simplest materials produce the most impressive results.
BEHIND THE CURTAIN: When buying tuna, look for a can with a silver finish instead of one with a gold or colored coating. The silver blends naturally with the eye bolt and gives the finished ornament a cleaner, more realistic appearance.
Shopping Tips Before You Begin
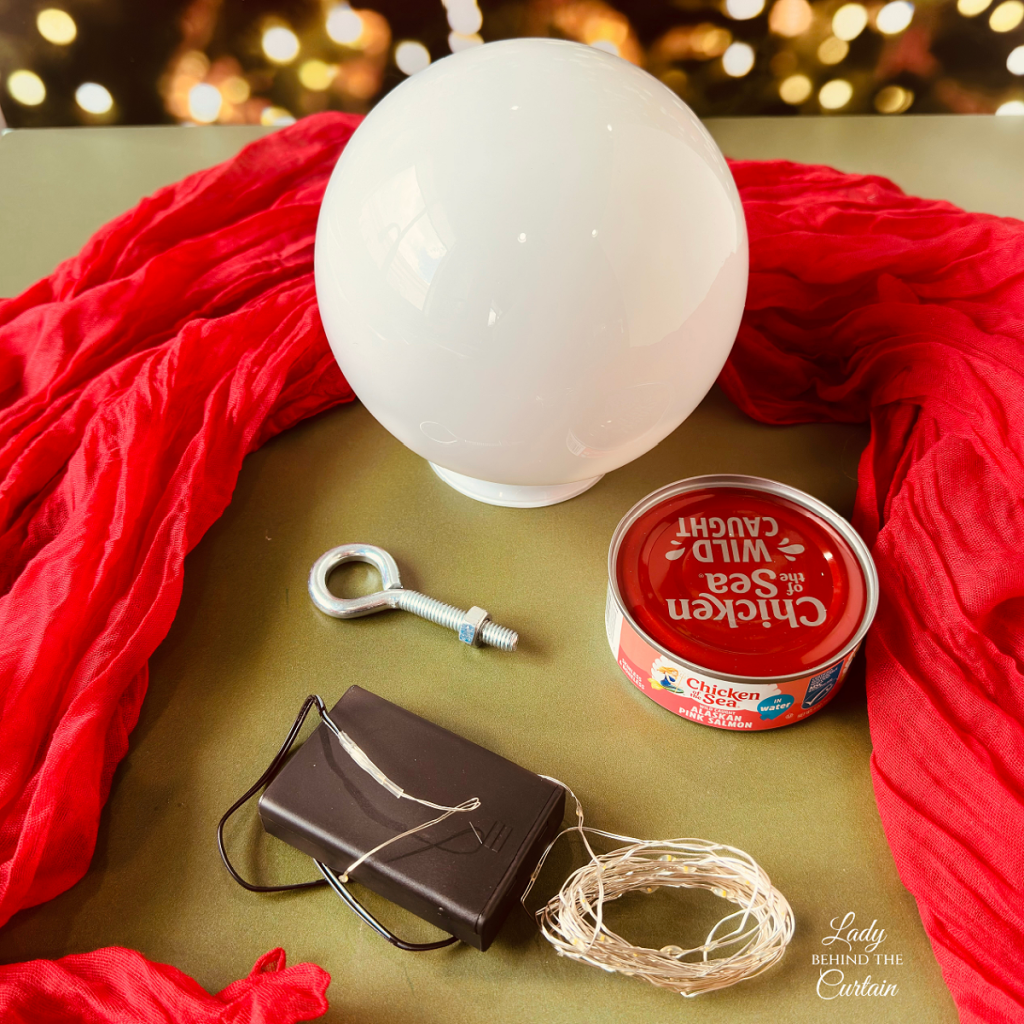
The supplies are easy to find! You may already have several of them at home.
The glass globe is the one item you’ll probably need to purchase. Look for a 6-inch replacement glass globe with a milky or frosted finish- not clear glass. Replacement globes are commonly sold in the lighting department because they’re designed to replace broken ceiling or light fixture globes.
I found that Home Depot consistently offered one of the best prices, making it an inexpensive starting point for this project. If you plan to make several ornaments, purchasing multiple globes at the same time can also save an extra trip to the store.
When choosing fairy lights, battery-operated LED strands work best. LEDs stay cool while producing plenty of light, making them ideal for enclosed decorations like this one.
BEHIND THE CURTAIN: Spend a couple of extra dollars for fairy lights with a built-in timer. Turn them on once, and they’ll automatically light up at the same time every evening. It’s one of those little upgrades you’ll appreciate all season long.
Before You Start: A Few Simple Tips
Although this project is wonderfully easy, paying attention to a few small details before you begin will make the finished ornament look even more polished.
- First, when preparing the tuna can, remember that you’ll only remove one end. The opposite end stays intact because that’s where the eye bolt will be attached. Leaving one side in place transforms an ordinary tuna can into the perfect ornament cap.
- You’ll also want to drill the hole as close to the center of the can as possible. A centered eye bolt helps the ornament look balanced and gives it the appearance of a traditional Christmas ornament.
- Finally, don’t simply drop the battery pack into the globe. Wrap the fairy lights loosely around it before placing everything inside. This helps disguise the battery pack so it blends into the glowing lights instead of standing out through the glass.
Those three little details may seem minor, but together they make the finished ornament look much more refined.
Creative Ways to Display Your Giant Glowing Ornament
Because of its size and soft glow, the ornament becomes a decorative accent you can incorporate throughout your home. A single ornament makes a beautiful statement, but displaying several together creates an even bigger impact. Vary the heights by placing some on decorative boxes, cake stands, wooden crates, or stacks of books hidden beneath a tablecloth. The different elevations give your display depth and make it feel professionally styled.
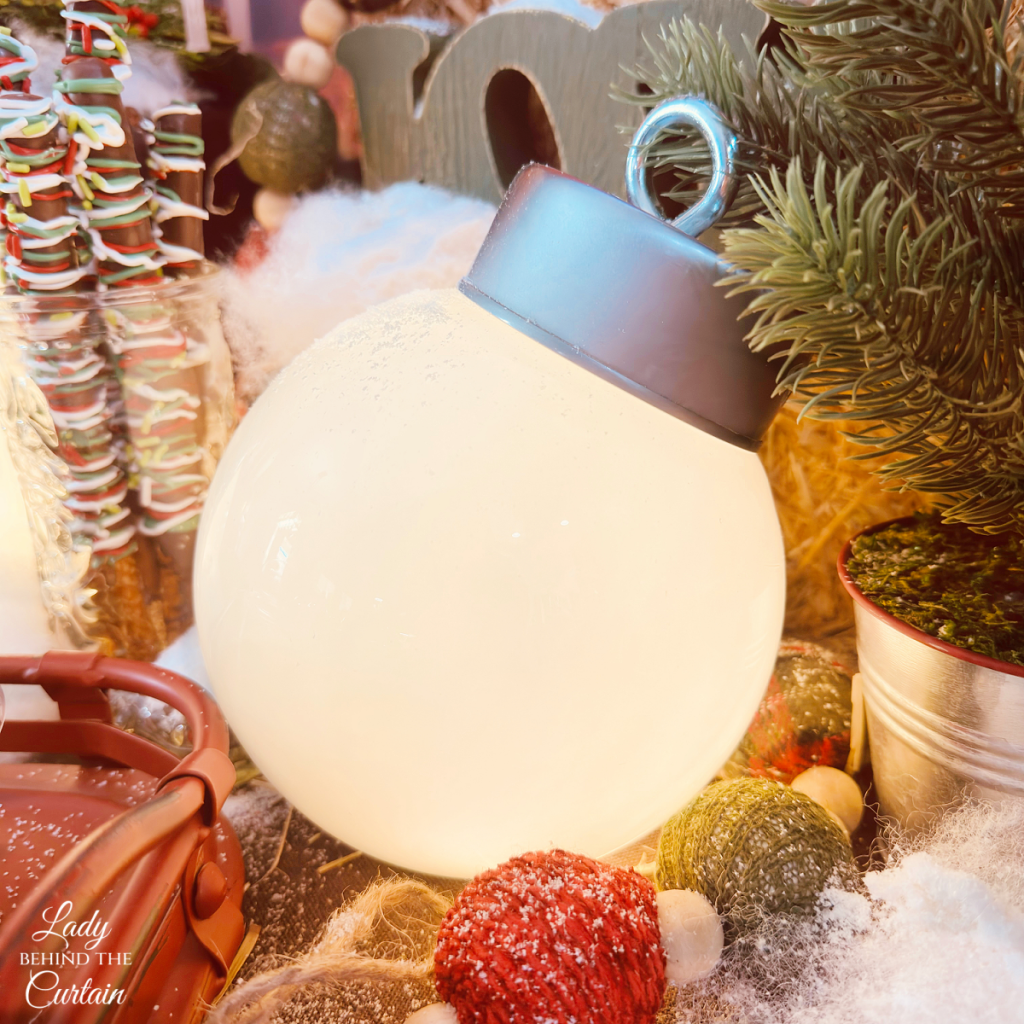
These ornaments are equally at home indoors or on a covered porch. Imagine guests arriving to a pair of glowing ornaments flanking your front door, or a trio nestled among evergreen garland on an entry table. They also make wonderful additions to dessert tables, where the soft light adds warmth without competing with your sweets.
| Display Location | Styling Ideas |
|---|---|
| Front Porch | Surround with potted evergreens, lanterns, and pinecones. |
| Dessert Table | Tuck among cake stands and greenery for added height and ambiance. |
| Fireplace Mantel | Mix with garland, stockings, and battery-operated candles. |
| Entryway Table | Pair with a small Christmas tree and vintage holiday décor. |
| Dining Table | Use one large ornament as a glowing centerpiece surrounded by greenery. |
| Window Display | Let the glow shine through the window to welcome guests. |
| Under the Christmas Tree | Group several ornaments together with wrapped gifts for a magical effect. |
Behind the Curtain Tip: f you’re recreating the Christmas in July dessert table from this year’s series, place one or three glowing ornaments among your cake stands to add soft ambient lighting and varying heights.
Decorating Beyond Christmas
Although this project was inspired by my Christmas in July celebration, I quickly discovered it was too versatile to pack away after December. The secret is simply changing the color of the fairy lights. In less than a minute, the ornament takes on a completely different personality.
Orange lights create a warm autumn glow that’s perfect for Halloween party tables. Red lights make a beautiful Valentine’s Day centerpiece, while green lights fit right in with St. Patrick’s Day celebrations. Soft pastel lights work beautifully for Easter brunches, and red, white, and blue lights can be used for Memorial Day, Independence Day, or Labor Day gatherings.
| Celebration | Fairy Light Color | Decorating Inspiration |
|---|---|---|
| Christmas | Warm White, Red, Green, Multicolor | Evergreen, ornaments, faux snow, ribbon |
| Valentine’s Day | Red or Pink | Roses, hearts, candles |
| St. Patrick’s Day | Green | Moss, shamrocks, rustic wood |
| Easter | Soft Pastels | Spring flowers, eggs, bunnies |
| Halloween | Orange or Purple | Pumpkins, black candles, spiders |
| Patriotic Holidays | Red, White, and Blue | Flags, stars, Americana décor |
| Birthdays | Match Party Colors | Coordinate with balloons, cake, and table décor |
| Baby Showers | Pink, Blue, or Neutral | Florals, baby blocks, themed centerpieces |
Changing only the lights allows one decoration to serve multiple purposes throughout the year, making this project even more budget-friendly.
Wow! I Never Knew That!
Colored lights influence the mood of a display just as much as the decorations themselves. Warm colors like orange and red create a cozy, intimate atmosphere, while cooler colors such as blue and purple feel more dramatic and elegant. Simply changing the light color can completely transform the same ornament without changing anything else.
Personalize Your Ornament with Glass Etching
If you know your ornament will always be part of your Christmas decorating, consider personalizing the glass with an etched design. A frosted word or simple image gives the ornament a custom look while still letting light shine beautifully through the design.
Short words tend to have the greatest visual impact because they’re easy to read from across the room. Display several ornaments together, each featuring a different Christmas word, and they become part of the décor rather than simply another decoration.
Some of my favorite words include:
- Joy
- Noel
- Believe
- Peace
- Hope
- Merry
- Faith
- Cheer
- Blessed
- Love
You can also personalize ornaments with your family name, the year they were made, or a favorite holiday saying. They make thoughtful gifts for newlyweds, first homes, teachers, neighbors, or anyone who loves decorating for Christmas.
If you enjoy decorating for multiple holidays, consider etching only one or two globes and leaving the rest plain. That way you can continue changing the fairy light colors throughout the year while still having a few personalized ornaments reserved for your Christmas display.
Behind the Curtain Tip: Before permanently etching the globe, print your design on paper and place it inside the glass. Step back several feet to make sure the size looks balanced. It’s much easier to adjust the design before etching than afterward.
Make It Your Own
These ornaments are super easy to customize. Even though the basic construction stays the same, a few simple changes can completely transform the finished ornament to match your decorating style. Whether your home is farmhouse, traditional, rustic, modern, or vintage, these glowing ornaments blend right in.
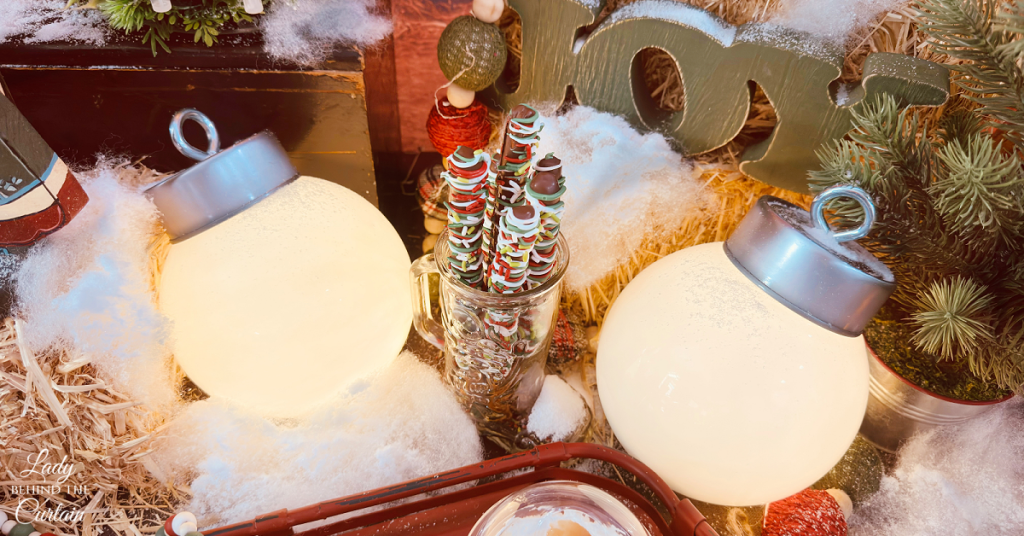
If you’re creating a large display, consider using globes in different sizes. A grouping of 6-inch, 8-inch, and 10-inch globes creates a more natural arrangement than using several ornaments that are all the same size. The varying heights and proportions make the display feel collected over time instead of purchased as a matching set.
Ribbon is another easy way to personalize your ornaments. Tie a simple bow around the eye bolt using velvet ribbon for an elegant look, buffalo plaid for farmhouse charm, burlap for rustic decorating, or satin ribbon that coordinates with your Christmas color scheme.
You can also create themed displays by pairing your ornaments with different decorative elements.
| Decorating Style | Pair With |
|---|---|
| Farmhouse | Burlap ribbon, galvanized metal, evergreen branches |
| Rustic Woodland | Pinecones, birch logs, faux berries, cedar |
| Traditional Christmas | Red ornaments, velvet ribbon, classic greenery |
| Vintage Christmas | Bottle brush trees, mercury glass, old-fashioned ornaments |
| Modern | White ceramic trees, metallic accents, simple greenery |
| Winter Wonderland | Faux snow, crystal ornaments, silver accents |
The ornament itself becomes the foundation, allowing you to change the surrounding decorations whenever you want a fresh look.
Behind the Curtain Tip: Don’t feel like every ornament has to look exactly the same. Mixing ribbons, globe sizes, or even fairy light colors within the same display often creates a more interesting arrangement than making every ornament identical.
Common Mistakes to Avoid
This project is simple enough for beginners, but a few small mistakes can affect the finished appearance. Fortunately, they’re all easy to avoid.
- The most common mistake is purchasing a clear glass globe instead of a milky one. While both will hold the fairy lights, a clear globe reveals every wire, bulb, and battery pack. The finished ornament loses the soft, glowing appearance that makes this project so special.
- Another mistake is forgetting to center the hole in the tuna can. Even a slightly off-center eye bolt becomes noticeable once the ornament is assembled. Taking a moment to measure before drilling creates a much more balanced finished project.
- Many people also underestimate the importance of the battery pack. Simply dropping it into the globe often leaves a dark rectangle that’s visible through the glass. Wrapping the light strand loosely around the battery pack helps disguise it and blends it into the glow.
- Finally, resist the temptation to overfill the globe with lights. More lights don’t necessarily make a prettier ornament. A moderate number of fairy lights allows the entire globe to glow evenly without creating bright hotspots.
Why This DIY Is Worth Making
There are countless oversized ornament tutorials online, but many require painting, specialty supplies, or complicated assembly. What I love about this version is its simplicity. Four inexpensive supplies come together to create a decoration that looks polished enough to display anywhere in your home.
It’s also one of those rare DIY projects that continues to earn its place long after Christmas. By changing the fairy lights, you can enjoy the same ornament for Halloween parties, Valentine’s Day dinners, birthday celebrations, baby showers, and countless other occasions. Instead of making a decoration you’ll use for a few weeks each year, you’re creating one that can become part of your decorating collection all year long.
Most importantly, this project proves that beautiful decorating doesn’t have to be expensive. Sometimes the most memorable decorations begin with ordinary items and a little creativity.
As another Christmas in July comes to a close, I hope you’ve found a few new recipes, decorating ideas, and projects that inspire you to make this holiday season your most memorable yet.
This glowing ornament is one of those projects. It doesn’t require special crafting skills or expensive materials, yet it creates such a warm, inviting feeling wherever it’s displayed. Whether it becomes part of your Christmas dessert table, welcomes guests on your front porch, or brightens celebrations throughout the year with different colored lights, I hope it inspires you to look at everyday items in a new way.
The holidays have always been about creating memories, not spending the most money. Sometimes all it takes is a little imagination, a handful of simple supplies, and the soft glow of fairy lights to create something your family will remember year after year.
Happy decorating,
Sheryl
LATEST POSTS
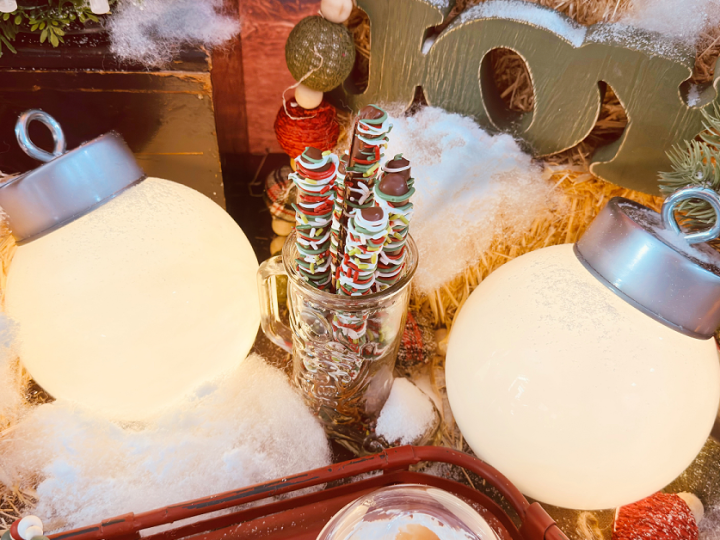
DIY Giant Glowing Christmas Ornament
Materials
- 1 (6 inch) glass globe, not clear (cheapest at Home Depot)
- 1 tuna can
- 1 (5/16 x 3 ¼ -inch) eye bolt with a nut
- fairy light
Tools
- drill
- drill bit the size of the bolt
Instructions
- Rinse and clean the tuna can. ONLY OPEN ONE SIDE; leave the other side intact. Soak in hot water to remove the label. TIP: Choose a silver can to match the bolt.
- Drill a hole in the center of the intact side of the can the size of the bolt.
- Insert the bolt into the hole and tighten with the nut.
- Insert fairy lights with the battery pack into the glass globe. I wrapped the lights around the battery pack, and that seemed to hide it from being seen on the outside of the globe. TIP: Get the kind of lights that have a timer.
- Position the globe with the opening on top, and add the tuna can.

Frequently Asked Questions-DIY GIANT GLOWING CHRISTMAS ORNAMENT
Even though this is a simple DIY project, there are always a few questions that come up before getting started. Here are the answers to the ones I hear most often, along with a few tips that will help you get the best results from your giant glowing ornament.
- Can I use a clear glass globe instead of a milky one? You can, but I wouldn’t recommend it. A clear globe allows you to see every wire, individual LED light, and the battery pack. A milky or frosted globe diffuses the light, creating a soft, even glow that gives the ornament a much more polished, store-bought appearance.
- Can I use rechargeable fairy lights? Absolutely! Rechargeable fairy lights are an excellent option if you plan to display your ornaments frequently or use them throughout the year for different holidays. Just make sure the battery pack is small enough to fit comfortably inside the globe.
- Can I make these ornaments in different sizes? Yes! Replacement glass globes are available in several sizes, making it easy to create a collection. Grouping different-sized ornaments together creates a more natural, professionally styled display than using ornaments that are all the same size.
- Can I display these ornaments outdoors? They work beautifully on a covered porch or patio where they’re protected from rain and snow. If you plan to use them outside, choose battery-operated fairy lights rated for outdoor use and make sure the battery pack stays dry.
- How long do the batteries last? Battery life depends on the type of fairy lights you purchase and how often they’re used. Lights with a built-in timer typically last much longer because they’re only on for a set number of hours each day instead of running continuously.
- Can I leave the fairy lights inside the globe when I store it? You can, but I prefer removing the lights before packing everything away. Separating the lights from the globe helps prevent tangled wires, makes battery replacement easier next season, and allows you to switch to a different light color whenever inspiration strikes.
- What if my battery pack is visible through the glass? Try wrapping the fairy light strand loosely around the battery pack before placing it inside the globe. The lights help camouflage the battery pack, making it much less noticeable once the ornament is glowing.
- How should I store the ornaments after the holidays? Wrap each glass globe in bubble wrap or store it in its original box to protect it from chips and cracks. If you’ve made several ornaments, label the storage box so they’re easy to find when it’s time to decorate again. Proper storage will help keep them looking beautiful for many Christmas seasons to come.
These are cute! Thanks for letting me know what an eye bolt is!
How are you attaching the can to the globe
Hi Theresa, No, the can sits on the globe. The lip on the globe keeps the can from slipping off. Leaving the can loose allows for changing the lights or turning them off and on if the lights don’t have a timer.