The Complete Guide to Baking Scoops: Sizes, Uses, and Tips for Better Baking
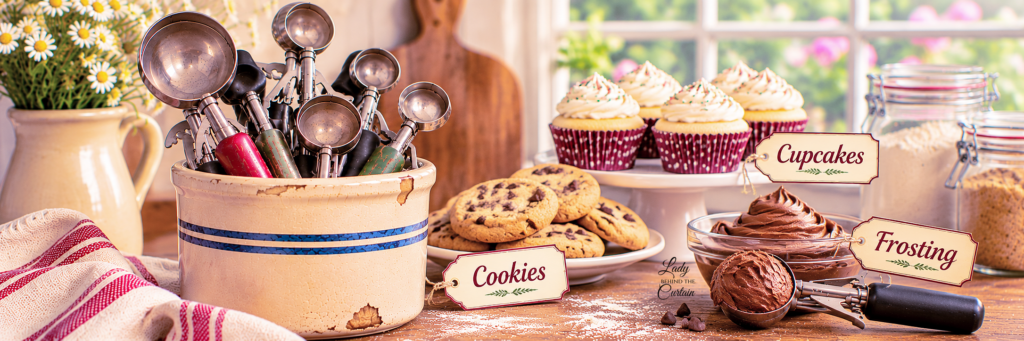
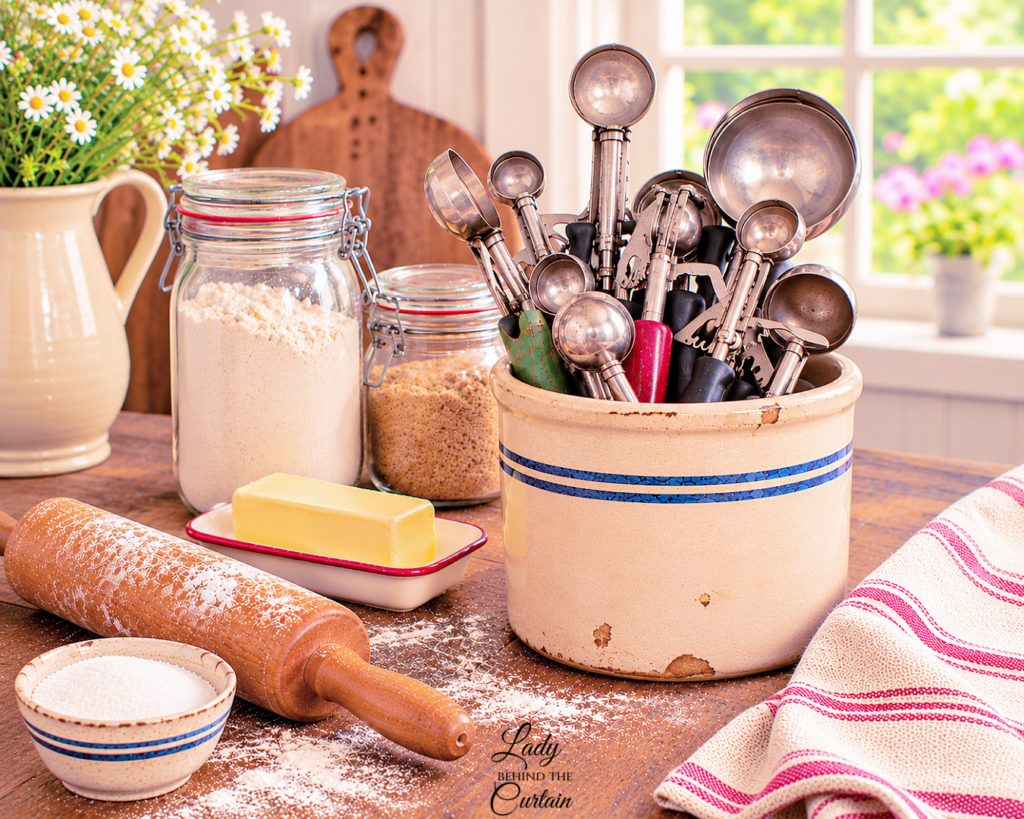
Some of the most useful tools in my kitchen aren’t fancy or expensive. They’re the ones I reach for again and again because they make everyday baking a little easier and the results more consistent. Baking scoops are a perfect example. You might think of them as cookie scoops, but once you discover how many ways you can use them, you’ll wonder how you ever managed without them.
I’ve collected several sizes over the years, and each one has earned its place in my kitchen. My most-used scoop is a 3-tablespoon OXO that I’ve had since 2018. I use it for regular-size cookies, but where I really appreciate it is when making cupcakes and muffins. Instead of guessing how much batter to add to each cup, I can portion it quickly and consistently, helping everything bake more evenly and look beautifully uniform.
And that’s what I love about sharing baking tips. Sometimes the smallest changes can make a noticeable difference in something you’ve been baking for years. Whether you’ve been baking for decades or are just getting comfortable in the kitchen, there’s always another little trick worth learning.
In this guide, we’re taking a closer look at baking scoops, from understanding the different sizes and measurements to choosing the right scoop for cookies, cupcakes, muffins, and even fillings. I’ll also share how I use them in my own kitchen, when I prefer a kitchen scale, and a few simple tips that can help you get the most out of this hardworking little tool.
Some of the most useful tools in my kitchen aren’t fancy or expensive. They’re the ones I reach for again and again because they make everyday baking a little easier and the results more consistent. Baking scoops are a perfect example. You might think of them as cookie scoops, but once you discover how many ways you can use them, you’ll wonder how you ever managed without them.
I’ve collected several sizes over the years, and each one has earned its place in my kitchen. My most-used scoop is a 3-tablespoon OXO that I’ve had since 2018. I use it for regular-size cookies, but where I really appreciate it is when making cupcakes and muffins. Instead of guessing how much batter to add to each cup, I can portion it quickly and consistently, helping everything bake more evenly and look beautifully uniform.
I also love using smaller scoops for cookie fillings, especially when making stuffed cookies. Portioning the filling before assembling the cookies helps me control how much goes inside each dough ball. It’s a simple way to make sure the filling fits comfortably and that every cookie gets a similar amount of that delicious center.
And that’s what I love about sharing baking tips. Sometimes the smallest changes can make a noticeable difference in something you’ve been baking for years. Whether you’ve been baking for decades or are just getting comfortable in the kitchen, there’s always another little trick worth learning.
In this guide, we’re taking a closer look at baking scoops, from understanding the different sizes and measurements to choosing the right scoop for cookies, cupcakes, muffins, and fillings. I’ll also share how I use them in my own kitchen, when I prefer a kitchen scale, and a few simple tips that can help you get the most out of this hardworking little tool.
The Little Tool That Makes a Big Difference
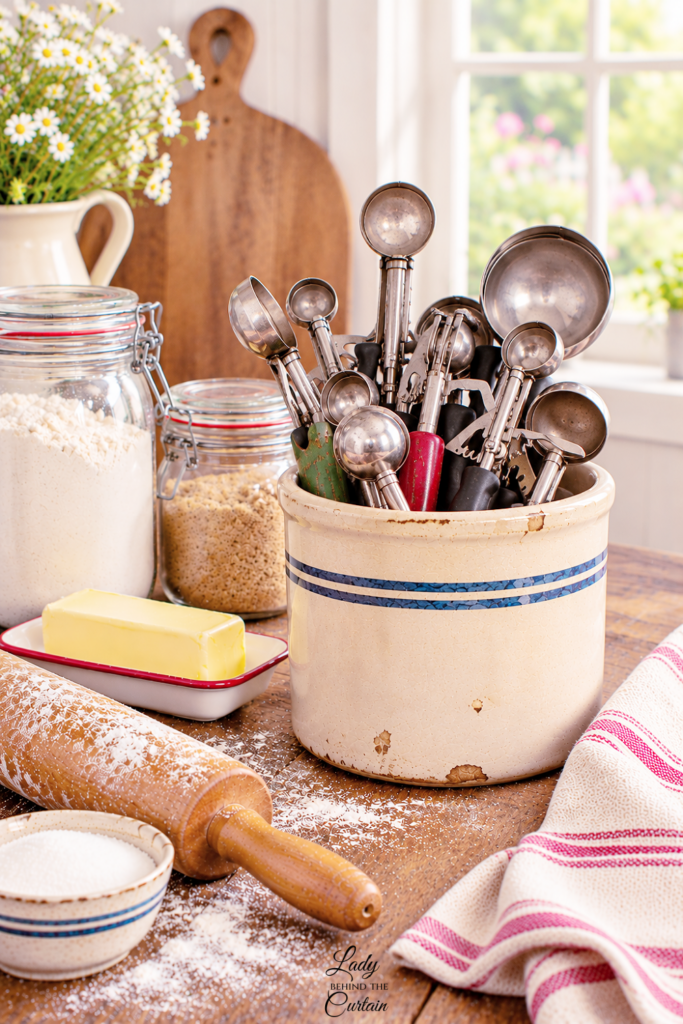
There’s a good reason professional bakers rely on portioning tools. When cookies are approximately the same size, they’re more likely to finish baking at the same time. Smaller cookies generally bake faster than larger ones, so a baking sheet filled with noticeably different portions can produce a mixture of textures even when every cookie is made from the same dough.
The same principle applies to cupcakes and muffins. Similar amounts of batter help everything bake more consistently, and the finished treats look more uniform. That’s particularly nice when you’re arranging cupcakes on a dessert table or preparing a basket of muffins for guests.
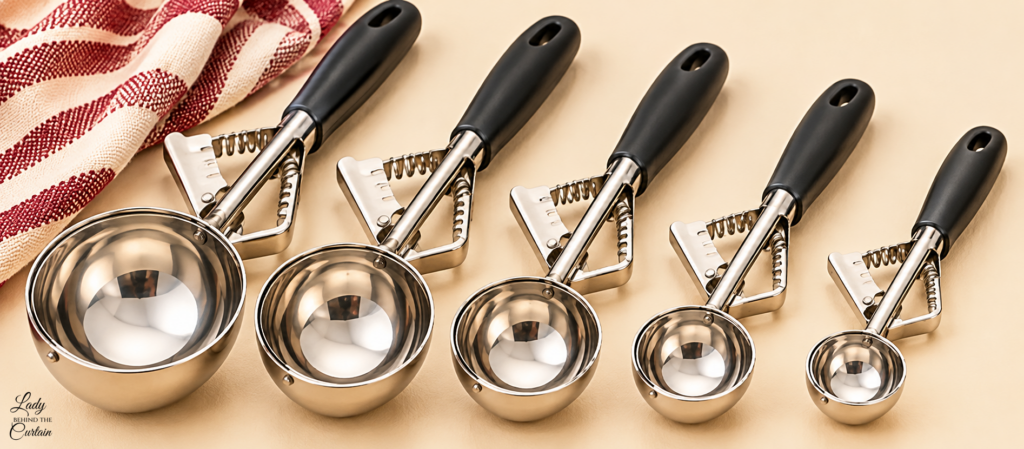
A spring-loaded scoop makes portioning convenient because a small metal arm sweeps across the inside of the bowl to help release the dough or batter. Instead of using two spoons or scraping the mixture out with your fingers, you can fill the scoop, position it over the pan, and squeeze the handle.
WOW! I never knew that…Two cookies made from the same dough can have different textures simply because of their size. A smaller cookie has more surface area in proportion to its volume, which means a greater percentage of the cookie may become crisp during baking. Larger cookies have more dough in the center, so they can remain softer inside when baked appropriately.
That’s why changing the scoop size isn’t always as simple as making more or fewer cookies. A recipe developed for smaller portions may need a different baking time when made into larger cookies. Understanding that relationship helps you choose the size that produces the finished cookie you want.
Understanding Baking Scoop Sizes
One of the more confusing things about shopping for baking scoops is discovering how many different ways manufacturers describe their sizes. Some list tablespoons, others use fluid ounces, and some identify their scoops with numbers such as #20, #30, or #40.
Those numbers come from a traditional portioning system used for commercial dishers. The number represents approximately how many level portions of that capacity make up one U.S. quart. For example, a #16 scoop has a nominal capacity of ¼ cup because sixteen ¼-cup portions equal one quart.
Here’s what surprises many home bakers: The larger the scoop number, the smaller the scoop. A #60 scoop is much smaller than a #20 scoop.
Baking Scoop Size Chart
| Scoop number | Approximate capacity | Fluid ounces | Common uses |
|---|---|---|---|
| #100 | About 2 teaspoons | ⅓ fl oz | Tiny cookies, fillings, truffles |
| #60 | About 1 tablespoon | ½ fl oz | Small cookies, candy centers |
| #40 | About 1½ tablespoons | ¾ fl oz | Regular-size cookies |
| #30 | About 2 tablespoons | 1 fl oz | Larger cookies, batter |
| #20 | About 3 tablespoons | 1½ fl oz | Cookies, cupcakes, muffins |
| #16 | About 4 tablespoons | 2 fl oz | Large muffins, generous portions |
| #12 | About ⅓ cup | 2⅔ fl oz | Large batter portions |
Capacities are approximate. Manufacturers may use different size designations, so check the listed volume when purchasing.
For home baking, tablespoons and fluid ounces are often easier to understand than scoop numbers. There’s also an important distinction between fluid ounces and ounces by weight. Fluid ounces measure volume, while a kitchen scale measures weight. A scoop holding 1½ fluid ounces of cookie dough won’t necessarily contain 1½ ounces of dough by weight.
If you have an older scoop without a size marking, there’s an easy way to determine its capacity. Fill it level with water, then transfer the water to measuring spoons or a graduated measuring cup. Once you know how many tablespoons it holds, you can compare it with the chart.
Beyond Cookies: Putting Your Scoops to Work
Although cookie dough may be the first thing that comes to mind, baking scoops are useful for all sorts of recipes. Once you start using them regularly, you’ll discover that different sizes can make portioning everything from batter to fillings much easier.
CUPCAKES AND MUFFINS: This is where my 3-tablespoon scoop really shines. I love using it to transfer batter into cupcake liners and muffin pans because it gives me better control over how much goes into each cup. It’s especially convenient with thicker batters that don’t pour neatly from a mixing bowl.
For cupcakes, many recipes recommend filling the liners about two-thirds full, though the right amount depends on the recipe. Muffins sometimes require a more generous portion, particularly when you’re looking for a taller muffin top.
Rather than assuming one scoopful is always the correct amount, use the first cup as a guide. Once you’ve established how much batter the recipe needs, you can repeat that amount throughout the pan.
Behind the Curtain Tip: When using a scoop for cupcakes or muffins, hold it close to the liner before releasing the batter. This helps keep the batter inside the cup instead of leaving little drips across the top of the pan.
COOKIES AND STUFFED COOKIE FILLINGS: For regular-size cookies, a scoop makes it easy to portion dough directly onto a parchment-lined baking sheet. Depending on the recipe, you can use a smaller scoop for bite-size treats or a larger one for more substantial cookies.
But one of my favorite ways to use my smaller scoops is for fillings, especially when making stuffed cookies. When you’re enclosing a filling inside a ball of cookie dough, the amount of filling matters just as much as the amount of dough surrounding it.
If one cookie has a generous portion of filling and the next has considerably less, the finished cookies won’t have the same balance of dough and filling. A scoop helps eliminate that guesswork by creating portions that are similar in size.
There’s another advantage that I especially appreciate. Using the right-size scoop helps ensure the filling fits inside the cookie dough ball. You want enough filling to create that wonderful center when someone bites into the cookie, but you also need enough dough surrounding it to enclose the filling completely. Choosing a scoop that works with the size of your dough portion makes assembling stuffed cookies much easier.
I recently used my smallest scoop to portion a filling that needed to be frozen before assembling the cookies. I scooped the filling into individual portions, placed them in the freezer, and then used the frozen portions when forming the cookies. The scoop gave me the perfect amount for each cookie, and the filling held its shape beautifully during baking.
Freezing a soft filling can make it easier to handle because the portions become firm enough to pick up and position inside the dough. It also helps when you’re trying to enclose a filling without smearing it across the edges of the dough where the cookie needs to be sealed. The recipe and the type of filling will determine whether freezing is appropriate, but when it is, portioning first makes the process much more convenient.
Behind the Curtain Tip: When making stuffed cookies, choose your filling scoop based on the size of the cookie dough portion, not simply the amount of filling you’d like to add. The filling needs to fit comfortably inside the dough with enough room to bring the edges together and seal them. If you’re developing your own stuffed cookie, assemble one portion first to check the proportions before scooping the entire batch.
Frosting, Cake Layers, and Other Baking Projects
Scoops can be surprisingly helpful when working with frosting. You can portion frosting onto individual cupcakes before spreading or piping it, or transfer measured amounts onto cake layers to help distribute the filling more evenly.
They also work well for dividing thicker batters into individual dessert cups, portioning fillings for hand pies, and measuring pancake or waffle batter. A scoop isn’t necessary for every task, but it’s worth remembering that the tool you use for cookie dough can do much more.
Choosing the Right Scoop for Your Kitchen
You don’t need a drawer full of baking scoops to appreciate their usefulness. If you’re purchasing your first one, think about what you bake most often. A medium-size scoop may be the most versatile choice for someone who regularly makes cookies, while a larger capacity may be especially useful for cupcakes and muffins.
If you enjoy making stuffed cookies, a smaller scoop can be a wonderful addition. Having a dedicated size for fillings makes it easier to portion individual centers without relying on measuring spoons or guessing how much filling to use.
I have five different scoop sizes, but I’ve collected them over time. My everyday favorite is still the 3-tablespoon OXO scoop I purchased back in 2018. It’s one of those kitchen tools that has proven its usefulness year after year.
OXO is one of my favorite kitchen brands, but you certainly don’t need to purchase an expensive collection to get good results. Plenty of affordable options exist, and what matters most is choosing a scoop that works well for the recipes you make.
When comparing scoops, there are a few things worth considering:
- Comfortable handles: A scoop should feel comfortable in your hand, especially when you’re portioning several dozen cookies.
- A smooth release mechanism: The sweeping arm should move easily and release the mixture without excessive squeezing.
- Sturdy construction: Look for a bowl and handle that feel secure, particularly if you frequently work with thick cookie dough.
- Useful capacity: Choose a size that matches your favorite recipes rather than purchasing a scoop simply because it’s part of a set.
- Easy cleaning: Check the manufacturer’s instructions to see whether the scoop is dishwasher-safe or requires handwashing.
A Few Scooping Techniques Worth Knowing
Once you’ve chosen a scoop, how you fill and use it can make a difference in the results.
Scoop before chilling when the dough allows. Many cookie doughs are easier to portion while they’re still soft. Scooping the dough before refrigerating it can save you from struggling with a firm batch later. However, very sticky dough may benefit from chilling first, so follow the recipe’s instructions and consider the dough’s consistency.
Pay attention to level versus rounded portions. Scoop capacities generally refer to level measurements. A generously rounded scoop holds more dough, and the amount can vary depending on how firmly the mixture is packed. If you’re aiming for uniform portions, try to fill the scoop the same way each time.
Avoid forcing a scoop through very hard dough. Spring-loaded release mechanisms can be damaged if you force them through excessively firm dough. If your dough has become too hard to scoop comfortably, allow it to soften enough to portion safely, provided the recipe permits it.
Use a kitchen scale when precision matters. For my oversized gourmet cookies, I always weigh the dough rather than using a scoop. These cookies contain several ounces of dough, and weighing each portion allows me to control the exact size. It’s also useful for doughs containing large mix-ins that can affect how much each scoopful weighs.
A scoop and a scale can even work together. You can use the scoop to portion dough quickly, then check the weight and make small adjustments when a recipe calls for particularly precise portions.
A Little Baking Help You Can Keep Close By!
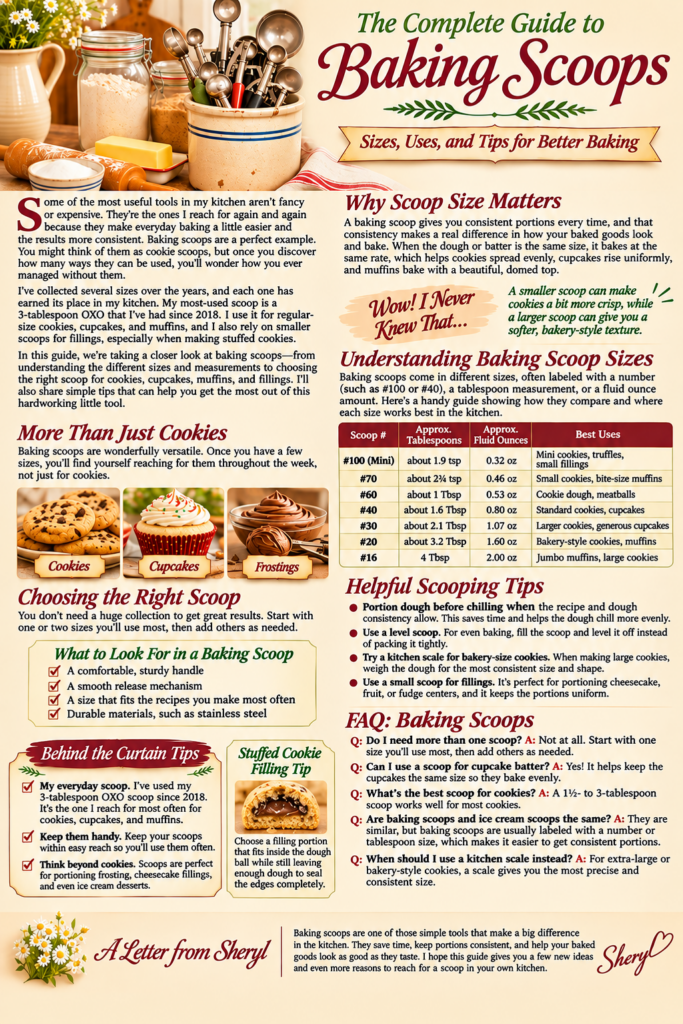
Sometimes the simplest kitchen tools make the biggest difference! I’ve put together this free printable Baking Scoop Guide to help you take the guesswork out of choosing the right scoop for cookies, cupcakes, muffins, and fillings. You’ll find a handy scoop-size chart, practical baking tips, and a few of my favorite ways to use these hardworking little tools. Print a copy, tuck it into your recipe binder, and keep it handy whenever you’re ready to bake!
Frequently Asked Questions About Baking Scoops
Even something as simple as a baking scoop can raise a few questions, especially when you’re comparing different brands or trying to understand measurements. Here are some additional details that can help you choose and care for your scoops.
- Are baking scoops and ice cream scoops the same thing? Some spring-loaded portion scoops work for both, but traditional ice cream scoops may have solid bowls without a release mechanism. For baking, a spring-loaded scoop is often convenient because it helps release sticky dough and batter.
- Can baking scoops be used with both thick and thin batters? Yes, although very thin batters may drip from the scoop before you can transfer them. Scoops are especially convenient for thicker mixtures that hold together long enough to move into the pan.
- Why does cookie dough sometimes stick inside the scoop? Sticky doughs containing ingredients such as honey, molasses, or softened chocolate may cling to the bowl. A small amount of cooking spray can sometimes help, although it isn’t necessary for every recipe. Keeping the scoop clean between batches may also improve release.
- Can I use a scoop for frozen ice cream? That depends on the scoop’s construction. Some spring-loaded dishers aren’t designed to cut through very hard frozen ice cream, and forcing them can damage the mechanism. Always check the manufacturer’s recommendations.
- How should I clean a spring-loaded baking scoop? Wash according to the manufacturer’s instructions, paying particular attention to the release arm and hinge where dough or batter can collect. If handwashing, use warm, soapy water and rinse thoroughly. Dry the scoop completely before storing it.
- Are plastic-handled scoops better than all-metal scoops? Neither style is automatically better. Cushioned or plastic-coated handles may feel more comfortable during extended use, while all-metal designs may appeal to bakers who prefer simpler construction. Comfort, durability, and ease of cleaning matter more than handle material alone.
- How can I tell whether an older scoop still works properly? Check that the release arm moves smoothly across the inside of the bowl and returns to its starting position. Look for loose connections, cracks, corrosion, or a mechanism that catches during use. A scoop that’s difficult to operate or has damaged moving parts may be ready for replacement.
I’ve always believed that good baking doesn’t have to be complicated. Sometimes it’s as simple as discovering a better way to do something you’ve been doing for years. That’s one of the reasons I’m so excited to share more baking tips and how-to guides here at Lady Behind the Curtain.
My hope is that you’ll find something useful in each guide, whether it’s a technique you’ve never tried, a little explanation that helps something finally make sense, or a new way to use a tool you already have in your kitchen.
And if you’ve been baking for forty or fifty years, I hope you’ll keep sharing what you’ve learned, too. There’s always something new to discover, and some of the best kitchen conversations happen when we learn from one another.
Happy Baking!
Sheryl
LATEST POSTS

Comments
The Complete Guide to Baking Scoops: Sizes, Uses, and Tips for Better Baking — No Comments
HTML tags allowed in your comment: <a href="" title=""> <abbr title=""> <acronym title=""> <b> <blockquote cite=""> <cite> <code> <del datetime=""> <em> <i> <q cite=""> <s> <strike> <strong>