





How to Make Halloween Haunted Chocolate Trees: Spooky Edible Cake Toppers
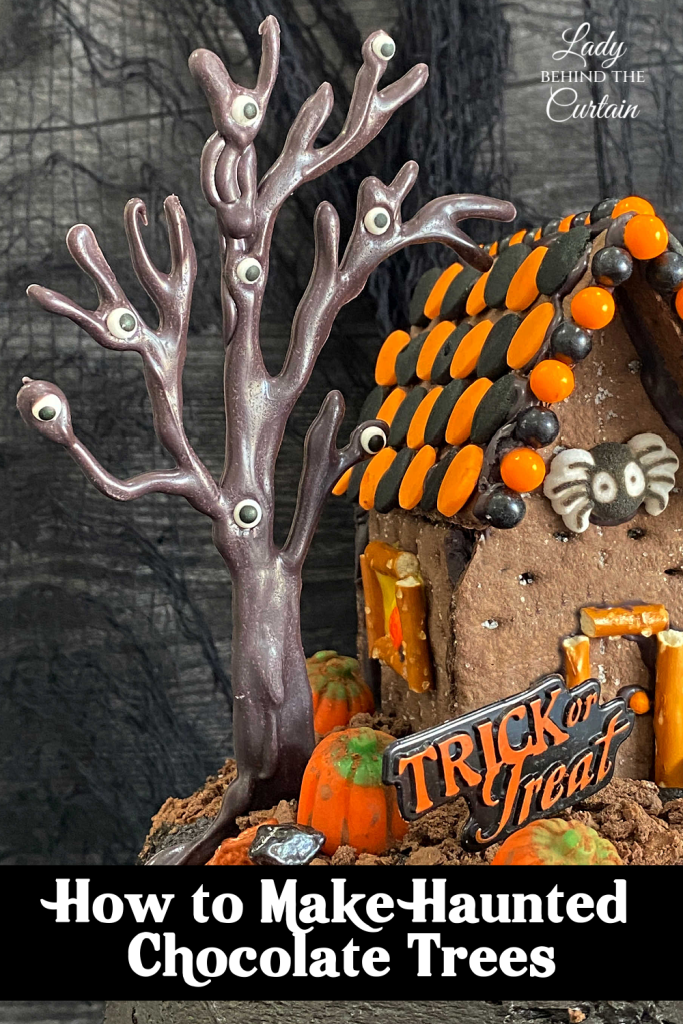
Some Halloween cakes are beautiful. Others tell a story. Picture an old haunted house tucked deep inside a crooked forest. Towering trees stretch their twisted branches toward the moon while tiny glowing eyes peek from the shadows, making guests wonder what mysterious little creatures are hiding among the limbs. Before anyone takes the first bite, they’re already leaning in for a closer look, discovering new details every time they circle the cake.
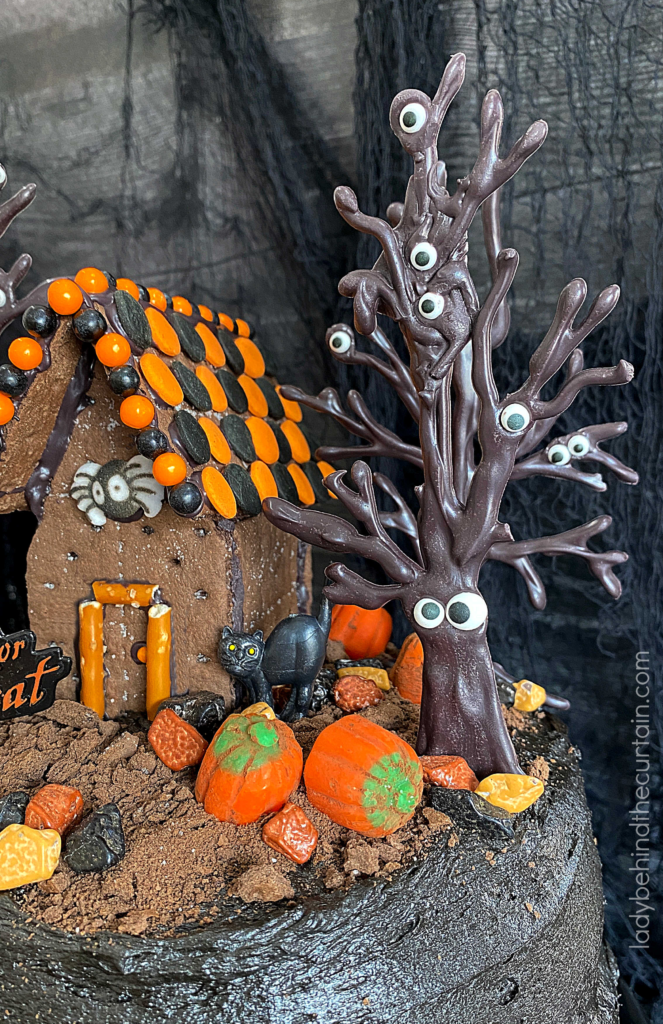
That’s exactly what these Chocolate Halloween Haunted Trees bring to a dessert. I love decorations that encourage people to explore. They’re the little details that make someone smile and say, “Wait…did you see the eyes hiding in that tree?” Those unexpected discoveries are what transform a cake from simply being dessert into the centerpiece of a Halloween celebration.
The wonderful thing about these trees is that they look much more complicated than they really are. At first glance, most people assume they require advanced decorating skills or years of experience working with chocolate. The truth is almost the opposite. These are one of the most forgiving Halloween decorations you’ll ever make because there isn’t a “right” way for a haunted tree to grow. In fact, the more personality your tree has, the better.
Crooked branches, uneven trunks, extra twists, and unexpected curves all make the finished decoration feel older, more whimsical, and more believable. Nature isn’t perfect, and your haunted forest shouldn’t be either. By the time you’ve finished your first tree, I think you’ll discover something I did years ago: you’ll stop trying to make every branch perfect and simply enjoy watching each tree develop a personality all its own.
Why You’ll Love These Chocolate Haunted Trees
I return to this project year after year because these trees do so much more than decorate a cake. They create atmosphere.
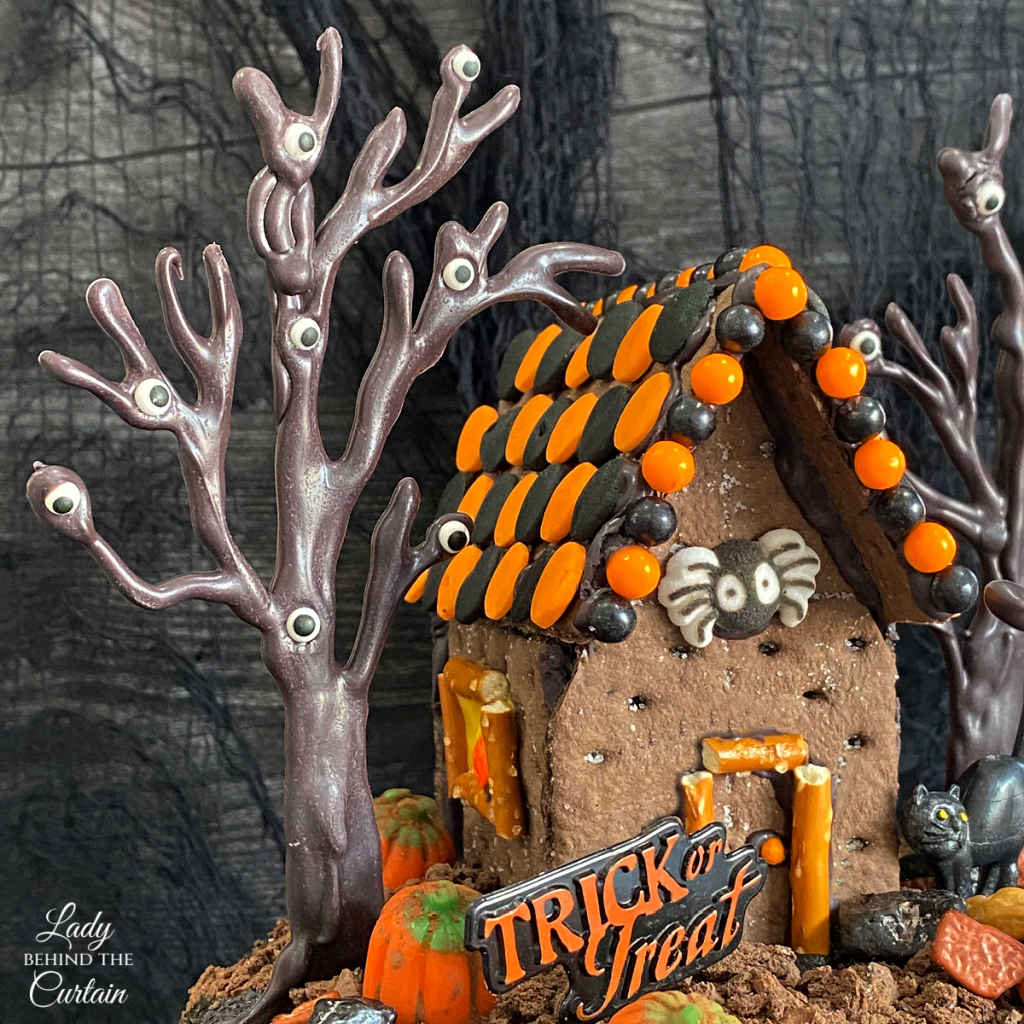
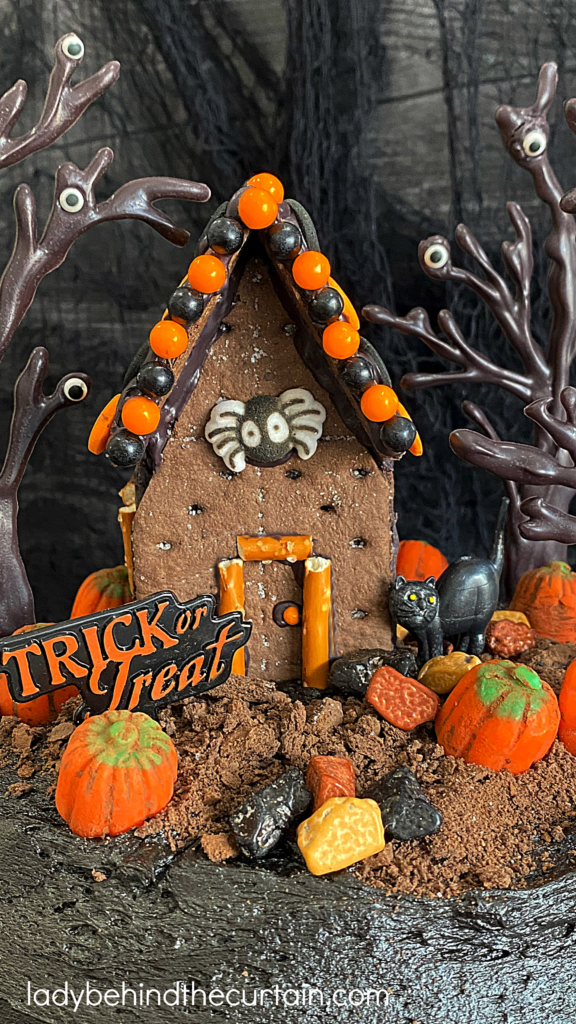
Imagine placing a haunted house in the middle of a cake with nothing around it. It certainly looks festive, but it also feels a little lonely. Now imagine surrounding that same house with twisted trees of different heights. Suddenly the house feels hidden inside an old forest. Add a winding path, a pumpkin patch, a weathered fence, or a curious black cat, and you’ve created a scene that invites people to stop and explore before the cake is ever sliced. That’s the difference thoughtful decorations can make.
These trees are also wonderfully versatile. While I often use them on Halloween cakes, they look just as charming on cupcake displays, cookie cakes, brownie platters, dessert charcuterie boards, and Halloween party centerpieces. Because they’re edible, every part of the scene contributes to the dessert, making them as practical as they are decorative.
Perhaps my favorite part comes after the cake is finished. Children usually notice the candy eyes first. Then the adults begin searching the branches to see how many tiny eyes they can find. It becomes a conversation piece, and I love desserts that bring people together like that.
Most importantly, these trees encourage creativity. No two are ever identical, and that’s exactly how it should be. Every branch, bend, and twist adds character, making each tree feel like it has been growing in your haunted forest for hundreds of years.
Don’t Let Them Fool You- They’re Much Easier Than They Look
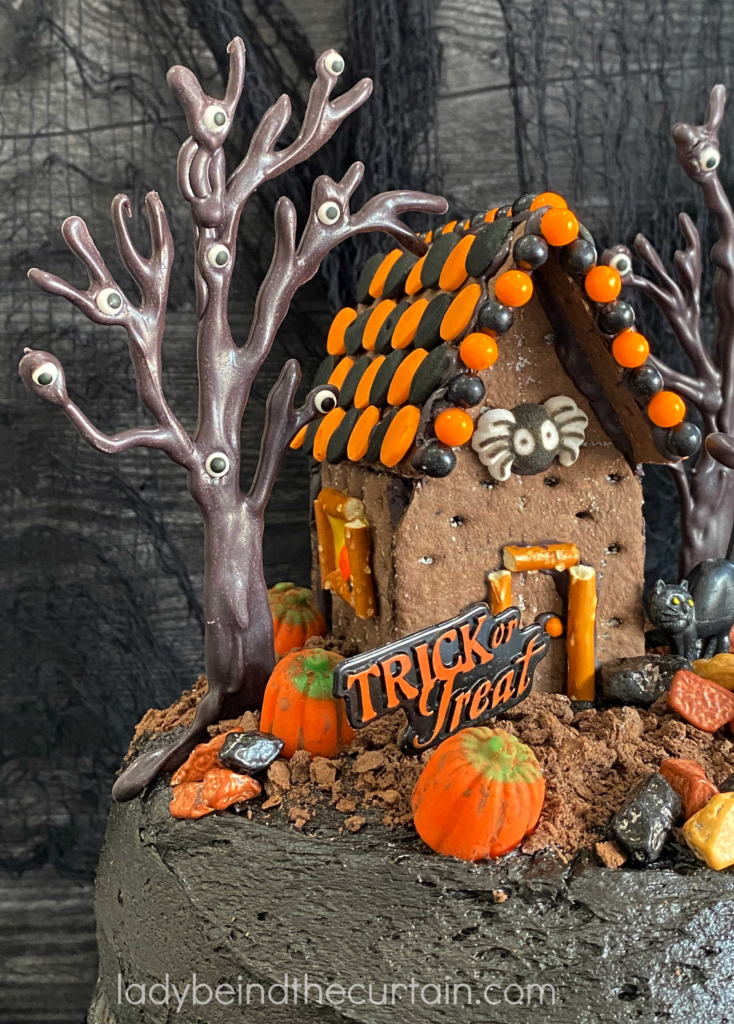
Whenever I share a cake decorated with these haunted trees, I almost always hear the same comment: “I could never make those.”
I always smile because that’s exactly what I thought the first time I saw chocolate decorations. The truth is, these haunted trees are one of the best beginner projects you can make with candy melts. They don’t require perfect lines, precise lettering, or carefully shaped flowers. In fact, trying to make them perfectly symmetrical usually makes them look less convincing.
Think about the oldest tree you’ve ever seen. Chances are it wasn’t perfectly balanced. One side probably reached farther than the other. Some branches twisted toward the ground while others stretched high into the sky. Years of wind, storms, and changing seasons gave that tree its unique character.
Your chocolate trees should have that same sense of history. That’s one of the reasons I encourage readers not to compare their trees to anyone else’s. The printable template simply gives you a place to begin. After that, your own imagination takes over. Maybe one tree grows tall and narrow with long reaching branches. Another becomes short and wide with thick limbs that seem to wrap around themselves. Neither one is wrong because nature never grows identical trees.
I think that’s what makes this project so enjoyable. Instead of worrying about getting every detail exactly right, you can relax and simply have fun creating a whimsical Halloween forest.
Behind the Curtain Tip: Whenever I’m making several trees for one cake, I intentionally make each one a little different. Some are tall, some are short, and some lean ever so slightly to one side. When they’re placed together on the cake, those little differences make the forest feel much more natural than if every tree matched perfectly.
The Secret Is Personality, Not Perfection
Many decorating techniques ask you to strive for perfect symmetry, smooth finishes, and identical designs. These haunted trees ask you to do the exact opposite.
The tiny imperfections that might frustrate you in another decorating project become the very things that make these trees so charming. A crooked trunk looks as though it’s been standing through countless Halloween nights. An extra bend in a branch makes the tree appear older. Thick, uneven lines resemble rough bark instead of smooth chocolate. Instead of correcting every little irregularity, learn to appreciate it.
One of my favorite moments happens after I finish a batch of trees and line them up across the counter. Even though they all began with the same template, every single one has developed its own personality. Some seem curious. Others look mischievous. A few almost appear to be waving their branches at one another.
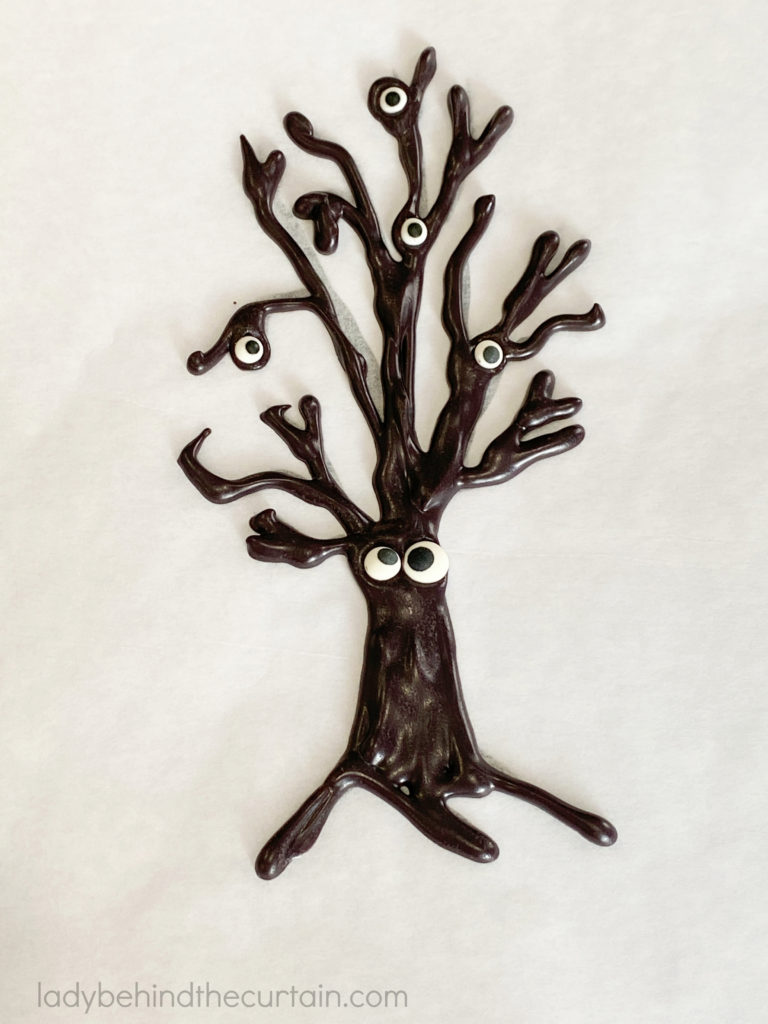
That personality becomes even stronger once the candy eyes are added. Something as small as moving one eye a quarter of an inch can completely change the expression of the tree. Suddenly it looks surprised, curious, sleepy, or playful. It’s such a simple detail, but it gives each tree a whimsical character that guests can’t resist looking at a little longer.
When decorating Halloween desserts, I always remind myself that I’m creating something meant to spark smiles, not perfection. Those little crooked branches that worried you while you were making them often become the details everyone comments on first.
WOW! I NEVER KNEW THAT: One of the reasons these whimsical trees look so believable has nothing to do with Halloween at all; it’s actually a principle artists and landscape designers have used for centuries.
Perfectly balanced objects often feel formal and man-made, while uneven shapes feel natural and alive. That’s why an old oak tree is more interesting to look at than a perfectly trimmed hedge, and why a winding garden path feels more inviting than one that runs in a perfectly straight line.
The same principle applies to these haunted trees. Crooked branches, uneven spacing, and unexpected twists give the illusion that the tree has been shaped by years of weather rather than carefully designed by a decorator. Ironically, trying too hard to make every branch identical often makes the finished tree look less realistic.
Once you understand this simple design principle, decorating becomes much less intimidating. Instead of chasing perfection, you begin looking for opportunities to add character.
What Gives a Haunted Tree Personality?
One of the easiest ways to think about decorating these trees is to imagine you’re creating characters instead of decorations.
| Design Element | What It Adds to the Tree |
|---|---|
| Long, twisting branches | An old, enchanted storybook feel |
| Thick, uneven trunk | The appearance of age and weathered bark |
| Branches growing in different directions | A natural, whimsical shape |
| Candy eyes tucked into the trunk | Makes the tree seem alive |
| Tiny eyes hidden among the branches | Creates a fun surprise guests discover as they look closer |
| Different heights and widths | Makes the haunted forest feel realistic |
| Slightly leaning trees | Suggests years of growing through wind and storms |
You’ll notice that none of these elements require artistic talent. Instead, they encourage you to embrace the little imperfections that naturally happen while decorating. Those imperfections are often what transform an ordinary chocolate decoration into a tree full of personality.
Behind the Curtain Tip: Before I place a finished tree on the cake, I always set it on the counter and look at it from several feet away. Sometimes I’ll notice that one side feels a little empty or that another tiny candy eye would add just the right amount of personality. It’s amazing how such a small detail can completely change the way the finished tree feels.
Let the Template Build Your Confidence
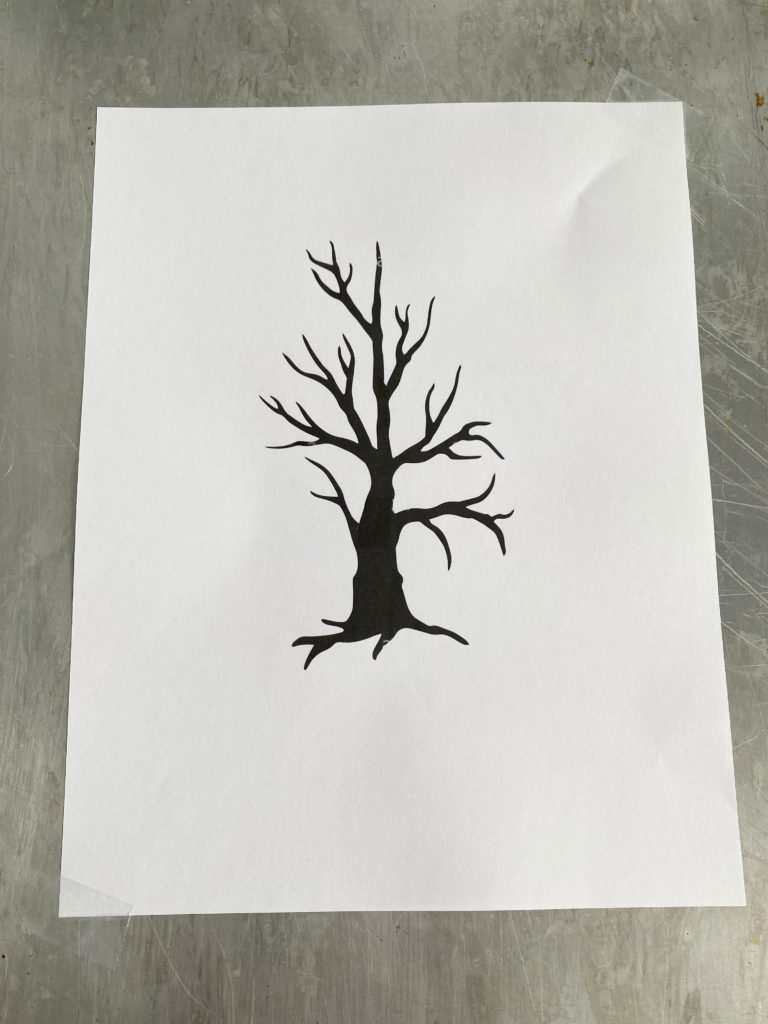
If drawing freehand sounds intimidating, remember that the printable template isn’t there to limit your creativity- it’s there to build your confidence. Think of it as training wheels.
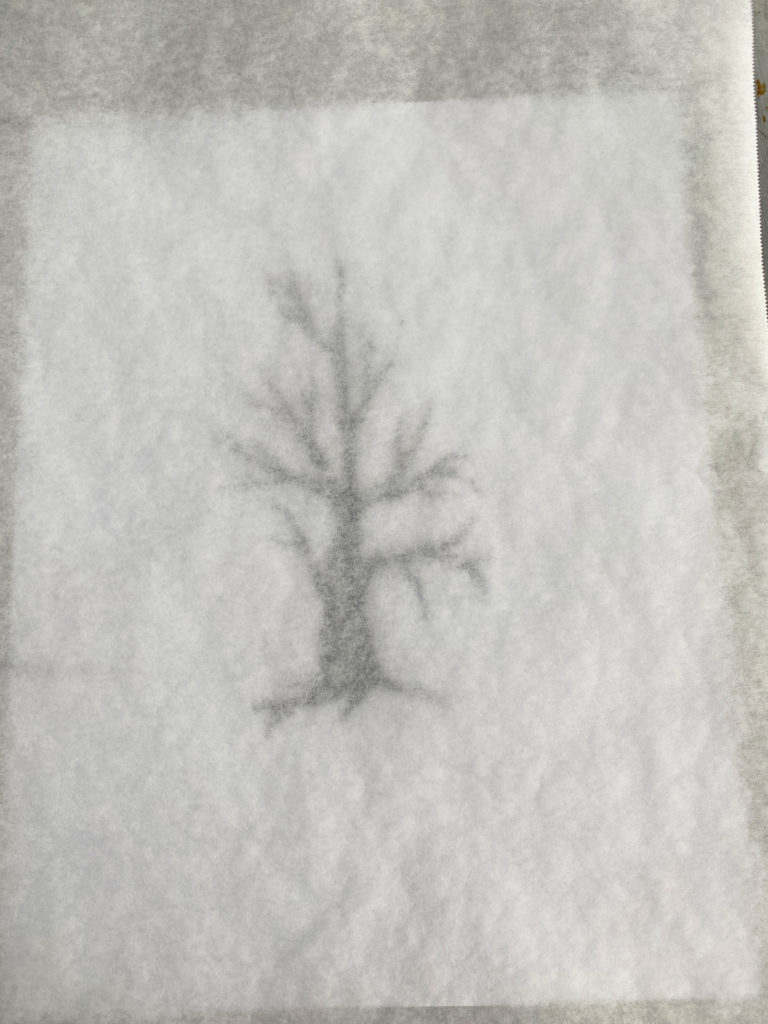
The template gives you a comfortable place to begin, helping you understand the basic proportions of the trunk and branches. Once you’ve made your first tree, you’ll probably find yourself becoming more comfortable with the process. You may decide to extend one branch, shorten another, or add an extra twist to the trunk. That’s exactly what I hope you’ll do.
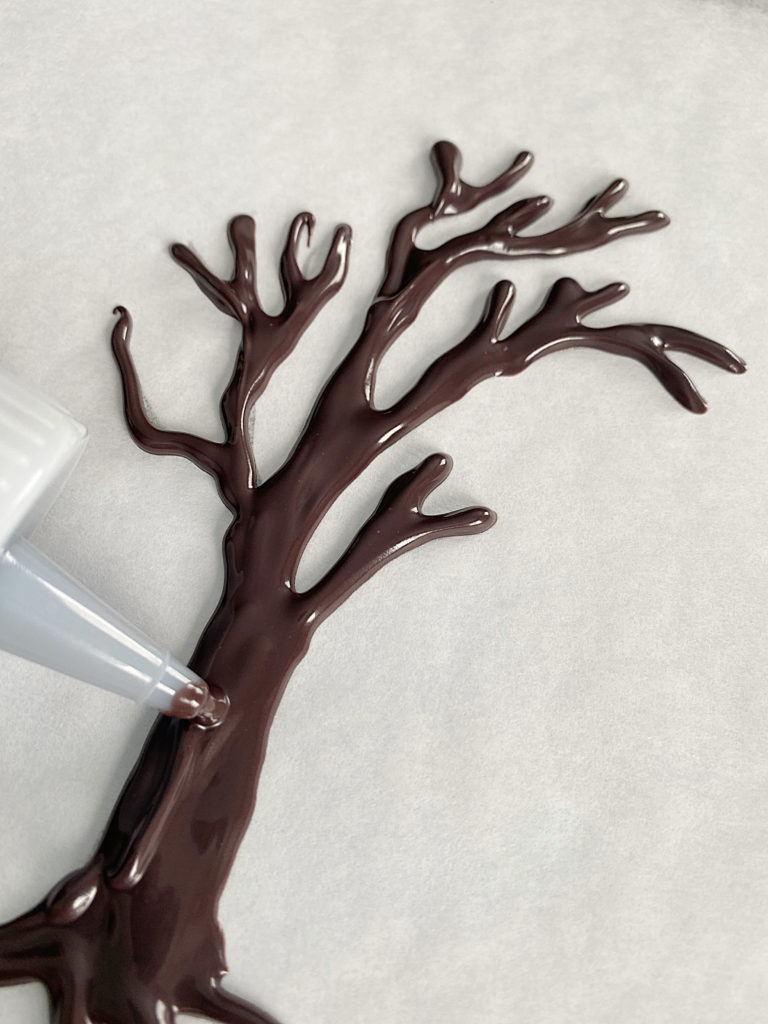
Some of my favorite trees no longer resemble the original template very much because I allowed them to grow into something a little different. The template simply helped me take that first step.
Tree Templates
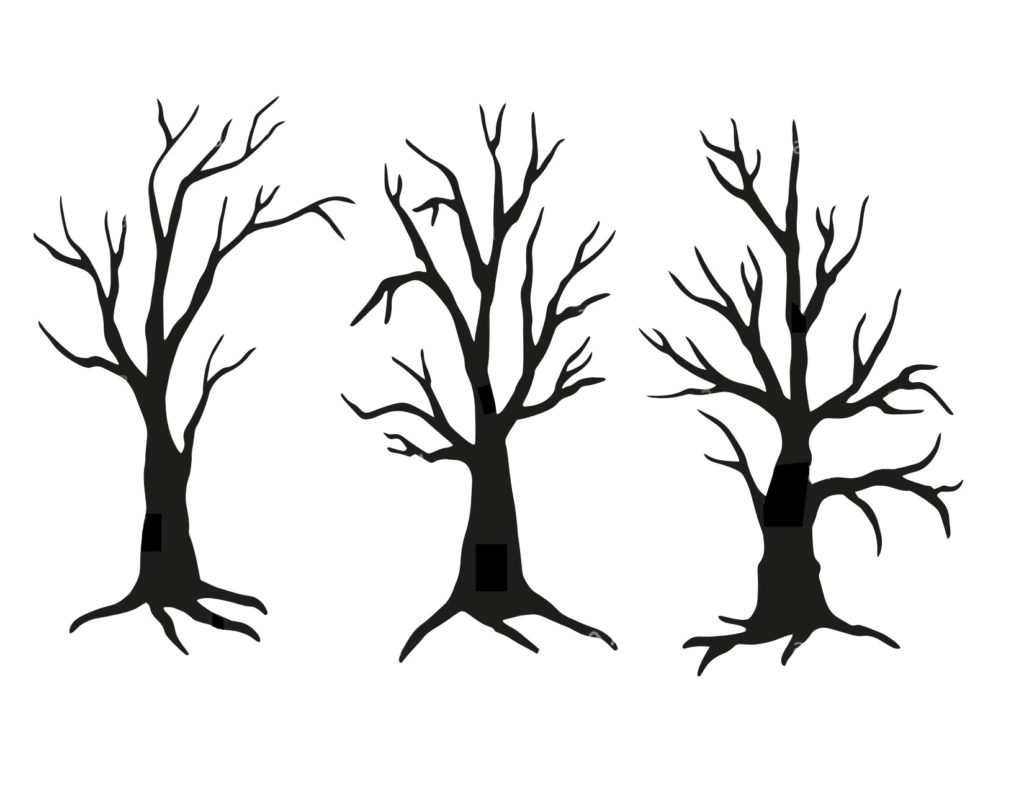
TREE #2
TREE #3
Why Candy Melting Wafers Work So Well
One reason I recommend candy melting wafers for this project is that they take much of the guesswork out of making edible decorations. If you’ve ever worked with real chocolate, you know it can be a little temperamental. Temperature plays a big role in whether it sets with a smooth, shiny finish or ends up streaky, soft, or difficult to handle.
Candy melts are much more forgiving, making them an excellent choice for decorators of all skill levels. They melt easily, harden consistently, and create sturdy decorations that can be made well before party day. That means you can spend your time enjoying the creative process instead of worrying about whether your decorations will set properly.
Another advantage is their durability. Once the trees have hardened and been reinforced, they’re sturdy enough to stand upright on a cake while still being completely edible. Whether you’re decorating a simple chocolate cake or creating an elaborate Halloween dessert display, candy melts provide the strength needed to support taller decorations without requiring advanced chocolate-working techniques.
One of my favorite things about working with candy melts is how approachable they make decorating. Even if this is your first time creating edible cake toppers, you’ll quickly discover that you don’t need professional equipment or years of experience to achieve beautiful results. The combination of a printable template and easy-to-use candy melts gives beginners the confidence to try something they may have thought was beyond their skill level.
Behind the Curtain Tip: If you’re planning to make several trees, don’t feel like you have to finish them all in one sitting. Candy melts can be remelted if they begin to thicken, allowing you to work at a comfortable pace instead of feeling rushed.
Wow! I Never Knew That! One of the biggest advantages of candy melts is that they don’t need to be tempered like real chocolate. Tempering is the process of heating and cooling chocolate to specific temperatures so it hardens properly with a glossy finish. Because candy melts are made with a different type of fat than traditional chocolate, they skip that entire process, making them one of the easiest mediums for creating edible decorations.
Make It Your Own
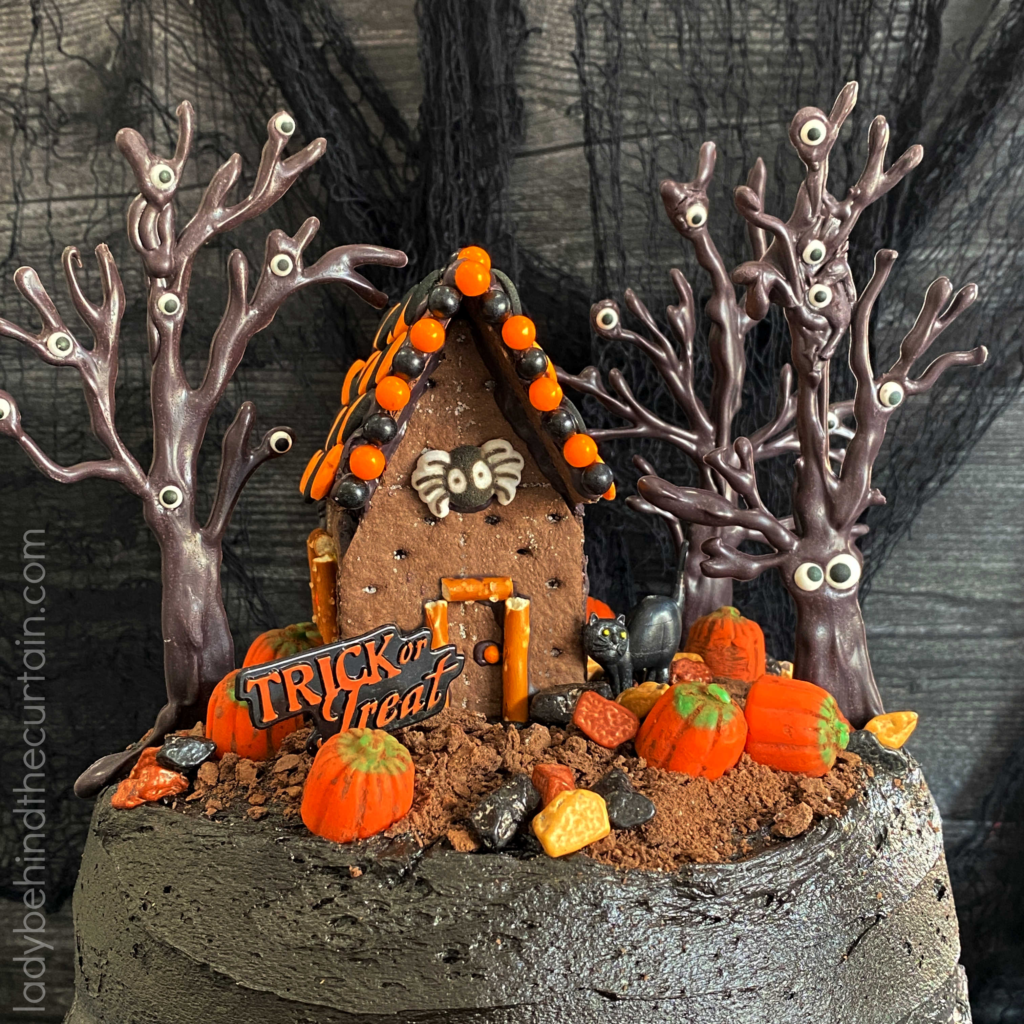
What I enjoy most about these candy haunted trees is that no two forests ever look exactly alike. Once you’ve made your first batch, you’ll quickly discover how easy it is to personalize them to fit your own decorating style.
If you love a playful Halloween theme, add extra candy eyes peeking from the branches and create trees with exaggerated twists and curls. Decorating a more vintage-inspired dessert table? Keep the silhouettes simple and let the graceful curves of the branches become the focal point. You can even make trees in a variety of heights and widths to create the look of an old woodland that has been growing for generations.
These trees are also incredibly versatile beyond the classic haunted house cake. Use a single tree as a dramatic cupcake topper, surround a tray of brownies with several different sizes, or tuck them throughout a Halloween dessert board for added height and visual interest. They also make wonderful edible centerpieces for classroom parties, bake sales, and Halloween buffets where guests can admire the decorations before enjoying them.
Don’t be afraid to let your imagination guide you. Add a few extra branches, change the shape of the trunk, or experiment with the placement of the candy eyes. Those little creative decisions are what give each tree its own personality and make every Halloween creation uniquely yours.
Inspiration for Your Haunted Forest
| If Your Style Is… | Try This |
|---|---|
| Whimsical | Lots of twisting branches and playful candy eyes |
| Vintage Halloween | Simpler silhouettes with graceful curves |
| Cute & Kid-Friendly | Larger candy eyes and shorter, curvier trees |
| Mysterious | Taller trees with fewer eyes and longer branches |
| Enchanted Woodland | Mix a variety of heights and branch shapes for a natural-looking forest |
Whether you make one tree or an entire haunted forest, remember that there isn’t a right or wrong way to create them. Every crooked branch, unexpected twist, and playful candy eye adds a little more charm to the finished decoration. That’s what makes these trees so much fun to create and why I look forward to making them every Halloween.
Can You Make Chocolate Haunted Trees Ahead of Time?
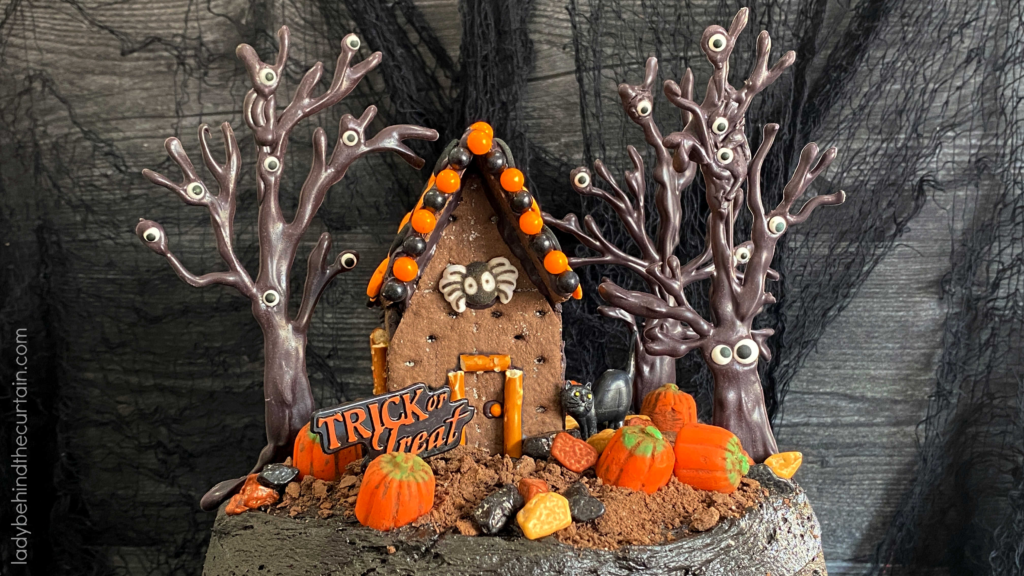
Absolutely! In fact, I encourage it. One of the nicest things about making chocolate decorations is that they can be prepared well before decorating day. Having your haunted trees ready to go allows you to focus on assembling your cake instead of trying to make every element at the last minute.
Once the trees have completely hardened, store them flat between sheets of parchment or wax paper in an airtight container. Keeping a layer of paper between each tree helps protect the delicate branches and prevents the decorations from rubbing against one another. Store the container in a cool, dry place away from direct sunlight or heat until you’re ready to use them.
Preparing the trees ahead of time is also helpful if you’re hosting a Halloween party or making desserts for a bake sale. With the decorations already finished, assembling your desserts becomes the fun part instead of feeling like a race against the clock.
Behind the Curtain Tip: I like to make my chocolate decorations several days before I decorate my cake. Not only does it make decorating day much more relaxing, but it also gives me plenty of time to make a few extra trees in case I decide I want a fuller forest.
LATEST POSTS
Halloween has always been one of my favorite holidays to decorate for because it’s the perfect excuse to let your imagination take over. A crooked tree doesn’t have to be fixed, a twisting branch doesn’t have to be straightened, and every little imperfection simply adds more charm to the finished piece.
I hope these chocolate haunted trees inspire you to step outside your comfort zone and try something new this Halloween. They may look like they belong in a bakery window, but I promise they’re much easier to make than they appear. Once you finish your first tree, you’ll realize there really isn’t a wrong way to create one.
Most of all, have fun with the process. Give each tree its own personality, enjoy the little surprises that happen along the way, and don’t forget to tuck in a few candy eyes where they’ll make someone smile.
If you create your own haunted forest, I’d love to see it! Seeing your creativity and the unique personality you give each tree is one of my favorite parts of sharing these projects.
Happy Halloween and happy decorating!
—Sheryl

Halloween Haunted Trees
These fun homemade trees are super easy to make. All you need is a few items and a template!
Materials
- tree templates (download in post)
- parchment or wax paper
- melting candy ( I used black candy melts from Wilton)
- candy eyes
Tools
- squeeze bottle
- tweezers
- 3 (7½ inch) skewers
Instructions
- Tape one printout to a hard, transferable surface ( I used a cookie sheet)
- Tape a piece of parchment or wax paper on top of the printout.
- Pour 1 bag of candy melts and 1 tablespoon of vegetable shortening into a microwave-safe bowl; heat on high for 1 minute, then stir until melted and creamy. NOTE: If the candy is not melted, continue heating in 30-second increments at 60% power.
- Pour melted candy into a squeeze bottle ( I use the ones from Wilton).
- Start by outlining the tree and then filling in. Use a heavy hand; you want the candy to be thick.
- Once you have the tree outlined and filled, use tweezers to place the eyes.
- Place the cookie sheets in the refrigerator to harden ( at least 30 minutes).
- Save the leftover melted candy in the bottle.
- ADDING STABILITY: If necessary, reheat the candy (still in the bottle) for 30 seconds on high.
- Carefully turn the trees over, add a strip of melted candy to the center of the trunk and up as far as you can to the top.
- Place the skewer in the melted candy and lightly press in place.
- Once all the trees have skewers, refrigerate until ready to decorate your cake.
Frequently Asked Questions-EASY CHOCOLATE HALLOWEEN HAUNTED TREES
Even though these chocolate haunted trees are beginner-friendly, it’s natural to have a few questions before getting started. Here are the answers to the ones I hear most often to help you decorate with confidence.
- Do I need to be good at drawing to make these trees? Not at all! The printable template gives you a great starting point, and because haunted trees are naturally crooked and uneven, there isn’t a “perfect” way for them to look. Every twist, bend, and curve simply adds more personality.
- Can I make the trees in different sizes? Absolutely! A collection of trees in different heights and widths looks much more natural than identical trees. Mixing sizes also gives you more decorating options for cakes, cupcakes, and dessert tables.
- Can I make these before Halloween? Yes! They’re an excellent make-ahead decoration. Once the trees have hardened completely, store them flat between sheets of parchment or wax paper in an airtight container until you’re ready to decorate.
- What else can I decorate with chocolate haunted trees? These whimsical trees aren’t just for cakes. They’re wonderful on cupcakes, brownie platters, cookie cakes, dessert charcuterie boards, and Halloween party centerpieces. Anywhere you want to add a little Halloween charm is the perfect place for a chocolate tree.
- Do all of my trees need to match? Definitely not. In fact, they shouldn’t! Real forests are filled with trees that are different heights, shapes, and sizes. Giving each chocolate tree its own personality creates a much more whimsical and believable haunted forest.
Comments
How to Make Halloween Haunted Chocolate Trees: Spooky Edible Cake Toppers — No Comments
HTML tags allowed in your comment: <a href="" title=""> <abbr title=""> <acronym title=""> <b> <blockquote cite=""> <cite> <code> <del datetime=""> <em> <i> <q cite=""> <s> <strike> <strong>