





Easy Chocolate Buttermilk Layer Cake
Chocolate cake is one of those recipes that almost every baker has in their collection. Some have been passed down through generations, while others are clipped from magazines, scribbled on recipe cards, or tucked inside old cookbooks. With so many recipes available, you might wonder why anyone would need another chocolate cake recipe.
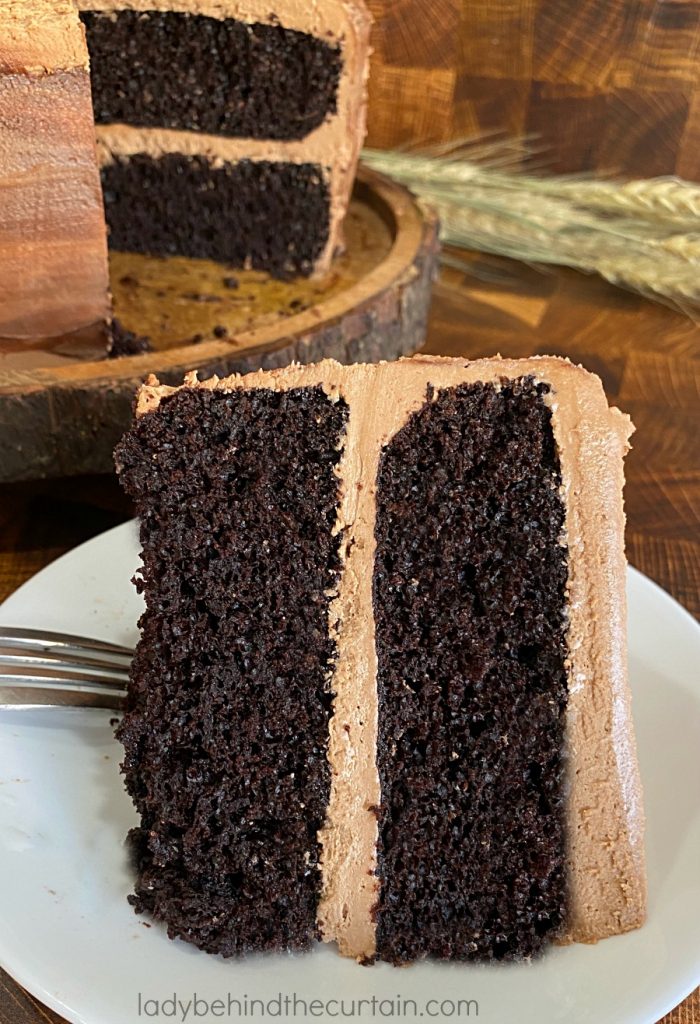
The answer is simple. Not every chocolate cake delivers the same results. Some cakes have wonderful chocolate flavor but turn out dry after a day or two. Others are incredibly moist but lack the rich chocolate flavor you’re hoping for. Then there are cakes that taste delicious but are so delicate they fall apart when you try to frost them. Finding one recipe that checks every box isn’t always easy. That’s exactly why this Easy Chocolate Buttermilk Layer Cake deserves a place in your recipe collection.
It produces tender cake layers with a rich chocolate flavor, stays moist for days, slices beautifully, and is sturdy enough for birthdays, holidays, family gatherings, and any celebration that calls for an impressive homemade dessert. Even better, the recipe doesn’t depend on specialty ingredients or complicated baking techniques. If you can measure, mix, and bake, you can make this cake with confidence.
Another reason this recipe stands out is the frosting. Instead of relying solely on cocoa powder, it combines real melted milk chocolate with butter to create an incredibly smooth buttercream that’s creamy, rich, and easy to spread. Finish the cake with a simple marbled frosting technique, and you’ll have a dessert that looks like it came from a neighborhood bakery. This isn’t a cake that’s all about appearance, though. The real magic happens inside each layer.
Every ingredient has a purpose. The buttermilk creates tenderness. The oil keeps the cake moist long after it has cooled. The hot coffee intensifies the chocolate flavor without making the cake taste like coffee. Even the surprisingly thin batter contributes to the finished texture. None of these ingredients are included by accident, and understanding why they work together will make you a better baker—not just for this recipe, but for many others as well.
BEHIND THE CURTAIN TIP: Great recipes don’t happen by chance. Once you understand what each ingredient contributes, you’ll have the confidence to recognize an exceptional recipe before you even turn on the oven.
Why Does Buttermilk Make Such a Big Difference in Chocolate Cake?
If you’ve ever wondered whether buttermilk is really worth buying for one recipe, the answer is yes. While it may seem like a simple swap for regular milk, buttermilk changes nearly every aspect of the finished cake from its rise and texture to its flavor and how long it stays fresh.
The biggest difference is acidity.
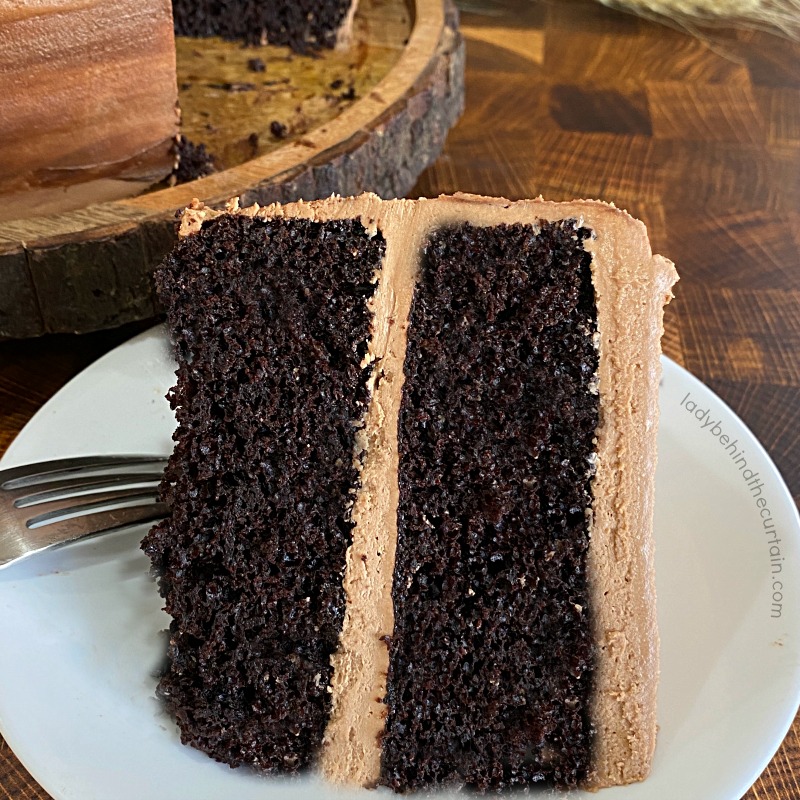
Unlike regular milk, buttermilk is cultured, giving it a gentle acidity that reacts with the baking soda in the batter. As the two ingredients work together, they create tiny carbon dioxide bubbles that help the cake rise higher while producing a finer, more tender crumb. At the same time, that acidity slows gluten development, preventing the cake from becoming tough and giving each slice the soft, delicate texture that’s expected from a great layer cake.
Buttermilk also helps the cake retain moisture, which means it stays fresh longer than many cakes made with regular milk. That’s especially important if you’re baking the layers a day ahead for a birthday, holiday, or special celebration. Instead of drying out overnight, the cake remains soft and delicious.
Flavor is another reason buttermilk shines in chocolate cake. Although you won’t taste a distinct tang, its subtle acidity balances the sweetness of both the cake and the frosting, allowing the chocolate flavor to stand out instead of being overpowered by sugar.
WOW! I NEVER KNEW THAT! The buttermilk you buy at the grocery store is thicker than regular milk because it’s cultured with beneficial bacteria. Those cultures create the acidity that gives buttermilk its baking power. It’s that acidity—not the thickness—that helps produce a softer crumb and a cake that stays moist longer.
To really appreciate what buttermilk contributes, it helps to compare it with regular milk.
| Feature | Buttermilk | Regular Milk |
|---|---|---|
| Acidity | High | Low |
| Reacts with baking soda | ✔ Yes | ✘ No |
| Cake texture | Soft, tender crumb | Slightly firmer crumb |
| Moisture | Helps the cake stay fresh longer | Can dry out more quickly |
| Flavor | Balances sweetness with a subtle tang | Neutral flavor |
| Best choice for this recipe | ✔ Yes | Not recommended |
Looking at the comparison, it’s easy to see why this recipe was developed with buttermilk instead of regular milk. While you can make a substitute by adding lemon juice or vinegar to milk, it isn’t quite the same as cultured buttermilk. A homemade version provides the acidity needed for the baking soda to react, but it doesn’t have the same consistency or depth of flavor. If it’s all you have, it will certainly work in a pinch. However, when you’re baking a cake that’s meant to be the centerpiece of a celebration, I recommend using cultured buttermilk whenever possible. It’s one of those small details that helps transform a good chocolate cake into an exceptional one.
BEHIND THE CURTAIN TIP
If you don’t bake with buttermilk very often, look for powdered buttermilk in the baking aisle. It stores in the pantry for months, so you can enjoy all the benefits of buttermilk without worrying about using up the rest of a carton.
How Is Buttermilk Different from Regular Milk?
At first glance, milk and buttermilk seem interchangeable. They’re both dairy products, they’re both liquids, and they even look similar once mixed into a batter. But once they’re in the oven, they perform very differently.
| Feature | Buttermilk | Regular Milk |
|---|---|---|
| Acidity | High | Low |
| Reacts with baking soda | Yes | No |
| Cake texture | Soft, tender crumb | Slightly firmer crumb |
| Moisture | Stays moist longer | Can dry out sooner |
| Flavor | Balances sweetness with a subtle tang | Neutral flavor |
| Best choice for this recipe | ✔ Yes | Not recommended |
Looking at the comparison, it’s easy to see why this recipe was developed with buttermilk instead of regular milk. Replacing it with milk won’t ruin the cake, but it will change the texture, reduce the rise, and slightly flatten the overall flavor.
If you’ve ever made two chocolate cakes and wondered why one seemed lighter, softer, and more flavorful than the other—even when the ingredient lists looked almost identical—buttermilk may have been the difference.
BEHIND THE CURTAIN TIP
Keep powdered buttermilk in your pantry if you don’t bake with liquid buttermilk very often. It’s a great way to avoid wasting a partial carton while still getting the benefits of buttermilk whenever a recipe calls for it.
Can You Make Your Own Buttermilk?
A quick internet search will tell you to stir lemon juice or white vinegar into a cup of milk and let it sit for a few minutes. While that mixture creates enough acidity to work in many recipes, it isn’t exactly the same as cultured buttermilk.
Cultured buttermilk has a thicker consistency and a richer flavor because it has been fermented with live cultures. The homemade version provides the acidity needed for the baking soda to react, but it doesn’t always produce the same richness or tenderness.
If homemade buttermilk is your only option, go ahead and use it. You’ll still bake a delicious chocolate cake. However, when you’re making a dessert that’s meant to be the centerpiece of a birthday, holiday, or special celebration, I recommend using cultured buttermilk if it’s available. The difference may be subtle, but it’s one of those little details that helps transform a good cake into a great one.
The next ingredient in this recipe often surprises people even more than buttermilk. At first glance, it almost seems out of place in a chocolate cake. Once you understand what it does, though, you’ll probably never make another chocolate cake without it.
Why Add Coffee to Chocolate Cake If You Don’t Want It to Taste Like Coffee?
This is one of the questions I hear most often whenever someone reads the ingredient list for a chocolate cake.
“I don’t drink coffee. Can I leave it out?”
“Will my cake taste like mocha?”
“Do I have to use coffee?”
The short answer is that you can make a chocolate cake without coffee. The better question, though, is whether you should.
Coffee has been paired with chocolate for generations because the two flavors naturally complement one another. However, the coffee isn’t there to become another flavor in the cake. Its job is much more subtle. It enhances what is already there.
Think about adding vanilla to cookie dough. You don’t bite into a chocolate chip cookie and say, “This tastes like vanilla.” Instead, the vanilla makes every other ingredient taste richer and more complete. Coffee works the same way in chocolate cake.
When hot coffee is mixed with cocoa powder, it helps dissolve many of the flavor compounds locked inside the cocoa. As those compounds are released, the chocolate flavor becomes deeper, richer, and more complex. That’s why two chocolate cakes made from nearly identical ingredients can taste completely different simply because one uses hot coffee while the other uses plain hot water.
Temperature plays an important role as well.
Adding a hot liquid to cocoa powder is often referred to as blooming the cocoa. Heat wakes up the cocoa powder, allowing it to release more of its natural flavor before the batter even reaches the oven. It’s a simple step, but one that professional bakers have relied on for years to create cakes with a more intense chocolate flavor.
If you don’t keep brewed coffee on hand, instant coffee dissolved in hot water works beautifully. In fact, that’s often my preference because I only need a small amount and never have leftover coffee to worry about. It delivers the same chocolate-enhancing benefits without requiring an extra pot of coffee.
If caffeine is a concern, simply substitute decaffeinated coffee. The flavor-enhancing compounds remain, so you’ll still enjoy the same rich chocolate taste.
Of course, if you absolutely don’t want to use coffee, hot water will still produce a delicious cake. The texture won’t change because the coffee isn’t responsible for the cake’s structure. You’ll simply lose some of the depth and richness that coffee brings to the chocolate.
BEHIND THE CURTAIN TIP: If someone tells you they don’t like coffee, don’t mention it’s in the cake until after they’ve taken a bite. Chances are they’ll never know it was there—they’ll simply comment on how rich and chocolatey the cake tastes.
Why Does This Recipe Use Oil Instead of Butter?
Butter has long been considered the gold standard for baking, so it’s natural to wonder why a classic chocolate cake would use vegetable oil instead. Isn’t butter supposed to have better flavor? In some recipes, absolutely.
Cookies, pound cakes, shortbread, and pie crusts all benefit from butter because its flavor becomes one of the stars of the recipe. Chocolate cake is a little different. Chocolate is the dominant flavor, which means butter isn’t contributing nearly as much to the finished taste as many people think. Instead, the biggest difference between butter and oil is the texture they create. Butter is solid at room temperature. As a cake cools, the butter firms back up, causing the crumb to become slightly firmer as well. That’s why refrigerated butter cakes often seem dry until they’ve had time to warm up.
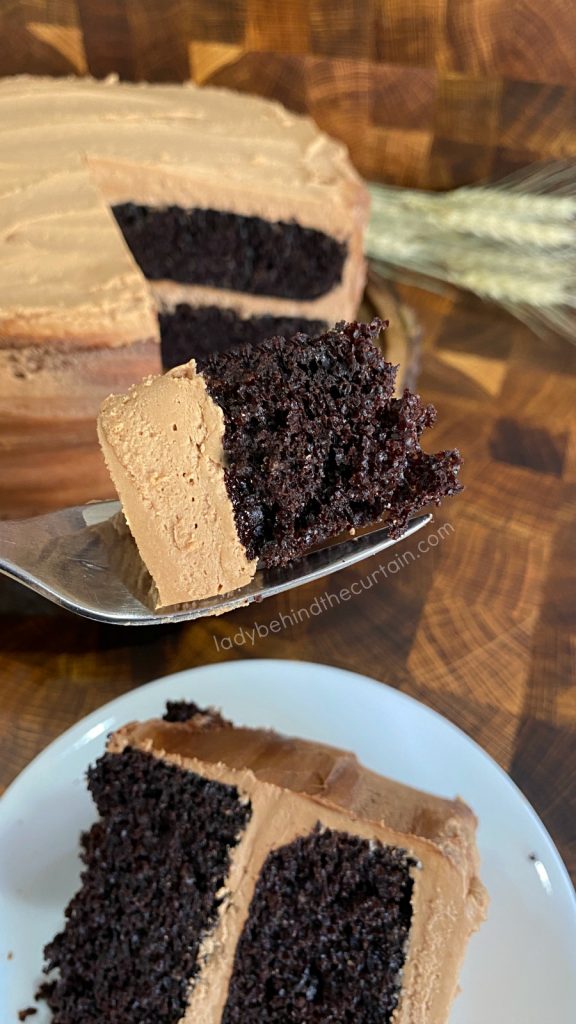
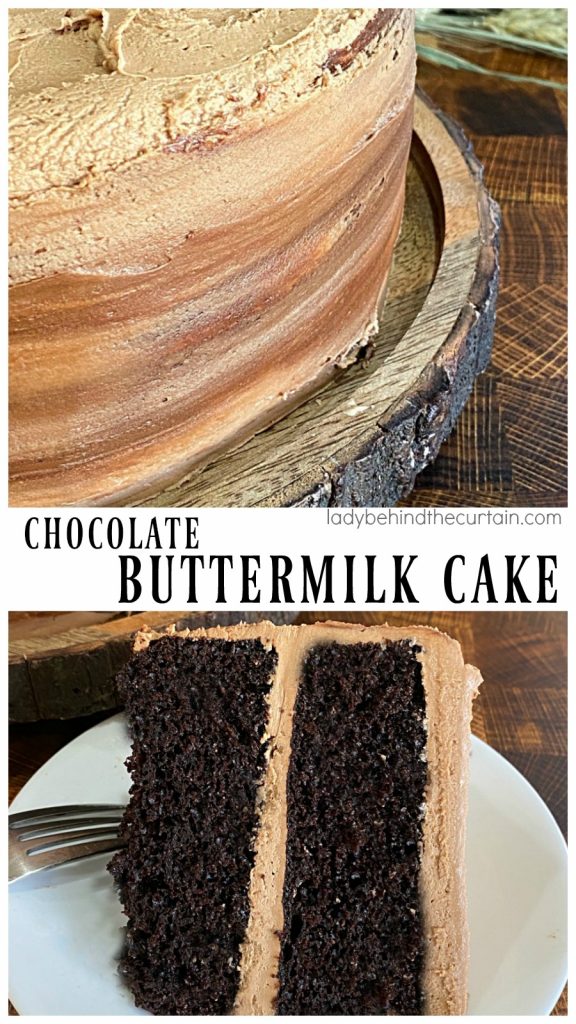
Vegetable oil behaves differently. Because oil stays liquid, it continues coating the flour particles even after the cake has completely cooled. That keeps every slice feeling soft and moist, even several days after baking. It’s one of the reasons so many bakery cakes stay tender much longer than homemade cakes made entirely with butter. Oil also creates a finer, more even crumb. Instead of large air pockets, you’ll notice small, delicate holes throughout each slice, giving the cake a smooth texture that’s easy to cut and beautiful to serve.
This recipe pairs oil with buttermilk, allowing each ingredient to do what it does best. The oil locks in moisture while the buttermilk tenderizes the crumb and balances the richness of the chocolate. Together, they create a cake that’s soft enough to melt in your mouth yet sturdy enough to support generous layers of frosting.
Understanding how those ingredients work together also explains something else that surprises many bakers- the consistency of the batter itself. If you’ve never made a chocolate cake like this before, don’t be alarmed when you see just how thin it is. That’s not a mistake. In fact, it’s one of the secrets to this cake’s incredible texture.
What Makes This Milk Chocolate Buttercream So Creamy?
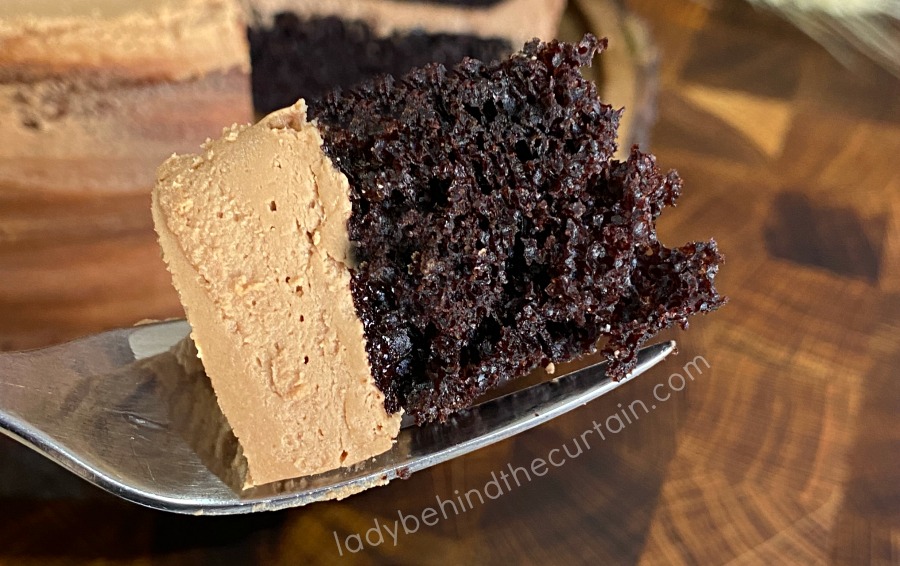
A great chocolate layer cake deserves a frosting that’s every bit as memorable as the cake itself. While many chocolate buttercream recipes rely almost entirely on cocoa powder for flavor, this one takes a different approach by using melted milk chocolate. It’s a simple change, but one that completely transforms both the flavor and texture of the frosting.
Melted chocolate contributes cocoa butter, which gives the buttercream a silky, melt-in-your-mouth consistency that cocoa powder alone can’t achieve. Instead of tasting dry or overly sweet, the frosting has a smooth, creamy richness that spreads effortlessly over the cake and makes every bite feel luxurious. The chocolate also softens the sweetness of the powdered sugar, creating a buttercream that’s balanced instead of overwhelmingly sugary.
Coffee quietly plays another important role here as well. Just as it enhances the chocolate flavor in the cake layers, it deepens the flavor of the melted milk chocolate in the frosting. The result isn’t a coffee-flavored buttercream. Instead, it creates a fuller chocolate flavor that complements the cake beautifully from the first bite to the last.
Texture is just as important as flavor, and one of the easiest ways to improve homemade buttercream is simply to let the mixer do the work. After all of the ingredients have been incorporated, continue beating the frosting for several minutes. During that time, thousands of tiny air bubbles are worked into the mixture, making it noticeably lighter and fluffier. It’s a step that’s easy to skip when you’re in a hurry, but it makes a remarkable difference in both the appearance and mouthfeel of the finished frosting.
You’ll also notice that this frosting glides over the cake with very little effort. Because it contains melted chocolate instead of relying solely on cocoa powder, it has a naturally smoother consistency that makes filling the layers and frosting the sides much easier. Even if you’re new to decorating cakes, you’ll find this buttercream forgiving enough to smooth with an offset spatula while still holding beautiful swirls and texture.
WOW! I NEVER KNEW THAT!
Professional bakers don’t just mix buttercream until the ingredients come together, they continue whipping it to incorporate air. Those tiny air bubbles are one of the secrets to creating frosting that’s light, fluffy, and easy to spread instead of dense and heavy.
How Do You Create the Beautiful Marbled Bakery Finish?
One of my favorite details about this cake has nothing to do with complicated decorating techniques. In fact, it’s just the opposite. The beautiful marbled finish is proof that you don’t need years of cake decorating experience to create a dessert that looks bakery-worthy.
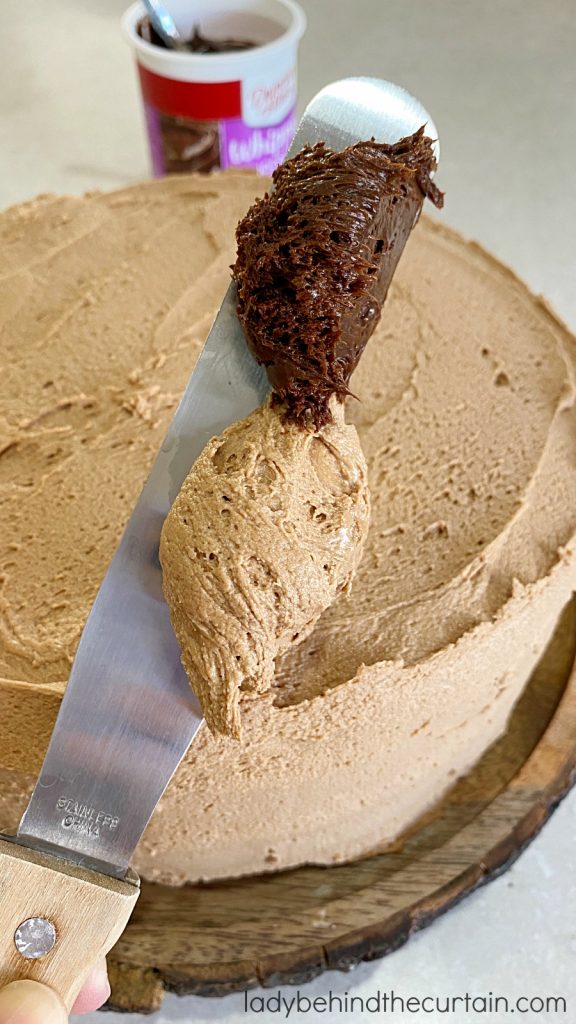
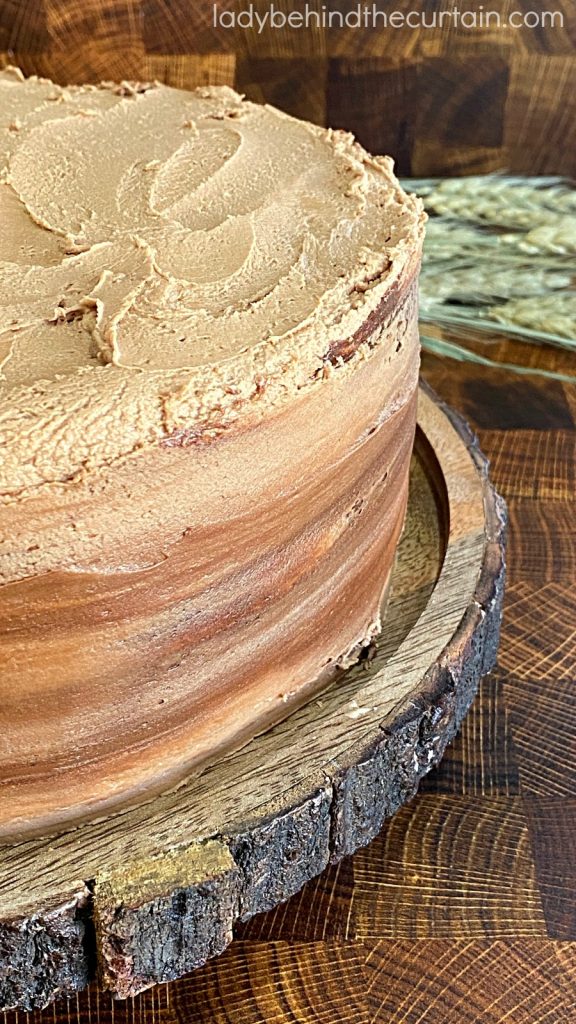
After frosting the cake with the homemade milk chocolate buttercream, add small amounts of store-bought dark chocolate frosting to your spatula along with the homemade frosting. As you spread the frosting around the sides of the cake, the two shades naturally blend together, creating soft ribbons of light and dark chocolate.
The key is to resist the temptation to keep smoothing. A few passes with the spatula are all it takes. Every swipe creates a slightly different pattern, making each cake unique. That’s part of the charm. The goal isn’t perfectly even stripes or a precise design. It’s an elegant, handcrafted finish that gives the cake depth, movement, and the appearance of professional decorating.
The contrast between the creamy milk chocolate frosting and the darker chocolate swirls also hints at the rich flavor waiting inside. Before anyone takes the first bite, the cake already promises layers of chocolate.
BEHIND THE CURTAIN TIP: Think of the dark chocolate frosting as an accent, not the main event. Using too much will muddy the marbled effect, while just a few small scoops create beautiful ribbons that make the cake look professionally finished with almost no extra effort.
Why Is This the Chocolate Cake Recipe You’ll Make Again and Again?
With so many chocolate cake recipes available, it’s easy to wonder whether one more recipe can really make a difference. I believe this one does.
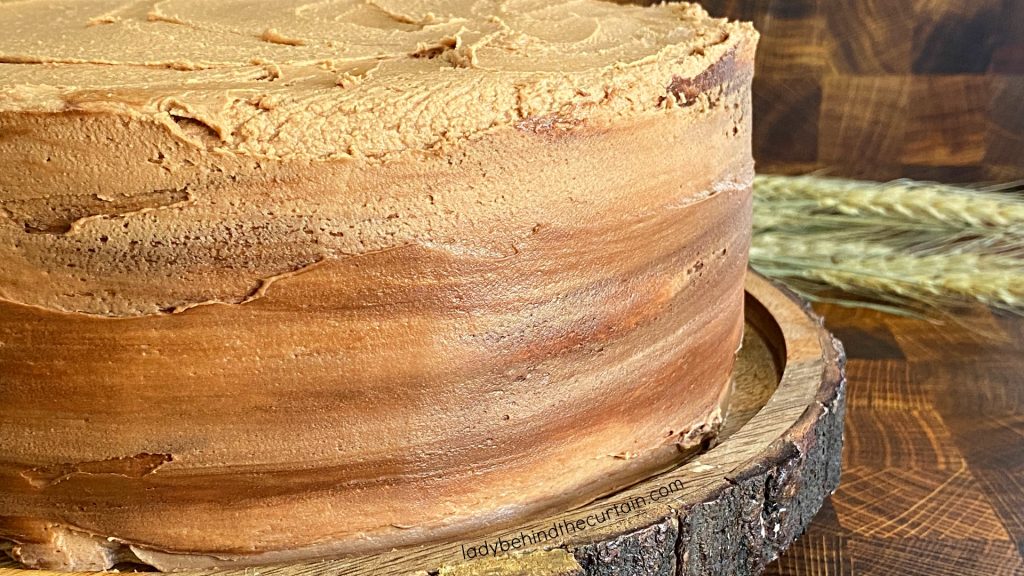
Every ingredient has a purpose. The buttermilk creates a tender crumb while balancing the sweetness. The hot coffee quietly intensifies the chocolate without overpowering it. The oil helps the cake stay moist for days, making it just as enjoyable the next afternoon as it is fresh from the oven. Even the frosting was designed to do more than simply cover the cake. Melted milk chocolate creates a silky buttercream that’s rich, creamy, and easy to spread, while the marbled finish gives the cake a bakery-quality appearance with very little effort.
What I love most about this recipe is that it doesn’t ask you to choose between beauty and flavor. You get both. It’s elegant enough for birthdays, anniversaries, holidays, and special celebrations, yet simple enough to bake simply because you’re craving a really good slice of homemade chocolate cake.
If you’re looking for a dependable chocolate layer cake that will earn a permanent spot in your recipe collection, I truly believe this is one you’ll come back to again and again.
Chocolate cake has a way of bringing people together. It doesn’t matter whether it’s sitting in the middle of a birthday table, waiting to be sliced after Sunday dinner, or surprising a friend on an ordinary afternoon. Somehow, it always makes the occasion feel a little more special.
I think that’s why I enjoy creating recipes like this one so much. It’s not about making the fanciest dessert or using the most expensive ingredients. It’s about helping home bakers create something they can feel proud to serve—something that looks beautiful, tastes even better, and creates memories around the table.
I hope this Easy Chocolate Buttermilk Layer Cake becomes one of those recipes in your home. The kind that’s requested for birthdays, shared with neighbors, and passed along to family members because everyone wants a copy.
If you bake it, I’d love to hear how it turned out and what special occasion brought it to your table.
Happy baking,
Sheryl
LATEST POSTS

Easy Chocolate Buttermilk Layer Cake
An incredible moist cake with a rich chocolate flavor covered in a creamy milk chocolate buttercream frosting makes this the perfect chocolate cake.
Ingredients
For the Cake:
- 2 cups granulated sugar
- 1¾ cups all-purpose flour
- ¾ cup unsweetened cocoa powder
- 2 teaspoons baking soda
- 1 teaspoon baking powder
- 1 teaspoon salt
- 2 large eggs
- 1 cup buttermilk
- 1 cup hot water + 1 tablespoon instant coffee OR (1 cup of strong coffee)
- ½ cup vegetable oil
- 1 teaspoon vanilla extract
For the Frosting:
- 12 ounces milk chocolate, melted and cooled
- ½ cup unsalted butter, softened
- ½ teaspoon salt
- 8 cups powdered sugar
- ¼ cup milk
- ¼ cup hot water+ 1 teaspoon instant coffee OR (¼ cup of strong coffee)
- 2 teaspoons vanilla extract
Instructions
For the Chocolate Buttermilk Cake:
- Preheat oven to 350°. Spray 2 (9-inch) round cake pans with nonstick cooking spray, cut a piece of parchment paper the size of the bottom of each pan, place the paper in the pan, spray the top of the paper, and set aside.
- In a medium bowl, whisk together the sugar, flour, cocoa, baking soda, baking powder, and salt.
- In a large mixing bowl, beat the eggs, buttermilk, coffee, oil, and vanilla until well blended.
- Add the flour mixture to the buttermilk mixture; beat until combined, and there are no lumps (batter will be thin).
- Pour into prepared pans.
- Bake 30-35 minutes or until a toothpick inserted into the center comes out clean..
- Cool in the pans 10 minutes, then remove from pans onto a wire rack to cool completely.
For the Milk Chocolate Buttercream Frosting:
- To a large mixing bowl, add the melted chocolate, butter, and salt.
- Beat until light and fluffy.
- In a small bowl, whisk together the milk, coffee, and vanilla.
- Add the powdered sugar 1 cup at a time, alternating with the milk mixture.
- Once all the ingredients have been added, beat on high for 3 minutes or until the frosting is light, fluffy, and air has been incorporated.
- Generously fill and frost the cake.
For the Marbled Look:
- Set aside about ½ cup of the milk chocolate frosting.
- After frosting the cake, put a scoop of the milk chocolate frosting on a spatula, then add a scoop of store-bought canned dark chocolate frosting. Spread around the sides (see photo in post).

Frequently Asked Questions-EASY CHOCOLATE BUTTERMILK LAYER CAKE
By now, you know what makes this chocolate buttermilk layer cake so incredibly moist, why coffee deepens the chocolate flavor, and how a few simple techniques can help you achieve bakery-quality results. Before you head to the recipe card, let’s answer a few of the most common questions home bakers have. These quick tips will help you bake, frost, store, and serve your cake with confidence.
- Can I bake the cake layers ahead of time? Absolutely! In fact, baking the layers a day in advance is one of my favorite time-saving tricks. Once the cakes have cooled completely, wrap each layer tightly in plastic wrap and store them at room temperature overnight. If you’re making them more than a day ahead, wrap them well and freeze them for up to three months. Thaw the layers while they’re still wrapped to help retain moisture.
- Can I use Dutch-process cocoa powder instead of natural cocoa powder? This recipe was developed using natural unsweetened cocoa powder. Since natural cocoa and Dutch-process cocoa have different acidity levels, they don’t always react the same way with the baking soda. For the best rise, texture, and flavor, I recommend sticking with natural cocoa powder.
- Do I have to use coffee? No. Hot water is a perfectly acceptable substitute if you don’t have coffee on hand. The cake will still be rich, moist, and delicious. Coffee simply enhances the chocolate flavor, giving it a little more depth without making the cake taste like coffee.
- Can I use this recipe for cupcakes? Yes! This batter works beautifully as cupcakes. Simply fill the liners about two-thirds full and begin checking for doneness around 18 to 22 minutes. Baking times can vary slightly depending on your oven, so use a toothpick to test for doneness.
- How do I get clean slices? Use a long, sharp knife and wipe the blade clean between each cut. A warm knife glides through the frosting more easily, giving you beautiful bakery-style slices every time.
Comments
Easy Chocolate Buttermilk Layer Cake — No Comments
HTML tags allowed in your comment: <a href="" title=""> <abbr title=""> <acronym title=""> <b> <blockquote cite=""> <cite> <code> <del datetime=""> <em> <i> <q cite=""> <s> <strike> <strong>