





Halloween Cake Pop Filled Cauldron for Beginners
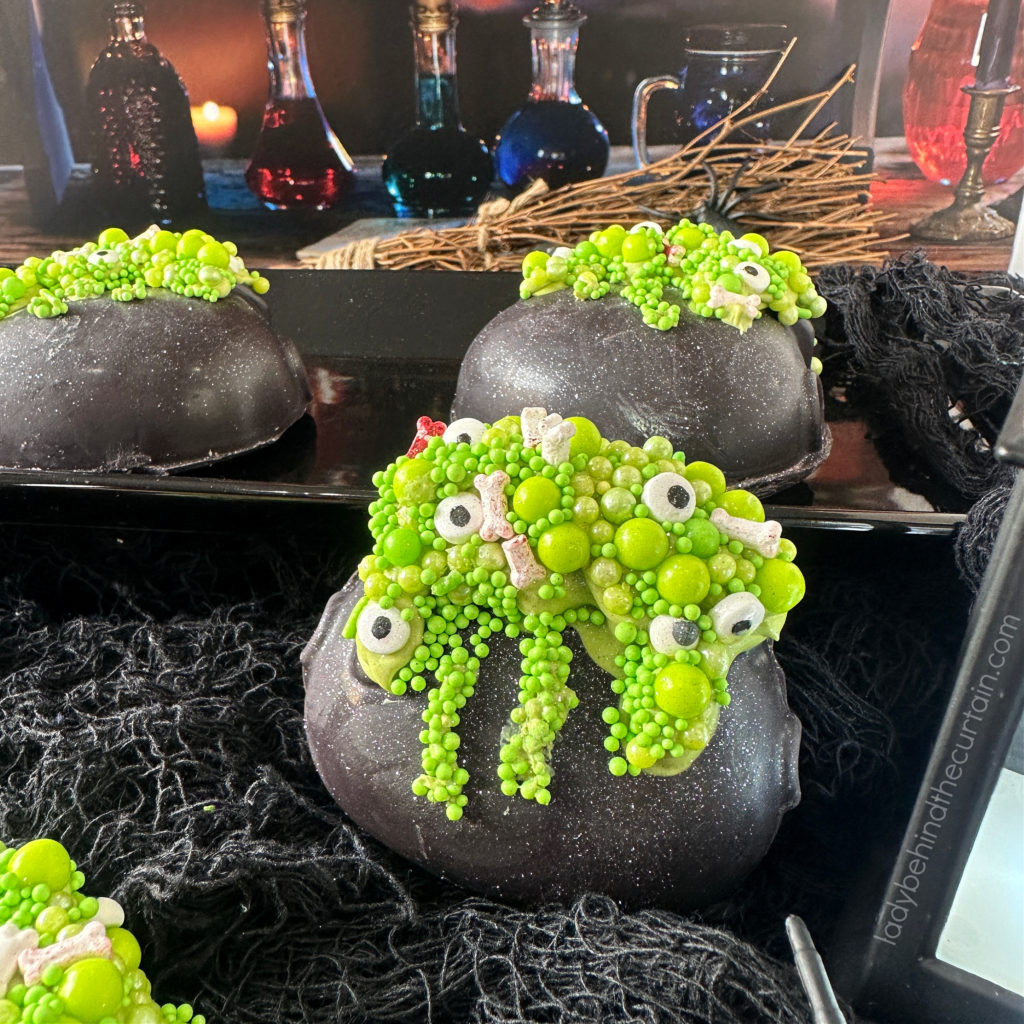
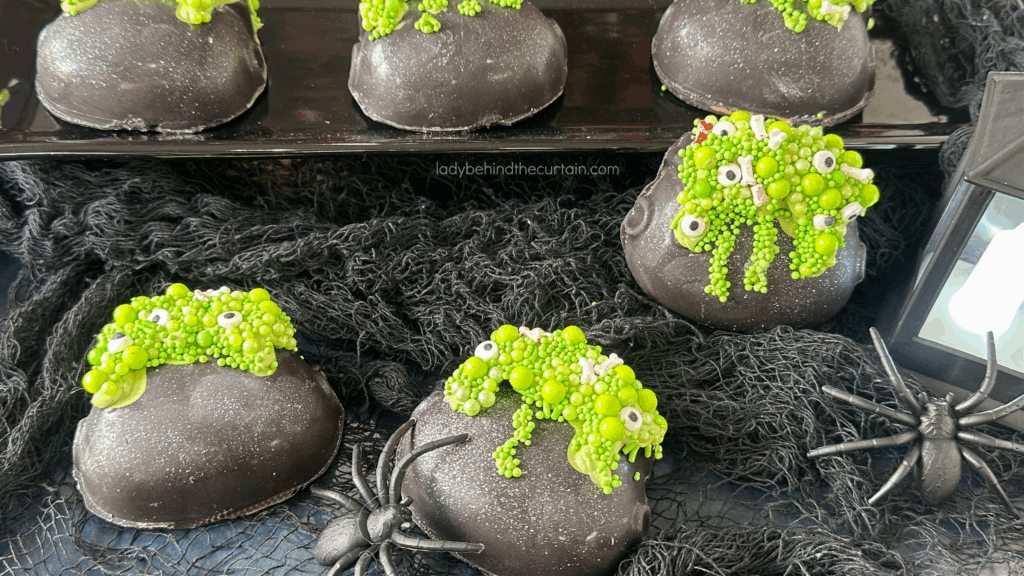
If you’re looking for a fun and easy Halloween treat that looks spooky but tastes sweet, these Halloween Cake Pop Filled Cauldrons are the perfect beginner-friendly recipe. Made using a simple cauldron silicone mold, each cauldron is filled with rich dark chocolate cake pop dough and topped with a creamy layer of orange fudge. The result? A delicious chocolate-orange treat that’s as magical as it looks!
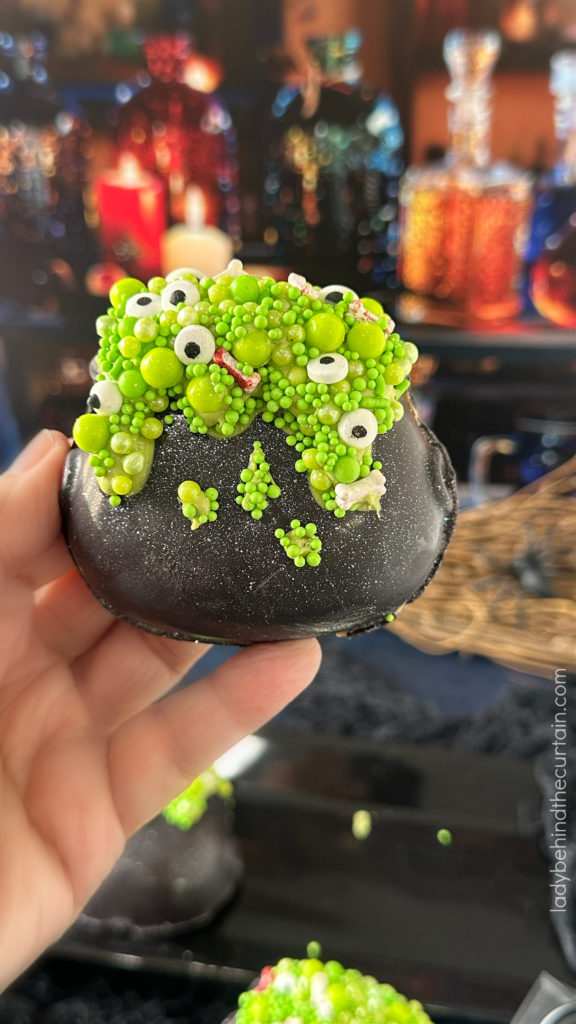
A Spooky-Cute Treat for Beginners: Halloween dessert ideas don’t have to be complicated. These cake pop cauldrons are simple enough for first-time candy makers and kids to help with as well. The silicone mold makes shaping the cauldron effortless—no sculpting or fancy decorating needed. Just press in the cake pop dough, add your orange fudge layer, chill, and pop them out for a professional-looking treat that’s ready to impress.
How to Make Halloween Cake Pops
Get ready to whip up a spooky-sweet treat that’s perfect for Halloween! These Halloween Cake Pop-Filled Cauldrons are made with rich, dark chocolate cake pop dough and topped with a smooth layer of orange fudge for the ultimate chocolate-orange combination. Using a cauldron silicone mold, this recipe is beginner-friendly and easy to follow—no fancy decorating skills required. Whether you’re hosting a Halloween party or looking for a fun weekend project, these magical little cauldrons are sure to be a hit with kids and adults alike!
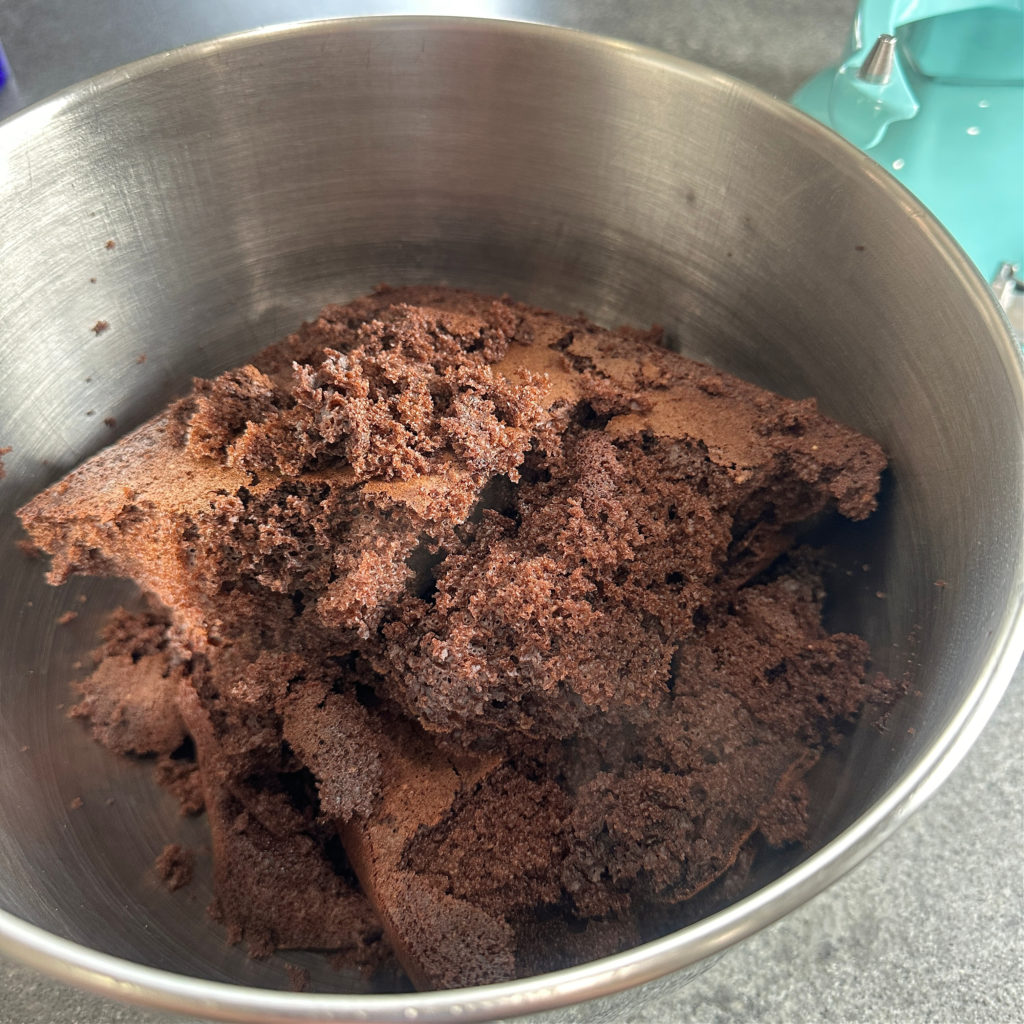
IT’S VERY IMPORTANT THAT THE CAKE IS HOT, FRESH OUT OF THE OVEN.
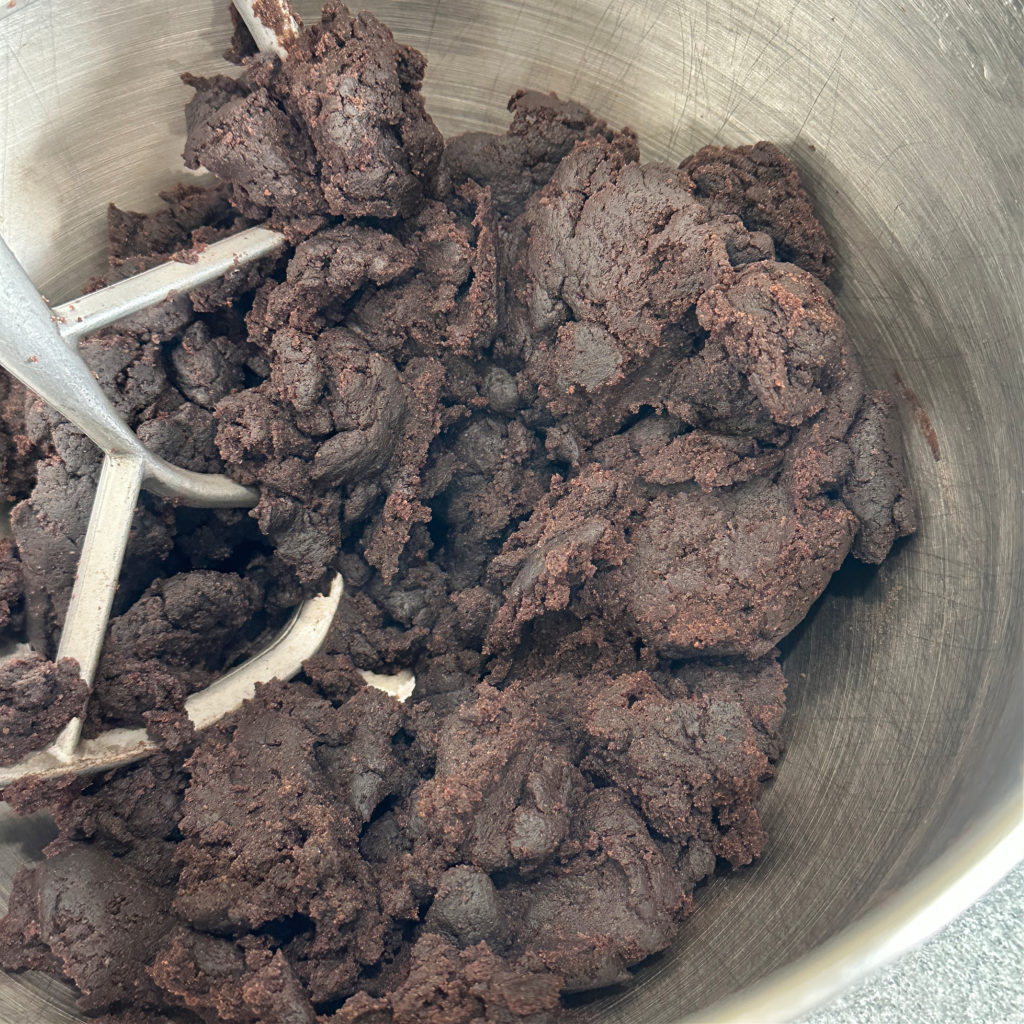
MIX UNTIL THE DOUGH PULLS AWAY FROM THE MIXING BOWL.
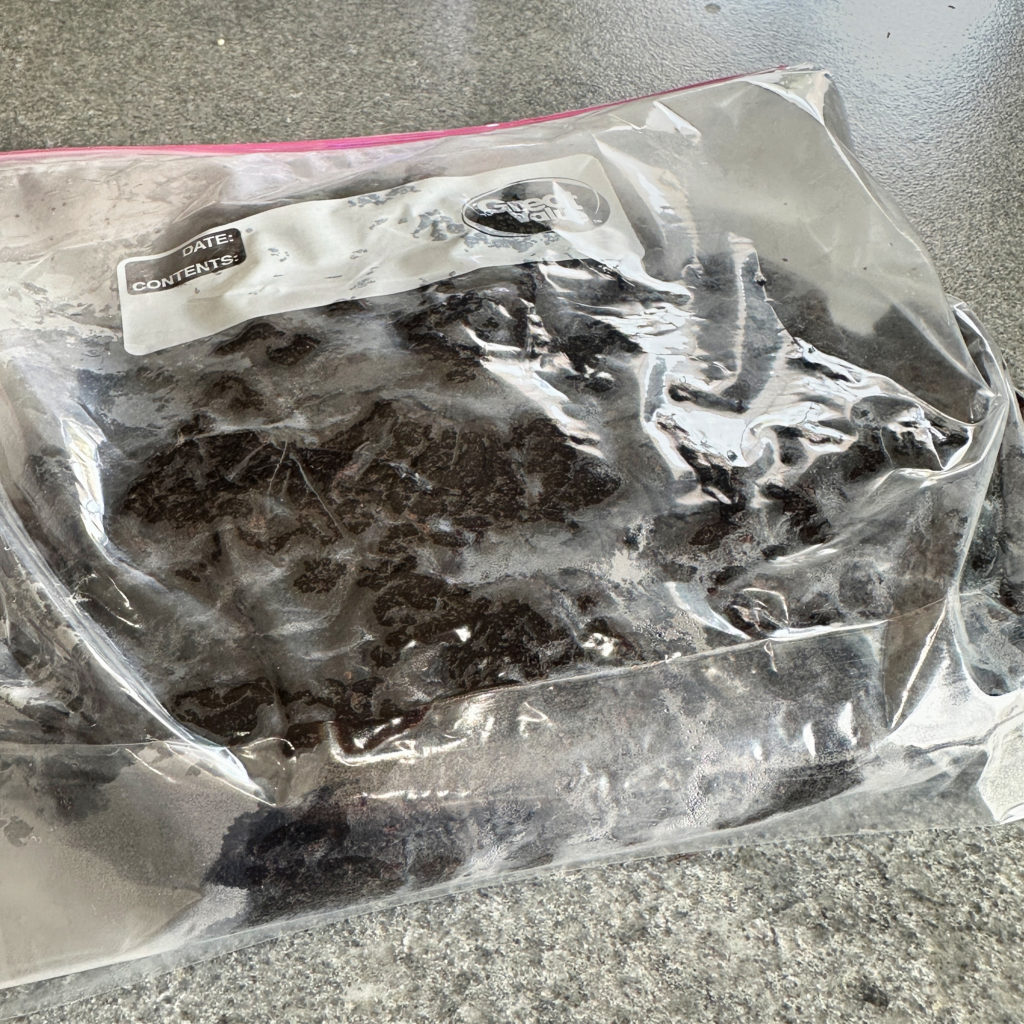
IMMEDIATELY PLACE THE HOT DOUGH IN A ZIP-TOP BAG SO THE CAKE POP DOUGH CAN ABSORB ALL THE MOISTURE.
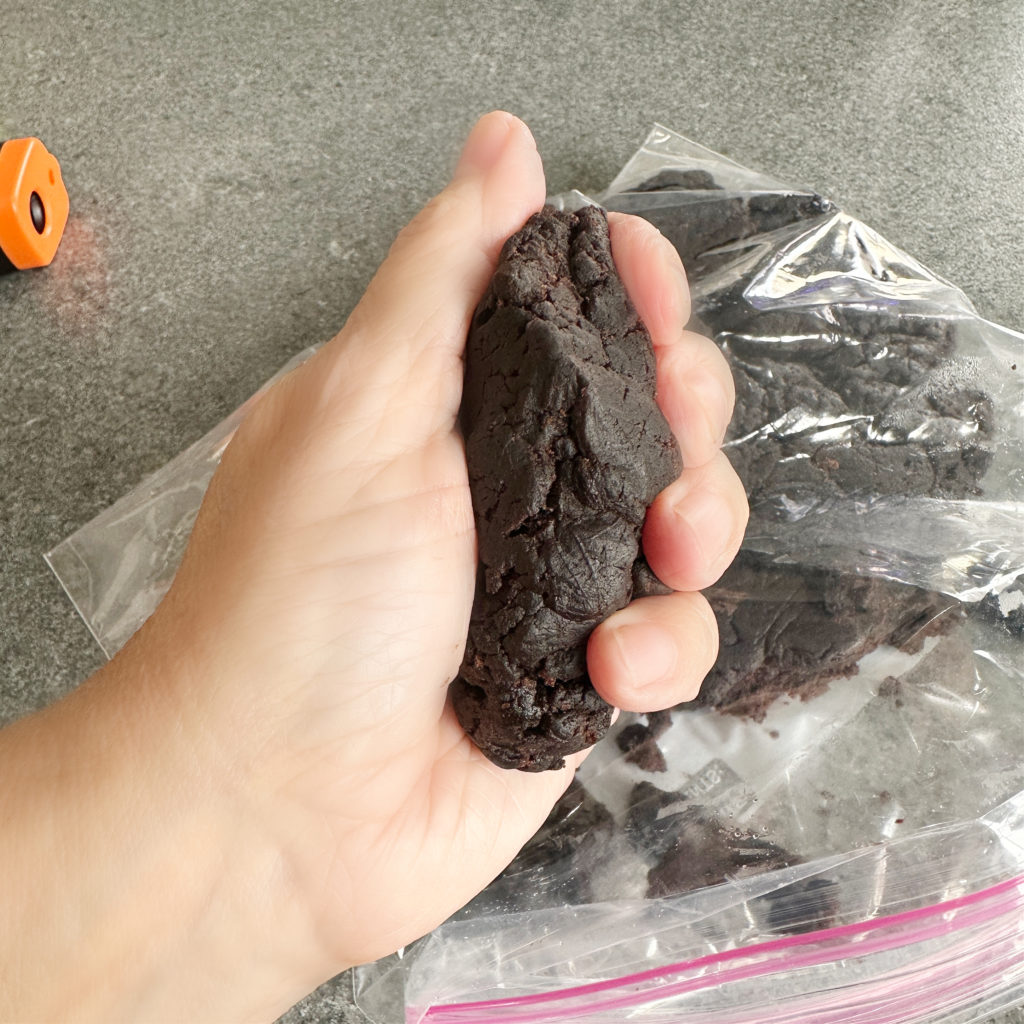
THE DOUGH SHOULD BE SPONGY LIKE PLAYDOUGH.
CHOCOLATE CAKE POP DOUGH INGREDIENTS LIST – full printable recipe below in recipe card
- 1 dark chocolate cake mix
- 2 large eggs
- ½ cup milk
- 4 tablespoons butter, melted
- ¾ cup water
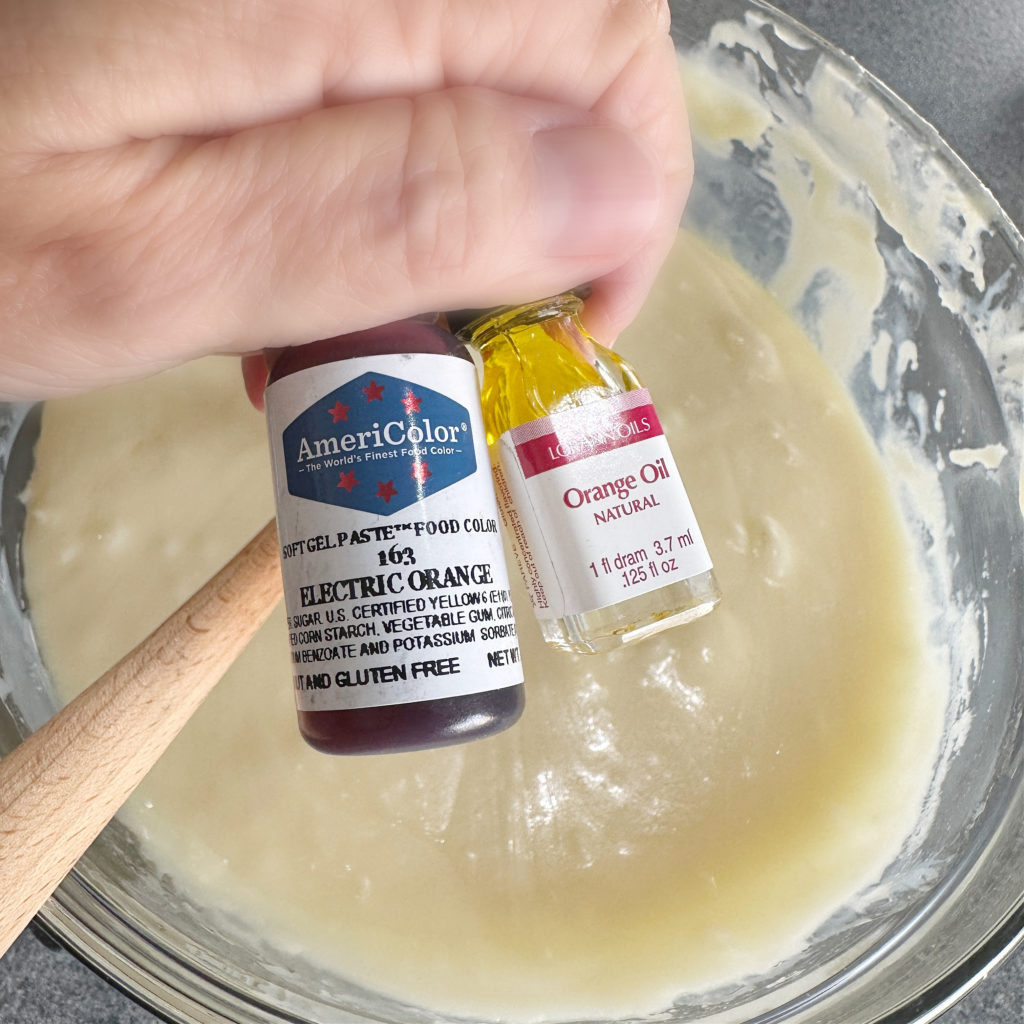
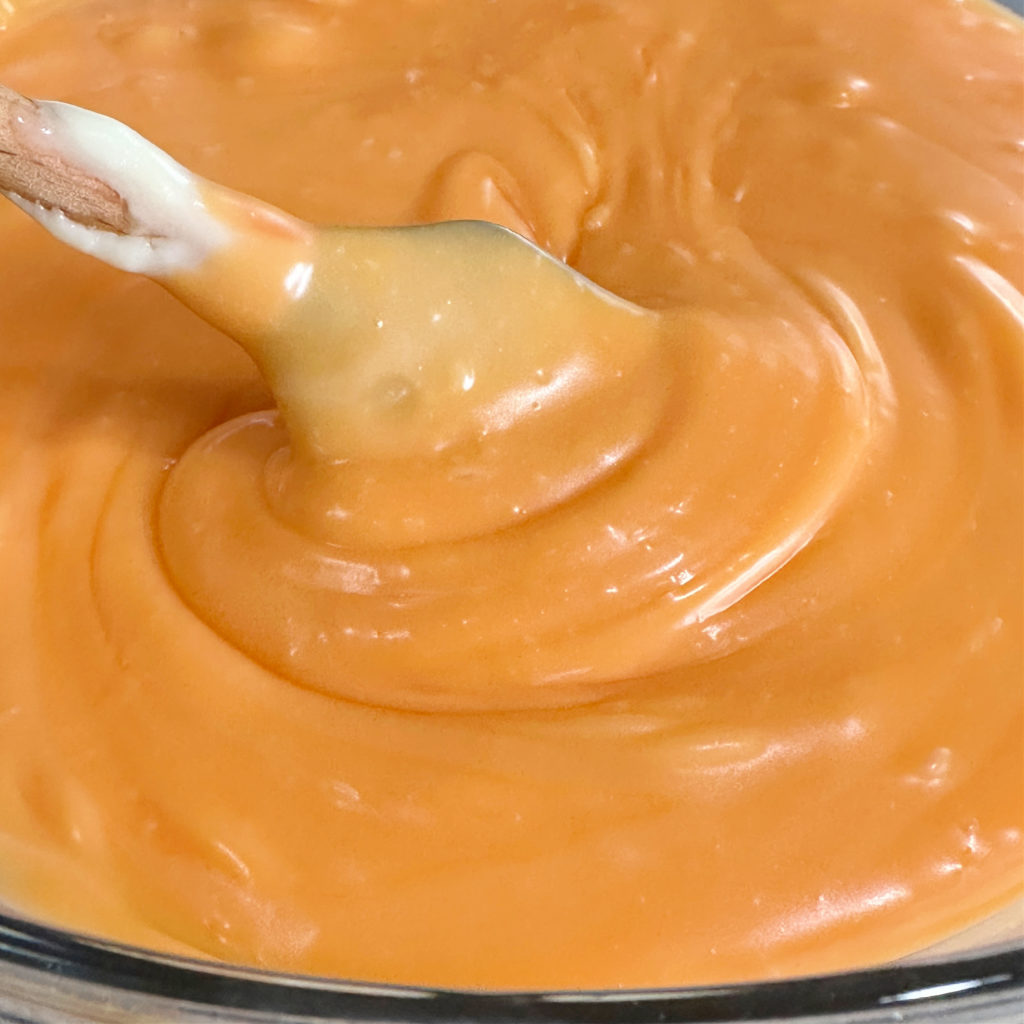
COLOR AND FLAVOR THE FUDGE.
ORANGE FUDGE LAYER INGREDIENTS LIST
- 1 (12-ounce) bag PLUS 6 ounces white chocolate chips
- 1 (15-ounce) can sweetened condensed milk
- 2 tablespoons butter
- 1 teaspoon vanilla extract
- 1 dram oil orange flavoring (if you don’t like the combo of orange and chocolate, leave out the orange flavoring)
- orange gel food coloring
- Optional Sprinkles (2 tablespoons)
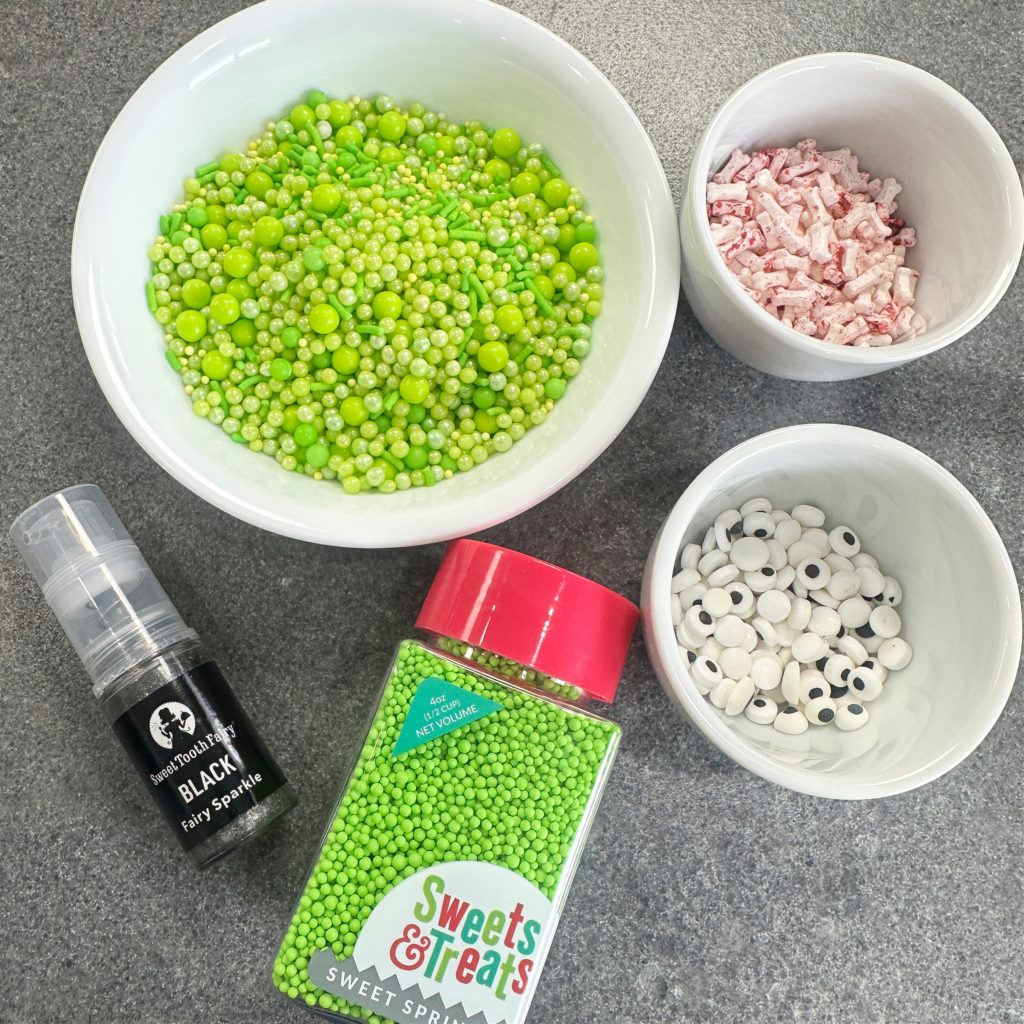
DECORATIONS LIST
- 7-ounce black candy melting wafers
- 12-ounce bag plus 1 cup green candy melting wafers
- candy sprinkles, green pearls, eyes, bones, etc.
HOW TO MAKE CAULDRON CAKE POPS INSTRUCTIONS
CHOCOLATE CAKE POP DOUGH
- In a large mixing bowl, add the cake mix, eggs, milk, butter, and water. Mix until combined, creamy, and thick.
- Line the bottom of a 9×13-inch pan and grease it.
- Preheat oven to 325°F. Bake 28 to 30 minutes.
- Place the hot cake into a large mixing bowl and mix until the cake pulls away from the sides of the bowl and forms a dough-like consistency. Be patient, the mixing can take up to 5 minutes.
- Store in a zip-top bag until completely cooled, and you’re ready to use it. This will add moisture to the dough. About 1 hour. NOTE: The dough should feel like playdough.
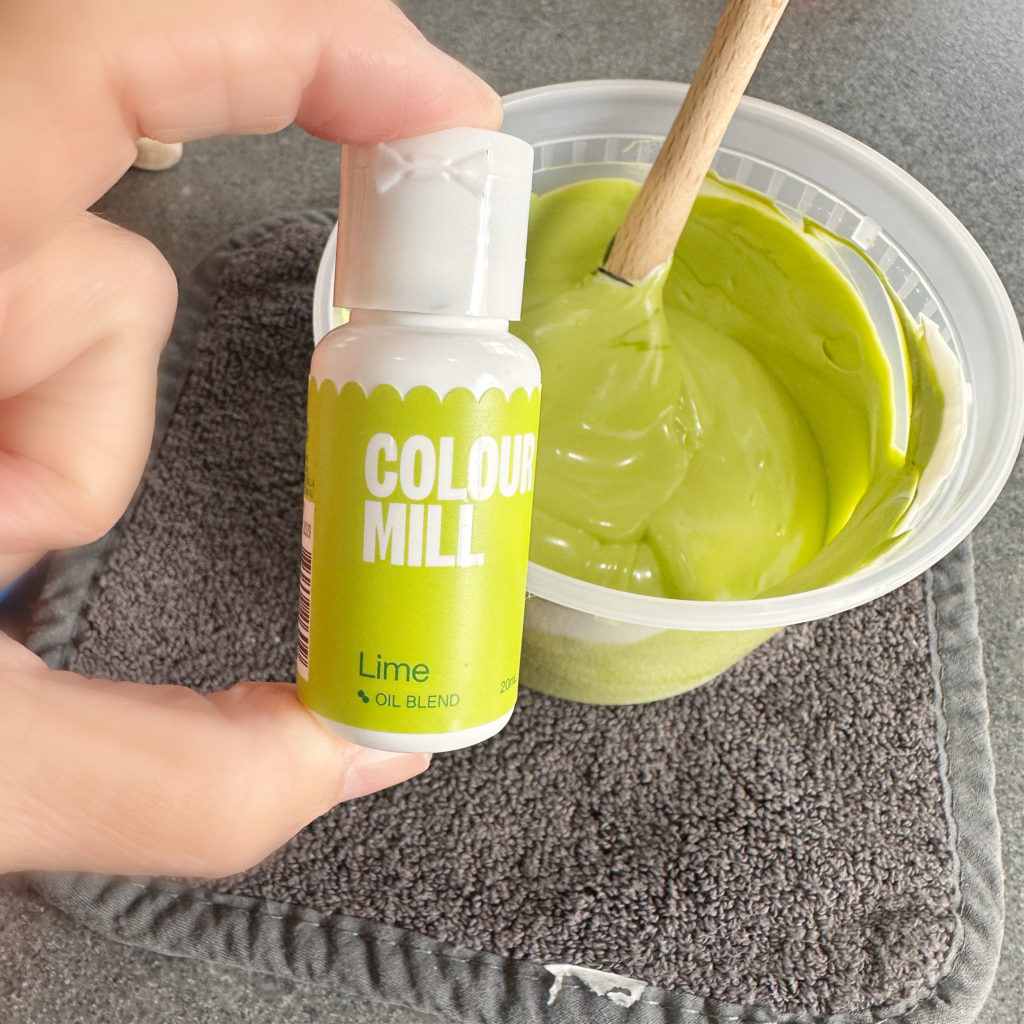
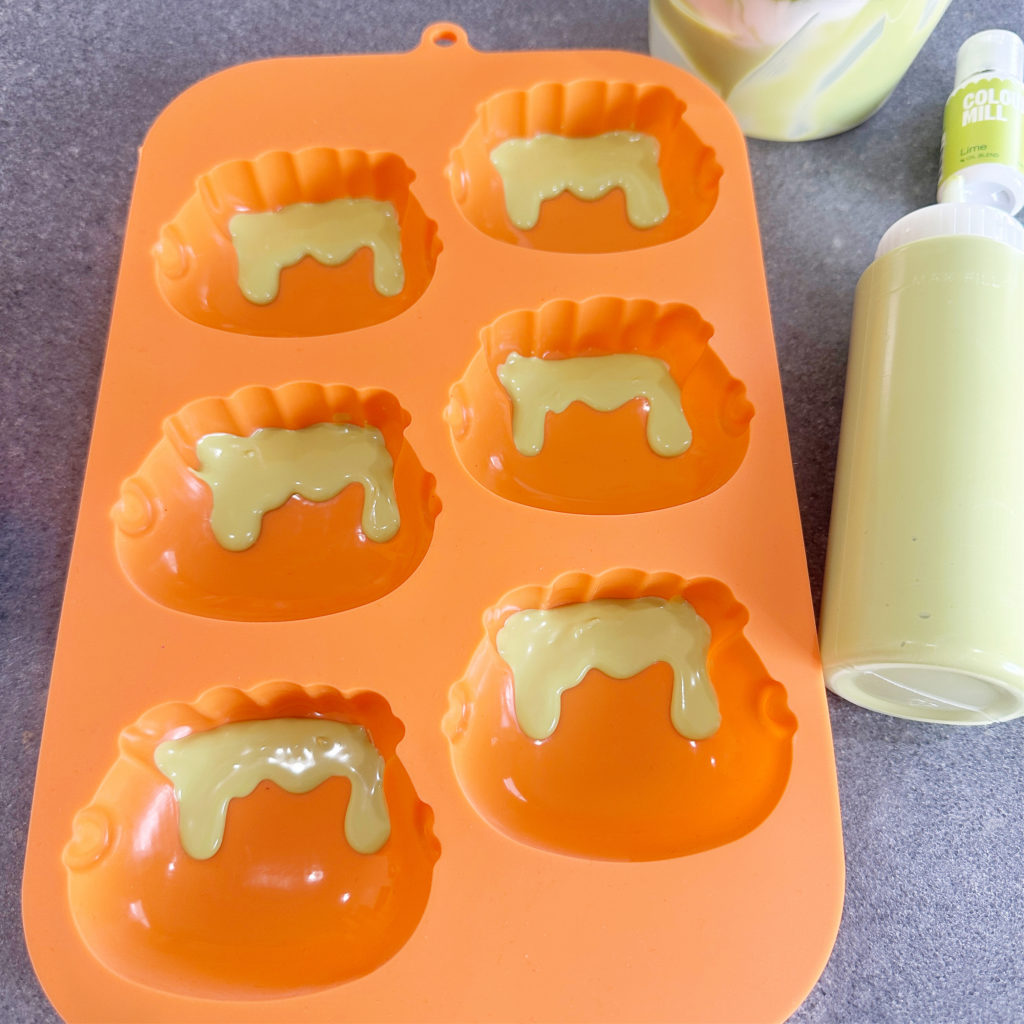
DID YOU KNOW IT’S EASY TO MAKE COLORED MELTING WAFERS? THE ONLY RULE YOU MUST ABIDE BY IS TO USE ONLY AN OIL-BASED FOOD COLORING. DO NOT USE GEL FOOD COLORING OR THE STORE BOUGHT FOOD COLORING. THEY CONTAIN WATER AND WILL MESS WITH THE TEXTURE OF THE CANDY. If your cauldron mold has a place for the dripping potion, fill it with lime green melted candy.
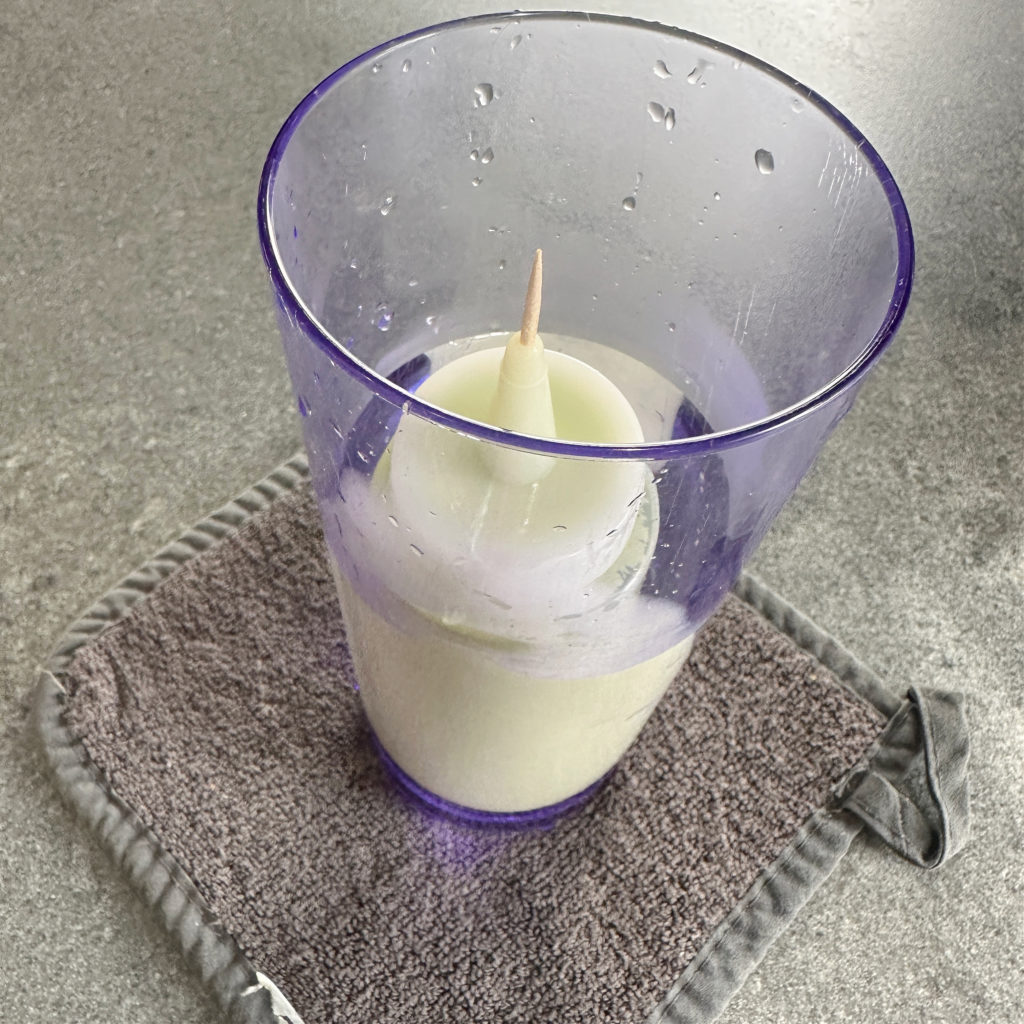
SAVE THE LEFTOVER GREEN MELTED CANDY FOR LATER. PLACE THE SQUEEZE BOTTLE IN A LARGE CUP WITH HOT WATER. PUT A TOOTHPICK IN THE OPENING TO PREVENT THE CANDY FROM HARDENING AND FILLING THE WHOLE.
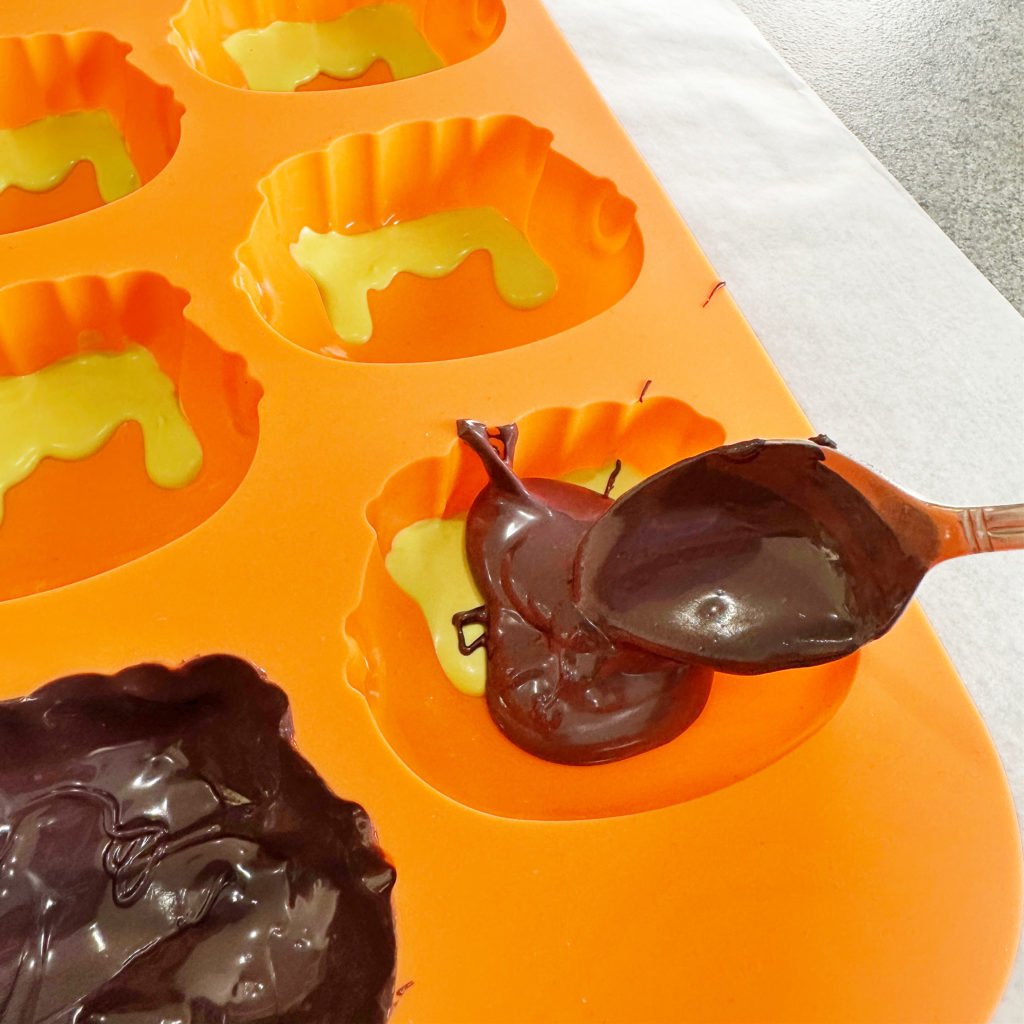
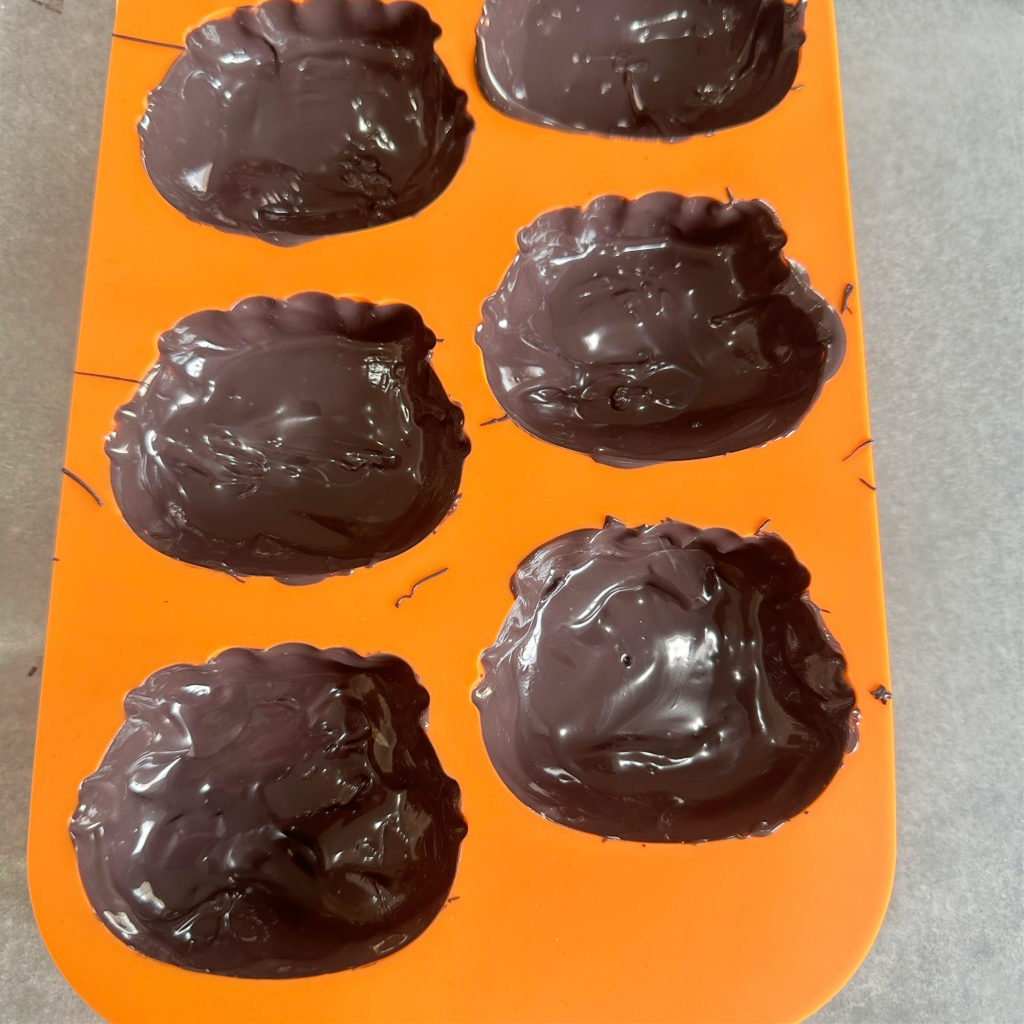
SPOON MELTED BLACK CANDY ON TOP OF THE HARDENED GREEN CANDY. USE A SPOON TO BRING THE BLACK CANDY UP THE SIDES. MAKE SURE THIS LAYER IS THICK ENOUGH SO IT CAN BE HANDLED.
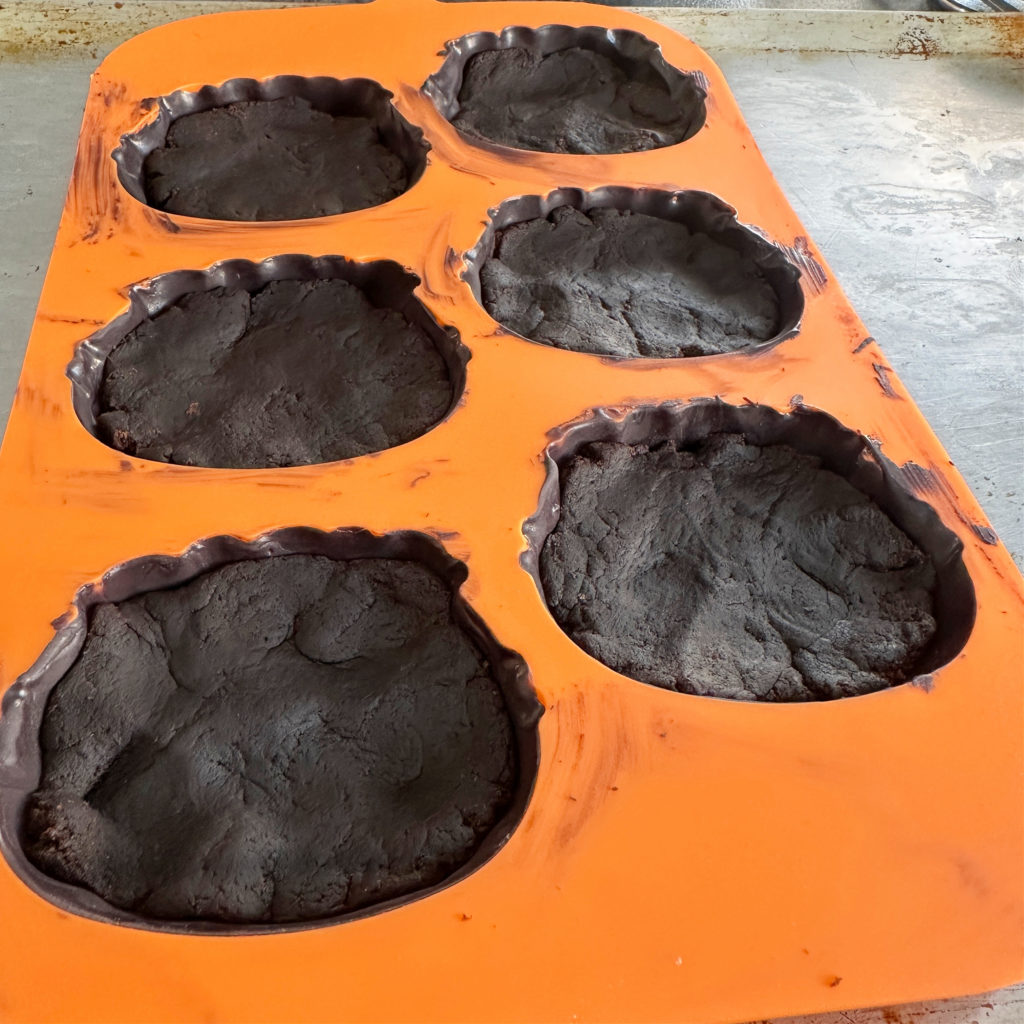
ADD ENOUGH OF THE CAKE DOUGH TO FILL THE CAULDRON, BUT MAKE SURE YOU LEAVE ENOUGH ROOM FOR THE FUDGE AND OUTER SHELL.
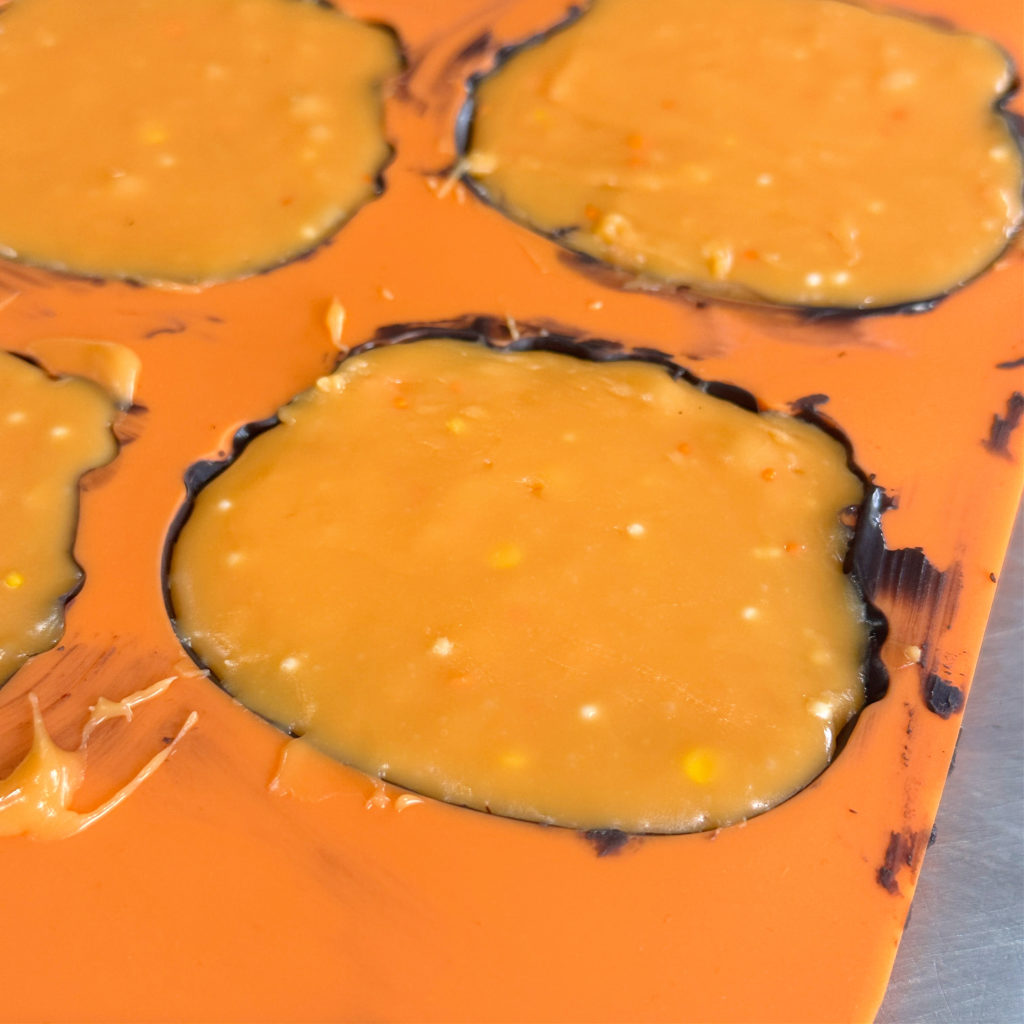
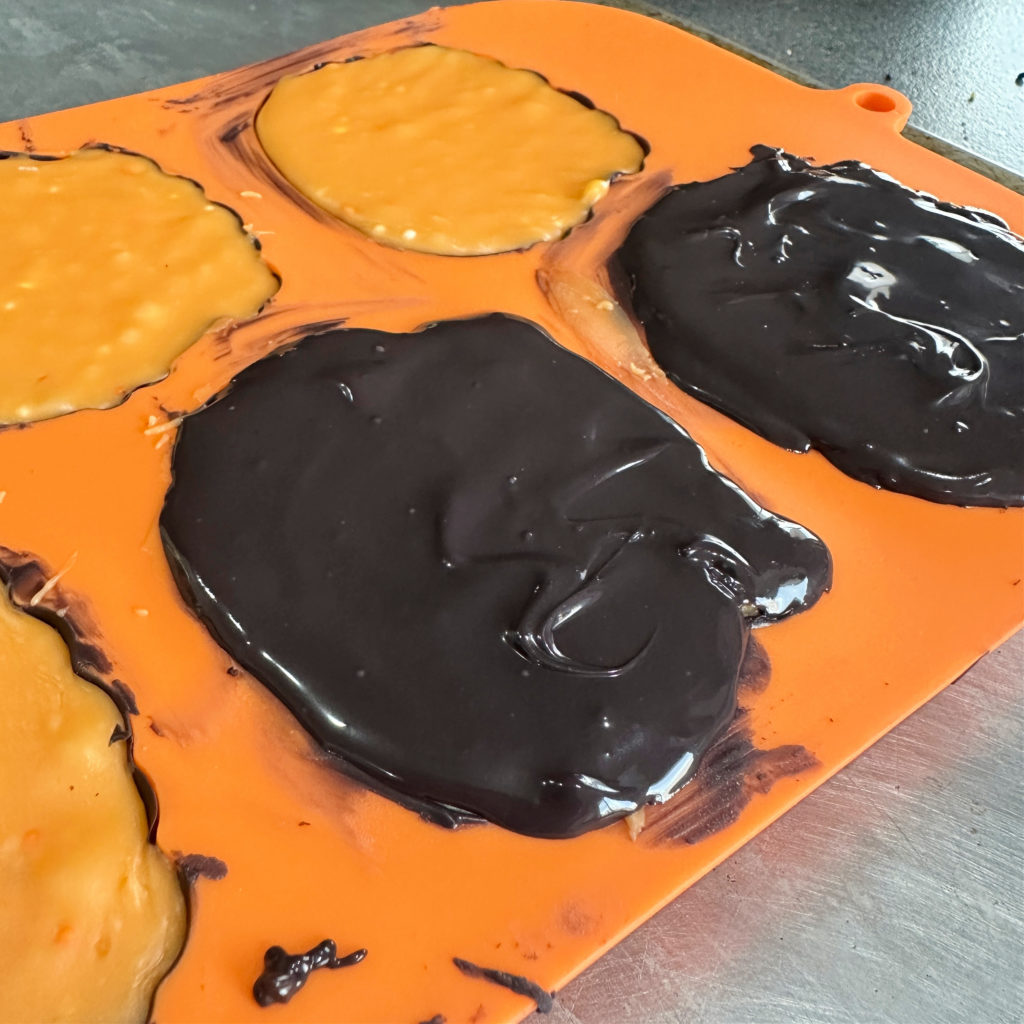
SPOON THE FUDGE OVER THE CAKE-POP-DOUGH, AND ADD MELTED BLACK CANDY OVER THE FUDGE. SET ASIDE TO HARDEN. FOR QUICKER RESULTS, PUT THE MOLD IN THE REFRIGERATOR.
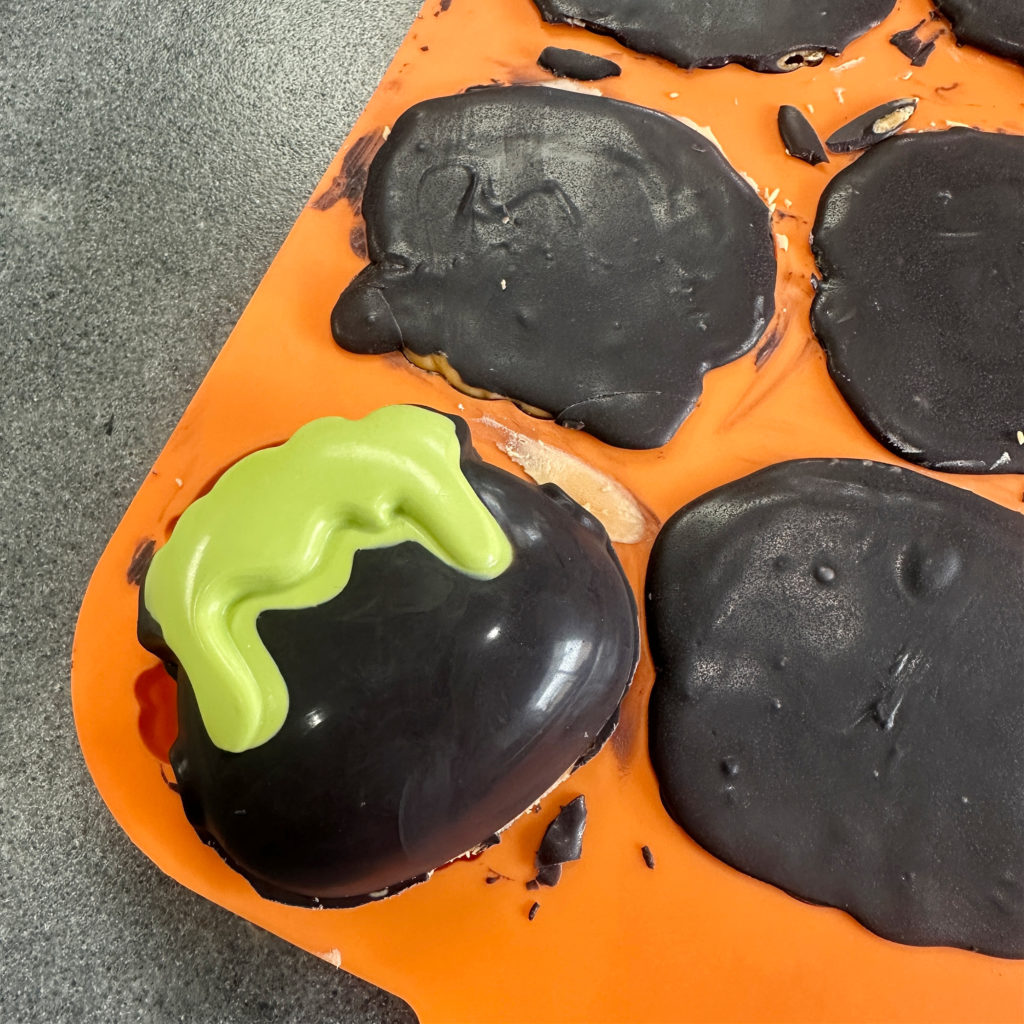
BEFORE REMOVING THE CAULDRON, IT IS IMPORTANT THAT THE CANDY HAS SET AND IS COMPLETELY HARD.
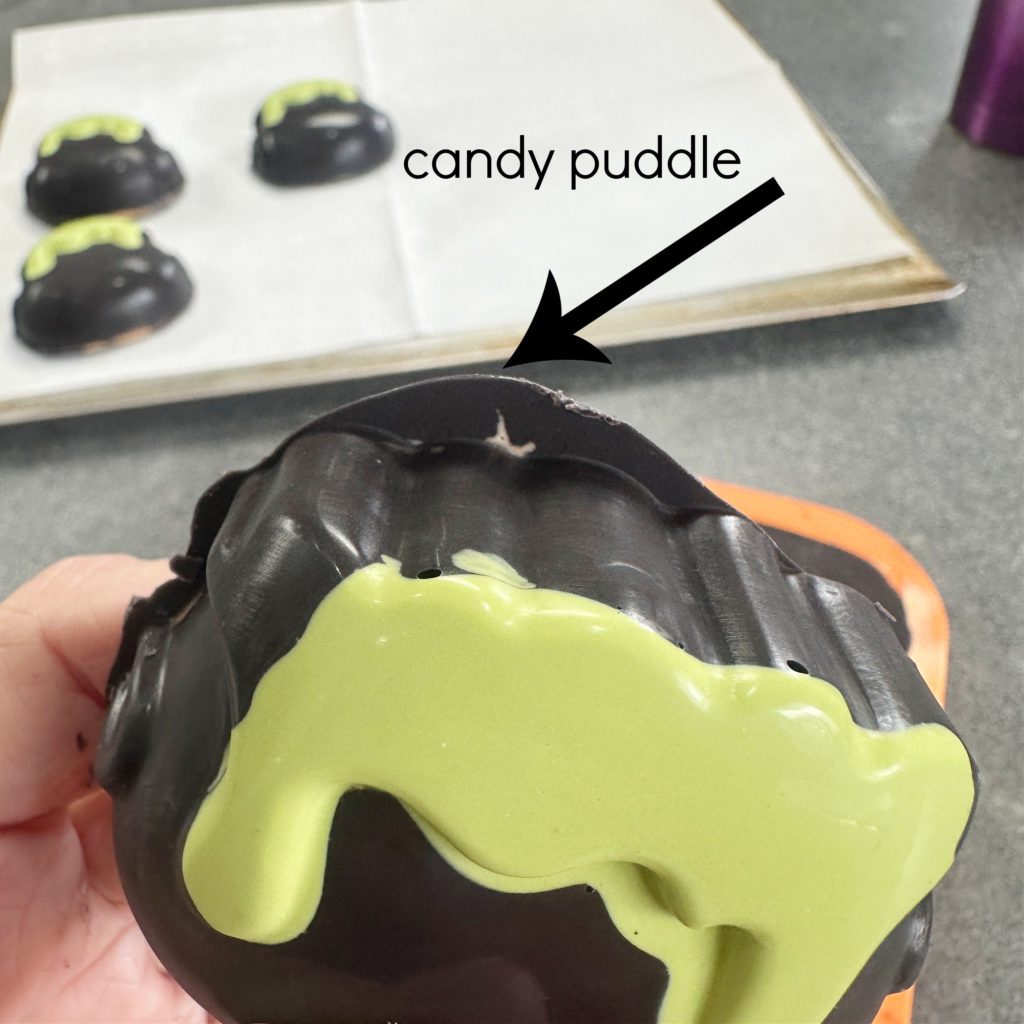
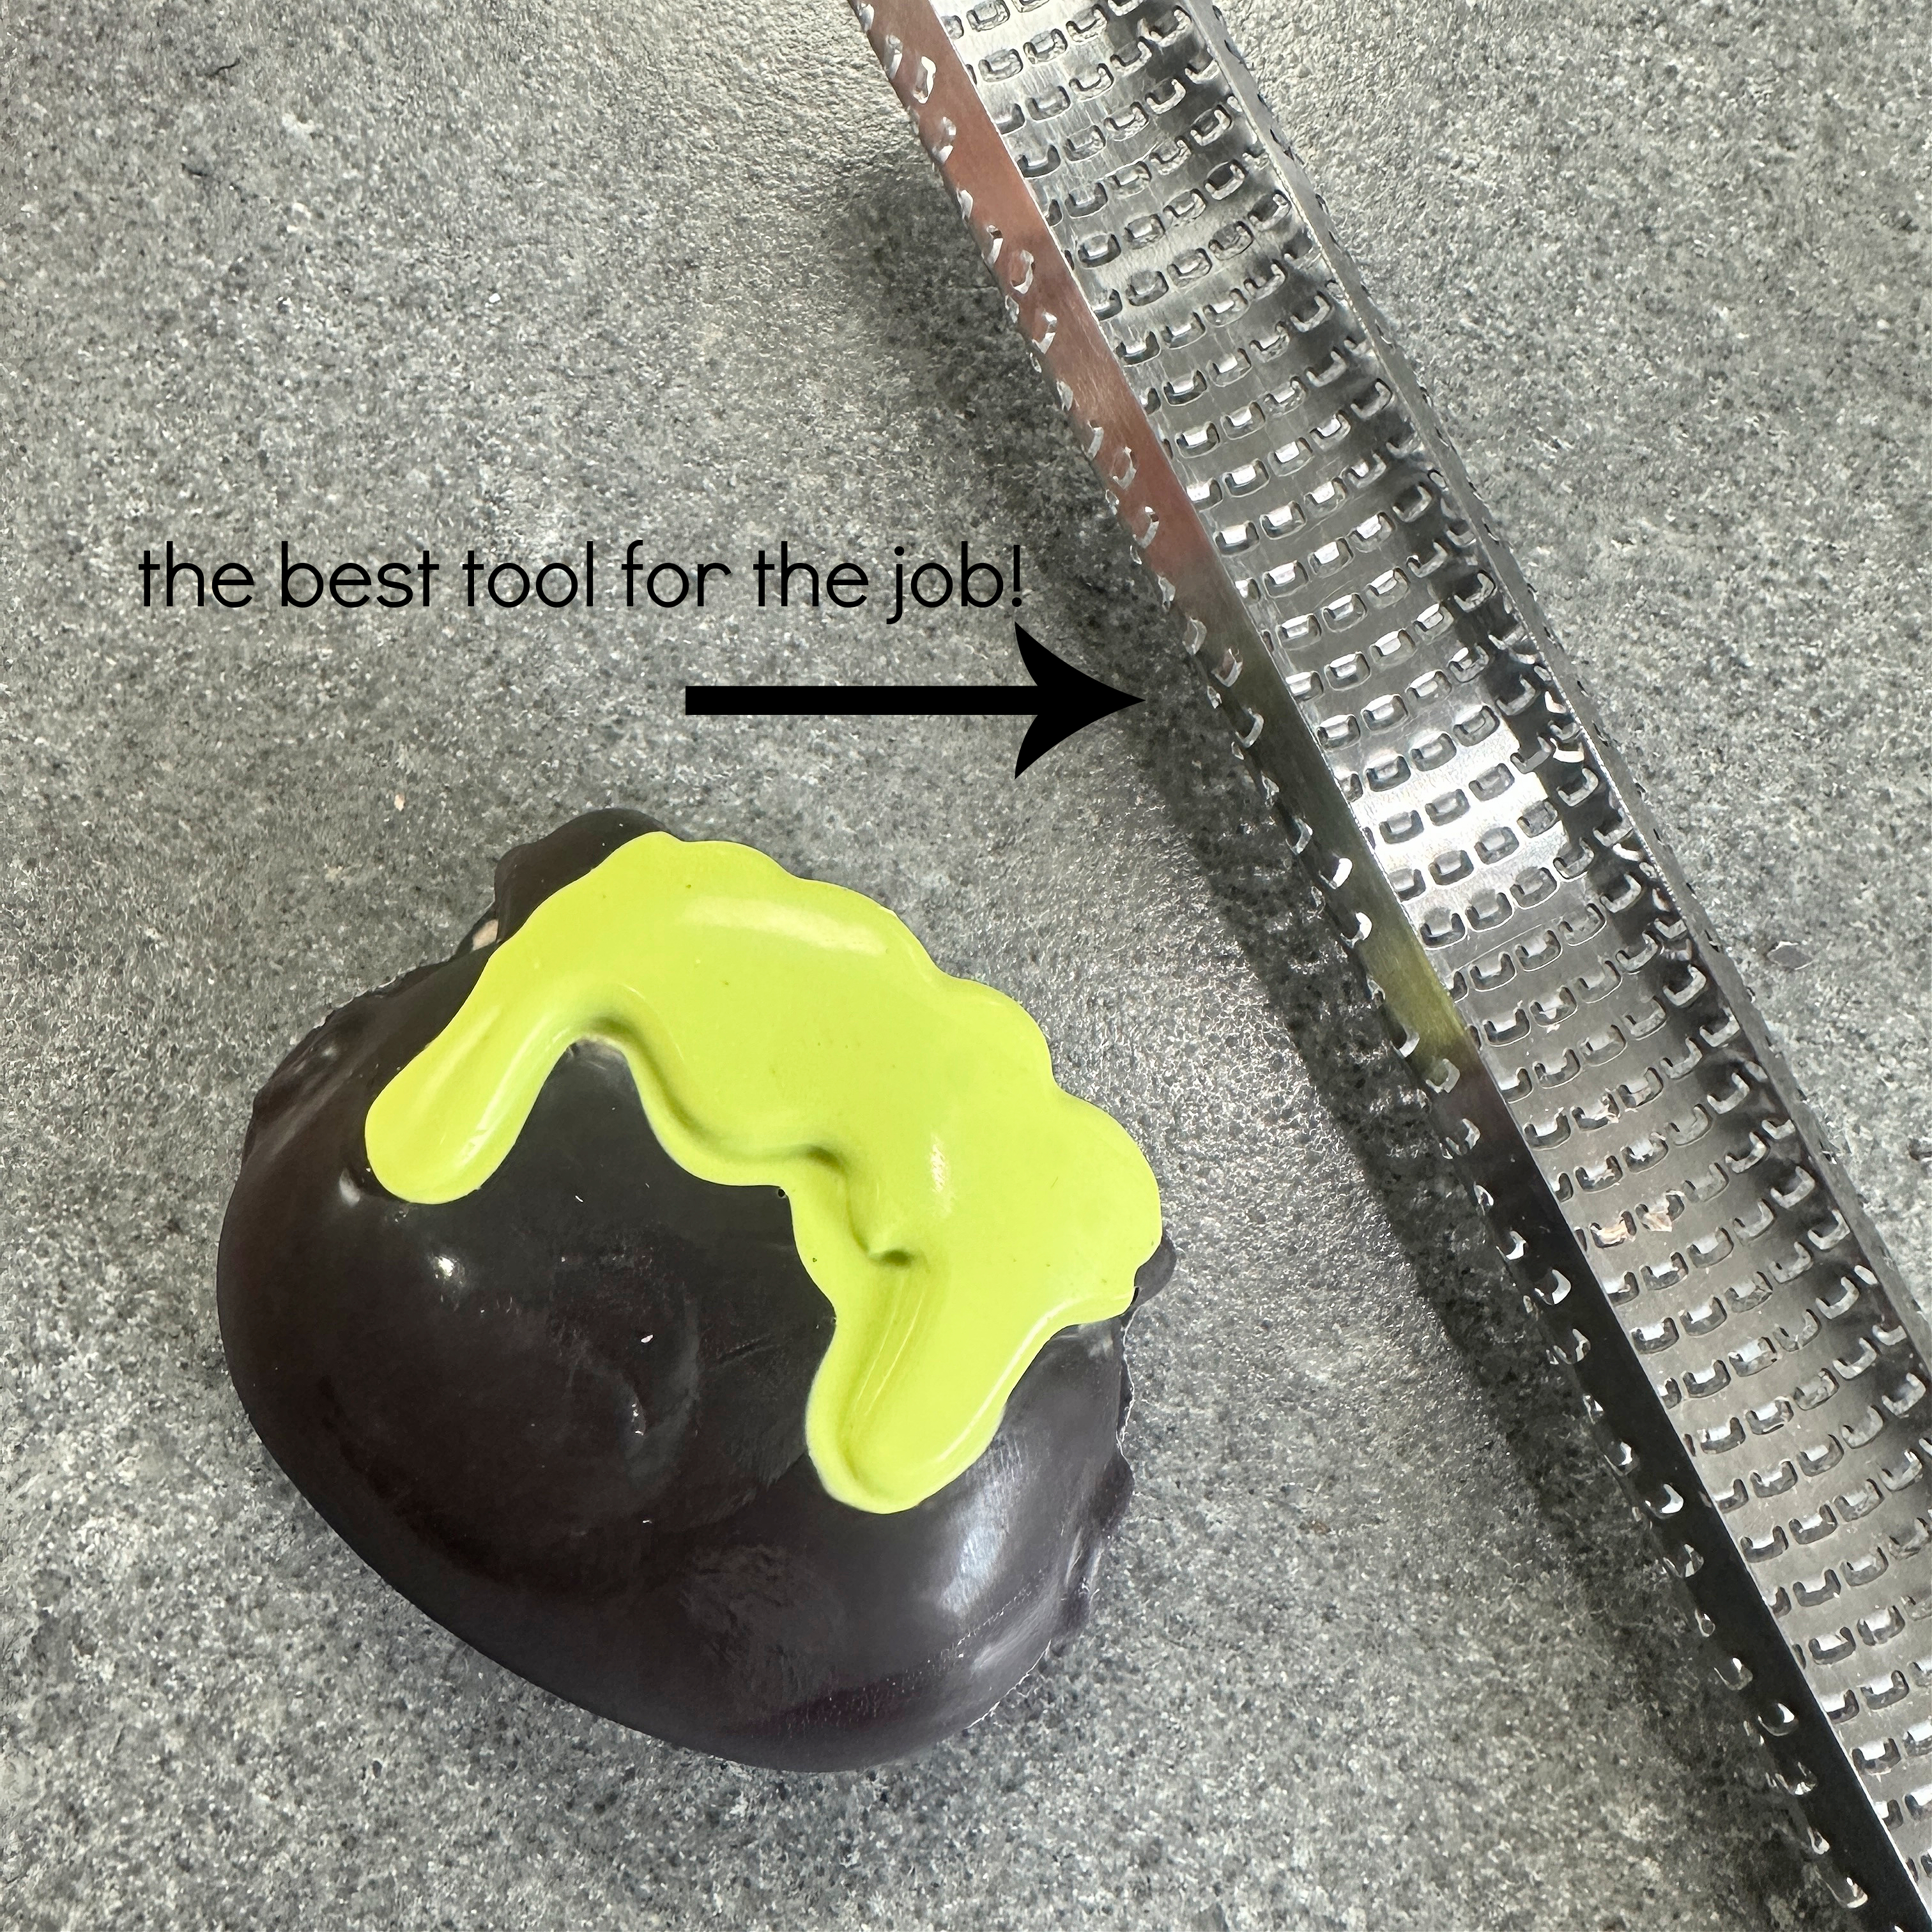
USE A MICROPLANE TO REMOVE ANY CANDY PUDDLES.
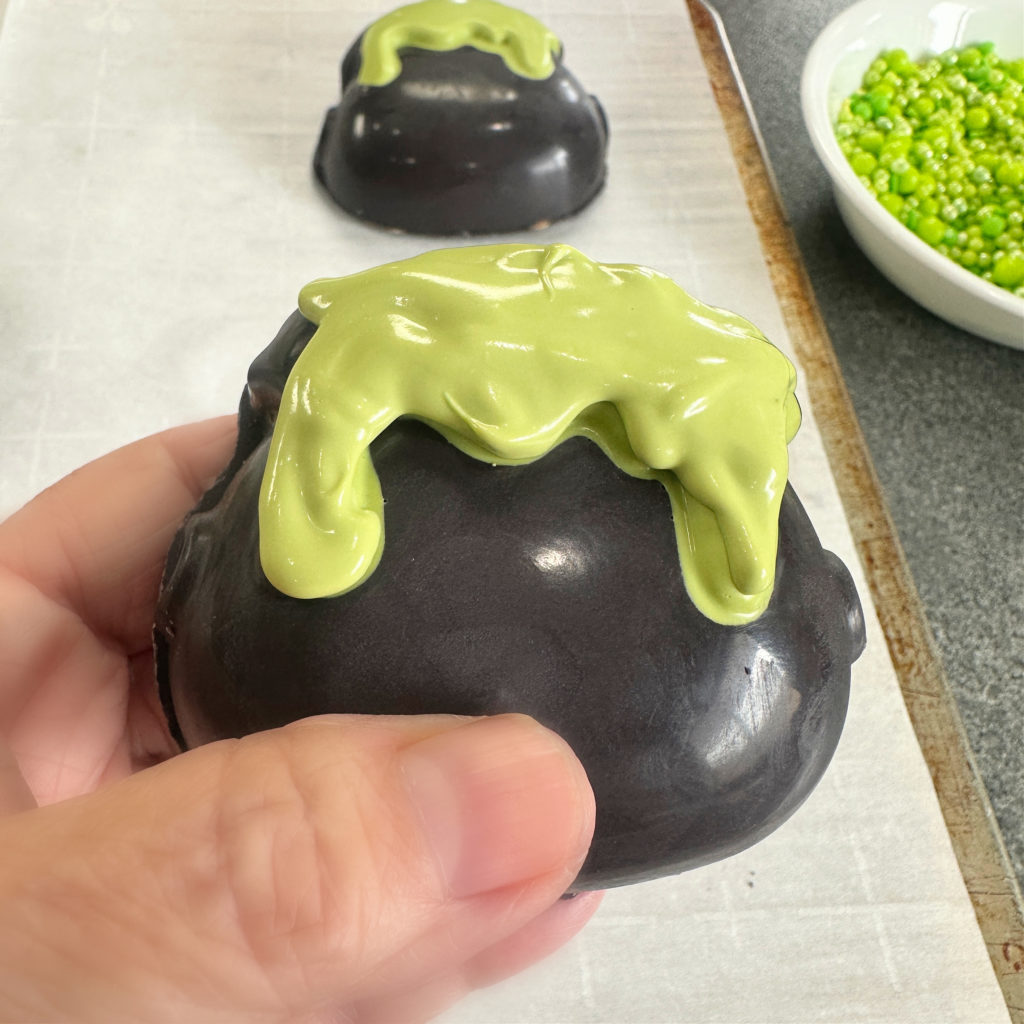
NOW IT’S TIME TO USE THE MELTED GREEN CANDY YOU’VE BEEN SAVING. ADD A LAYER TO THE DRIPS AND ON TOP. IMMEDIATELY ADD THE DECORATIONS WHILE THE CANDY IS WET.
CAULDRON INSTRUCTIONS
- Start with the green melting wafers. Pour wafers into a medium microwave-safe bowl. Heat for 1 minute, stir until melted and creamy. If the candy still has lumps, continue heating for an additional 30 seconds or until the candy is melted.
- IF YOUR CAULDRON HAS FORMED DRIPS, start here; otherwise, move on to step #5. Pour the melted green candy into a squeeze bottle. Fill the drips and the top of the cauldron. Set aside to harden or refrigerate for 15 minutes. The candy will go from shiny to opaque. Reserve the remaining green candy for later.
- HOW TO KEEP THE GREEN CANDY MELTED UNTIL READY TO USE IT AGAIN: Place the bottle in a tall glass of very hot water, place the bottle in a pre-heated Wilton melting pot with water in it, or place the bottle on a heating pad.
- Once the green candy has hardened, proceed to the black one.
- Pour black candy wafers into a medium microwave-safe bowl. Heat for 1 minute, stir until melted and creamy. If the candy still has lumps, continue heating for an additional 30 seconds or until it reaches the desired consistency.
- Once the candy is melted, spoon some into each cauldron mold. TIP: MAKE SURE THE BOTTOM LAYER IS THICK ENOUGH SO IT CAN HANDLE HAVING THE CAKE POP DOUGH BEING PRESSED INTO IT. Use the back of the spoon to move the candy up the sides of the mold. Tap the counter to remove any air bubbles, allowing the candy to settle into every part of the mold. Set aside to harden. TIP: The candy will go from shiny to opaque. For a quicker result, place the mold in the refrigerator for 30 minutes. LEAVE THE CANDY IN THE MOLD!
- Gently press cake pop dough (about 1.5 ounces) into each cauldron. Ensure there is sufficient room to add a layer of fudge and melted black candy. Set aside to make the orange fudge.
ORANGE FUDGE CENTER INSTRUCTIONS
- Add condensed milk, all the white chocolate chips, and butter to a microwave-safe bowl. Stir together.
- Heat until the chocolate chip mixture is melted (1 minute on high, stir, 30 seconds, stir, 30 seconds, and stir) a total of 2 minutes.
- Add the vanilla and orange flavoring. Stir until combined.
- While the fudge is still warm, add some ( about ⅛ cup) to the cauldron on top of the cake pop dough, making sure there is enough room for a black melted candy layer.
- Add a layer of melted black candy to the top of the fudge layer.
- Place the mold in the refrigerator to harden (about 15 minutes).
- Carefully remove the cauldrons from the mold. Set aside for decorating.
HALLOWEEN CAKE POP DECORATIONS
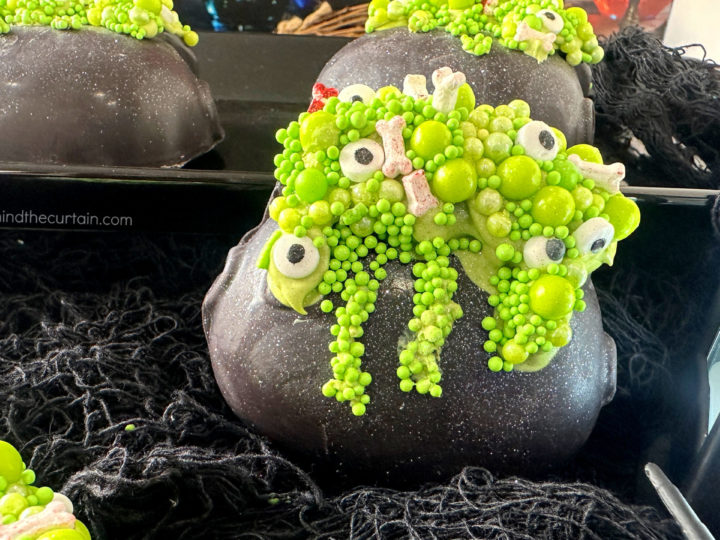
- BEFORE ADDING THE GREEN CANDY: Collect any embellishments you want to add ( eyes, bones, bubbles).
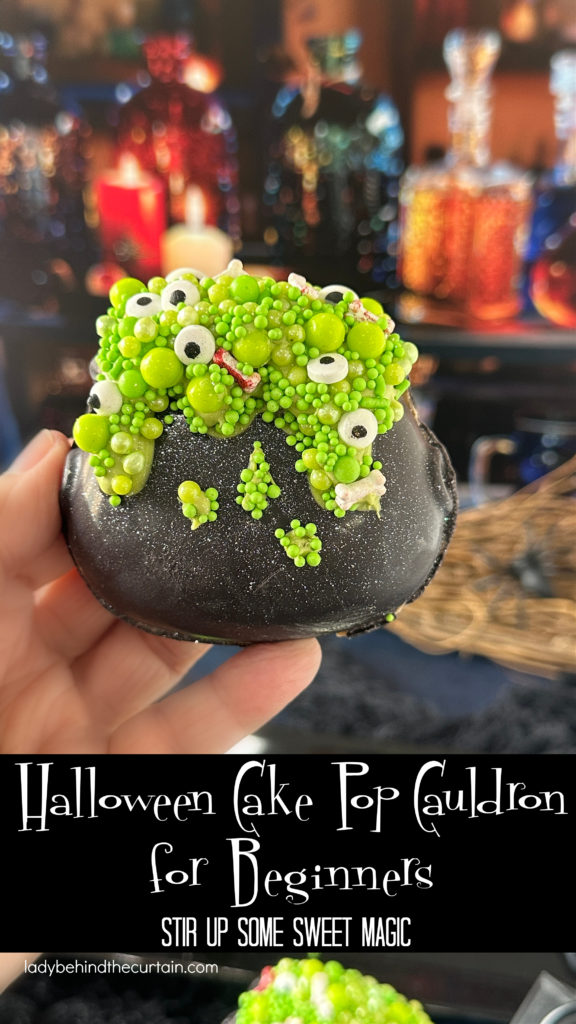
- If your cauldron mold has a drip design, follow the design of the drip on the mold with the green melted candy. If your cauldron mold does NOT have a design, create drips. Don’t forget to add green to the top of the cauldron.
- While the candy is wet, add the embellishments.
- Set aside to harden. TIP: The candy will go from shiny to opaque.
The Perfect Combination: Chocolate and Orange
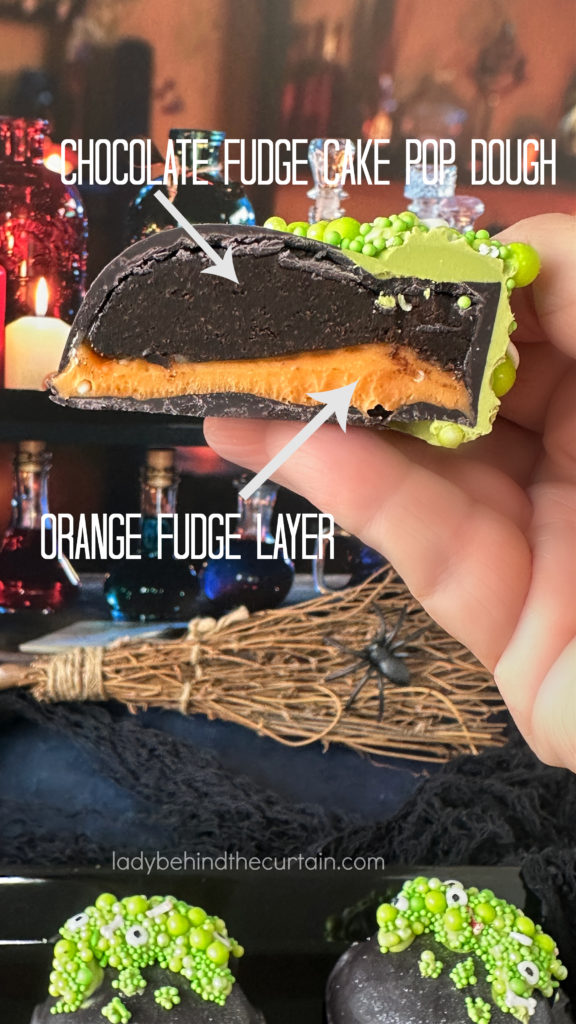
The deep chocolate flavor of the cake pop dough pairs perfectly with the sweet citrusy notes of the orange fudge. Together they create a Halloween dessert that’s both festive and flavorful. The contrast of dark chocolate and bright orange makes each mini cauldron pop on your party table!
WHY IS THIS CONSIDERED THE PERFECT TREAT FOR BEGINNING TREAT MAKERS?
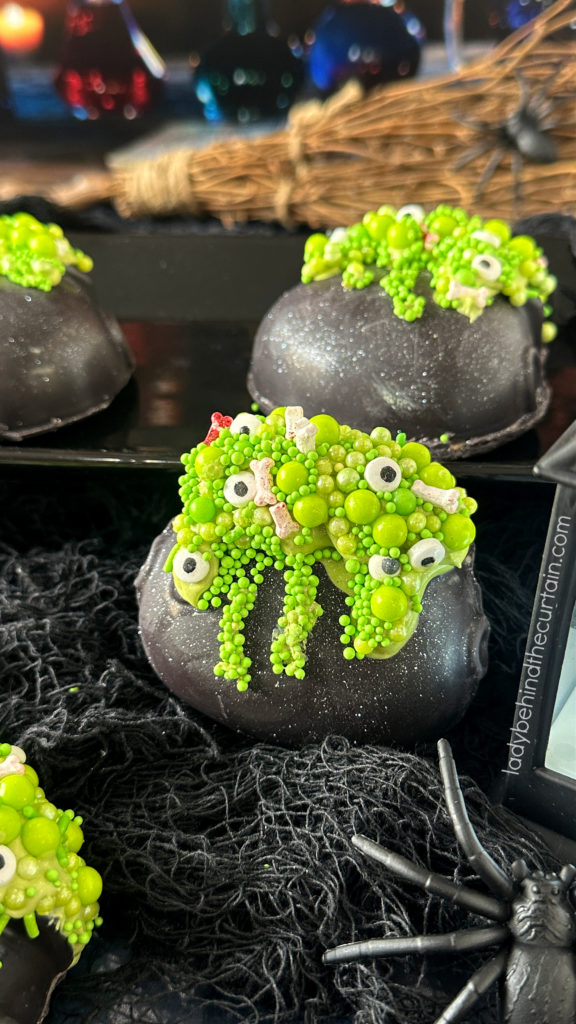
If you’ve ever tried making cake pops, you know that they can sometimes be challenging, especially for the new treat creator. These pops take all the stress out of making not only a delicious treat but also an eye-catching one. The key? NO PESKY STICK so that the cake pop can slide down. These amazing Halloween-themed treats feature a light and spongy dark chocolate cake center, topped with a layer of orange-flavored fudge. I love the combination of orange and chocolate.
HELP! I DON’T LIKE ORANGE AND CHOCOLATE TOGETHER
No problem, I know that not everyone likes fruit added to their chocolate. All that’s needed to change the flavor from orange to vanilla is to leave out the orange oil. It’s that simple.
ORANGE EXTRACT VS ORANGE OIL FLAVRING
Orange extract is an alcohol-based solution that provides a softer, less intense orange flavor. Orange oil flavoring is a more concentrated, pure essential oil that delivers a potent, intense citrus taste. Perfect for recipes that require a strong flavor. Without the oil, the strong flavor of the white chocolate will take over. Too much orange extract would need to be added to match the intense flavor of the orange oil.
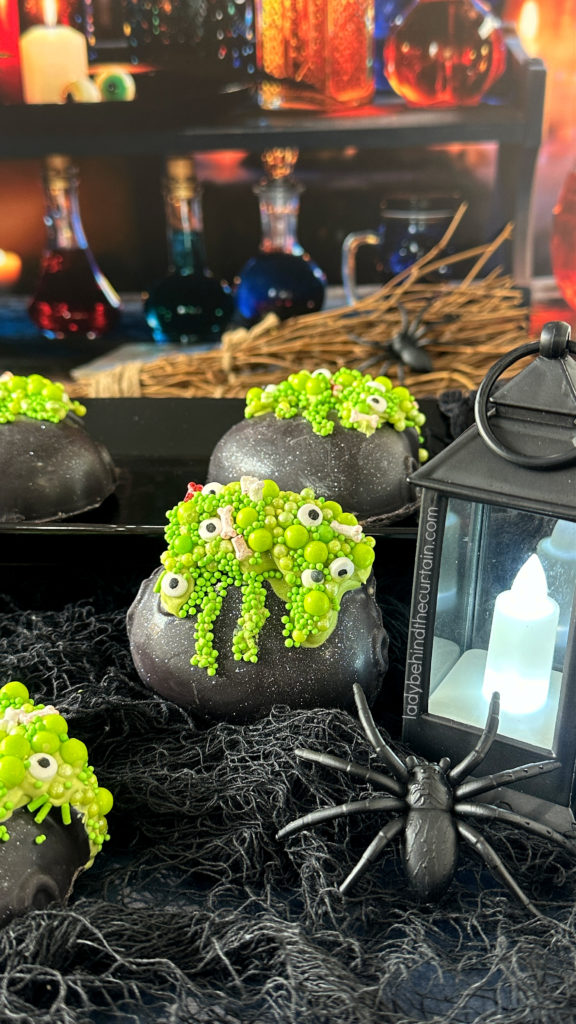
Why You’ll Love These Halloween Cauldrons
- Beginner-friendly recipe – easy to make, even if it’s your first time using a silicone mold.
- No baking required – just mix, fill, and chill!
- Versatile Halloween treat – perfect for parties, trick-or-treat bags, or spooky dessert tables.
- Customizable – decorate with edible glitter, candy “bubbles,” or a drizzle of extra fudge for a magical touch.
Tips for Success
- Use a high-quality silicone cauldron mold to achieve the perfect shape and ensure easy release.
- Ensure your cake pop dough is slightly chilled before pressing it into the mold.
- Let the orange fudge layer set completely before unmolding to keep those layers neat and clean.
FREQUENTLY ASKED QUESTIONS ABOUT HALLOWEEN CAKE POP FILLED CAULDRONS
You’ll need a cauldron-shaped silicone mold—they’re easy to find online, especially around Halloween. Look for a flexible mold that can accommodate both chocolate and fudge layers for optimal results.
Absolutely! You can use any baked chocolate cake, even a boxed mix. Remove as much of the frosting as you can, crumble the cake, and mix until it forms a dough-like texture. NOTE: If the dough is too dry, add a small amount of the frosting. This shortcut makes it ideal for beginners.
The orange fudge can be made with white chocolate chips, sweetened condensed milk, and a touch of orange food coloring or candy melts. Melt, mix, and pour over your cake pop base for a smooth, colorful finish.
Yes, refrigerate them until the fudge is fully set. This helps the layers stay firm, making unmolding much easier.
Definitely! These Halloween cauldron treats can be made up to three days in advance. Store them in an airtight container to keep the fudge and cake pop layers fresh.
Of course! Swap the orange fudge for green or purple for a different Halloween vibe. You can also try mint, caramel, or raspberry-flavored fudge for a fun twist.
Try adding edible glitter, small candy eyes, or a drizzle of melted green candy to make your cauldrons look like they’re bubbling with magic.
Yes! These easy Halloween cake pop cauldrons make perfect party favors or spooky treats for dessert tables. They look impressive, but they’re surprisingly simple to make—ideal for beginners or busy hosts.
Definitely! Kids can help press the cake pop dough into the molds, pour the fudge, or add decorations once the cauldrons are set. It’s a fun and safe Halloween activity for the whole family.
Serve them at room temperature on a Halloween dessert tray. For extra flair, display them on black cupcake liners or mini cauldron stands for a magical presentation. They also make the perfect Halloween Party Favor!
Orange extract is an alcohol-based solution that provides a softer, less intense orange flavor. Orange oil flavoring is a more concentrated, pure essential oil that delivers a potent, intense citrus taste. Perfect for recipes that require a strong flavor. Without the oil, the strong flavor of the white chocolate will take over. Too much orange extract would need to be added to match the intense flavor of the orange oil.
MORE HALLOWEEN TREATS
- MELTING WITCH CANDY POPCORN HALLOWEEN MIX
- DIY SPOOKY HOUSE CAKE TOPPER AND THREE-LAYER HALLOWEEN CAKE
- HOMEMADE CANDY CORN MARSHMALLOWS
- EASY HALLOWEEN FUDGE
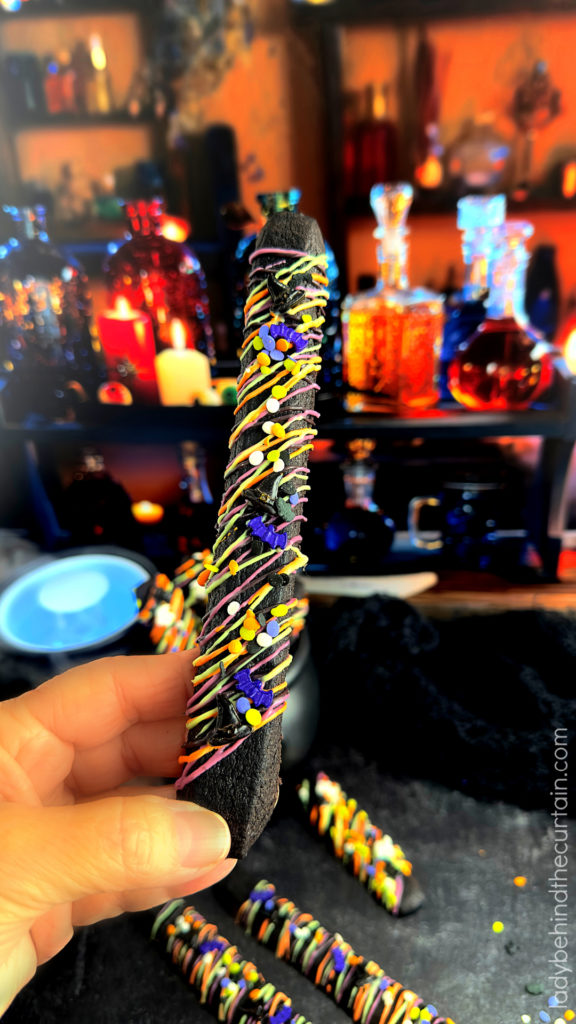
- HALLOWEEN CHOCOLATE SUGAR COOKIE STICKS
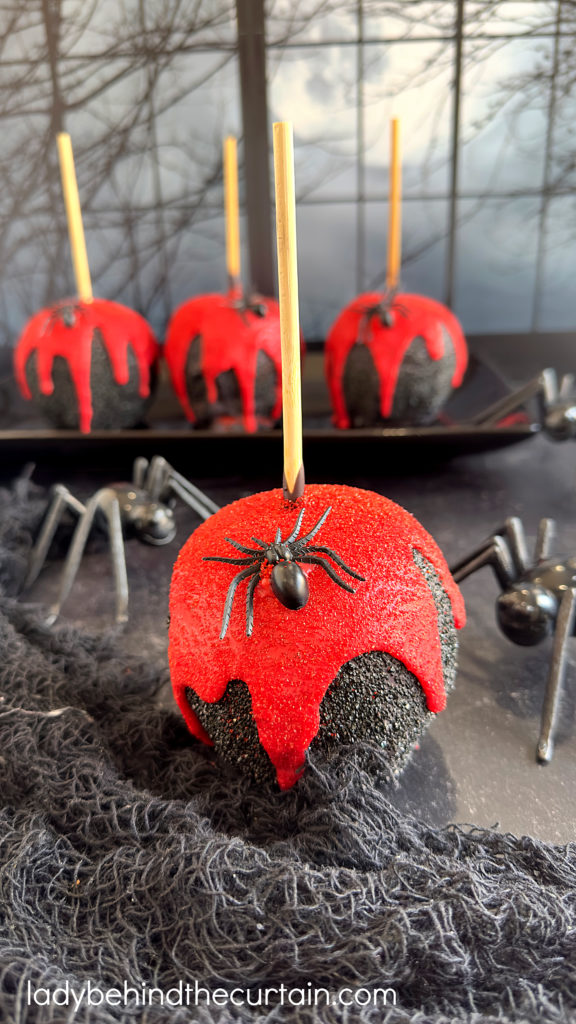
- BLACK WIDOW CARAMEL APPLES
LATEST POSTS
- Homemade Pure Vanilla Extract 2 Ways: Vodka and Bourbon
- Gourmet Soft and Thick Candy Corn Cookies
- Black Cocoa Raspberry Candle Cakes
- Brown Butter Pumpkin Pie Cookies
- Pumpkin Pie Spice Caramel Sauce
These Halloween cake pop-filled cauldrons are the perfect blend of spooky and sweet, making them an ideal project for beginner bakers who want to wow their guests with something creative and fun. With minimal effort and maximum flavor, this easy Halloween treat is sure to bubble up smiles all season long! ❤️Sheryl
Halloween Cake Pop Filled Cauldron for Beginners
Ingredients
For the Cake Pop Dough:
- 1 dark chocolate cake mix
- 2 large eggs
- ½ cup milk
- 4 tablespoons butter, melted
- ¾ cup water
For the Orange Fudge Layer:
- 1 (12 ounce) bag PLUS 6 ounces white chocolate chips
- 1 (15 ounce) can sweetened condensed milk
- 2 tablespoons butter
- 1 teaspoon vanilla extract
- 1 dram oil orange flavoring (if you don't like the combo of orange and chocolate, leave out the orange flavoring)
- orange gel food coloring
- Optional Sprinkles (2 tablespoons)
For the Decorations:
- 7-ounces black candy melting wafers
- 12-ounce bag plus 1 cup green candy melting wafers
- candy sprinkles, green pearls, eyes, bones, etc.
Instructions
For the Cake Pop Dough:
- In a large mixing bowl, add the cake mix, eggs, milk, butter, and water. Mix until combined, creamy, and thick.
- Line the bottom of a 9x13-inch pan and grease it.
- Preheat oven to 325°F. Bake 28 to 30 minutes.
- Place the hot cake into a large mixing bowl and mix until the cake pulls away from the sides of the bowl and forms a dough-like consistency. Be patient, the mixing can take up to 5 minutes.
- Store in a zip-top bag until completely cooled, and you're ready to use it. This will add moisture to the dough. About 1 hour. NOTE: The dough should feel like playdough.
For the Cauldron:
- Start with the green melting wafers. Pour wafers into a medium microwave-safe bowl. Heat for 1 minute, stir until melted and creamy. If the candy still has lumps, continue heating for an additional 30 seconds or until the candy is melted.
- IF YOUR CAULDRON HAS FORMED DRIPS, start here; otherwise, move on to step #5. Pour the melted green candy into a squeeze bottle. Fill the drips and the top of the cauldron. Set aside to harden or refrigerate for 15 minutes. The candy will go from shiny to opaque. Reserve the remaining green candy for later.
- HOW TO KEEP THE GREEN CANDY MELTED UNTIL READY TO USE IT AGAIN: Place the bottle in a tall glass of very hot water, place the bottle in a pre-heated Wilton melting pot with water in it, or place the bottle on a heating pad.
- Once the green candy has hardened, proceed to the black one.
- Pour black candy wafers into a medium microwave-safe bowl. Heat for 1 minute, stir until melted and creamy. If the candy still has lumps, continue heating for an additional 30 seconds or until it reaches the desired consistency.
- Once the candy is melted, spoon some into each cauldron mold. TIP: MAKE SURE THE BOTTOM LAYER IS THICK ENOUGH SO IT CAN HANDLE HAVING THE CAKE POP DOUGH BEING PRESSED INTO IT. Use the back of the spoon to move the candy up the sides of the mold. Tap the counter to remove any air bubbles, allowing the candy to settle into every part of the mold. Set aside to harden. TIP: The candy will go from shiny to opaque. For a quicker result, place the mold in the refrigerator for 30 minutes. LEAVE THE CANDY IN THE MOLD!
- Gently press cake pop dough (about 1.5 ounces) into each cauldron. Ensure there is sufficient room to add a layer of fudge and melted black candy. Set aside to make the orange fudge.
For the Orange Fudge Layer:
- Add condensed milk, all the white chocolate chips, and butter to a microwave-safe bowl. Stir together.
- Heat until the chocolate chip mixture is melted (1 minute on high, stir, 30 seconds, stir, 30 seconds, and stir) a total of 2 minutes.
- Add the vanilla and orange flavoring. Stir until combined.
- While the fudge is still warm, add some ( about ⅛ cup) to the cauldron on top of the cake pop dough, making sure there is enough room for a black melted candy layer.
- Add a layer of melted black candy to the top of the fudge layer.
- Place the mold in the refrigerator to harden (about 15 minutes).
- Carefully remove the cauldrons from the mold. Set aside for decorating.
For the Decorations:
- BEFORE ADDING THE GREEN CANDY: Collect any embellishments you want to add ( eyes, bones, bubbles).
- If your cauldron mold has a drip design, follow the design of the drip on the mold with the green melted candy. If your dauldron mold does NOT have a design, create drips. Don't forget to add green to the top of the cauldron.
- While the candy is wet, add the embellishments.
- Set aside to harden. TIP: The candy will go from shiny to opaque.
Recommended Products
The products listed below are not affiliated links. I just love the products! ❤️Sheryl



Comments
Halloween Cake Pop Filled Cauldron for Beginners — No Comments
HTML tags allowed in your comment: <a href="" title=""> <abbr title=""> <acronym title=""> <b> <blockquote cite=""> <cite> <code> <del datetime=""> <em> <i> <q cite=""> <s> <strike> <strong>