





Halloween Chocolate Pumpkin Cake
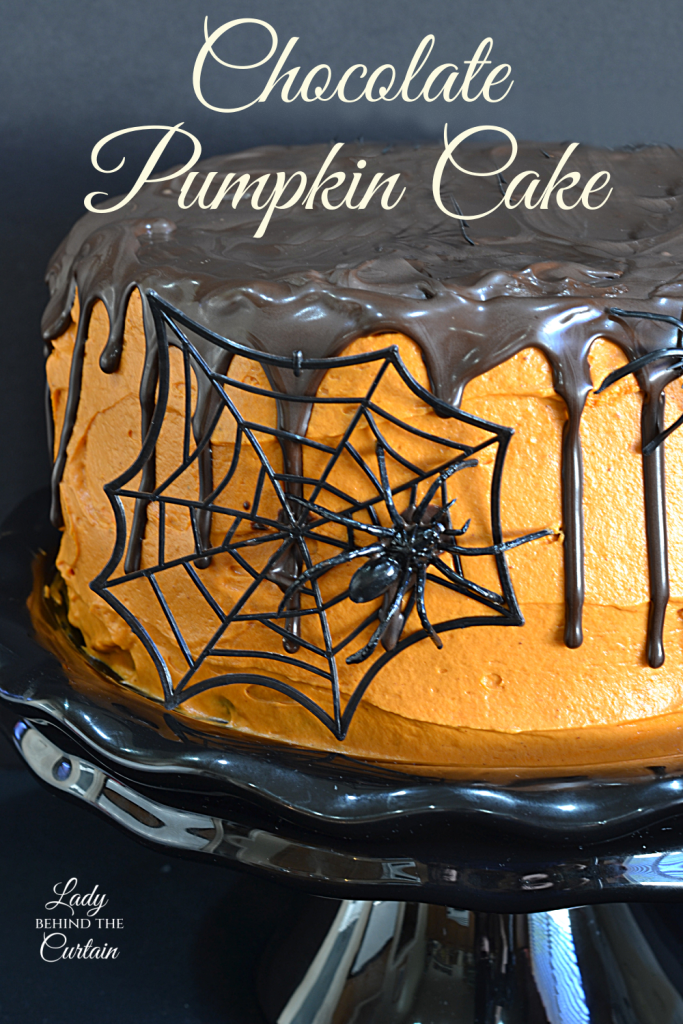
This Chocolate Pumpkin Halloween Cake brings together deep chocolate, pumpkin, orange-tinted, stabilized whipped-cream frosting, dark chocolate ganache flavored with cinnamon, and a dramatic spiderweb decoration. With its bright orange sides, glossy chocolate drips, and creepy-crawly spiders, it has all the personality a Halloween dessert table needs without requiring an elaborate shaped cake.
The cake begins with two 8-inch chocolate pumpkin cake layers and is finished with vanilla stabilized whipped cream frosting. Orange gel food coloring transforms the frosting for Halloween, while the dark chocolate ganache creates the dramatic drip effect over the top and sides. A touch of cinnamon gives the chocolate topping its spicy finish.
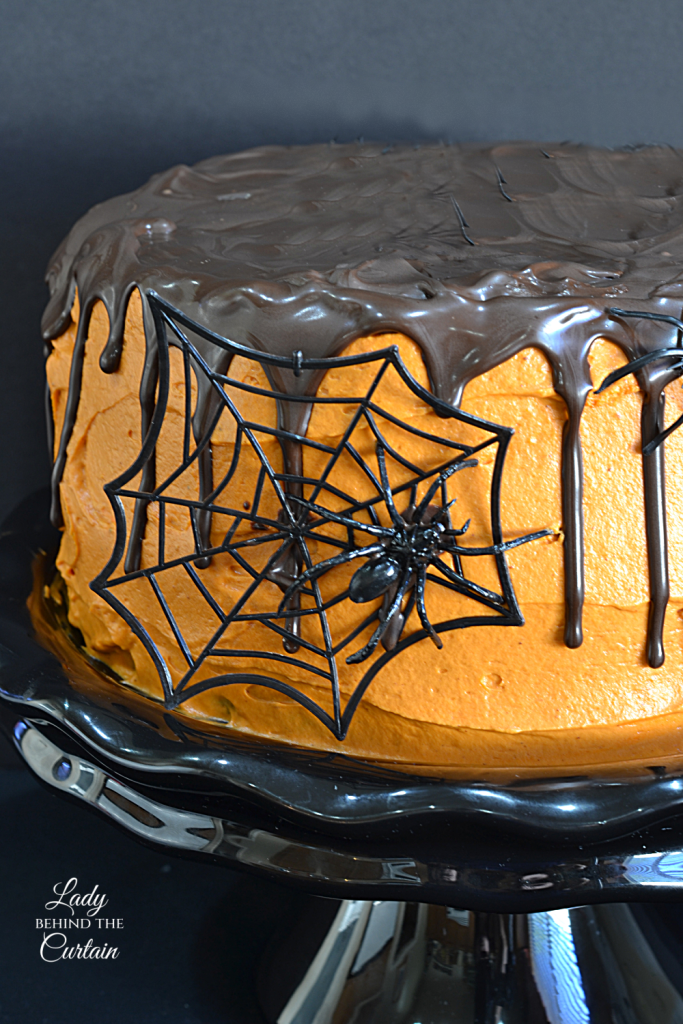
Chocolate, Pumpkin, and a Little Halloween Mischief
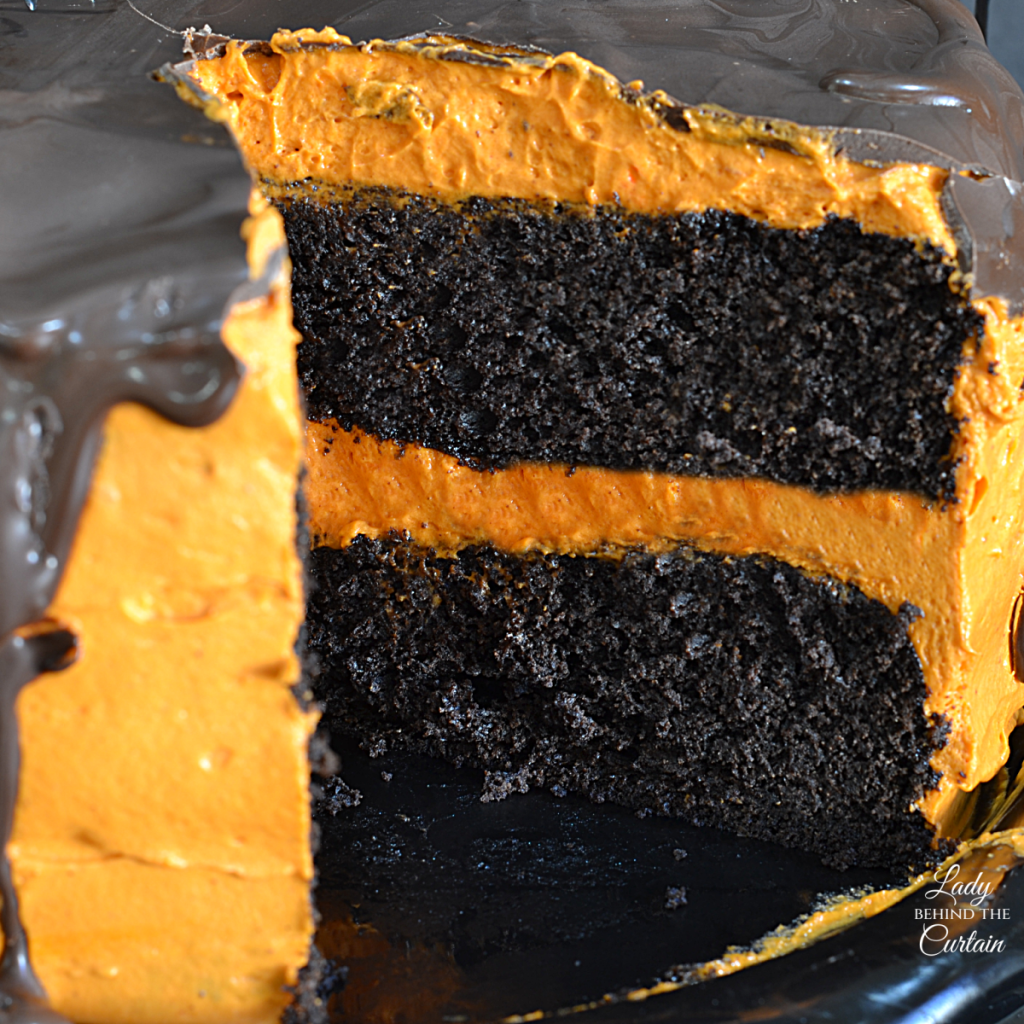
There is more happening inside this Halloween cake than its spooky decorations might suggest. The chocolate pumpkin cake includes cocoa, canned pumpkin, buttermilk, butter, dark brown sugar, granulated sugar, vanilla, eggs, and an additional egg yolk.
The recipe also uses both baking powder and baking soda. The dry ingredients are combined separately, while the pumpkin, buttermilk, and vanilla are whisked together in another bowl. These mixtures are later alternated into the butter mixture in thirds.
That chocolate-and-pumpkin base gives the cake its Halloween personality before any decorating begins. Instead of relying on a plain cake hidden beneath seasonal frosting, pumpkin is part of the cake itself, while cocoa provides the chocolate element that carries through to the ganache.
The decoration then builds outward from those flavors. Orange whipped cream surrounds the cake, cinnamon joins the chocolate ganache, and black embellishments complete the Halloween presentation.
Four Elements, One Halloween Centerpiece
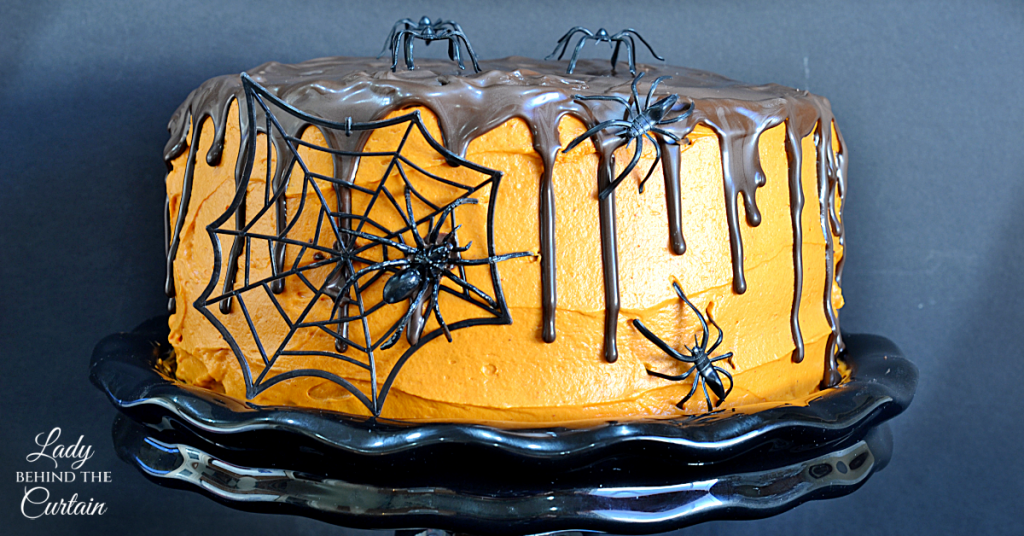
Although the finished cake looks like a single creation, thinking about it in terms of individual components makes the project much easier to organize.
| Cake Element | Its Place in the Finished Cake |
|---|---|
| Chocolate pumpkin cake | Two 8-inch layers form the base |
| Orange stabilized whipped cream | Covers the cake and supplies the Halloween color |
| Cinnamon chocolate ganache | Creates the dark top and drips |
| Spider web and spiders | Finish the Halloween design |
The decoration does not depend on intricate piping or cake carving. Much of the visual impact comes from layering simple elements: orange frosting, dark chocolate drips, a graphic black web, and spiders.
That also means the cake can be adapted visually without changing the recipe. The spider embellishments can be added for the full creepy-crawly effect or left off for a simpler orange-and-chocolate Halloween cake.
A Chocolate Pumpkin Cake Built for the Celebration
Two 8-inch round pans form the layers for this cake, and their bottoms are lined with parchment paper before being lightly coated with nonstick cooking spray. Once baked, the cake layers cool briefly in their pans before being removed to finish cooling completely.
That complete cooling period is an important part of planning the cake because decorating cannot begin as soon as the pans come out of the oven. When preparing this for a Halloween gathering, allow time not only for baking but also for the layers to reach the point where they are ready to be covered with the whipped cream frosting.
The cake itself bakes for 35 minutes at 375°F, with a toothpick inserted into the center used to check for doneness. Once the layers are out of their pans and completely cool, the decorating stages can begin.
Behind the Curtain Tip: When planning your baking time, count cooling as one of the stages of making the cake. The layers need to be completely cool before the frosting goes on, so build that waiting period into your schedule rather than treating it as an afterthought.
A Cloud of Orange Vanilla Whipped Cream
The bright orange exterior may be the first thing you notice, but beneath the Halloween color is vanilla-stabilized whipped cream. Heavy whipping cream is combined with powdered sugar, vanilla pudding mix, vanilla extract, and orange gel food coloring.
Before making the frosting, place the mixing bowl and whisk attachment in the freezer for 15 minutes. The ingredients are then beaten until the mixture reaches stiff peaks. Once prepared, the frosting can remain covered in the refrigerator until you are ready to use it.
This is also one component I actually tested beyond the day it was made.
That gives you an actual tested result rather than a guess about how the frosting behaves after the first day. Three days is the period I personally tested, so that is the timeframe I can confidently share.
Wow! I Never Knew That… I tested the whipped cream’s structure for three days, and it was just as light and fluffy as the day I made it. I’m sure it would have lasted longer, but we ate it!
Behind the Curtain Tip: Put the bowl and whisk attachment in the freezer before you are ready to make the frosting. That 15-minute chilling step is easy to forget once you are in the middle of assembling and decorating a cake.
Chocolate Ganache with a Spicy Little Twist
The dark chocolate layer across the top is made with dark chocolate melting wafers and heavy whipping cream, with cinnamon added after the chocolate and cream are combined.
The ganache serves two decorating purposes at once. It covers the top while also creating individual drips down the orange sides. Those drips allow both colors to remain visible, rather than hiding the orange frosting beneath a complete chocolate coating.
The timing for this component is different from that of the whipped cream. The frosting can be made and stored covered in the refrigerator until needed, but the ganache should not be made until you are ready to use it.
Once prepared, the ganache is transferred to a squeeze bottle for decorating. From there, it can be added across the top and allowed to drip down the sides before the final Halloween embellishments are added.
Creating the Black Candy Spider Web
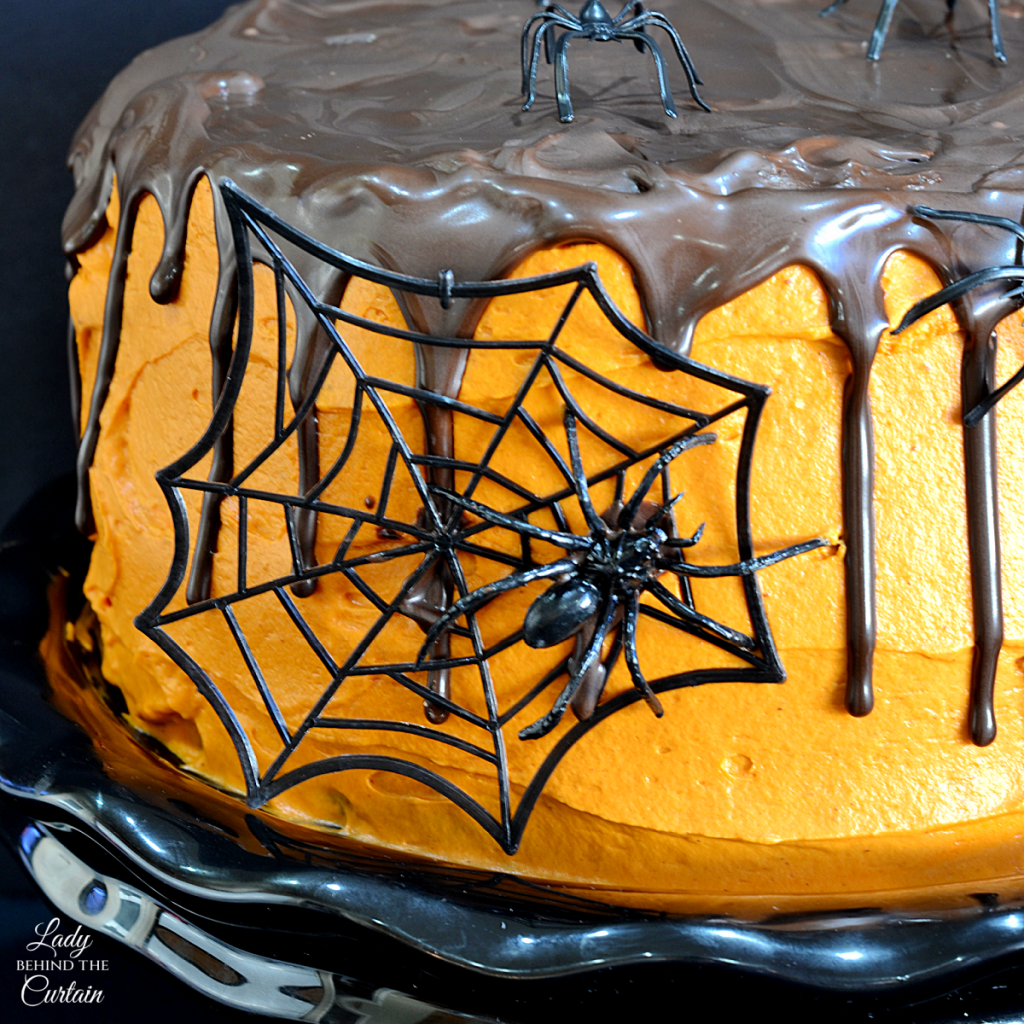
If you want the spider web itself to be edible, black candy wafers can be melted and transferred to a squeeze bottle. The web is drawn onto a piece of parchment paper placed on a cookie sheet.
You have two ways to create the pattern. Draw the web freehand with the melted candy, or first sketch a spider web in pencil on the parchment. When using the pencil method, flip the parchment over before adding the candy. Make the pencil lines dark enough to remain visible from the opposite side, so you can follow the pattern without piping directly over them.
The most important consideration is the thickness of the finished candy web. It needs enough structure to be picked up after it hardens. Once the design is complete, the cookie sheet is placed in the refrigerator until the candy is firm enough to handle.
The hardened web can then be pressed against the side of the cake.
Behind the Curtain Tip: Don’t make the candy lines so delicate that the web becomes difficult to handle. You are creating a decoration that has to travel from the parchment paper to the side of the cake, so make the web thick enough to pick up.
The Easy Spider Web Shortcut
There is absolutely no requirement that you make the candy web. A plastic spider web cake topper offers another option and eliminates that decorating project altogether.
Simply press the topper against the side of the cake and add spiders. This is especially useful if you want the dramatic web effect but would rather spend your time on the cake, frosting, and ganache.
The choice also gives you control over how involved you want the decorating portion of this cake to become. The homemade candy web turns decorating into part of the Halloween baking project, while the purchased topper gets you to the finished look much faster.
From Halloween Cake to Creepy-Crawly Showpiece
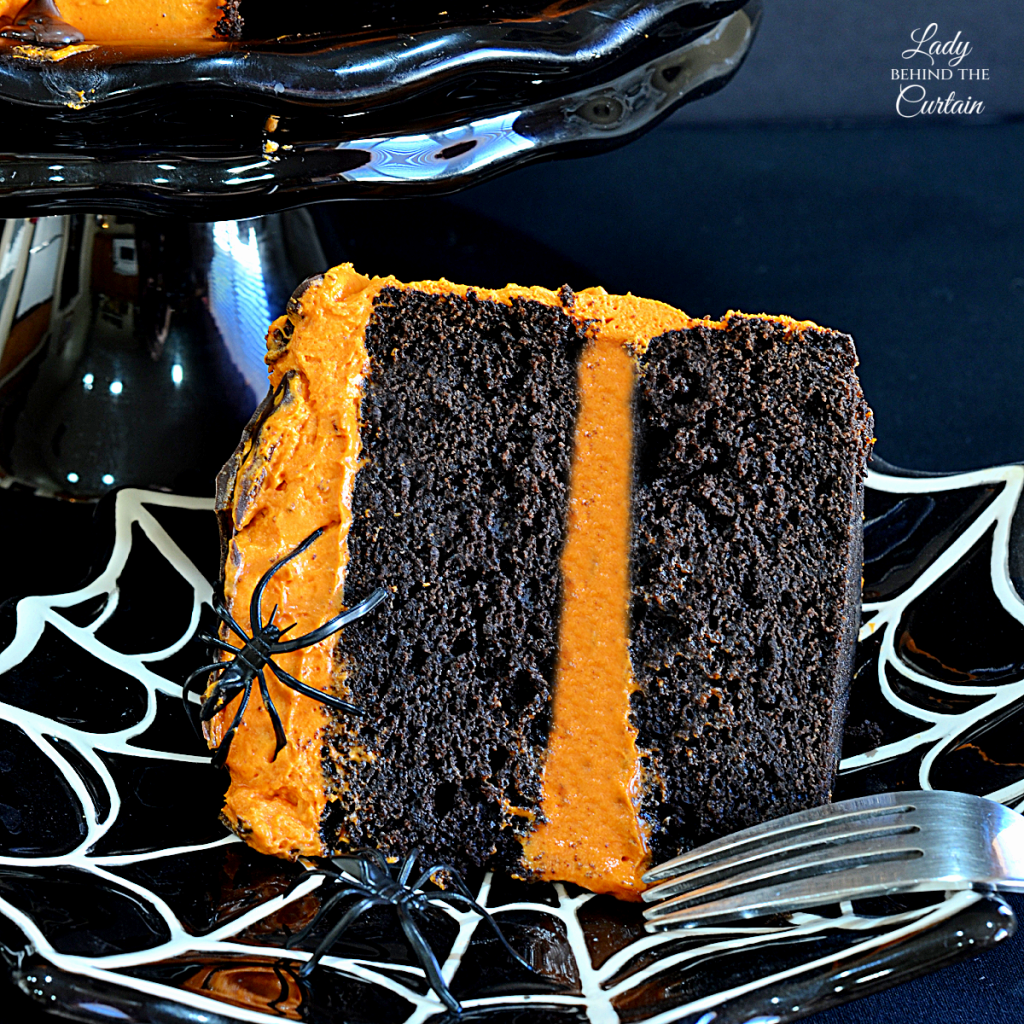
The spider embellishments are optional, which opens up several ways to present the same cake. Without them, the orange frosting, dark chocolate top, and dripping ganache still create a bold Halloween color palette.
Add the large web and spiders, and the personality changes immediately. In the finished cake, spiders crawl across both the web and the chocolate-covered top, extending the theme beyond one decorative focal point.
The web is especially effective on the side because it sits directly against the orange frosting. That bright background makes the black design easy to see and gives the front of the cake a strong focal point.
For a full Halloween display, the finished cake can become the centerpiece among smaller desserts and treats. It already has height, contrasting colors, and dimensional decorations, so it does not need an elaborate arrangement around it to establish the theme.
A Halloween Cake Plan That Keeps Everything Moving
This cake becomes much less complicated when you separate baking, cooling, frosting, and decorating into stages. You don’t have to tackle every component at once.
| Stage | What to Plan For |
|---|---|
| Cake pans | Prepare two 8-inch pans |
| Baking | 35 minutes at 375°F |
| Initial cooling | 10 minutes before removing layers from pans |
| Complete cooling | Allow layers to cool fully before frosting |
| Frosting prep | Chill bowl and whisk for 15 minutes |
| Frosting | Prepare and refrigerate, covered, until needed |
| Ganache | Wait to prepare until you are ready to use it |
| Spider web | Make the candy version or use a purchased topper |
| Final decorating | Add the web and optional spiders |
The most useful part of this timeline is knowing which components can wait. The cake needs to cool completely, and the prepared whipped cream can be kept covered in the refrigerator. The ganache, however, has its own clear instruction: don’t make it until you are ready to use it.
If you are making the candy web, you can also treat it as a separate project rather than trying to pipe it while handling the rest of the cake decorating. It needs time in the refrigerator to harden enough to handle before it can be transferred to the cake.
A Cake Made for the Halloween Dessert Table
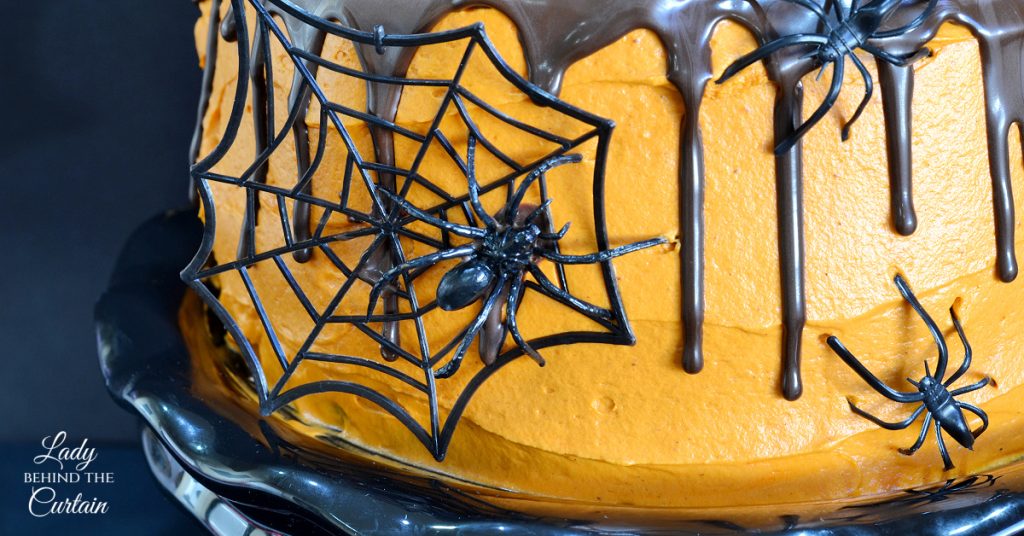
The decorating style gives this cake plenty of presence on a Halloween dessert table. The orange frosting creates a bright backdrop, while the dark chocolate top, long drips, black web, and spiders add darker Halloween details.
The design works especially well as a centerpiece because it is interesting from both the top and the side. The ganache and spiders decorate the top, while the web becomes the focal point from the front.
You can also control how spooky the presentation becomes. Use the chocolate drips without spiders for a more understated look, or add the web and several spiders for the full creepy-crawly version.
Either way, you are working from the same chocolate pumpkin cake and the same frosting and ganache. The decorations determine the final personality.
Why This Chocolate Cake Recipe Is Worth Making
This Chocolate Pumpkin Halloween Cake has Halloween worked into every part of its presentation. Pumpkin is paired with chocolate in the cake, vanilla-stabilized whipped cream becomes a brilliant orange exterior, cinnamon adds a spicy note to the dark chocolate ganache, and the spider web gives the finished cake its unmistakable Halloween look.
The decorating can also be adjusted to fit the amount of time you want to spend on it. Make the black candy web yourself or use a purchased topper. Add spiders for the full creepy-crawly presentation or leave them off for a simpler finish.
And because I tested the stabilized whipped cream for three days, I can tell you exactly what I observed rather than making assumptions about how it holds up. It remained light and fluffy throughout my three-day test.
There is something especially fun about making a cake that gets to look a little creepy. Orange frosting, dripping chocolate, a giant spider web, and spiders crawling across the top definitely qualify!
What I like about this cake is that you can decide how much decorating you want to do. Make the candy web if that’s part of the fun for you, or use a purchased spider web topper and get right to the finishing touches. Either way, that combination of orange, dark chocolate, and black decorations makes it ready for Halloween.
I hope this Chocolate Pumpkin Halloween Cake finds a place on your Halloween table. Share it with family and friends, have fun adding those creepy little spiders, and enjoy the moment when everyone sees it for the first time.
Happy Halloween and happy baking!
Sheryl
LATEST POSTS
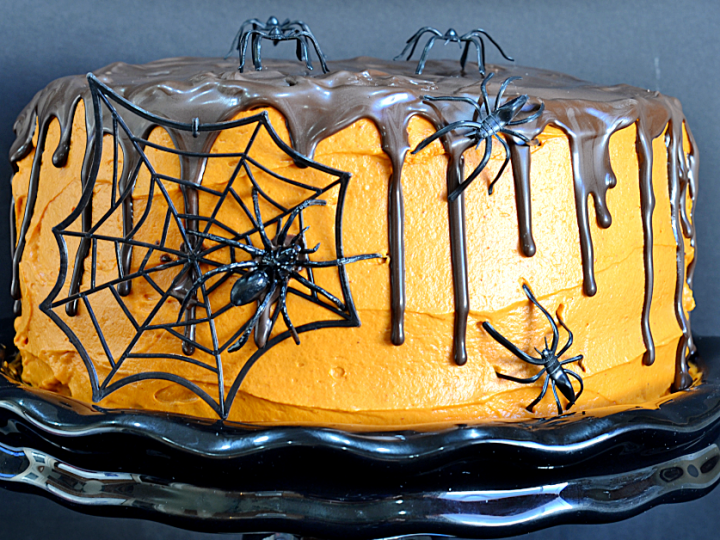
Chocolate Pumpkin Cake with Stabilized Vanilla Whipped Cream Frosting and a Spicy Chocolate Ganache Drizzle
Ingredients
For the Chocolate Pumpkin Cake:
- 1½ cups all-purpose flour
- ⅔ cup unsweetened cocoa
- 2 teaspoons baking powder
- 1 teaspoon baking soda
- ½ teaspoon salt
- ½ cup buttermilk
- 1 cup canned pumpkin
- 2 teaspoons vanilla extract
- ¾ cup unsalted butter, softened
- 1 cup dark brown sugar
- 1 cup granulated sugar
- 3 large eggs, plus one yolk
For the Vanilla Stabilized Whipped Cream Frosting:
- 2 cups heavy whipping cream
- ½ cup powdered sugar
- 2 tablespoons vanilla pudding mix
- ½ teaspoon vanilla extract
- ½ teaspoon orange gel food coloring
For the Spicy Chocolate Ganache:
- 1 (12- ounce) bag dark chocolate melting wafers
- ½ cup heavy whipping cream
- ½ teaspoon ground cinnamon
Instructions
For the Chocolate Pumpkin Cake:
- Heat oven to 375°. Line the bottoms of two 8-inch pans with parchment paper and lightly spray with a nonstick cooking spray.
- In a medium bowl, whisk together the flour, cocoa, baking powder, baking soda, and salt.
- In a small bowl, whisk together the buttermilk, pumpkin, and vanilla extract.
- Add the butter and sugars to a medium mixing bowl; beat together until fluffy.
- Beat in the eggs and the extra egg yolk, one at a time.
- Reduce mixer speed to low and alternately beat in the flour and buttermilk mixtures in thirds.
- Pour the batter into the prepared pans.
- Bake for 35 minutes or until a toothpick inserted into the center comes out clean.
- Cool the layers on a wire rack for 10 minutes; remove the cake from the pans and let it cool completely before frosting.
For the Stabilized Whipped Cream Frosting:
- Before starting, place the mixing bowl and whisk attachment in the freezer for 15 minutes.
- Add the heavy cream, pudding mix, powdered sugar, and vanilla to the mixing bowl. Beat on low until lightly thickened.
- Continue mixing (working your way up to high speed) until the mixture reaches stiff peaks.
- Store covered in the refrigerator until ready to use.
- NOTE: I tested the whipped cream's structure for three days, and it was just as light and fluffy as the day I made it. I'm sure it would have lasted longer, but we ate it!
For the Black Ganache Drizzle:
- In a medium microwave-safe bowl, add the chocolate wafers and cream.
- Heat on high for 1 minute.
- Remove from the microwave and let sit for one minute before stirring. (The cream is hot and will melt the chocolate)
- Add the cinnamon and, using a small whisk, combine the cream and chocolate.
- Pour into a squeeze bottle. NOTE: Don't make the ganache until you are ready to use it.
- Cover the top of the cake with drips down the sides.
- You can add spider embellishments or keep it plain.
Notes
You have two options for the web embellishment. Melt black candy wafers, spoon the melted candy into a squeeze bottle, and draw a spider web on a piece of parchment paper. TIP: Make sure the web is thick enough to pick up. Place a piece of parchment paper on a cookie sheet and first draw the spider web, either freehand or in pencil. NOTE: If you pencil in a spider web, flip the paper over before adding the melted candy. Make sure your lines are dark enough to be seen from the opposite side. Place the cookie sheet in the refrigerator until the candy is hard enough to handle. Press it to the side of the cake. OR... order a plastic spider web cake topper. Press the cake topper to the side of the cake; add spiders.
A Few Last Details Before the Halloween Fun Begins
A cake with several components naturally brings up a few extra questions. These details are worth knowing before you start, as they can help you decide how to decorate and organize the project without repeating the instructions on the recipe card.
- Do I have to make the spider web myself? No. The homemade black candy web and a purchased plastic spider web cake topper are both options, so you can choose the approach that works best for the amount of decorating you want to do.
- Can I draw a pattern before making the candy web? Yes. Draw the web in pencil on parchment paper, then flip the parchment before piping the melted candy. The pencil lines should be dark enough to see from the reverse side.
- How long did you actually test the stabilized whipped cream? Three days. It was still just as light and fluffy on the third day as when it was first made. I did not test it beyond that point because we ate it.
- Do I have to add spiders? No. The spiders are embellishments and can be left off if you prefer the orange frosting, chocolate ganache, and web without the additional decorations.
- Can the frosting wait while I get everything else ready? Yes. Once made, the stabilized whipped cream is stored in the refrigerator, covered, until you are ready to use it.
- Should I prepare the ganache while the cake is cooling? No. The recipe specifically notes that the ganache should not be made until you are ready to use it.
- Does the candy web need to stay flat? It remains on the parchment-lined cookie sheet while it chills in the refrigerator. Once it is hard enough to handle, it is lifted and pressed against the side of the cake.
Those small planning details leave you free to concentrate on the fun part: watching an orange-and-chocolate layer cake turn into a spider-covered Halloween centerpiece.
Oh yummy! Thanks for sharing the recipe.
Pinning this on pinterest. 🙂
Cheers,
Tracy Screaming Sardine
This sounds like a homemade masterpiece! I love the photo with the spider!
Hopping on over to your blog from FTLOB..
This cake looks yum! (minus the spider of course lol)
Wow this cake looks so delicious, love the spider touch, creepy!
This looks like a kid friendly cake! Can’t wait to try it.
That is sooo clever! And it looks like it tastes delicious! I’ll have to make this for Halloween for sure!
Your cake is beautiful… in a Halloween-y way:@)
As many times as I’ve made a pumpkin cake I’ve never made one even close to this, it sounds delicious!
Absolutely adorable! I linked to you from Foodie Wednesday! Thanks for a gorgeous cake recipe!
Fabulous. I bet a red velvet would be great too. I make Blood cupcakes for halloween. Very fun.
I LOVE THE CHOCOLATE DRIZZLE!!!!!!
This cake is absolutely gorgeous! I love how the chocolate drips down the sides. Thanks for sharing on Crazy Sweet Tuesday! 🙂
Delicious and cute!
How cool is this cake?!?!? Love it!
Saw this on EKat’s .. looks amazing! Yummm!
Cool AND creepy – I love it. The orange and black is such a cool combination.
Yum! I love the presentation. I would love it if you would link this up to my Pumpkin Addicts Anonymous link party going on now: http://www.craftyconfessions.com/2011/09/pumpkin-addicts-anonymous-link-party.html
I hope to see you soon!
~Macy
Wow! I bet these flavors go so well together. Thanks for sharing with Sweets This Week.
Sarah
These look AMAZING! wow… so delicious. Thanks for all the pictures great instructions. Just wanted to let you know I’ll be featuring this tomorrow at this weeks Tasty Tuesday party. Stop by and grab a featured button!
http://nap-timecreations.blogspot.com/
You could open a bakery. This cake is stunning and what a success it will be on Halloween. Thanks for linking it up on Bake with Bizzy.
I keep saying it, I’m a huge pumpkin fan and on a pumpkin kick since it’s now fall! Bookmarking this for sure!
Thanks for linking up with Momtrends this week!
~Shannon, Food Channel Editor, Momtrends.com
This looks simply delicious! I featured this today, I know I know I featured you last week, but I just can’t help it!
Carlee
http://www.ladybirdln.com
My oh my this looks good! Perfect to take to mMurder Mystery night thanks!
What a great cake! Thanks for linking up with me for Friday Favorites. I just added this to pinterest for you!
Hi Sheryl,
I am making this cake and in the cream cheese frosting you have cocoa in the ingredients but not in the instructions. Do you add it with the cinnamon?
Hi A.J.
Yes, you add the confectioners’ sugar, cocoa, cinnamon and vanilla. I changed the directions to include the cocoa. Thanks for catching that! 🙂
We love your blog. You always have the most creative things at the holidays. Please visit us. We would love to have you and we are having a great giveaway this week. Register to win – it is under the Televenge post!
Hi Sheryl,
Your Chocolate Pumpkin Cake is awesome, just perfect for the fall festival. Hope you are having a great weekend and thank you so much for sharing with Full Plate Thursday.
Come Back Soon!
Miz Helen
Fantastic! Perfect for Halloween!
This makes me want to host a party! What an awesome cake!
Thanks!
Your chocolate Pumpkin cake looks delicious!
Thanks Kay! 🙂
My kids would be so excited if I made this for them on Halloween!
Thanks for sharing this one, Sheryl. Looking forward to trying it. We don’t have canned pumpkin here in Zambia, so will need to cook up some pumpkin instead. I might even try it with butternut squash. Yum!