





Peanut Butter Toffee Candy Bark
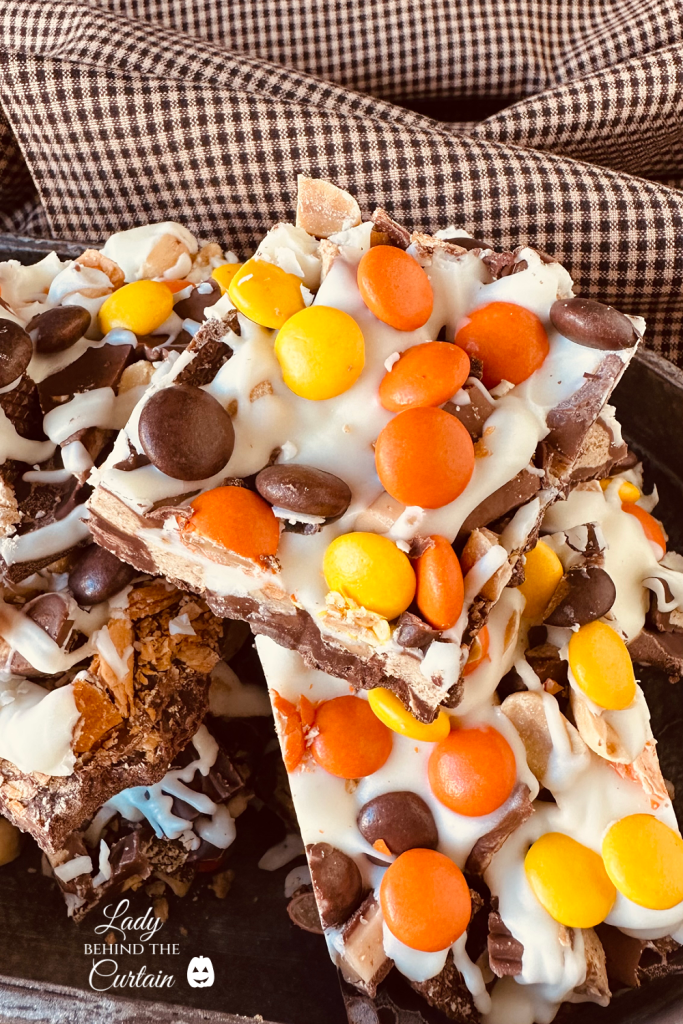
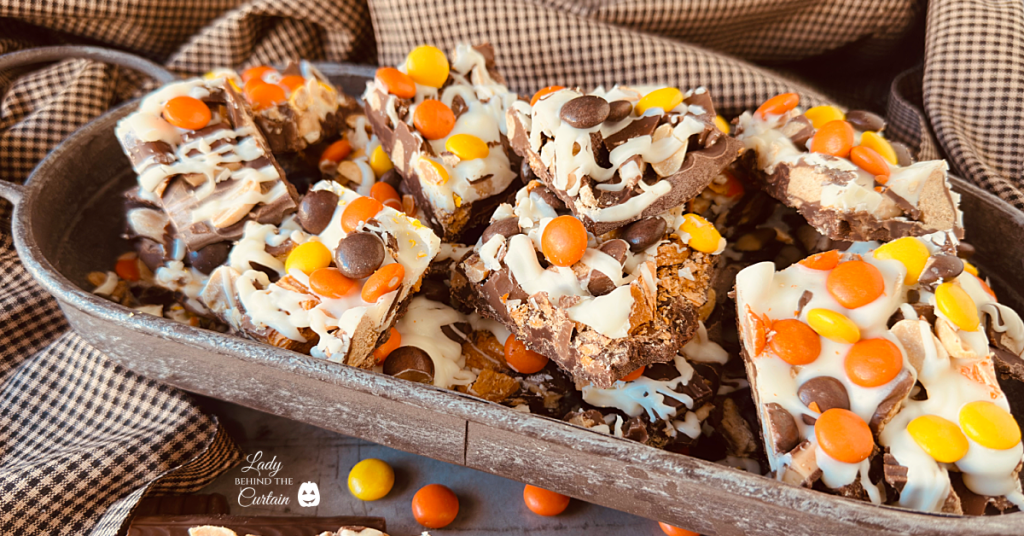
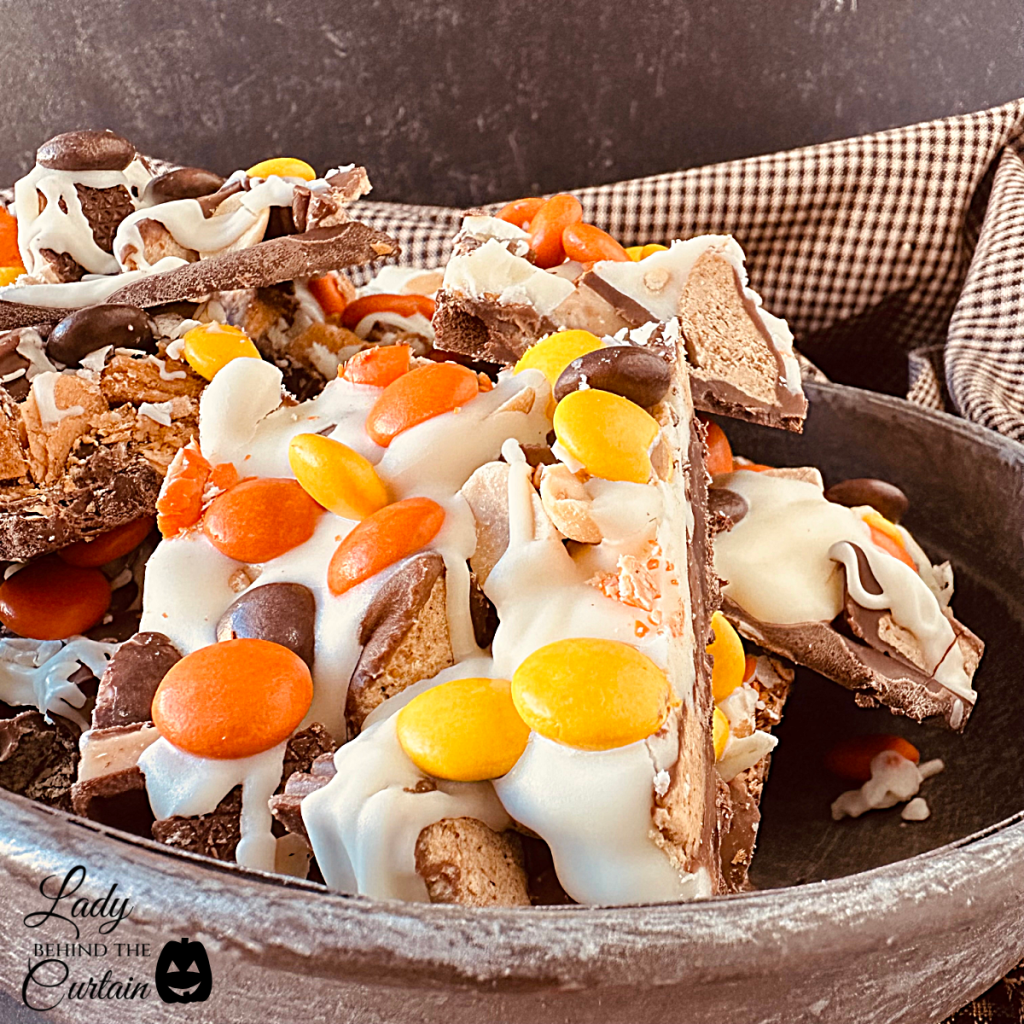
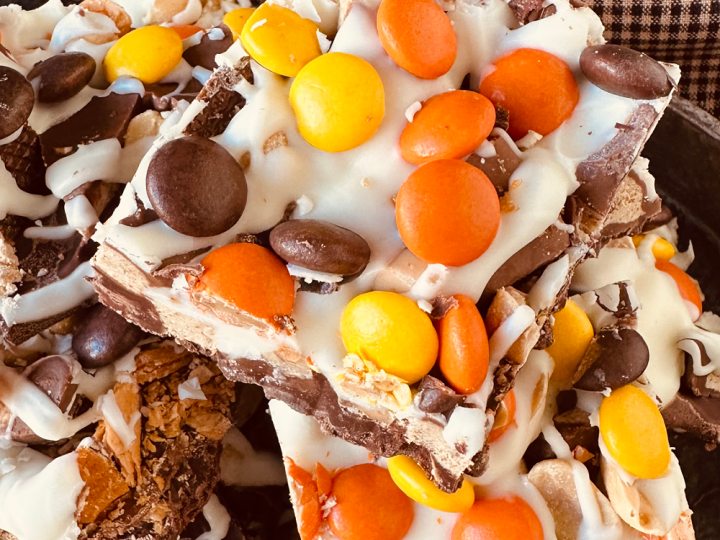
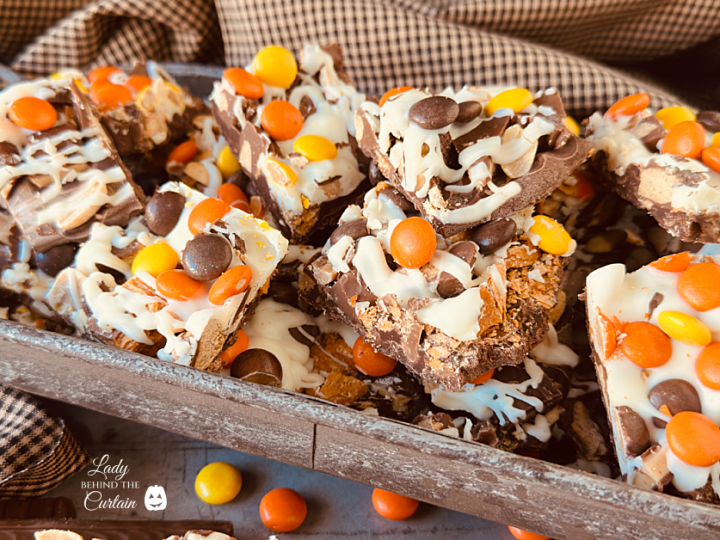
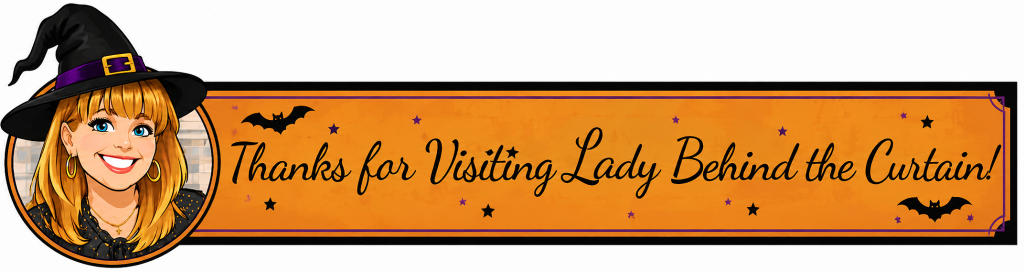
Chocolate bark is one of those treats that looks like you spent far more time making it than you actually did. A glossy layer of semisweet chocolate becomes the backdrop for chunks of peanut butter candy, buttery toffee, crunchy peanuts, colorful candy pieces, and a drizzle of vanilla candy coating. Once everything is chilled and broken into irregular pieces, every shard looks a little different, which is exactly the charm.
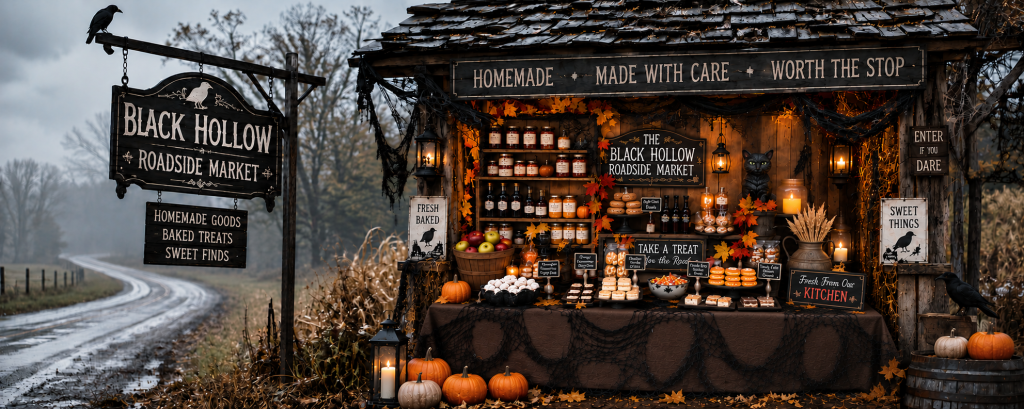
This Peanut Butter Toffee Candy Bark is Recipe #5 from the Black Hollow Roadside Market, and it feels right at home among the jars, bags, and old-fashioned sweets filling the shelves. It has the look of something you might discover wrapped in a clear cellophane bag at a little roadside candy counter, where the best treats aren’t necessarily the fanciest ones. They’re the ones packed with familiar flavors and enough little surprises to make you reach for another piece.
Where Chocolate, Peanut Butter and Toffee All Meet
Peanut butter and chocolate already have one of the strongest partnerships in the candy world, but adding toffee changes the experience. Instead of relying on one sweet, creamy flavor from start to finish, the bark shifts between creamy, crunchy, salty, buttery, and chocolatey.
The semisweet chocolate base plays an important role here. With peanut butter cups, Butterfinger candy, Heath bars, Reese’s Pieces, and vanilla candy coating all contributing sweetness, milk chocolate could push the finished bark into candy-overload territory. Semisweet chocolate brings enough cocoa intensity to anchor everything without becoming bitter.
Peanut butter arrives in several forms, and each contributes a different texture. Peanut butter cups provide soft, creamy centers, Butterfinger pieces bring a crisp, flaky peanut butter crunch, and Reese’s Pieces add a firmer candy-shell snap.
Toffee provides another kind of crunch altogether. Heath pieces are hard and buttery, while cocktail peanuts contribute a roasted flavor and a touch of salt. The nuts don’t need to dominate the bark to make a difference. Even a small amount helps sharpen the chocolate, peanut butter, and caramelized toffee flavors around them.
A Bite-by-Bite Look at the Bark
| Ingredient | What It Adds | Why It Matters |
|---|---|---|
| Semisweet chocolate | Rich cocoa flavor | Keeps the bark from becoming overly sweet |
| Butterfinger | Crisp peanut butter crunch | Adds a light, flaky candy texture |
| Heath toffee | Buttery caramelized crunch | Deepens the candy-shop flavor |
| Peanut butter cups | Soft, creamy peanut butter | Creates rich pockets throughout the bark |
| Cocktail peanuts | Salt and roasted crunch | Balances the sweeter candy |
| Vanilla candy drizzle | Creamy sweetness and contrast | Gives the bark a finished appearance |
| Reese’s Pieces | Candy-shell crunch and color | Adds a final pop of peanut butter flavor |
The combination works because no single ingredient has to carry the bark. Each contributes something the others don’t, making the finished candy more interesting than simply topping chocolate with chopped candy bars.
Wow! I Never Knew That… Chocolate bark gets its name from its irregular appearance. Once broken into pieces, the rough shapes resemble pieces of tree bark. Those uneven edges aren’t something to fix. They’re exactly what gives bark its characteristic handmade look.
Building a Bark That Holds All Those Goodies
Candy bark may be simple, but there is a little bit of structure involved. The melted chocolate isn’t just a flavor component. It’s the foundation holding all those toppings together.
A chocolate layer that’s too thin can crack into fragile slivers beneath substantial pieces of candy. Too thick, and the bark becomes difficult to bite while the ratio shifts toward plain chocolate. A layer around ¼ inch thick provides enough support for the toppings while still allowing the finished bark to break easily.
The size of the toppings matters, too. Candy pieces should be large enough to recognize, but not so large that they overwhelm the chocolate underneath. Peanut butter cups are especially worth leaving visibly chunky because their creamy centers create pockets of softness against the firm chocolate.
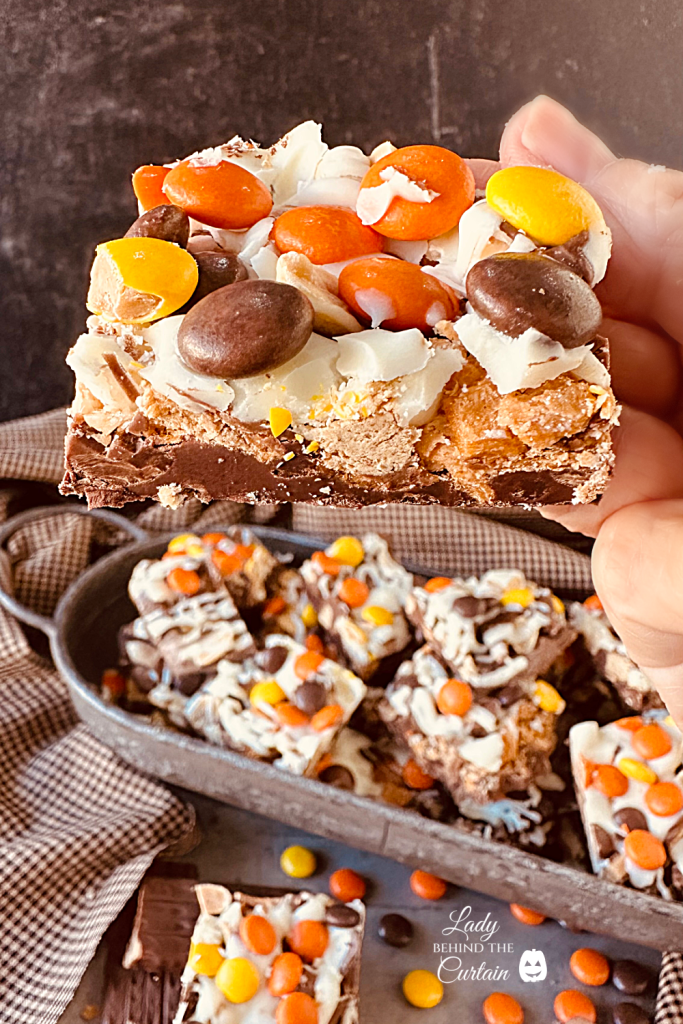
The most important part of topping the bark is contact. Candy that touches the melted chocolate becomes anchored as the chocolate sets. Pieces piled on top of other pieces may look abundant, but they aren’t securely attached and are more likely to tumble off when the bark is broken.
Rather than completely covering the surface, scatter the larger pieces across the chocolate while leaving small windows between them. Peanuts and Reese’s Pieces can fill some of those spaces, giving you better distribution without creating an overly thick topping layer.
The Bark-Building Checklist
Before the chocolate begins to set, take a quick look across the pan:
- Chocolate is spread in a fairly even layer.
- Butterfinger and toffee pieces reach from edge to edge.
- Peanut butter cup pieces are touching melted chocolate.
- Peanuts are scattered through the smaller spaces.
- Some chocolate remains visible between the toppings.
- There is room for the vanilla drizzle.
- Final candy pieces are touching either soft chocolate or drizzle.
Perfect spacing isn’t the goal. In fact, perfectly arranged toppings can take away some of the handmade character. You’re simply looking for enough distribution that nearly every piece of finished bark gets a good combination of flavors.
If a larger piece seems to be sitting too high, gently press it into the melted chocolate. It doesn’t need to be buried. A little contact is enough to help secure it as the bark firms.
Behind the Curtain Tip: Chop and measure every candy and topping before melting the chocolate. Once the chocolate is spread, keep everything within reach so you can add the toppings while the surface is still soft enough to grab.
The Finishing Touches That Give Bark Its Candy-Shop Look
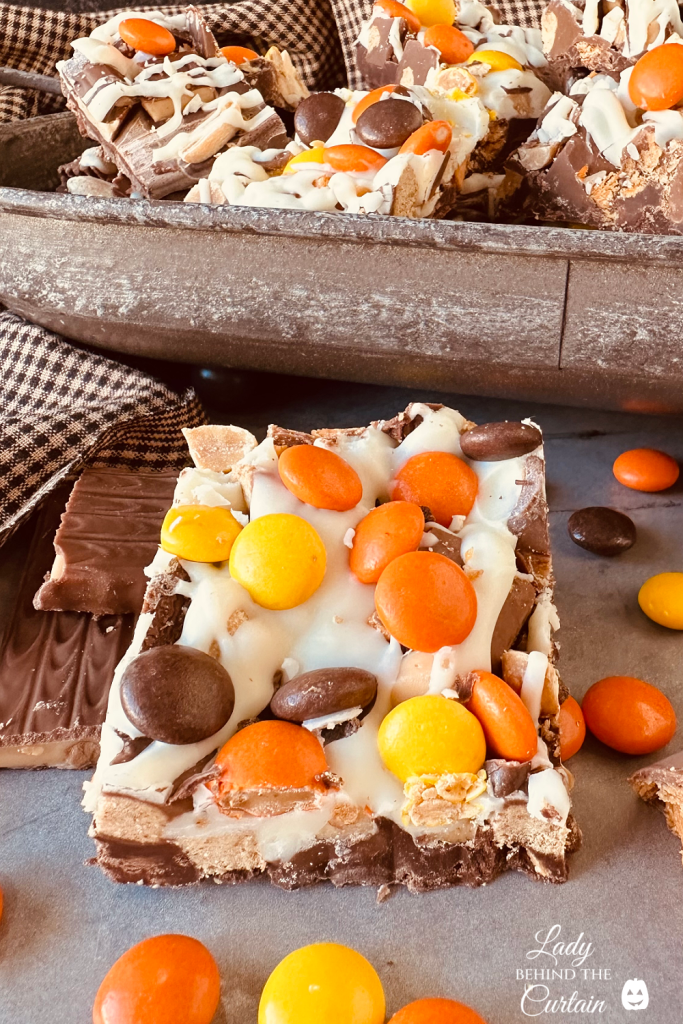
The vanilla drizzle and Reese’s Pieces may be the last additions, but they have an important job. Most of the bark is dark brown and filled with irregular pieces of candy, so the pale drizzle and small colorful candy shells provide visual contrast.
Candy melts work particularly well for the drizzle because they’re designed to melt and reset easily. They don’t behave exactly like real white chocolate because their fat composition is different, but for a decorative finish that needs to firm up on top of the bark, that’s actually useful.
Gentle heat matters with both white chocolate and pale candy coatings. Overheating can turn a smooth coating thick and difficult to drizzle. Short microwave intervals at reduced power give the coating time to melt gradually and make it easier to stop heating as soon as it becomes fluid.
The drizzle itself shouldn’t look overly precise. Moving a spoon loosely from side to side creates thin zigzag lines that visually connect all the toppings while still keeping the rustic character of the bark.
Reese’s Pieces provide the final bit of color and help fill some of the smaller visual gaps left between larger candy pieces. Because they’re added near the end, make sure they land where they can touch either soft chocolate or the freshly melted drizzle. Otherwise, those pretty little candies may be the first things to fall off when the bark is broken.
Wow! I Never Knew That… Real white chocolate is more heat-sensitive than dark or semisweet chocolate because it contains cocoa butter but no cocoa solids. Whether you’re using white chocolate or vanilla candy coating, slower melting gives you much more control.
Behind the Curtain Tip: Think of the drizzle as both decoration and edible glue. If you spot a topping that doesn’t seem securely attached, a little drizzle over or beside it can help hold it in place once everything firms.
From a Sheet of Chocolate to Rustic Candy Pieces
Chilling transforms the bark from a soft sheet of chocolate into something you can handle and break cleanly. The exact timing can vary depending on the temperature of your refrigerator and the thickness of the chocolate, so firmness is a better guide than the clock.
The chocolate should feel completely firm rather than tacky, and the parchment should peel away easily. Once the bark reaches that point, slide the entire sheet onto a flat work surface before breaking it. Having a stable surface underneath gives you better control and keeps the baking pan from moving around.
A Simple Bark Timeline
| Stage | What You’re Looking For |
|---|---|
| Prep | Candy chopped and toppings ready |
| Melt | Chocolate smooth and fluid |
| Spread | Even layer approximately ¼ inch thick |
| Top | Candy making contact with melted chocolate |
| Drizzle | Loose vanilla zigzags across the surface |
| Finish | Reese’s Pieces anchored to soft chocolate or drizzle |
| Chill | Chocolate completely firm |
| Break | Irregular pieces with a mixture of toppings |
Breaking bark by hand gives the most natural shapes, but a knife can help start a section if the sheet is particularly firm. Smaller shards are perfect for snacking, while larger pieces show off the toppings beautifully in gift bags and on dessert trays.
Don’t throw away the tiny fragments that form when you break them. Those little pieces are especially good sprinkled over ice cream, brownies, cupcakes, or pudding, and they can also be tossed into a sweet snack mix.
Candy Counter Twists for Every Season
Once you understand the balance behind this version, you can use the same idea to create variations without turning the bark into a random pile of candy. A useful formula is to keep one strong chocolate base, something creamy, something crunchy, something salty, and one decorative finishing element.
For stronger peanut flavor, add more roasted peanuts while leaving the candy-bar pieces about the same. For more toffee character, emphasize Heath pieces and reduce some of the candy-coated chocolates.
You can also change the appearance without rebuilding the entire flavor profile. Orange and yellow candies fit fall beautifully, while red and green candy pieces can shift the bark toward Christmas. Pastel candies or drizzle can take the same concept into spring.
A few more combinations worth playing with include:
- Miniature pretzel pieces for additional salty crunch
- A light sprinkle of flaky salt
- Chopped roasted peanuts for a stronger nut flavor
- Crushed chocolate sandwich cookies for a darker, cookie-heavy version
- Peanut butter candy coating as part of the drizzle
- Seasonal candy colors that change the look without changing the basic bark
The trick is restraint. Completely burying the chocolate makes the bark harder to break and prevents individual flavors from standing out. Leaving a little chocolate visible gives both your eyes and your taste buds somewhere to rest.
Made for Market Shelves, Parties and Gift Bags
Candy bark is especially easy to package because its irregular shape is part of the presentation. There’s no need for perfectly sized compartments or identical portions.
Clear cellophane bags are a natural fit for Peanut Butter Toffee Candy Bark because the candy itself provides the decoration. Chocolate, peanut butter cups, toffee, Reese’s Pieces, peanuts, and vanilla drizzle are all visible through the package, giving the bark the look of something you might choose from an old-fashioned candy counter.
That makes it especially fitting for the Black Hollow Roadside Market. A bag filled with jagged pieces feels homemade without being fussy, exactly the kind of sweet treat that belongs tucked among jars and other goodies on the market shelves.
For a party, arrange several sizes of bark loosely on a platter instead of lining everything up in rows. Large pieces create height while smaller fragments fill the spaces between them. The uneven arrangement actually works in your favor and makes the platter look abundant.
For gifting, try:
- Clear treat bags tied with ribbon or twine
- Small kraft candy boxes lined with parchment
- Cellophane bags tucked into fall gift baskets
- Individual packages used as party favors
- A mixed candy box featuring several bark flavors
- A bag of bark paired with homemade hot chocolate mix
Because this bark contains peanuts and several peanut-based candies, packages being shared outside your household should be clearly identified as containing peanuts. That’s particularly important for party favors, bake sales, classroom or teacher gifts, and other situations where you may not know everyone’s food allergies.
Keeping Every Piece Crisp, Snappy and Ready to Share
Candy bark is a convenient make-ahead treat because it doesn’t need to be served immediately after it sets. That makes it useful when you’re preparing several desserts or party foods and want to finish something ahead of the last-minute rush.
Heat and moisture are the biggest storage concerns. Heat softens chocolate and can make the peanut butter cups messy, while moisture can affect the chocolate’s surface and gradually soften some of the crisp candy components.
Store the bark in an airtight container in a cool location. If you’re stacking pieces, place parchment or wax paper between the layers so the toppings don’t scrape against the bottoms of other pieces.
Refrigeration is helpful in a warm kitchen, but the airtight container becomes even more important because chocolate can absorb surrounding odors. Keeping the container closed as chilled bark begins returning toward room temperature also helps protect the surface from condensation.
Candy Bark Storage Guide
| Situation | Best Approach |
|---|---|
| Serving soon | Airtight container in a cool room |
| Warm kitchen | Refrigerate in an airtight container |
| Stacking pieces | Separate layers with parchment or wax paper |
| Packaging for gifts | Keep cool until shortly before gifting |
| Dessert table | Keep away from sunlight and heat |
| Transporting | Use a rigid container to prevent crushing |
When you’re preparing several treats for an event, bark is a good candidate to make early. Once it’s firm, broken, and stored, it’s one more dessert you can check off the list while you turn your attention to recipes that need to be finished closer to serving time.
The Bark That Has a Little Bit of Everything
This Peanut Butter Toffee Candy Bark isn’t built around piling as much candy as possible onto melted chocolate. Every addition has a purpose.
Semisweet chocolate provides a rich foundation without making the bark overly sweet. Butterfinger brings crisp peanut butter layers, Heath adds buttery toffee crunch, peanut butter cups create soft, creamy pockets, cocktail peanuts supply salt and roasted flavor, Reese’s Pieces add candy-shell crunch and color, and the vanilla drizzle ties everything together.
The result is a bark that has plenty happening in every bite without losing the chocolate underneath.
It’s easy enough for a casual candy-making afternoon, colorful enough for a party, rustic enough for homemade gifts, and perfectly suited for a little roadside market where treats are supposed to look as though someone made them especially for you.
That’s exactly why Peanut Butter Toffee Candy Bark earned its place as Recipe #5 on the shelves of the Black Hollow Roadside Market.
Shop the Black Hollow Roadside Market
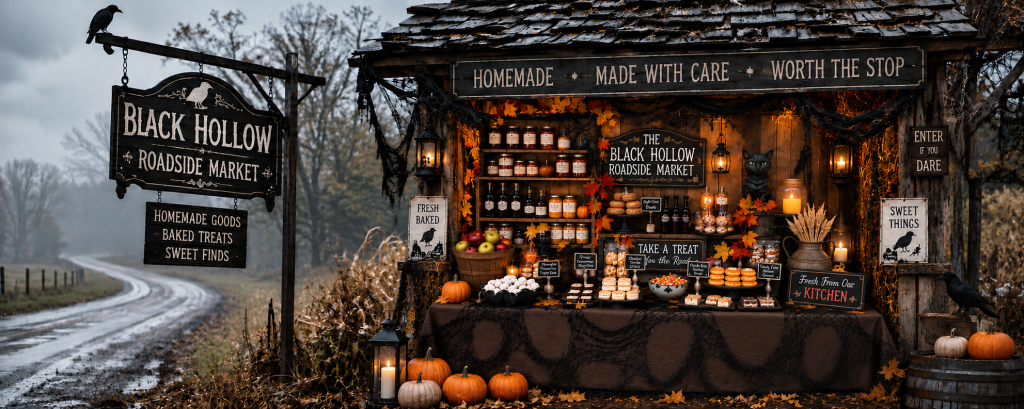
Welcome to the Black Hollow Roadside Market, a curious little roadside stand where the shelves are crowded, the lanterns are glowing, and there’s always something homemade waiting to be discovered. What began as a collection of fall flavors has turned into a market filled with jars of caramel and fruit toppings, handcrafted extracts, cozy spice blends, freshly baked treats, old-fashioned candies, and a few delightfully spooky surprises.
This page is your guide to everything on the shelves at Black Hollow. Each item you see in the market has its own recipe, from pantry staples like Apple Pie Spice and Pure Vanilla Extract to seasonal favorites like Apple Cider Caramel Sauce, Mini Ube Cheesecakes, Candy Corn Cookies, and all the other treats that have found their way to the stand.
Some recipes were created especially for Black Hollow, while others are longtime Lady Behind the Curtain favorites that were simply too good to leave behind. Together, they make up one wonderfully mismatched little roadside market filled with things that are homemade, baked, bottled, and made for sharing.
So wander through the shelves, peek inside the jars, and see what looks good. Every recipe from the Black Hollow Roadside Market is gathered below, and as new treats arrive at the stand, you’ll find them added here.
THE MARKET IS OPEN. COME SEE WHAT'S ON THE SHELVES.
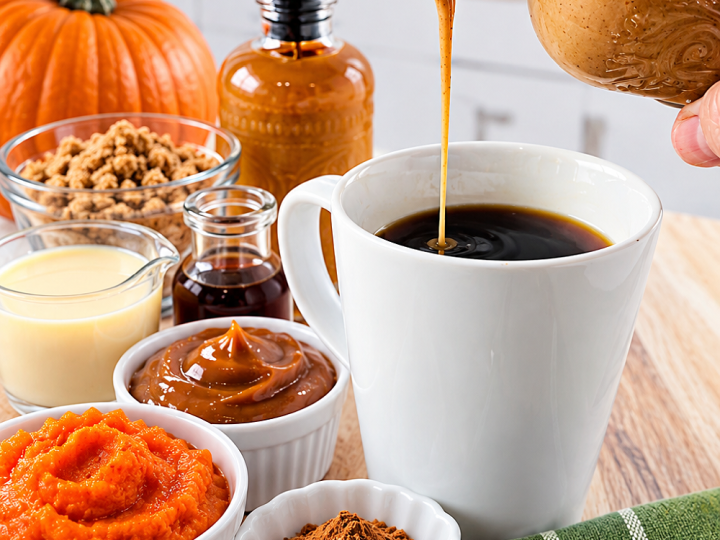
Homemade Pumpkin Spice and Pumpkin Spice Caramel Coffee Creamers
I hope this Peanut Butter Toffee Candy Bark brings a little candy-shop fun to your kitchen. One of the things I love about bark is that there’s no pressure to make every piece look the same. In fact, the crooked pieces with an extra peanut butter cup or a big chunk of toffee are usually the ones everyone reaches for first.
This is the fifth recipe to come from the Black Hollow Roadside Market, and little by little, those shelves are filling with homemade treats. I hope you’re enjoying discovering what’s waiting there as much as I’m enjoying sharing each new recipe with you.
Make a batch for a party, tuck a few pieces into treat bags, add it to a dessert tray, or simply keep some around when you want a little something sweet. However you serve it, I hope you share a few pieces with someone you love and make a little room for the good moments that happen around the table.
Enjoy every chocolatey, peanut buttery, toffee-filled bite. I’ll meet you back at the roadside market for Recipe #6.
Sheryl
LATEST POSTS
Peanut Butter Toffee Candy Bark
Ingredients
- 1 pound semi-sweet chocolate chips
- 2 (1.9-ounce) Butterfinger candy bars, cut into 1-inch pieces
- 3 (1.4-ounce) Heath toffee candy bars, cut into ¾-inch pieces
- 8 full-size peanut butter cups, each cut into 8 wedges
- ¼ cup cocktail peanuts
- 6 ounces white/vanilla candy melts
- share-bag-size Reese's Pieces
Instructions
- Make sure all your candy that needs to be chopped is chopped and ready to go
- Line a baking sheet with parchment paper and set aside.
- Microwave chocolate chips until melted (30-second increments for a total of about 1 min. 30 seconds).
- Pour chocolate onto parchment paper; spread to ¼ inch thickness (about 12x10-inches).
- Sprinkle on the Butterfinger, toffee, peanut butter cups, and nuts, making sure all the candy touches the melted chocolate to adhere.
- Melt white chocolate in the microwave. Microwave 30 seconds at 50% power, stir, then 30 seconds at 50% power, then 20 seconds at 50% power. White chocolate can easily seize.
- Dip spoon into chocolate; wave from side to side over bark, creating zigzag lines.
- Scatter Reese's Pieces over; TIP: make sure candy touches melted chocolate.
- Chill bark until firm (about 30 minutes).
- Slide parchment with candy onto a work surface; peel off the paper.
- Cut bark into irregular pieces.
A Few More Candy Counter Questions Answered
Candy bark is wonderfully straightforward, but working with several kinds of candy and chocolate can bring up questions that aren’t obvious from looking at the finished treat. These details are especially useful when you’re adapting the bark, transporting it, or making it for gifts.
- Can I use chocolate bars instead of chocolate chips for the base? Yes. Semisweet baking chocolate can create an especially smooth base because bar chocolate is formulated differently from chips, which are designed to retain more of their shape during baking. Keep the sweetness level similar to semisweet so the candy toppings remain balanced.
- Why does chocolate sometimes turn gray or streaky after sitting? That’s usually chocolate bloom. Fat bloom can happen when cocoa butter crystals migrate to the surface, while sugar bloom can occur when moisture dissolves sugar and it later recrystallizes. Bloom changes the appearance and sometimes the texture, but it doesn’t automatically mean the chocolate has spoiled.
- Can I temper the chocolate for this bark? Absolutely, though it isn’t necessary for a casual bark you’re chilling and enjoying relatively quickly. Tempering gives real chocolate a shinier appearance, firmer snap, and greater stability at room temperature, which can be useful for gift giving or longer displays.
- Can I use natural peanut butter as an extra drizzle? You can, but natural peanut butter tends to separate and won’t set as firmly as candy coating. If appearance and clean packaging are priorities, a peanut butter-flavored candy coating will usually produce a neater finish.
- Why are some pieces harder to break than others? Toppings change the structure of the chocolate. Sections heavily loaded with nuts, toffee, and candy pieces may break differently from areas containing more exposed chocolate. That’s normal and part of the rustic character of bark.
- Can the bark be mailed as a gift? Cool-weather shipping is the safest choice. Chocolate and peanut butter cups can soften significantly in warm delivery trucks or mailboxes, so the bark should be sealed, cushioned inside a rigid container, and shipped when temperatures are appropriate.
- Can I make smaller pieces for a candy buffet? Yes. Small pieces are actually helpful when the bark is one of several desserts because guests can sample it without taking a large portion. A mixture of small and medium pieces also makes a candy tray look fuller and more inviting.
With the bark made, broken, and ready for sharing, there’s really only one challenge left: deciding who gets the piece with the biggest peanut butter cup.
Comments
Peanut Butter Toffee Candy Bark — No Comments
HTML tags allowed in your comment: <a href="" title=""> <abbr title=""> <acronym title=""> <b> <blockquote cite=""> <cite> <code> <del datetime=""> <em> <i> <q cite=""> <s> <strike> <strong>