





How to Make Christmas Tree Ornaments from Old Tart Tins
After twenty years of use, I decided it was finally time to retire my old tart tins. They had served me well through years of baking, but instead of throwing them away, I gave them a completely new purpose—as charming vintage-inspired Christmas tree ornaments. And I have to say, all those years of wear made them even better for this project.
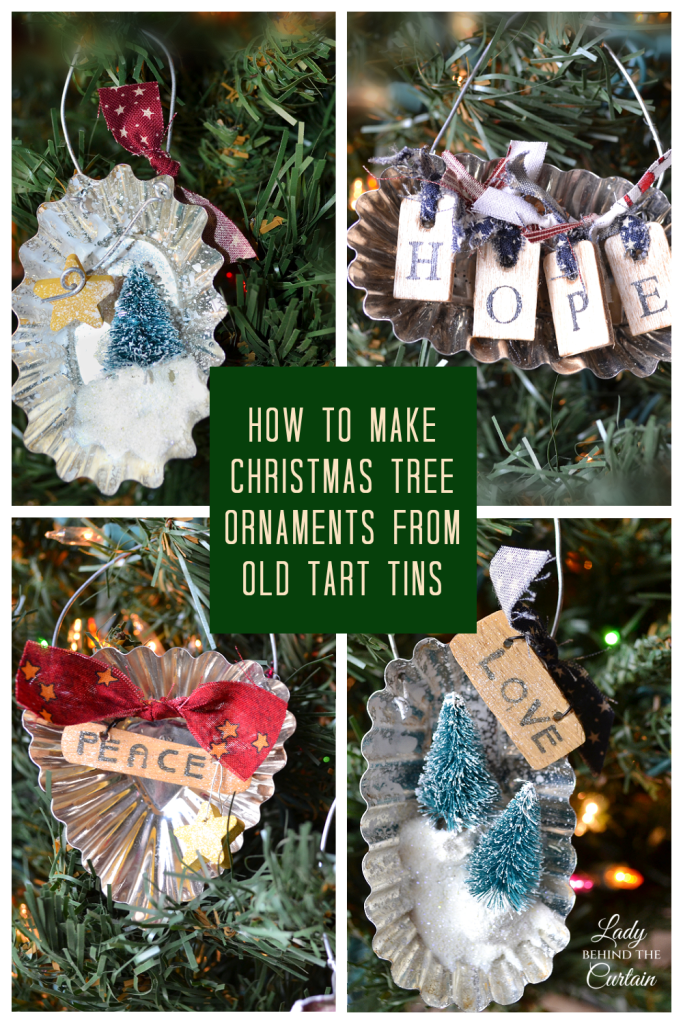
The aged metal, scalloped edges, and imperfections give each ornament a character that would be difficult to recreate with something brand new. Add miniature Christmas trees, sparkling snow, torn fabric, and small wooden embellishments, and an ordinary baking tin becomes a tiny Christmas scene.
This is the kind of Christmas craft I love most. There’s plenty of room for creativity, no two ornaments have to look alike, and you can use many of the little odds and ends already hiding in your craft supplies. Don’t have a collection of twenty-year-old tart tins? No problem. Tartlet tins are still available online, so you can create the same look without waiting two decades to get started.
Why Old Tart Tins Are Perfect for Christmas Ornaments
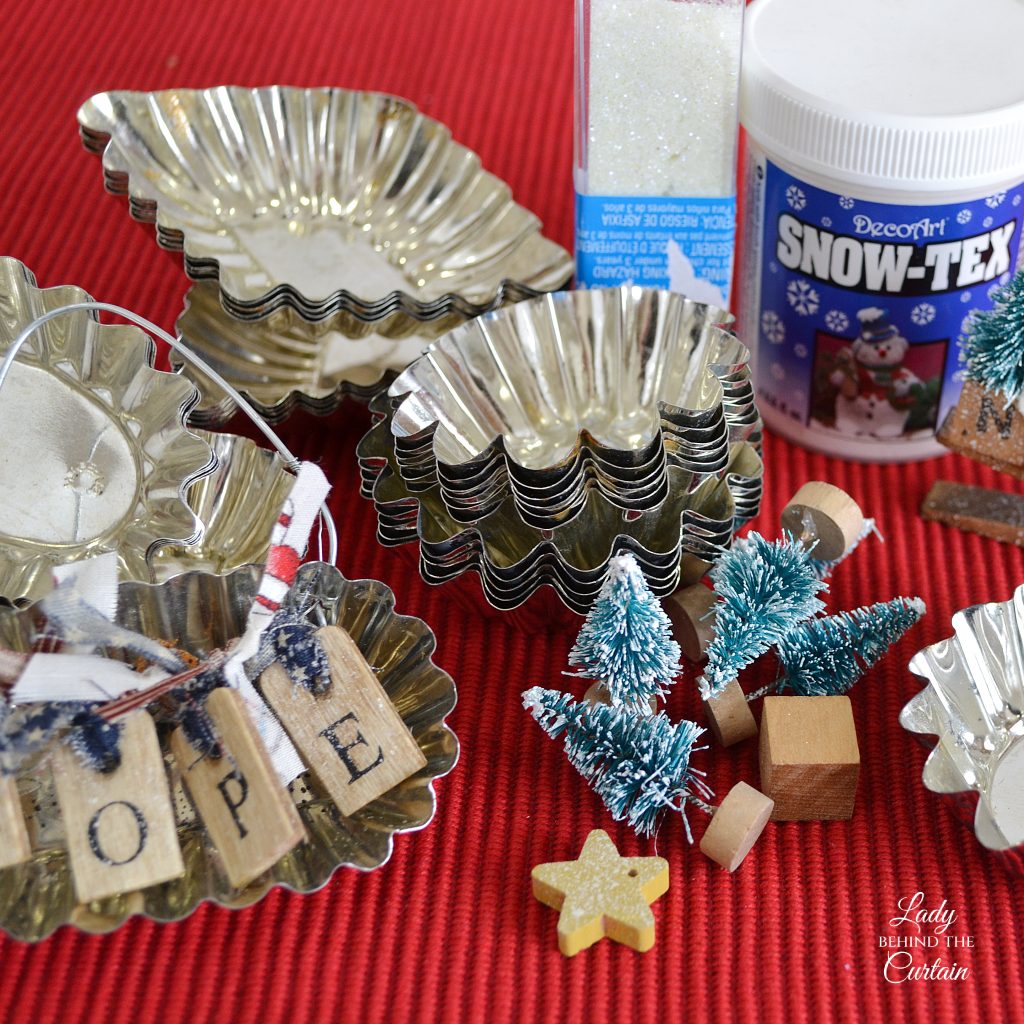
There is something about an old baking tin that immediately gives a Christmas ornament character. The fluted edges create a decorative frame around the miniature scene, and the shallow center is just deep enough to hold small trees and snowy embellishments without making the ornament too heavy for the Christmas tree.
But what I love most is the finish. Years of baking can leave metal tins with scratches, discoloration, and a patina that makes every ornament slightly different. Instead of trying to hide those imperfections, make them part of the design. That worn appearance works especially well with rustic, farmhouse, woodland, and vintage Christmas decorations.
Behind the Curtain: Before getting rid of old baking pans, tins, or cookie cutters, I always take a second look. A little wear and age can be exactly what a Christmas craft needs to give it character.
Create a Christmas Ornament Workshop Before You Begin
The secret to enjoying this project is doing all the preparation before you start designing the ornaments.
- Paint the pieces that need color. Add words or letters to the wooden embellishments. Prepare the fabric strips. Make any necessary holes for hanging the ornaments and attaching the decorations.
- Once all the prep work is finished, spread everything out on the table. Now comes the fun part.
- Instead of stopping every few minutes to paint something, find a tool, or prepare another piece, you can concentrate on combining colors, textures, and decorations. I like to think of it as creating my own little Christmas workshop.
- A pile of tiny trees, wooden stars, signs, letters, fabric scraps, glitter, and snowy embellishments may not look like much individually. Once you start putting them together, however, every tart tin begins to develop its own personality.
How to Design a Miniature Christmas Scene
The easiest way to create a balanced ornament is to start with a single focal point. For my ornaments, the miniature Christmas trees are the stars of the scene. From there, I add smaller details that complement the trees without overwhelming them. A wooden sign, a painted star, a letter, or a torn piece of fabric can add color and personality. The goal isn’t to fill every available space. Leaving some of the metal tart tin visible is what gives the ornament its vintage character.
| Design Element | What It Adds to the Ornament |
|---|---|
| Miniature trees | Height and a natural focal point |
| Wooden signs | A handmade, personalized detail |
| Torn fabric | Softness, color, and texture |
| Wooden stars | A simple Christmas accent |
| Letters | Personality and meaning |
| Snow and glitter | Dimension and Christmas sparkle |
Try arranging the pieces several different ways before committing to a final design. Sometimes, moving a tree slightly to one side or repositioning a small sign is all it takes to make the entire ornament look more balanced.
The Little Details That Make the Biggest Difference
One of the things I’ve learned from years of crafting and decorating is that the smallest details are often what make a project feel finished. For these ornaments, it’s the combination of snow, sparkle, and texture. The dimensional snow forms the base of the miniature scene, but adding a few sprinkles of iridescent glitter while the snow is still wet adds an extra layer of Christmas magic. The glitter catches the tree lights without taking over the ornament.
The speckled snow is another small detail that adds so much character. Tiny droplets of white paint scattered across the trees, signs, and metal make the ornament look as though it has been sitting outside during a gentle snowfall.
Behind the Curtain: When working with glitter, I think less is more. A few sparkles mixed into the snow catch the Christmas lights beautifully while still allowing all the handmade details to stand out.
Stamped Letters or Handwritten Signs?
Small wooden signs are an easy way to personalize these ornaments with Christmas words, names, or initials. I prefer letter stamps and a stamp pad because they create clean, crisp lettering while still keeping the handmade look. A black permanent marker is another option, especially if you have nice handwriting. However, unfinished wood can absorb ink, causing it to spread and making the letters look less defined.
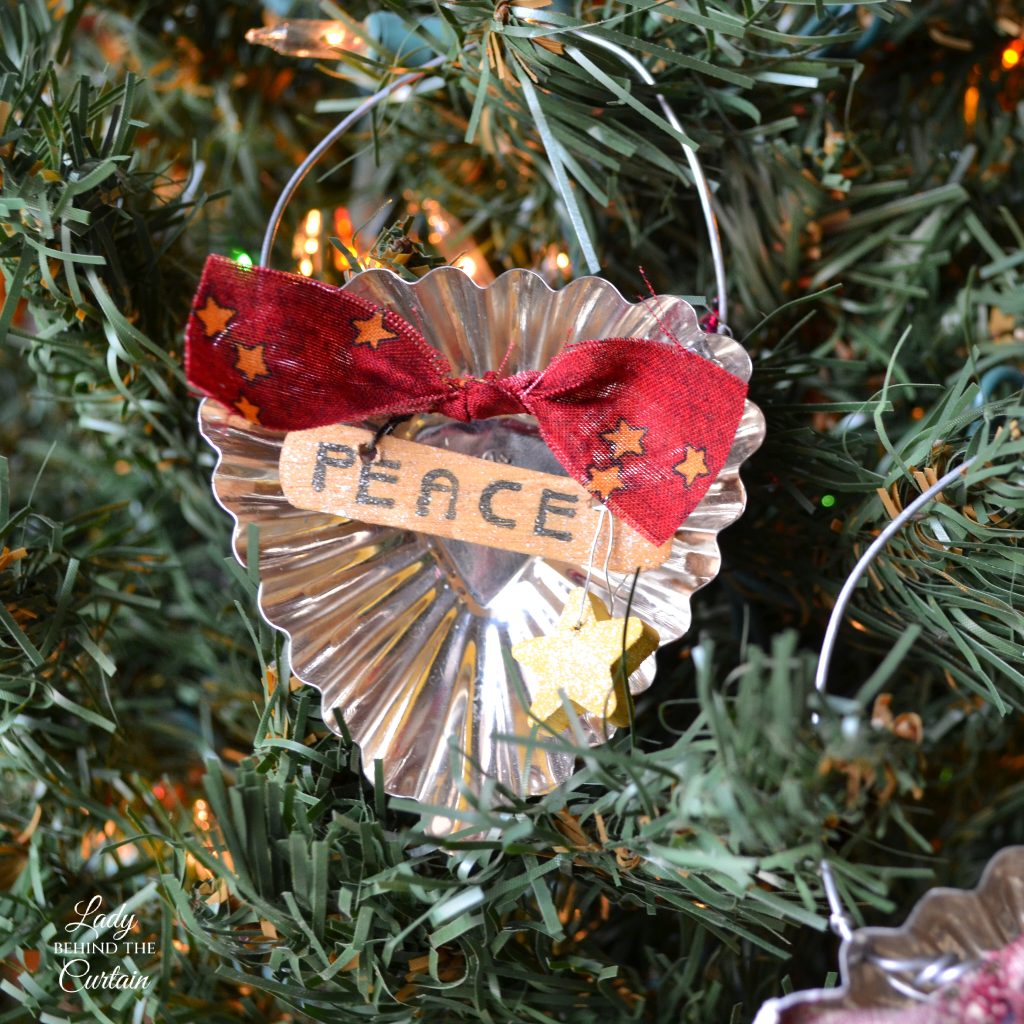
If you decide to use a marker, test it on a scrap piece of wood first. This is also a wonderful opportunity to personalize the ornaments. Add a family name, a child’s initial, the year the ornament was made, or a short Christmas word. Small details like these can turn a simple craft project into a keepsake.
Give Every Ornament Its Own Personality
You could make a dozen of these ornaments and never create the same design twice. That’s one of the reasons this project is so much fun. One ornament might have a snowy woodland feel with several miniature trees. Another could feature a bold wooden letter and a rustic fabric bow. A third might have a small Christmas sign hanging above the tart tin. Rather than deciding that every ornament needs to match, choose a general style and let each one be different.
| If You Love This Christmas Style | Try This Combination |
|---|---|
| Rustic | Torn fabric, wooden signs, and simple trees |
| Vintage | Aged metal, muted colors, and plenty of snow |
| Woodland | Groups of miniature trees and natural wood |
| Farmhouse | Checked fabric, wooden letters, and white accents |
| Personalized | Names, initials, dates, and meaningful words |
A collection of coordinating but different ornaments is often much more interesting than a set where every piece looks exactly the same.
Don’t Overlook the Back of the Ornament
The front may get all the attention, but the back of the tart tin is a great place to add a finishing touch. Consider adding the year, the recipient’s name, or a short handwritten message. If the tart tins belonged to someone special or were used for family baking traditions, you could even include a small note about their history. Imagine giving an ornament to a family member and writing on the back that the tart tin had been used in your kitchen for 20 years. Suddenly, it isn’t simply a Christmas decoration. It has a story.
A Handmade Christmas Gift with So Many Possibilities
These ornaments would make wonderful small Christmas gifts because they feel personal without requiring an elaborate gift basket or expensive presentation.
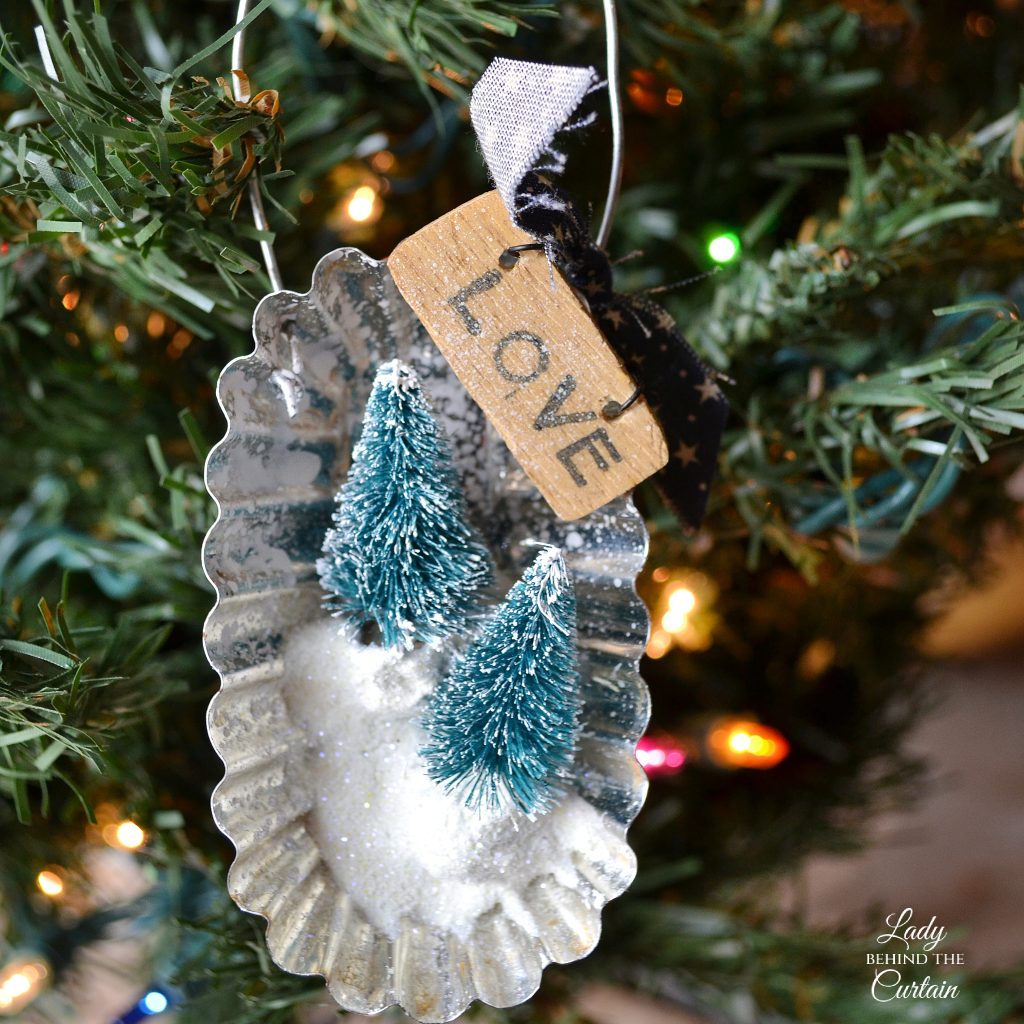
- Tie one onto a package of homemade cookies for a neighbor.
- Add one to a teacher’s Christmas gift.
- Bring one along with a holiday treat as a hostess gift.
- The ornament can be enjoyed long after the cookies are eaten and the wrapping paper is gone.
- For an extra-special touch, personalize the ornament with a name, initial, or the year.
Behind the Curtain: When I give a small handmade Christmas gift, I love including something the recipient can bring out again year after year. An ornament doesn’t have to be expensive or elaborate to become part of someone’s Christmas traditions.
Turn the Ornaments Into Christmas Party Favors
I especially love these tart tin ornaments as party favors. Instead of setting favors in a basket by the door, make them part of the Christmas decorations. Hang the ornaments from a small tabletop tree, display them across a garland, or use them as part of the place settings. At the end of the party, invite each guest to choose an ornament to take home. The favor becomes part of the party decor, and you don’t have to find another place to display it.
You could also add a small tag with the date of the party or personalize the ornaments for each guest. This idea would work beautifully for a Christmas luncheon, cookie exchange, ornament-making party, neighborhood gathering, or family Christmas celebration.
Make It an Ornament-Making Party
Why make the ornaments by yourself when you can turn the project into a Christmas gathering? Do all the messy and tool-related preparation ahead of time, then set out the tart tins and decorations for your guests. Use small bowls, trays, or muffin pans to organize the miniature trees, wooden embellishments, fabric pieces, and other decorations. Then add Christmas music, something warm to drink, and a few holiday treats.

Everyone can spend the afternoon creating an ornament to take home. This would be especially fun for a group of friends who enjoy crafting together. Because there is no single design everyone has to follow, experienced crafters and beginners can enjoy the project.
What I Learned While Making These Tart Tin Ornaments
The biggest lesson is not to rush the design. Arrange the decorations before attaching anything. Try different combinations. Move pieces around. Step away for a minute and look at the ornament again. It’s much easier to change your mind before everything is permanently in place.
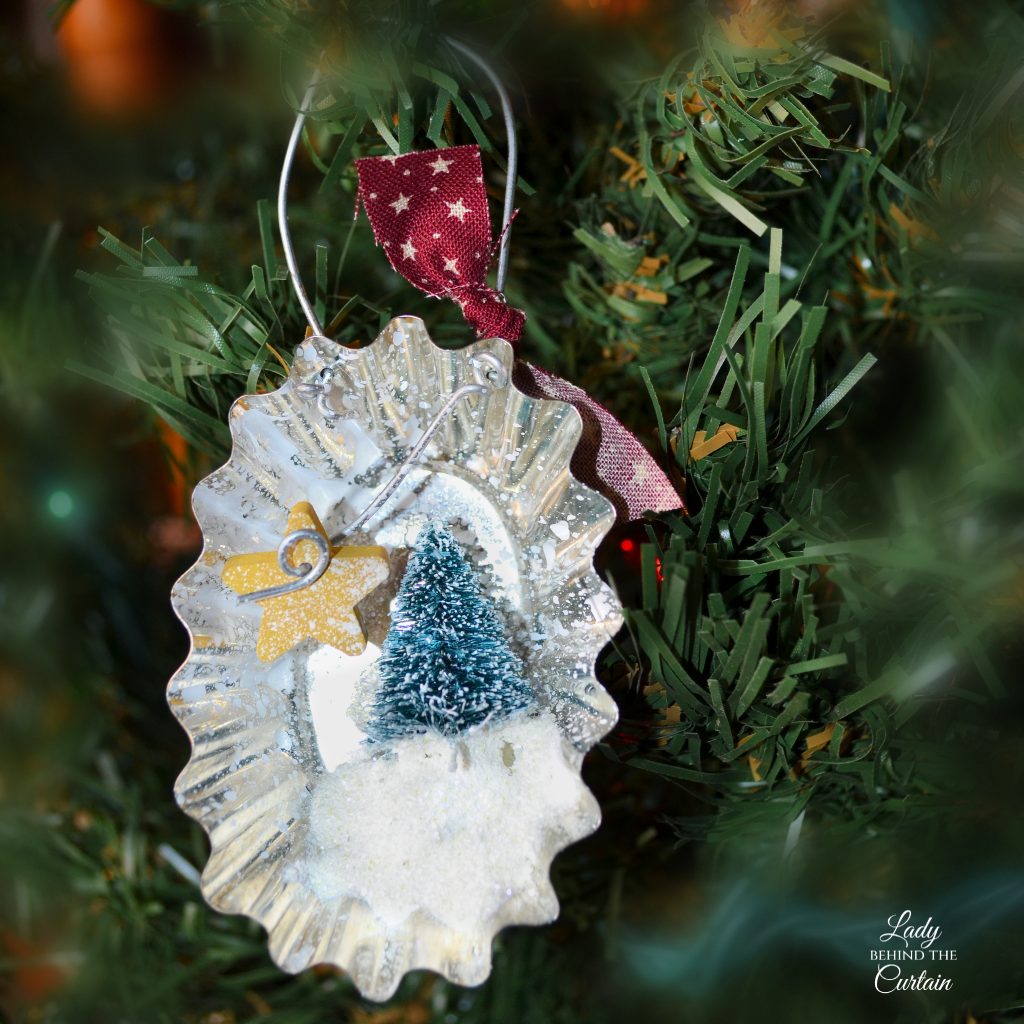
I also discovered that texture is what brings these ornaments to life. The combination of cold metal, soft, torn fabric, rough wood, dimensional snow, and sparkling glitter creates far more visual interest than decorations with the same finish.
And finally, embrace imperfection. The tart tins are old. The fabric edges are torn. The snow isn’t perfectly even. The wooden pieces have a handmade appearance. That’s exactly what makes them charming.
From the Kitchen Cabinet to the Christmas Tree
For twenty years, these tart tins had one job. They helped me bake. When it was finally time to retire them, I could have thrown them away and never thought about them again. Instead, they became part of something completely different. Now, every scratch, mark, and imperfection adds to their charm.
That’s what I love about this Christmas craft. It takes something ordinary and gives it a new story.
Whether you hang the finished ornaments on your own tree, give them to teachers and neighbors, bring one as a hostess gift, use them as Christmas party favors, or gather a group of friends together for an afternoon of crafting, these old tart tins get to be part of Christmas for many more years to come.
ENJOY CREATING! 🎄
Sheryl
How to Make Christmas Tree Ornaments from Old Tart Tins
Materials
- tart tins
- 22 gauge wire
- snow-tex (fake snow)
- iridescent glitter
- super glue
- white craft paint (for the speckled snow)
- yellow craft paint (for the stars)
- assorted decorations (fabric, wooden signs, wooden letters, wooden stars, and small mini trees)
Tools
- drill
- small drill bit
- wire cutters
- pliers
- small paint brush (for the snow)
- old toothbrush (for the specks of snow)
- letter stamps
- stamp pad
Instructions
- NOTE: MOST OF THE SUPPLIES ARE FROM MICHAEL'S. Get everything ready before assembling the ornaments.
- Paint any items that need paint (like the stars)
- Add letters to the wooden signs. This can be done with letter stamps and a stamp pad, or, if you have good handwriting, a black permanent marker (note: the marker might bleed into the wood and not look as crisp as the stamps).
- Rip pieces of fabric for the bows.
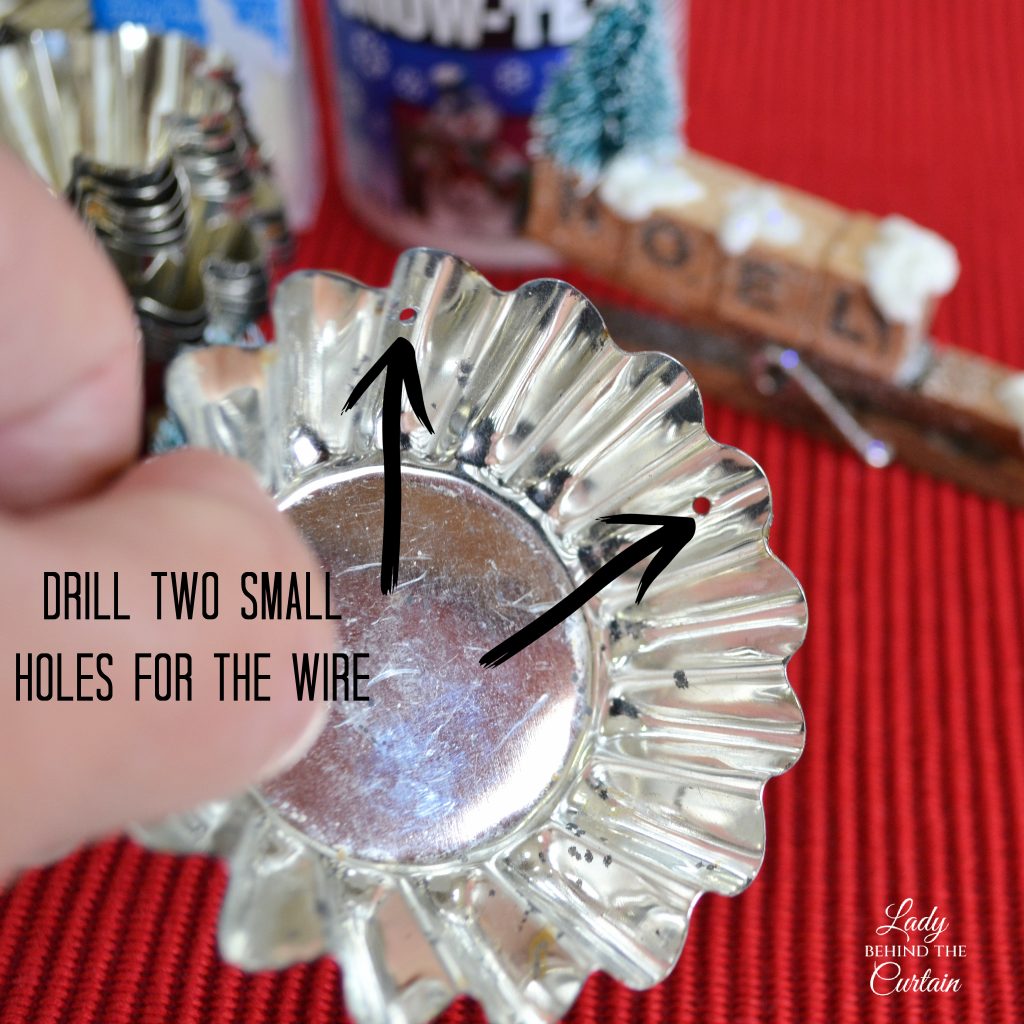
- Drill the holes in the tins and in the wood. Use a bit that is slightly larger than the wire.
- Thread the wire through the holes, then use pliers to twist the back so the wire stays in place.
- NOW IT'S TIME TO CREATE! Tip: When adding the snow, sprinkle a few sparkles of glitter on the wet snow.
- For the snow-speckled look, put some white paint on the toothbrush and flick it onto your skin with your thumb.
- ENJOY CREATING! 🎄

Questions About Making Old Tart Tin Christmas Ornaments
Before you start turning old tart tins into Christmas ornaments, you may have a few questions about choosing decorations, personalizing your designs, and getting the best results. Here are answers to some of the most common questions to help you create ornaments filled with vintage Christmas charm.
- Do the tart tins have to be old? Not at all. Old tart tins naturally have a beautiful aged finish, but new tartlet tins will work too. If you don’t have any tucked away in your kitchen, they can still be purchased online.
- How can I keep the ornaments from looking too cluttered? Choose one main focal point and build around it. Allow some of the tart tin to remain visible instead of trying to cover every empty space.
- What can I use to personalize the ornaments? Wooden letters, small signs, names, initials, dates, and short Christmas words are all easy ways to make each ornament unique.
- How do I get a crisp look when adding words to unfinished wood? Letter stamps and a stamp pad usually create cleaner results. Permanent markers can bleed into unfinished wood, so test the marker first if you decide to use one.
- How can I make the snow look more realistic? Use more than one type of snowy detail. Dimensional snow creates texture, iridescent glitter adds sparkle, and tiny speckles of white paint give the entire scene a freshly snowed-on appearance.
- Can I make these ornaments with children? Children can enjoy choosing decorations and designing their miniature scenes. Any preparation involving drilling or tools should be completed by an adult in advance.
Such a clever idea! They turned out so cute!
I love these they are so adorable. I bet when the lights shine on them they looks fantastic.
Lisa
Creative Raisins
These out shine modern ornaments at night.They reall reflect light.
Thanks Susan….I love the little scenes.
Where do you purchase them
Hi Trish, I’ve had mine for many years. I purchased them from a kitchen gadget store. You can also find them at antique stores. Here’s a link on Amazon Norpro Tarlet Tins
Love the tart tins
Awww…Thank You Cathie! ♥
Love, love, love these!!! Thank you for sharing your creativity with us. These are beautiful. I’m totally going to make some!! ????☃️❄️????????????
Awww…You’re so sweet Lorraine. I’m glad you like the ornaments!