





Hawaiian Sunset Decorated Pretzel Rods
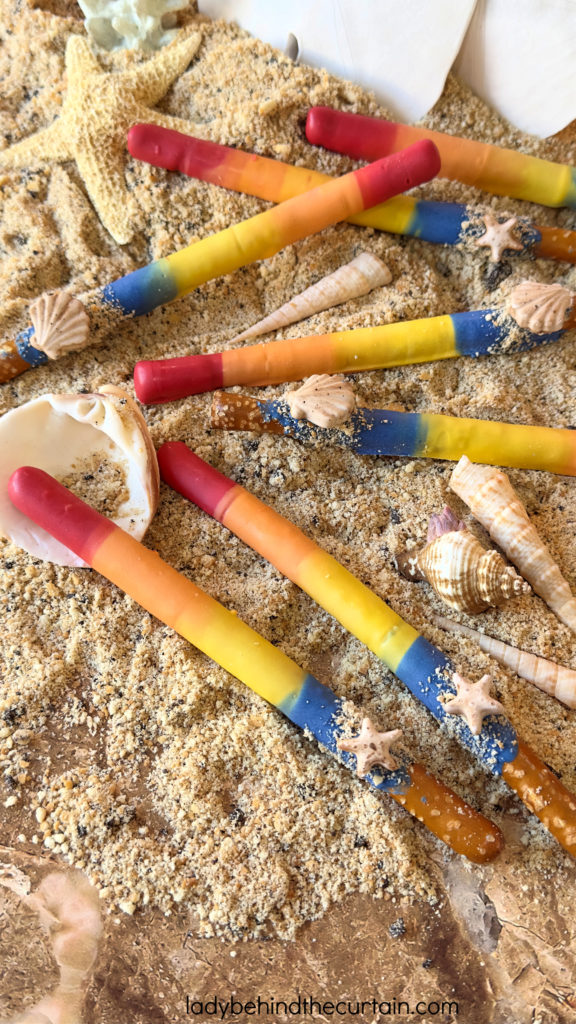
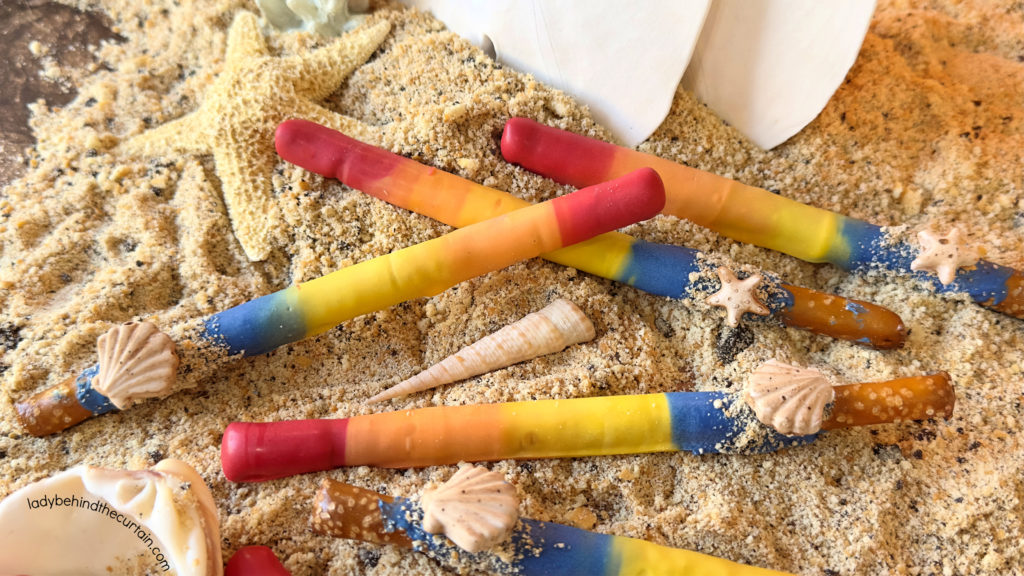
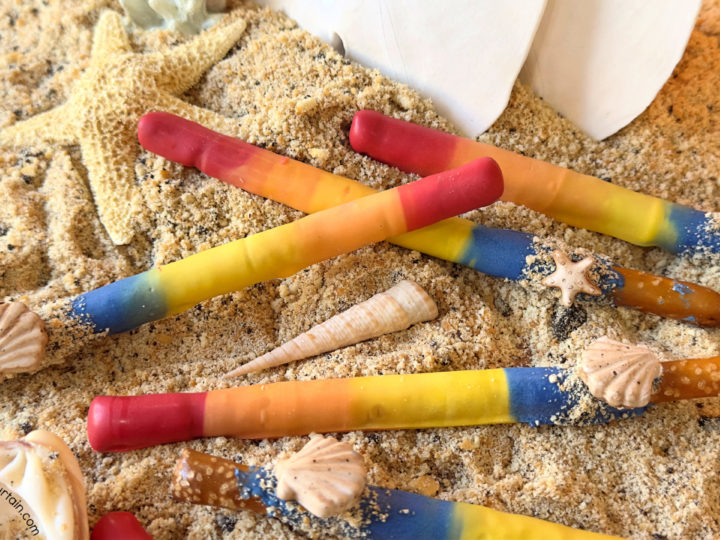
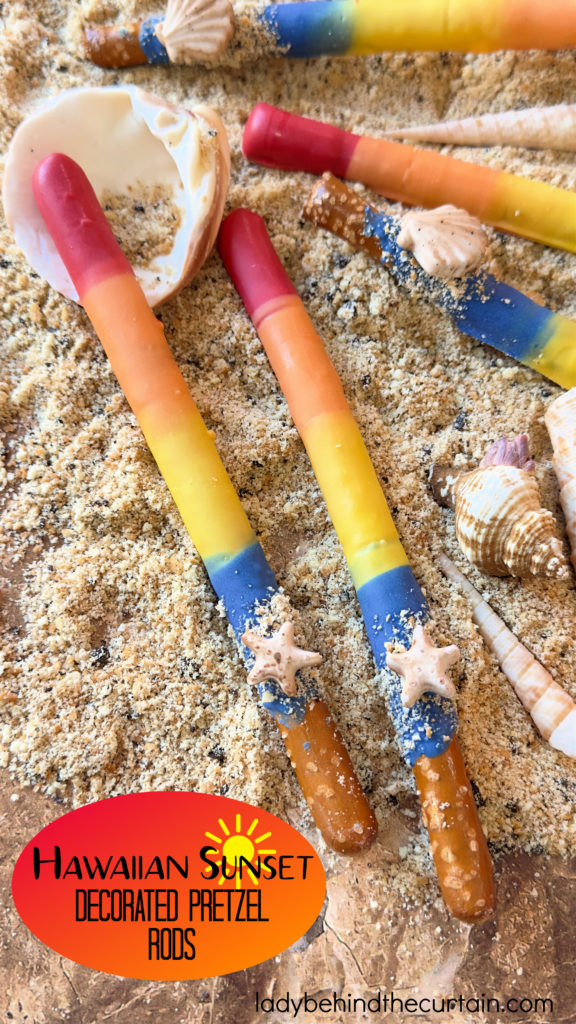
Transport your taste buds to the islands with these Hawaiian Sunset Decorated Pretzel Rods—a dazzling treat inspired by the vivid, melting hues of a tropical sunset. These sweet-and-salty delights combine vibrant color, crunchy texture, and just the right touch of whimsy.
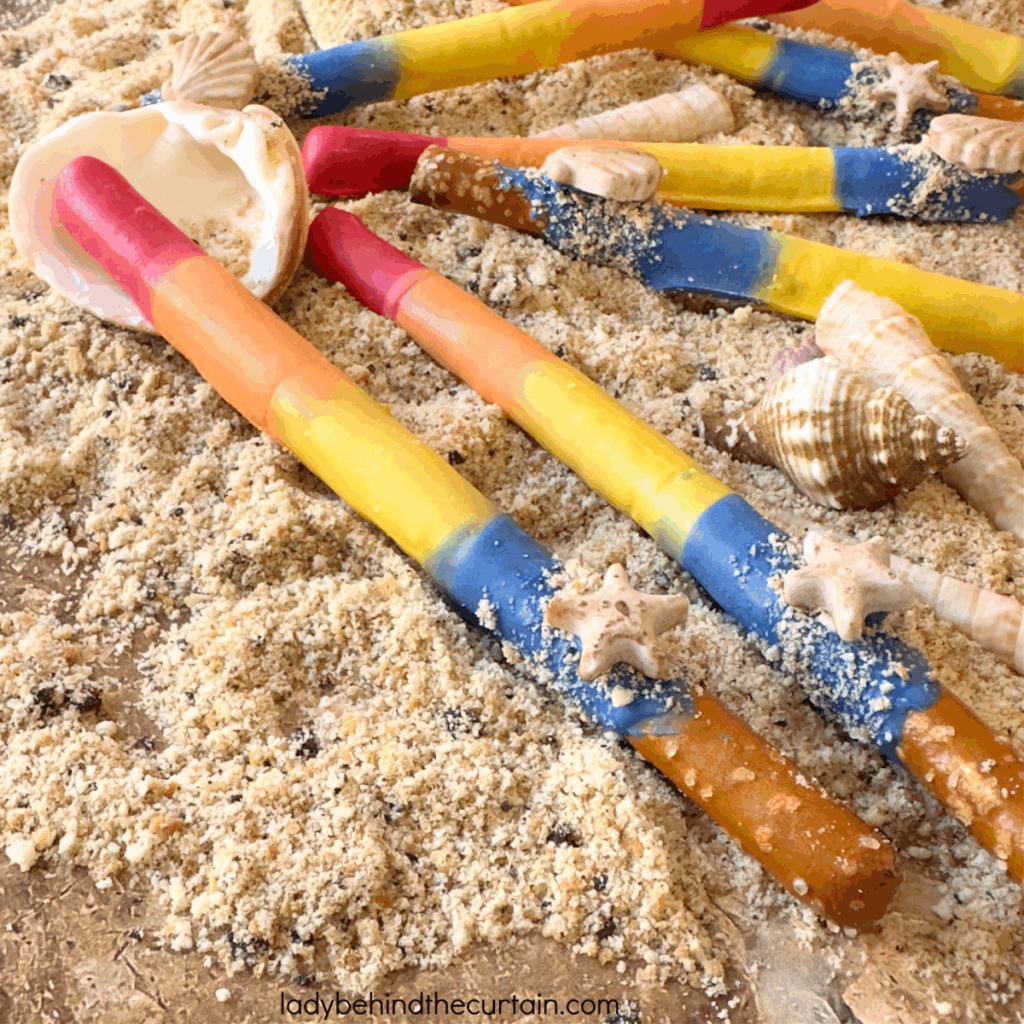
To complete the scene, the base of each pretzel is sprinkled with a layer of cookie crumb sand and topped with an edible candy shell. Perfect for beach-themed parties, luau events, or simply savoring summer any time of year, these tropical treats are as gorgeous as they are delicious.
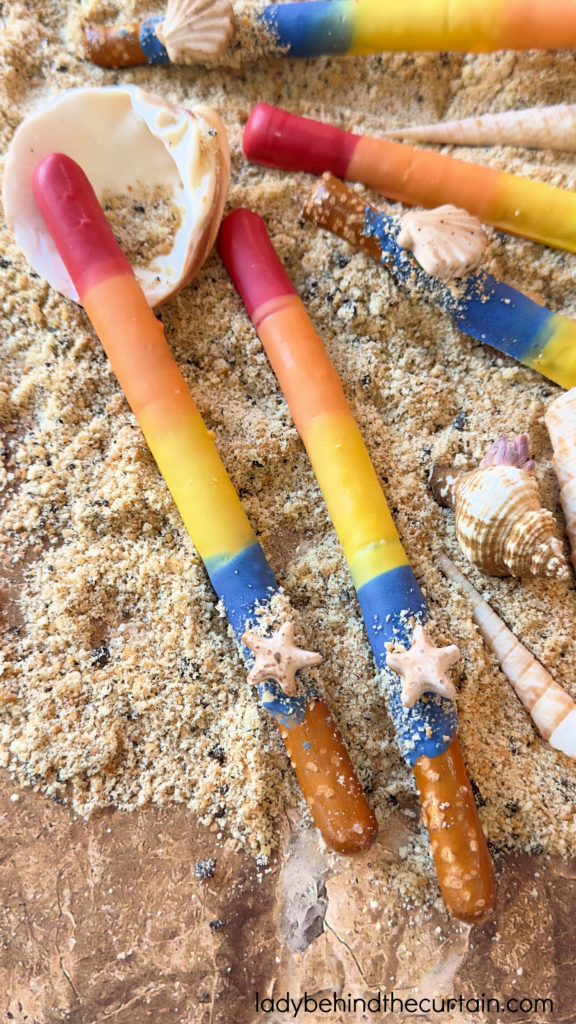
In this pretzel decorating post, you will learn the simple process of coating pretzels with four layers of color. Whether you’re planning a Luau, Pool Party, or Beach themed Party, get ready to impress your family and friends with these fun and easy-to-make sunset pretzels. With the right tools and my easy step-by-step instructions, you will become a master of making pretzels in no time.
How to Make Multi-Colored Decorated Pretzels
Capture the essence of a tropical sunset with these fun, delicious, and easy-to-make sweet and salty treats. Complete with edible sand, candy seashells, and starfish.
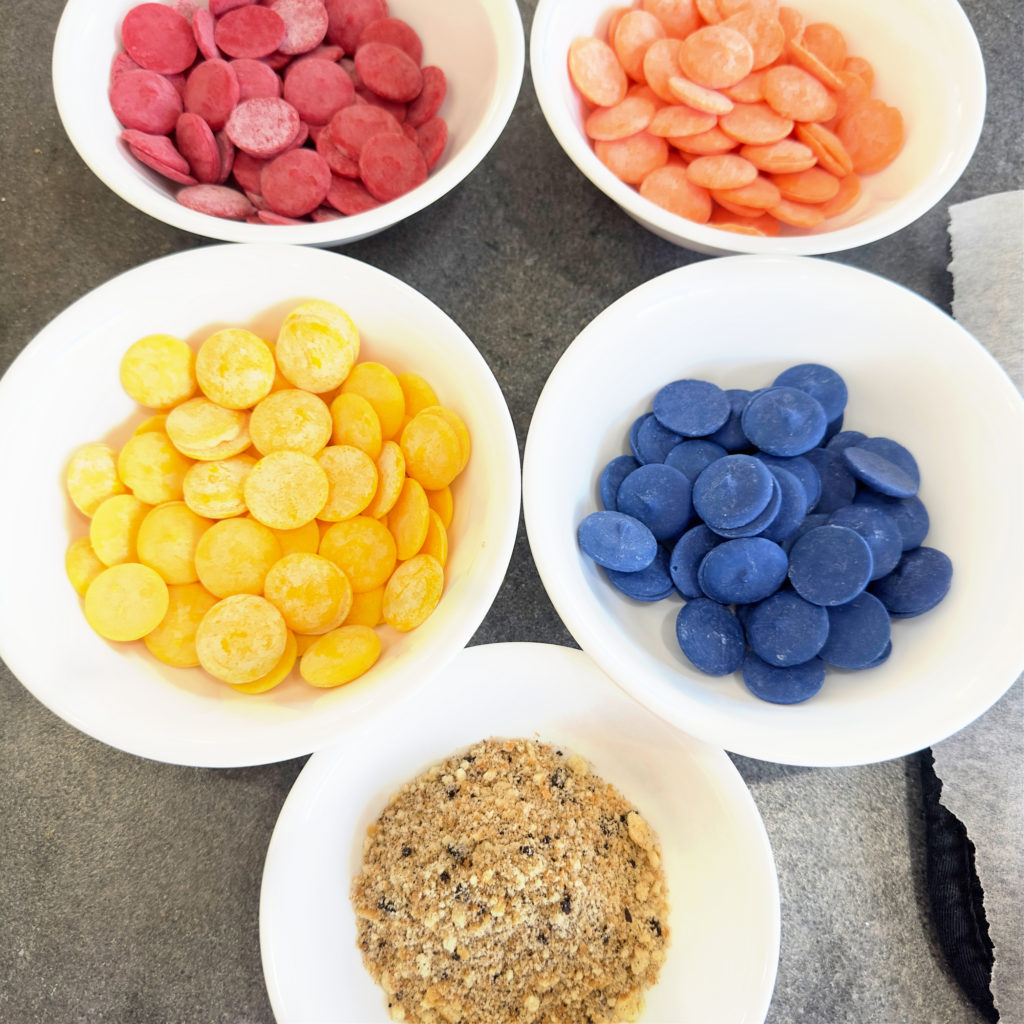
TROPICAL DECORATED PRETZELS INGREDIENTS LIST- full printable recipe below on the recipe card
- 6 ounces of red candy melting wafers
- 6 ounces of orange candy melting wafers
- 6 ounces of yellow candy melting wafers
- 5 ounces of dark blue candy melting wafers
- 6 ounces of white candy melting wafers (for the shells)
- optional cocoa powder (for the shells)
- ½ cup edible sand
SUNSET DECORATED PRETZEL INSTRUCTIONS
- If using a heating pad, turn it on. As the candy is melted and ready for use, place the bowls on the heating pad to keep the candy melted.
- Add the red melting wafers to a medium microwave-safe bowl. Heat for 1 minute, stirring until melted and creamy. If the candy is not melted, continue heating in 15-second intervals.
- Continue this process with the remaining colors (orange, yellow, and dark blue)
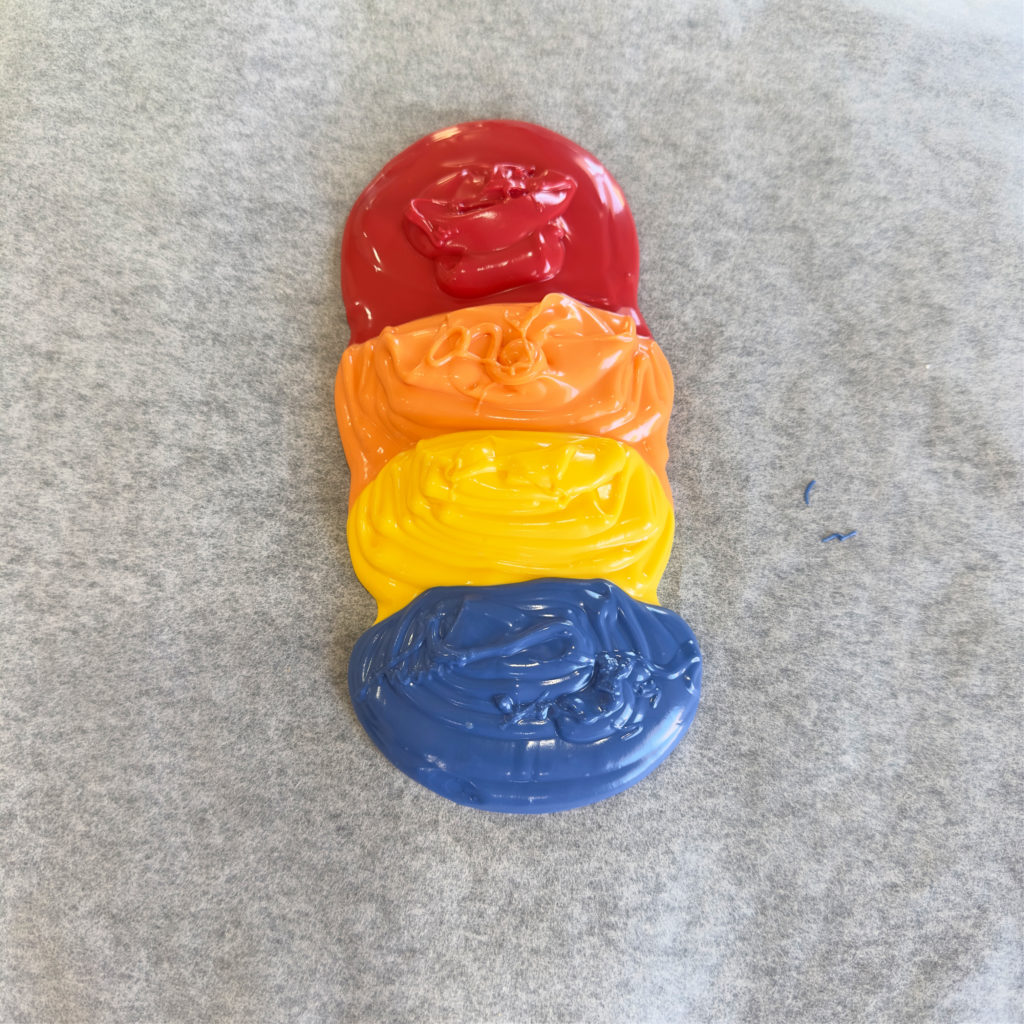
- Once all the candy is melted, place a piece of parchment paper on the heating pad (if using one) or the kitchen counter.
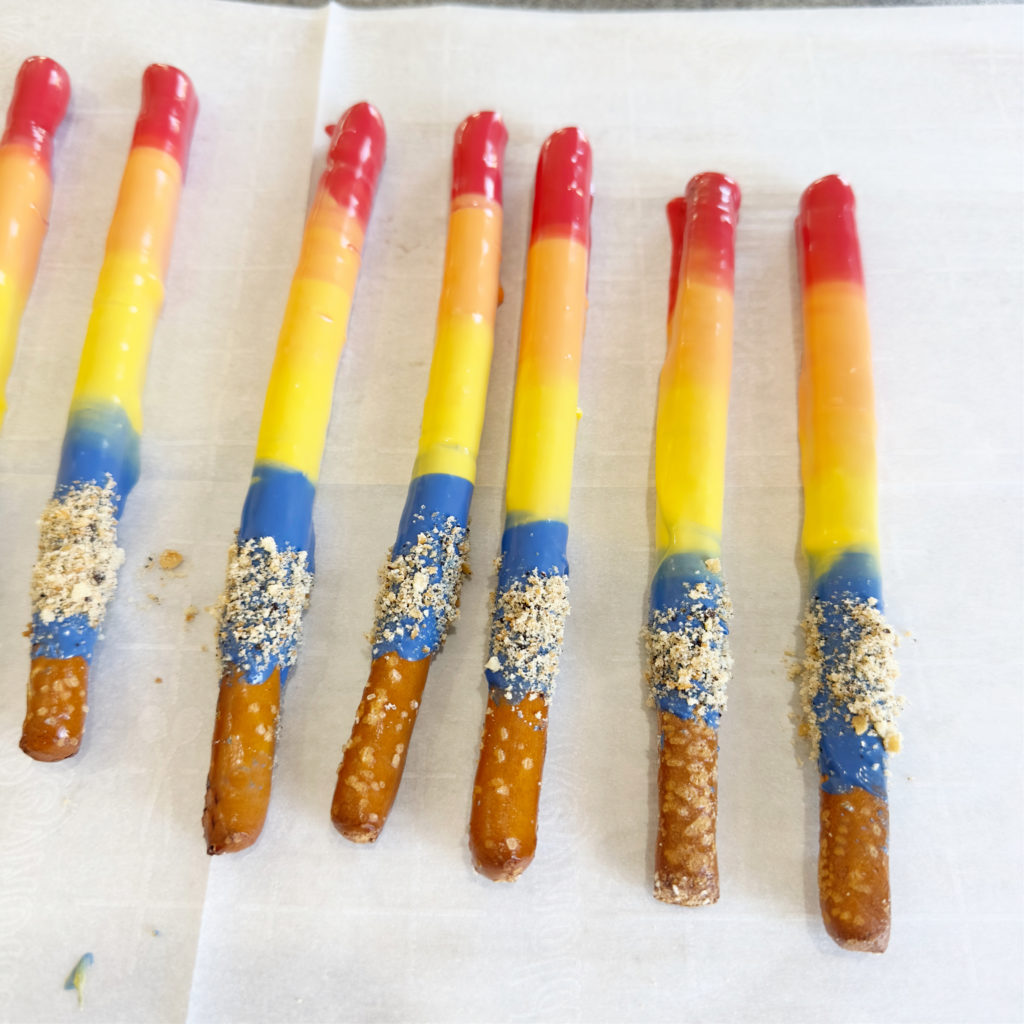
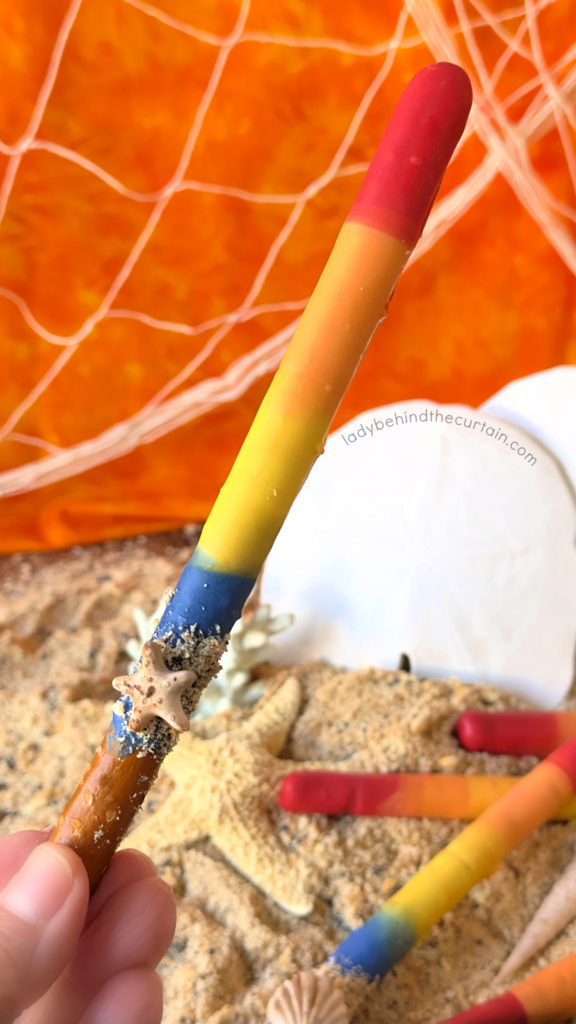
- Pour half of the red starting at the top, where the pretzel rod will be, then half of the orange with a little touching the red, half of the yellow touching the orange, and at the bottom, half of the blue touching the yellow. The candy should resemble stripes of candy, with a little of each color touching the next.
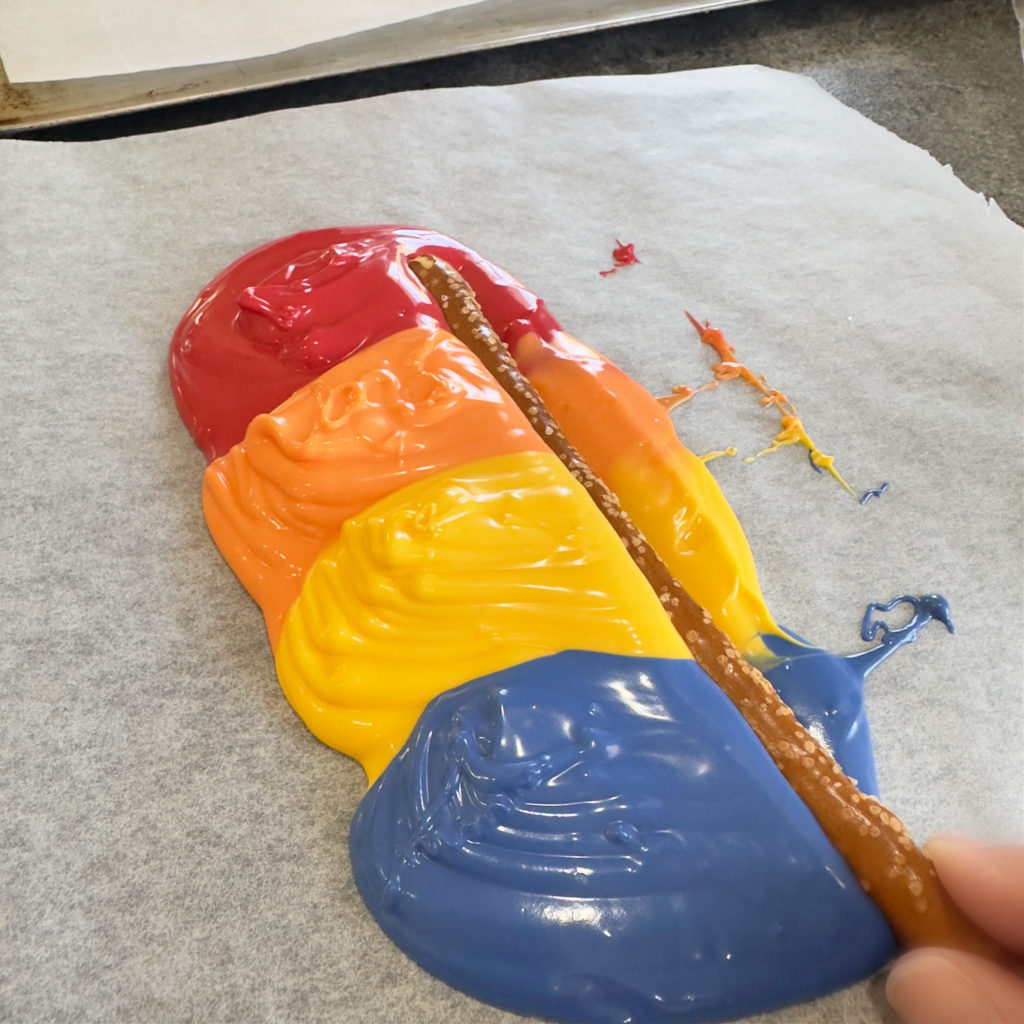
- Lay the pretzel on the melted candy in the position of the colors you want. Roll the pretzel until coated, move it to the side to let any extra candy coating drip off, and place it on a cookie sheet lined with parchment paper. Sprinkle some of the edible sand over a part of the dark blue melted candy, leaving some of the blue visible. Set aside to harden. For a quicker result, refrigerate for 10 minutes.
- DON’T GET RID OF THE MELTED CANDY. Dip the backs of the candy shells and starfish in the blue melted candy and add one to each pretzel on top of the sand. Hold for a few seconds until the candy adheres to the shells or starfish.
How to Make Edible Sand
- Nilla Wafers
- Oreo Cookie Thins
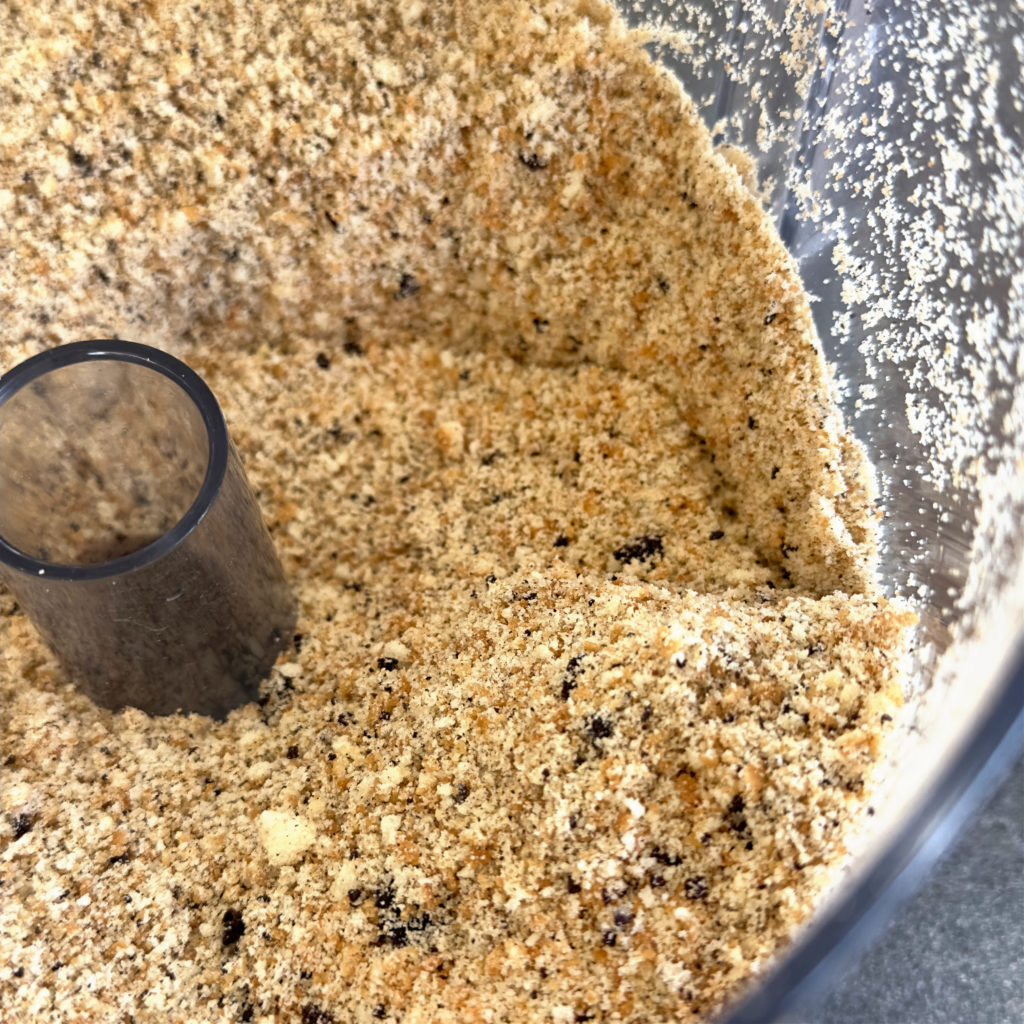
- Add the cookies (vanilla wafers and Oreo cookies) to a food processor bowl.
- Pulse until the cookies become finely ground, with a few chunks remaining.
How to Mix Melting Wafers to Make Brown
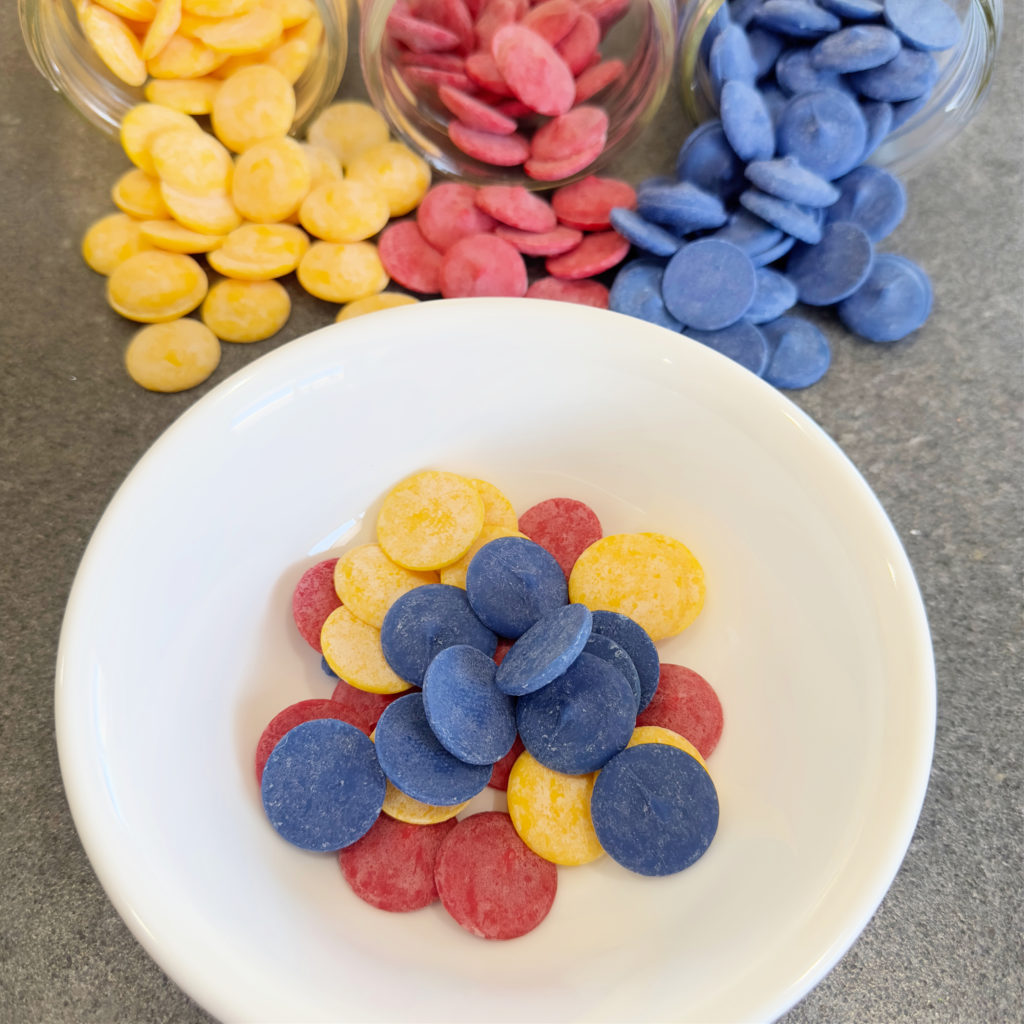
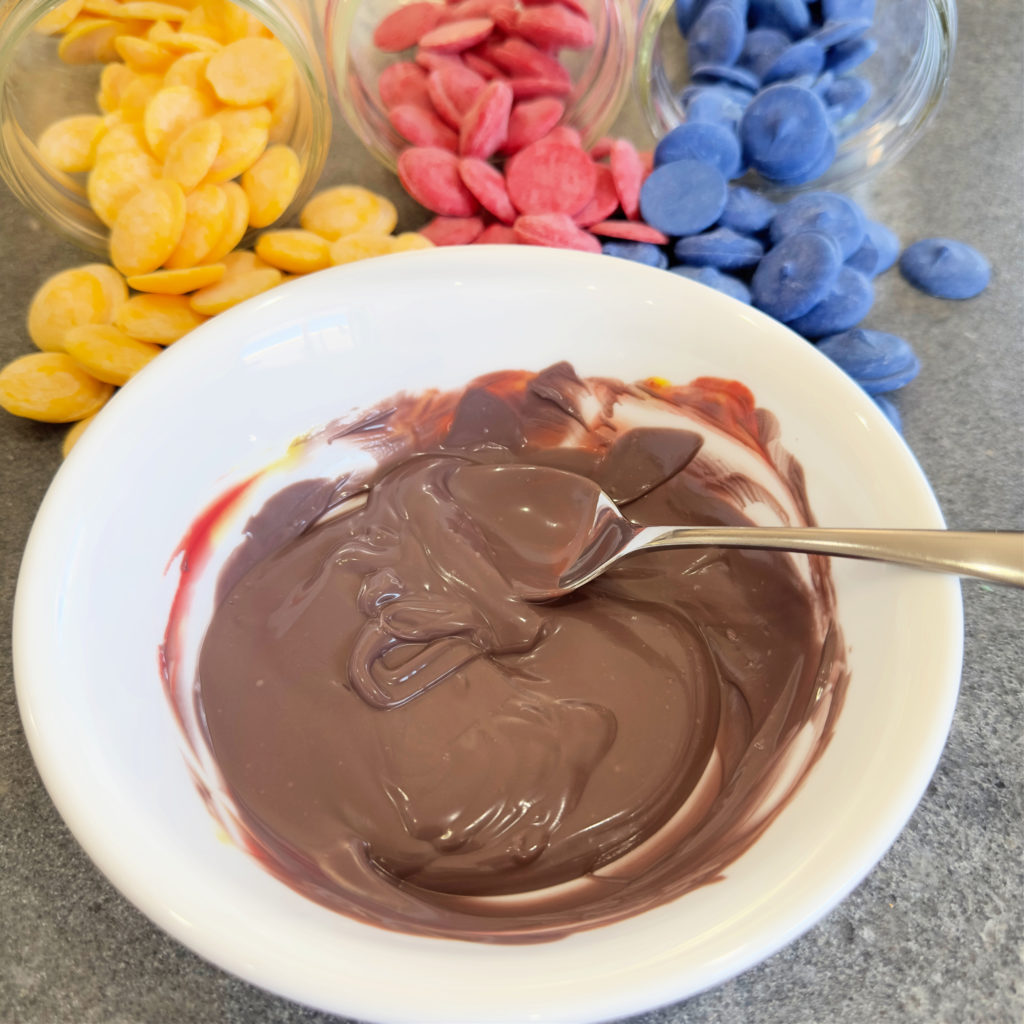
Using a combination of colored melting wafers is a great way to customize your project without adding a chocolate flavor or using oil-based candy coloring. All you need are equal parts red, yellow, and blue. Microwave on high for 1 minute, stirring until melted and creamy. If the candy is not melted, continue heating in 15-second increments until it is. NOTE: The blue I used was a dark blue. I combined all the colors at once to get a dark brown color. Another option would be to melt each color separately and combine them in a separate bowl, a little at a time, until the desired brown is reached.
How to Make Molded Candy Shells and Starfish
Not only does the addition of an edible shell add dimension to your pretzel, but it also adds another layer of sitting on a tropical island. This is the silicone mold I used for the shells and starfish→ 3D Summer Beach Theme Silicone Mold
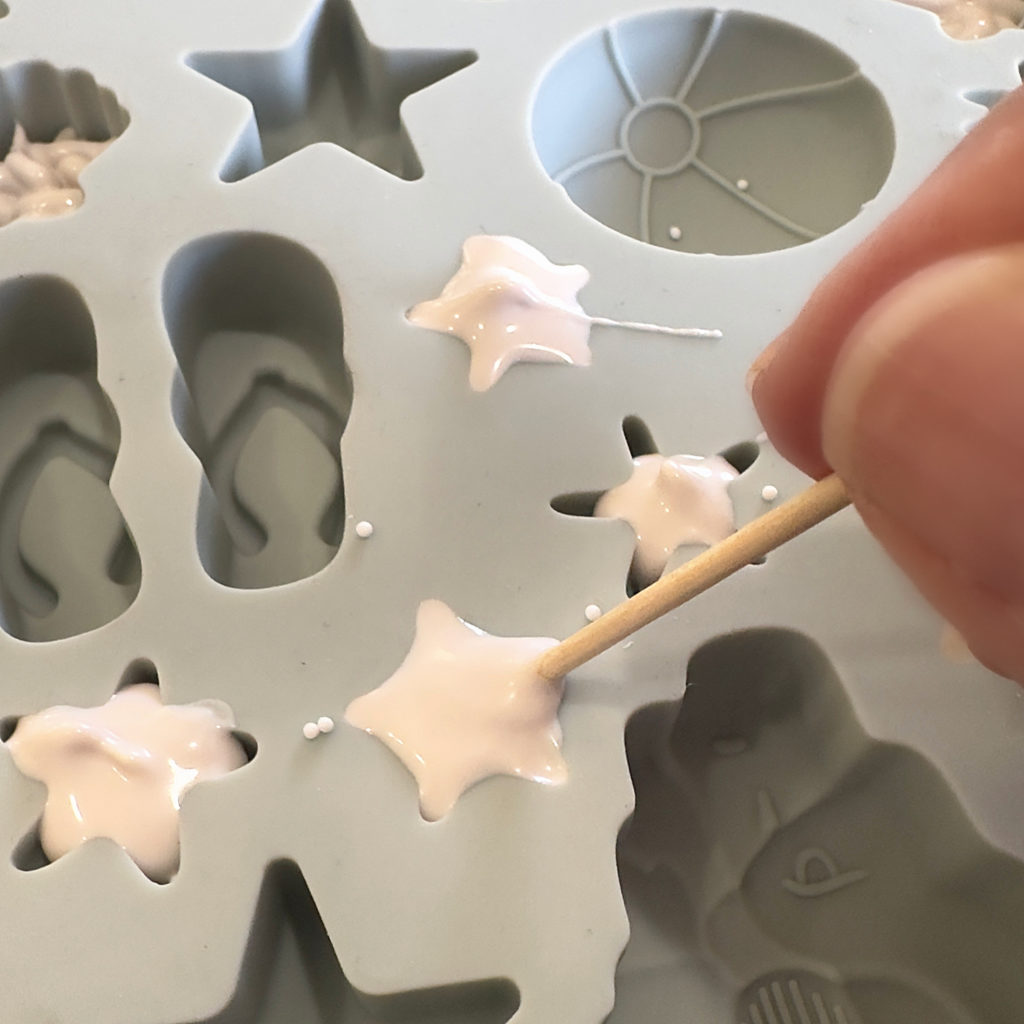
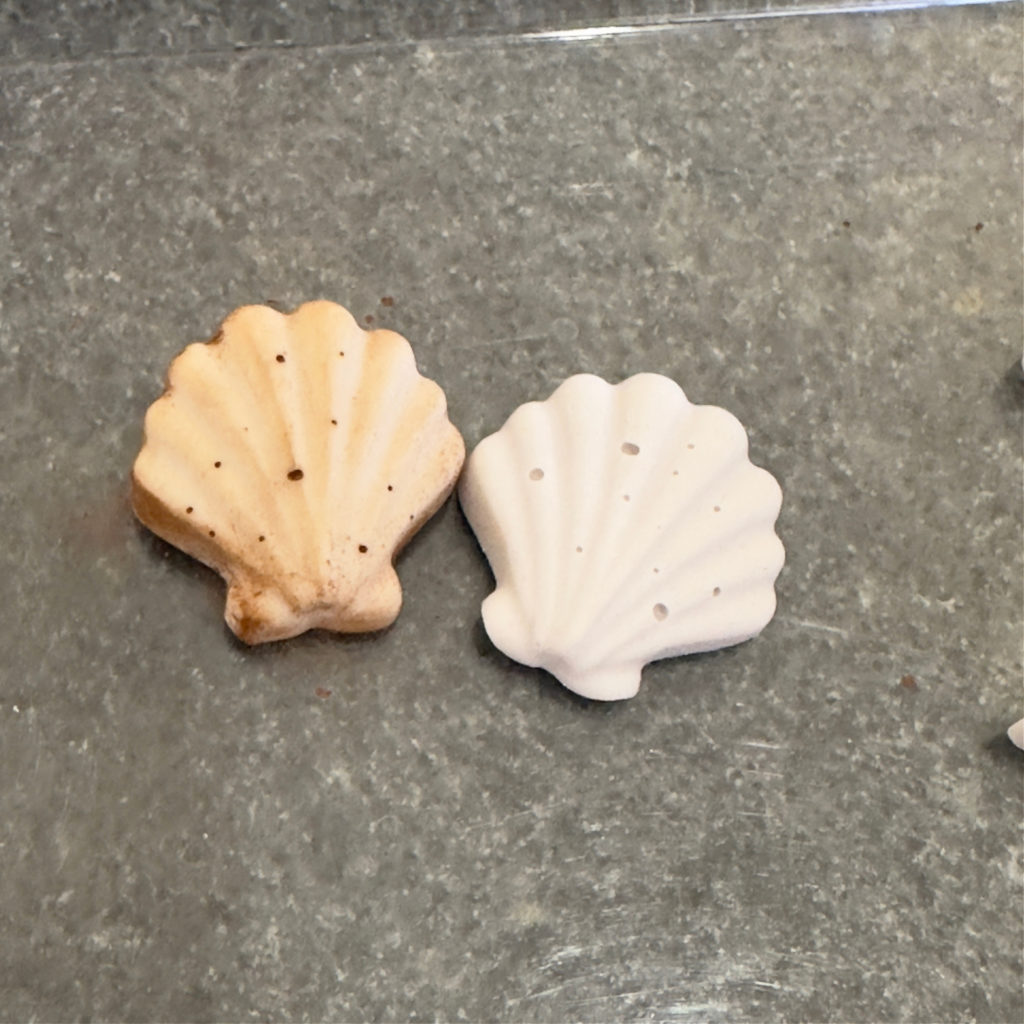
- Pour the white melting wafers into a medium-sized microwave-safe bowl. Heat for one minute, stirring until melted and creamy. NOTE: If the candy is not melted, heat in 15-second increments.
- Place a piping bag into a cup, pulling the sides over the top of the cup to secure it. Pour melted candy into the piping bag. OR use my favorite, a squeeze bottle. For the piping bag, snip a small portion of the end. TIP: To help eliminate bubbles, press the piping bag or the tip of the squeeze bottle against the bottom of the mold. A toothpick works well, too. Fill each cavity with the melted candy, and lightly tap the mold on the counter. Place in the refrigerator to harden.
- Remove the candy from the mold. Use a clean paintbrush to brush the cocoa powder over the shells and starfish. NOTE: The cocoa powder will fill the air pockets if you get air bubbles.
- TIP: Place finished candy in a bowl; the countertop will melt the candy.
NOTE: IF YOU WOULD LIKE YOUR CANDY TO BE BEIGE OR A MIXTURE OF WHITE AND BROWN MARBLED TOGETHER, TRY ADDING BROWN MELTING WAFERS. LOOK ABOVE FOR THE INSTRUCTIONS TO MAKE BROWN MELTED CANDY WITHOUT USING CHOCOLATE MELTING WAFERS.↑
How Much Can I Make Decorated Pretzels in Advance?
One of the best things about decorated pretzels (aside from the taste) is the convenience of making them before your party. It’s every hostess’s dream to be able to create something this tasty before the craziness of the party prep starts. Ultimately, taking some of the stress away from hosting a party. These adorable pretzels can be made as early as a week in advance of the party.
HOW TO STORE LEFTOVER MELTED CANDY
If you have melted too much candy for your project, don’t worry; melted candy can be stored for future use. STORAGE: Pour the melted candy into a zip-top bag, remove all the air from the bag, zip it closed, and set it aside until hardened. OR….Place a piece of parchment paper on the counter, pour the leftover candy onto the paper, and let it harden before breaking it into manageable pieces. Then, place the pieces into a zip-top bag. USE AGAIN: Pull the hardened candy out of the bag, chop it, and place it in a microwave-safe bowl. Heat for 30 seconds, then stir and continue heating in 30-second intervals until the candy is melted and creamy. NOTE: Reheated candy melts faster than the first time it was melted.
HOW TO STORE DECORATED PRETZELS
The easiest way to store decorated pretzels is in an airtight container at room temperature. Provided everything is fresh to begin with and the container is clean, dry, and has a tight seal, partially covered pretzel rods can stay fresh for about 2 weeks, sometimes even longer.
FOR MORE INFORMATION ABOUT DECORATED PRETZELS, VISIT THESE POSTS



LATEST POSTS
In conclusion, creating these beautiful Hawaiian sunset-decorated pretzels has been a fun and colorful adventure! From the red, orange, and yellow to the little tropical touches, each pretzel is a sweet reminder of island vibes and golden hour magic. Whether you’re making them for a party, a gift, or just a tasty escape, these treats bring a bit of paradise to every bite. Aloha and happy snacking!❤️ Sheryl
Hawaiian Sunset Decorated Pretzel Rods
Ingredients
For the Hawaiian Sunset Decorated Pretzel Rods:
- 6 ounces of red candy melting wafers
- 6 ounces of orange candy melting wafers
- 6 ounces of yellow candy melting wafers
- 5 ounces of dark blue candy melting wafers
- 6 ounces of white candy melting wafers (for the shells)
- optional cocoa powder (for the shells)
- ½ cup edible sand
For the Edible Sand:
- 1 (11 ounce) box of Nilla Wafers
- 3 ounces of Oreo Cookie Thins
Instructions
Tip for Success: My counters are cold, meaning the candy hardens before it gets used. To remedy that, I put a heating pad under the parchment paper. Any cheap heating pad will work. I recommend using one without a cover or taking the cover off. I place an oblong pot holder underneath the heating pad to protect my countertop.
For the Shell Shaped Candy:
Not only does the addition of an edible shell add dimension to your pretzel, but it also adds another layer of sitting on a tropical island.????????️ This is the silicone mold I used for the shells and starfish→ 3D Summer Beach Theme Silicone Mold
- Pour the white melting wafers into a medium-sized microwave-safe bowl. Heat for one minute, stirring until melted and creamy. NOTE: If the candy is not melted, heat in 15-second increments.
- Place a piping bag into a cup, pulling the sides over the top of the cup. Pour melted candy into the piping bag. OR use my favorite, a squeeze bottle. For the piping bag, snip a small portion of the end. TIP: To help eliminate bubbles, press the piping bag or the tip of the squeeze bottle to the bottom of the mold. Fill each cavity with the melted candy, and lightly tap the mold on the counter. Place in the refrigerator to harden.
- Remove the candy from the mold, use a clean paintbrush, and brush the cocoa powder over the shells and starfish.
- TIP: Place finished candy in a bowl; the countertop will melt the candy.
For the Edible Sand:
- Add the cookies (vanilla wafers and Oreo cookies) to a food processor bowl.
- Pulse until the cookies become finely ground with a few chunks.
For the Sunset Pretzels:
- If using a heating pad, turn it on. As the candy is melted and ready for use, place the bowls on the heating pad to keep the candy melted.
- Add the red melting wafers to a medium microwave-safe bowl. Heat for 1 minute, stirring until melted and creamy. If the candy is not melted, continue heating in 15-second intervals.
- Continue this process with the remaining colors (orange, yellow, and dark blue)
- Once all the candy is melted, place a piece of parchment paper on the heating pad (if using one) or the kitchen counter.
- Pour half of the red starting at the top of where the pretzel rod will be, then half of the orange with a little touching the red, half of the yellow touching the orange, and at the bottom, half of the blue touching the yellow. The candy should look like stripes of candy with a little of each color touching the next.
- Lay the pretzel on the melted candy in the position of the colors you want. Roll the pretzel until coated, move it to the side to let any extra candy coating drip off, and place it on a cookie sheet lined with parchment paper. Sprinkle some of the edible sand over a part of the dark blue melted candy, leaving some of the blue visible. Set aside to harden. For a quicker result, refrigerate for 10 minutes.
- DON'T GET RID OF THE MELTED CANDY. Dip the backs of the candy shells and starfish in the blue melted candy and add one to each pretzel on top of the sand. Hold for a few seconds until the candy holds the shells or starfish in place.

Comments
Hawaiian Sunset Decorated Pretzel Rods — No Comments
HTML tags allowed in your comment: <a href="" title=""> <abbr title=""> <acronym title=""> <b> <blockquote cite=""> <cite> <code> <del datetime=""> <em> <i> <q cite=""> <s> <strike> <strong>