

Everything you Need to Know About How to Decorate Pretzels Part 3
Welcome to part three of our pretzel decorating series! In this post, we delve into more advanced techniques, including working with caramel, creating stunning tri-color designs, achieving a beautiful marble effect, and more. If you haven’t read part one and part two yet, we strongly encourage you to check those out first, especially if you’re new to pretzel decorating.
Part one covers the essential basics, while part two builds on those skills with fun, themed creations. Each post lays the groundwork for the next, so make sure you’re caught up before moving on to these more challenging (but totally doable!) techniques.

It is an easy-to-make treat or dessert with the perfect sweet and salty combo. Ideal for any occasion, with numerous variations. This post will provide you with step-by-step instructions on decorating pretzels like a pro, along with several helpful videos. Stop paying someone else to make your treats—find out how easy it is to make them yourself! Scroll down for different techniques, videos, and ideas. PRETZEL POCKETS ARE NOW AVAILABLE! WHAT’S A PRETZEL POCKET? FIND OUT BELOW↓
- HOW TO MAKE AMBRE AND MARBLED DECORATED PRETZELS
- CHERRY COKE DECORATED PRETZELS
- HAWAIIAN SUNSET DECORATED PRETZEL RODS
- UNDER THE SEA DECORATED PRETZEL RODS
- SALTED CARAMEL DARK CHOCOLATE PRETZEL RODS
- BIRTHDAY CANDLE DECORATED PRETZELS AND FREE PARTY FAVOR TOPPER DOWNLOAD
Decorate Pretzels with the Caramel Technique
CREATE A PRETZEL WITH A SURPRISE INSIDE…CARAMEL!
After experimenting with four different caramel options, I have the following findings. You can decide which one is your favorite. Some of the caramel options are easier to work with than others. Please scroll down for all the details and find my favorite.
- CARAMEL BITS
- SALTED CARAMEL FLAVORED MELTING CANDY:
- WRAPPLES:
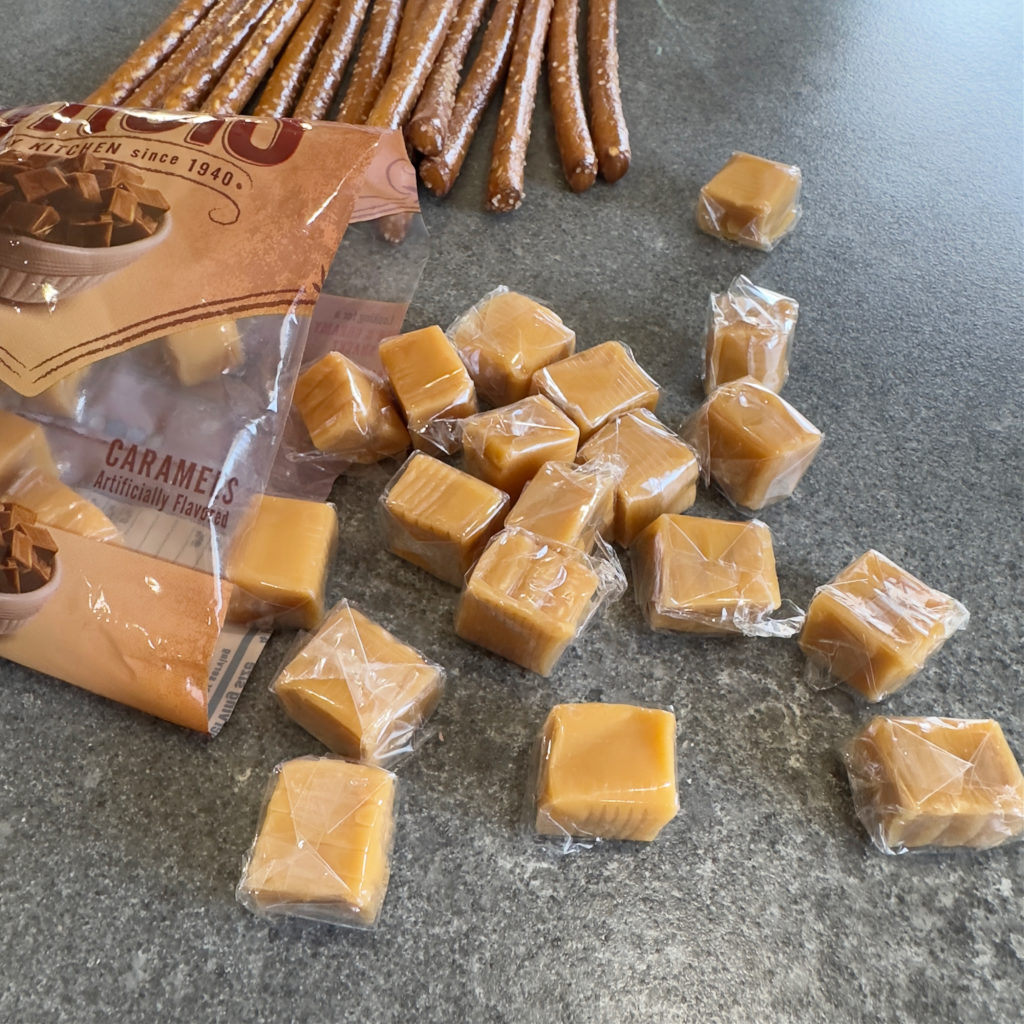
- KRAFT CARAMELS:
- WERTHER’S CARAMELS:
- MAKE HOMEMADE CARAMEL WRAPS:
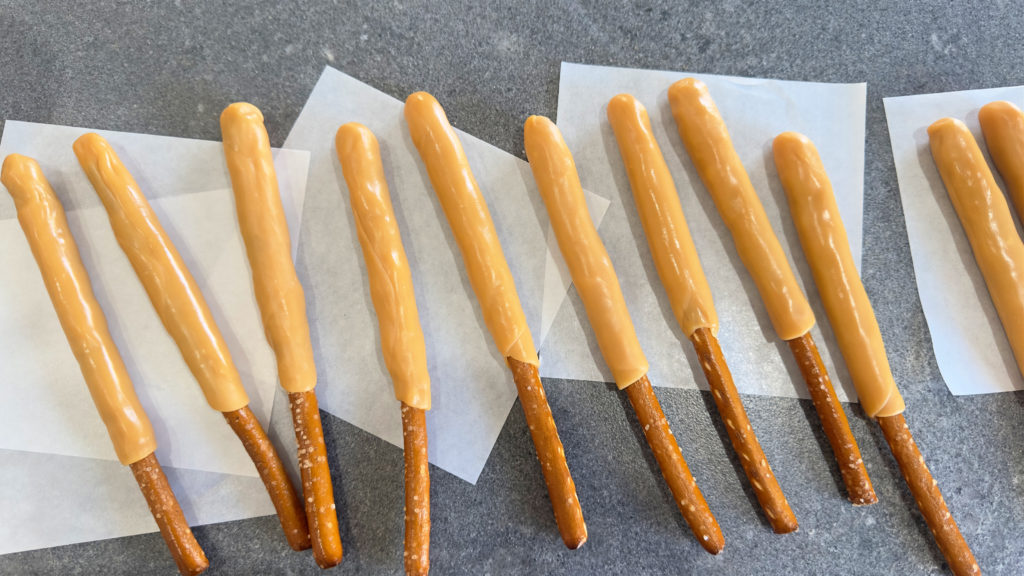
CARAMEL BITS

CARAMEL BITS: Heat the caramel bits for 1 minute, stir, and heat for an additional 30 seconds. Set aside for 5 minutes. Dip the pretzels and place them on a cookie sheet lined with parchment paper. I wasn’t too impressed with the caramel bits. They were very messy, and I had to dip them twice to achieve an adequate caramel coating.
MELTABLES
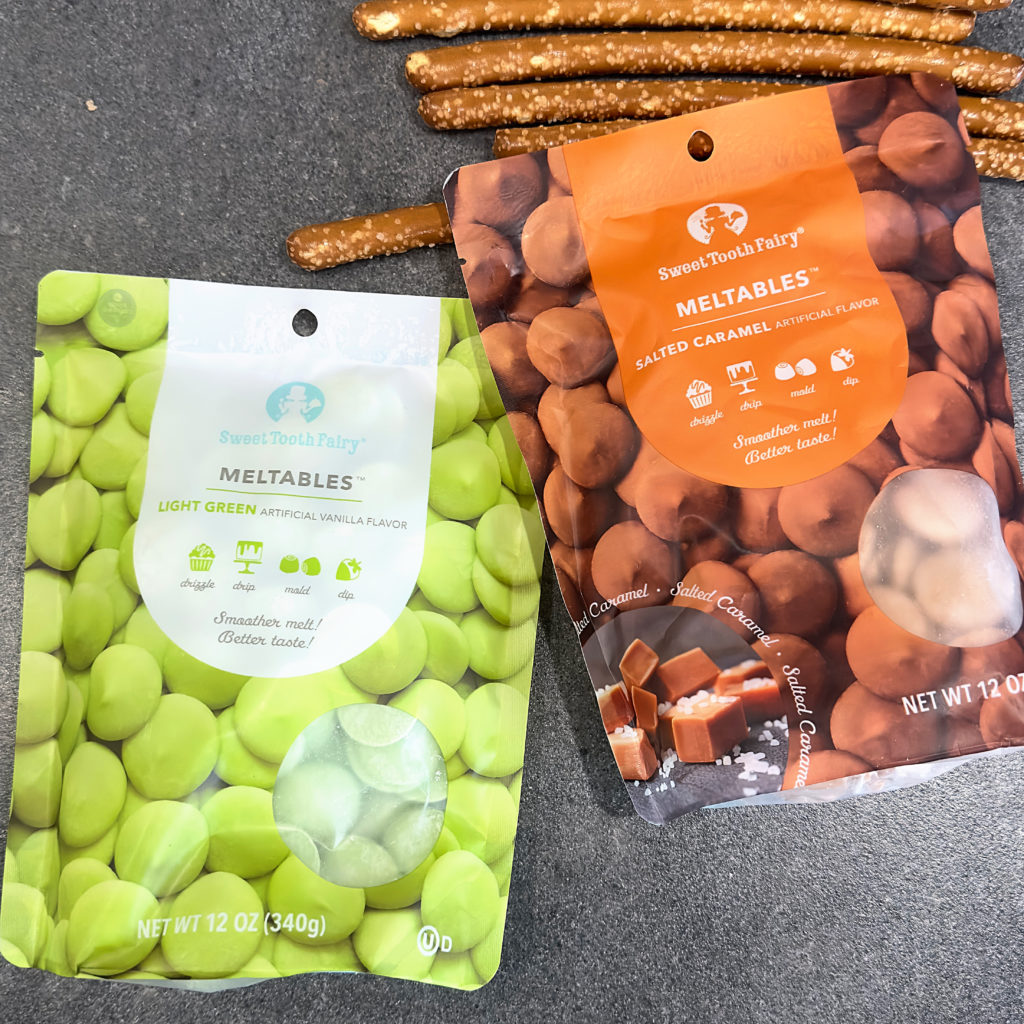
SALTED CARAMEL MELTING CANDY: I found this melting candy at Michael’s. The brand is Sweet Tooth Fairy Meltables Salted Caramel. If you use the melted candy, pour it into a microwave-safe container (I used a tall glass cup) and add one tablespoon of vegetable shortening. Heat for 1 minute and stir until the candy is melted. Place the dipped pretzels on a cookie sheet lined with parchment paper. To harden, either set them aside on the counter or, for quicker results, place them in the refrigerator (about 10 minutes). The candy had a decent flavor, but I missed the chewy caramel center.
WRAPPLES
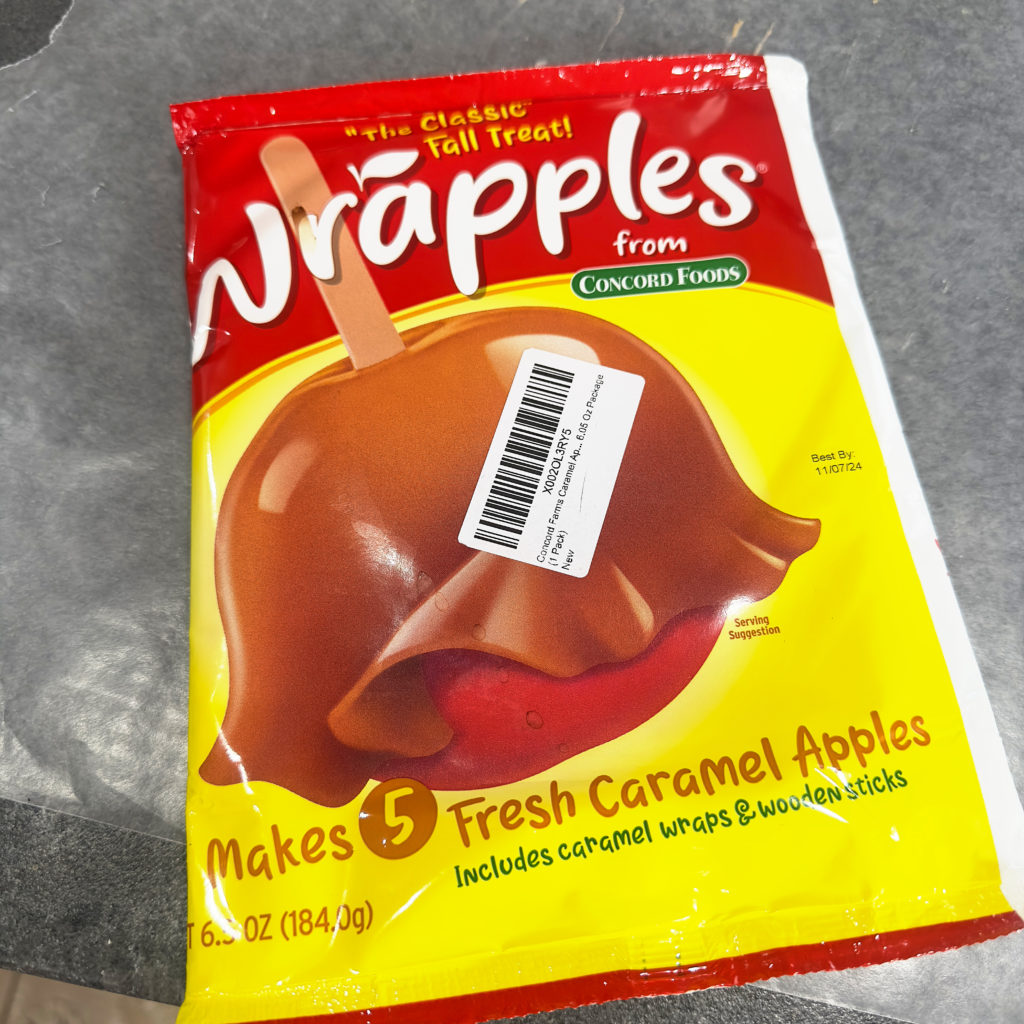
WRAPPLES: A fun seasonal product found in the Fall months in the produce department of most grocery stores. If you happen to find some, GRAB THEM! The Wrapples have a nice caramel flavor and are super easy to use. One Wrapple will cover THREE pretzel rods. Cut the wrappers into thirds, wrap, and mold the caramel disk around the pretzel rod. This one wins for its easy use, and the flavor is tied with the wrapped caramels. The only downfall is that they are seasonal. Look below to see how I solve that problem.
WRAPPED CARAMELS


KRAFT WRAPPED CARAMELS: If you can’t find the Wrapples caramel wraps, this is the next good option. Use 2-3 caramels per pretzel. Unwrap four caramels, microwave them for 10 seconds, and mold them around the pretzel. Cover one pretzel at a time, repeating until all the pretzels are covered.
WERTHER’S ORIGINAL SOFT CARAMELS: These caramels are softer and a little smaller than the Kraft Caramels. The flavor is similar to that of the Kraft brand. For a pretzel rod, you will need four caramels. Remove the wrapper, combine them into a ball, and microwave for 6 seconds. Lay the softened caramel on a piece of parchment paper and roll it into a 4-inch disk. Mold it around the pretzel, then pull and shape it to the desired length.
Recipe Support
Looking for recipe support or want to share your recipes?
Join our RECIPE FACEBOOK COMMUNITY
It’s the perfect place to ask questions, get help, and connect with fellow recipe makers.
How to Make Wrapples at Home
As I said above, the Wrapples were my favorite of the four caramel options. Since they’re only available in the Fall, I decided to make my own and share it with you!
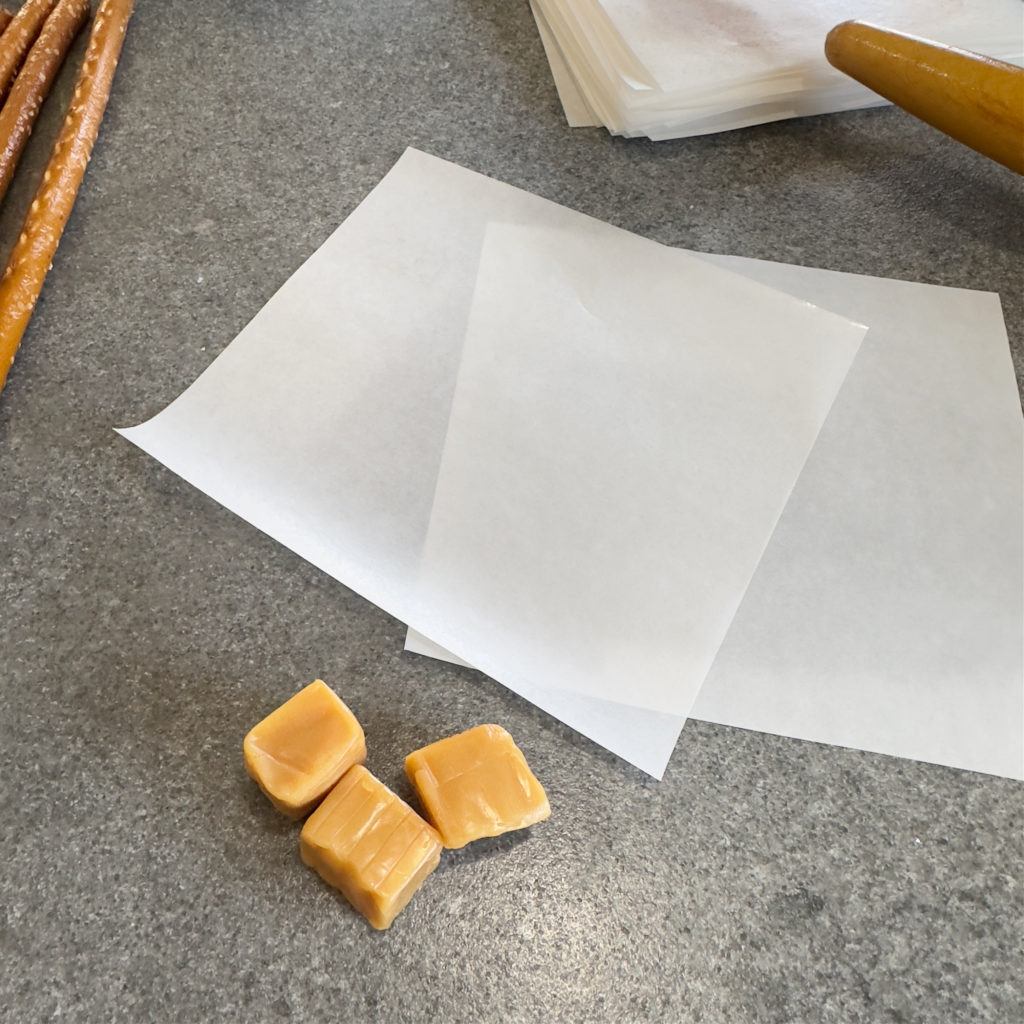
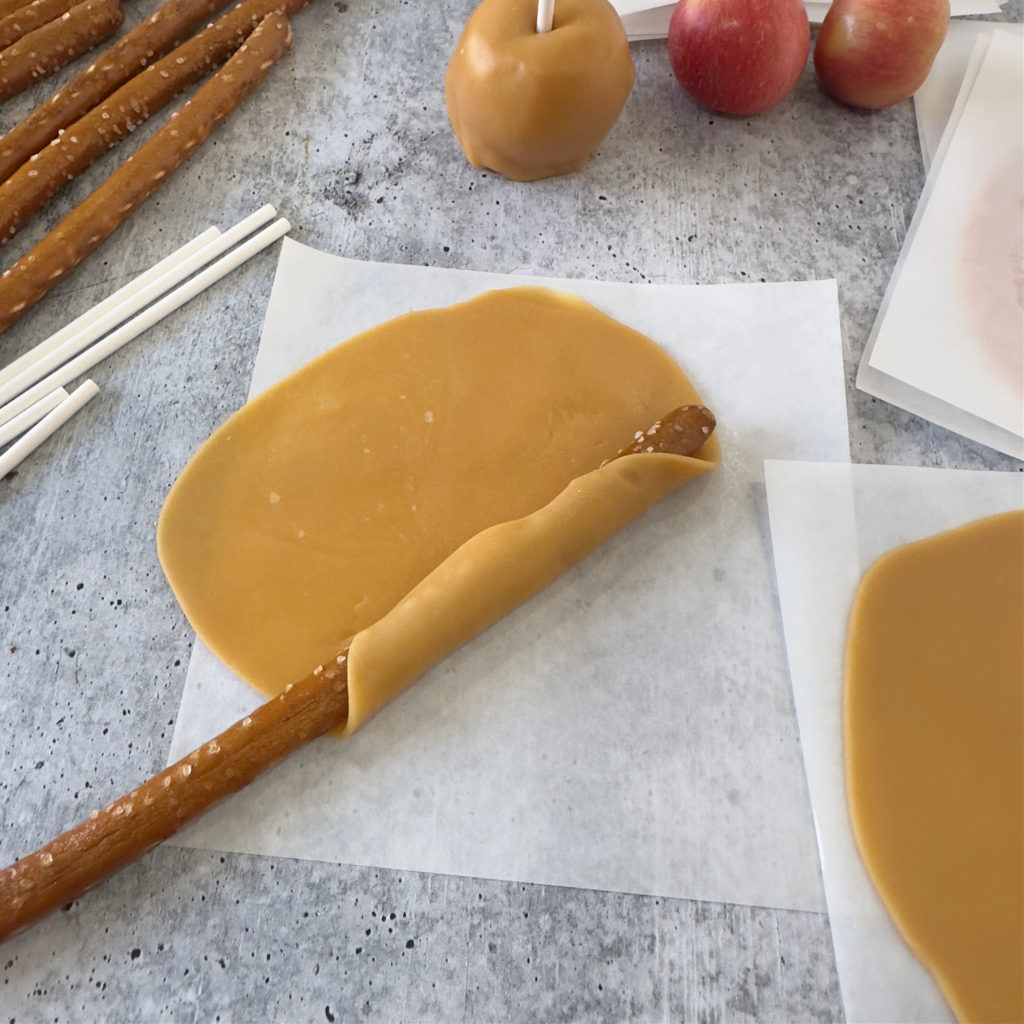

- Take off all the wrappers from around the caramel. Divide the caramels into threes.
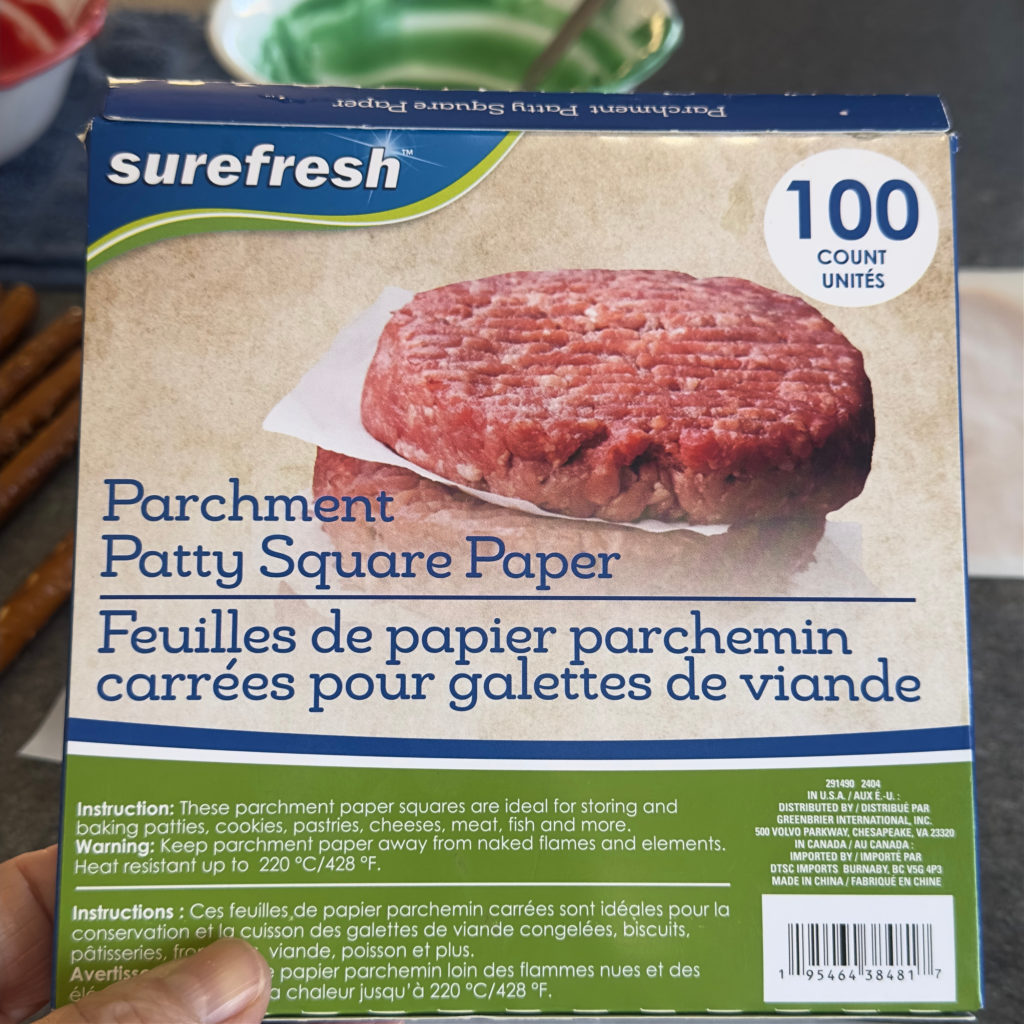
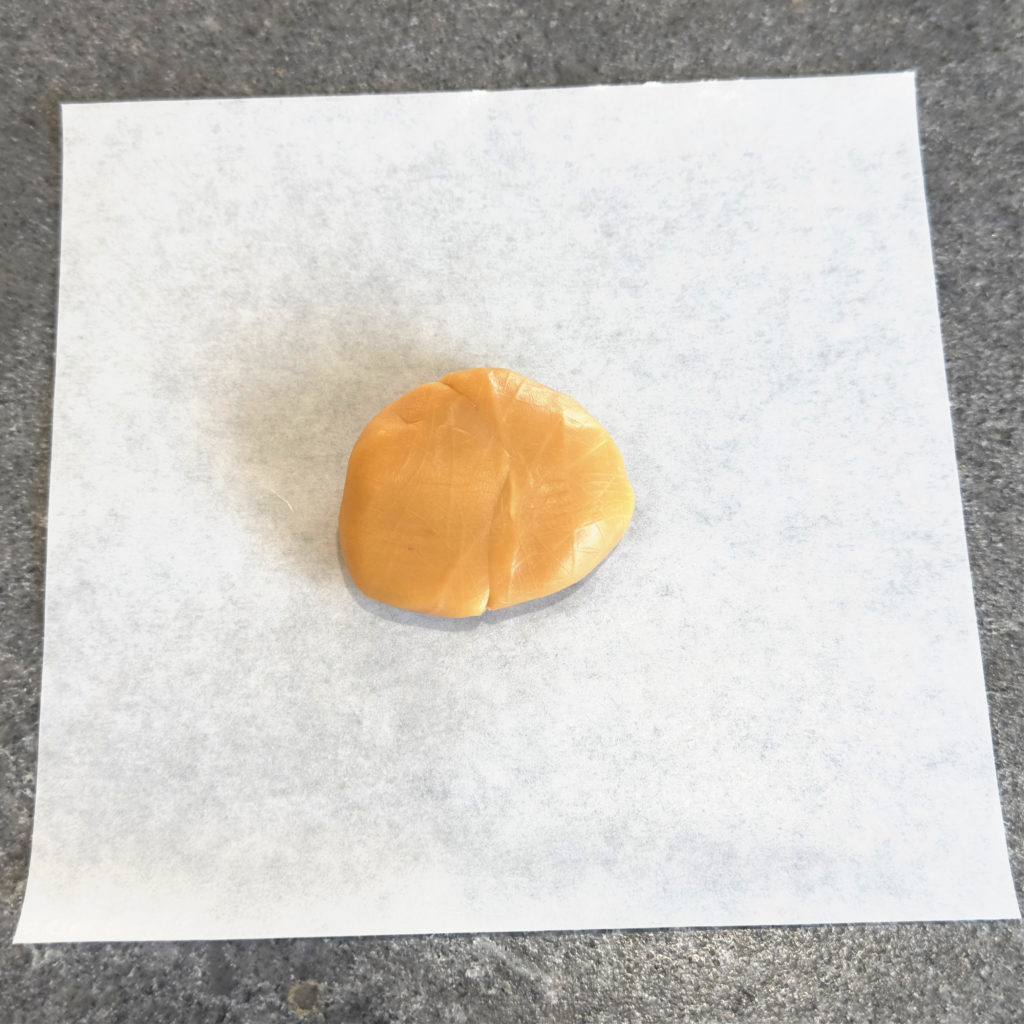
- Press two to three caramels (depending on the desired thickness of the caramel) together in your hand to warm them. Then, form them into a disk and place them on parchment paper. I FOUND THE PATTY SQUARE PARCHMENT PAPERS AT THE DOLLAR TREE
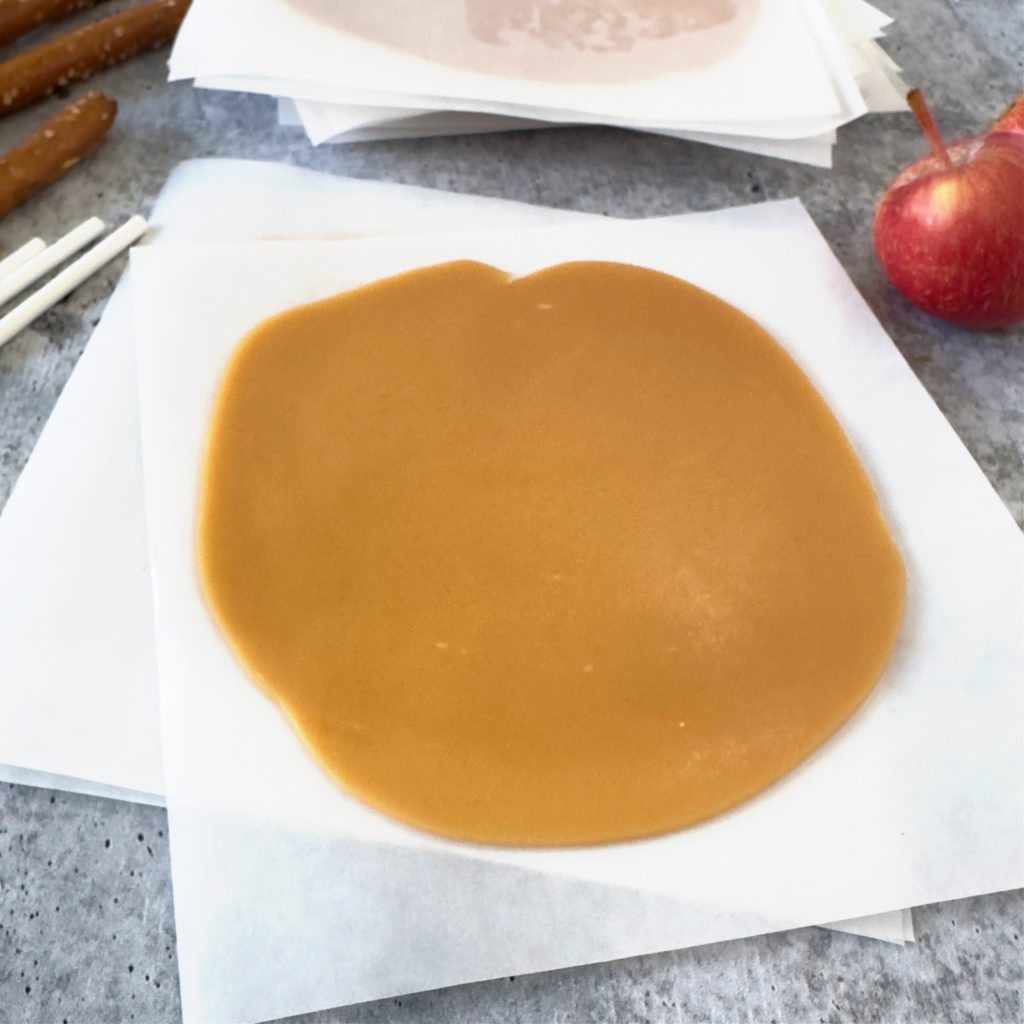
- Add another piece of parchment paper on top of the caramel disk, then press it with the palm of your hand as if you were pressing a hamburger patty.
- Use a rolling pin to roll the caramel into a 4½ x 4½ inch round.
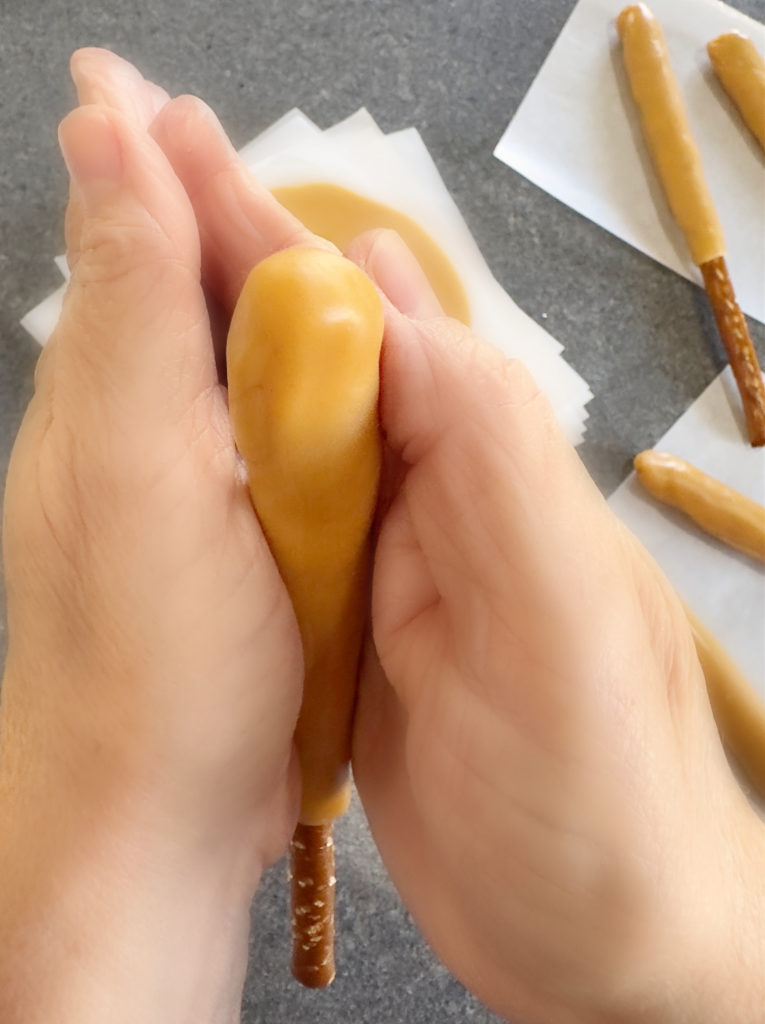
- Roll the pretzel rod on the caramel disk like a burrito.
- Use the warmth of your hands to press the caramel onto the pretzel.
- Roll the coated pretzel between your hands, as shown in the post. Set it aside; once all the pretzels have a caramel coat, melt the chocolate.
TWO-TONE DECORATED PRETZELS
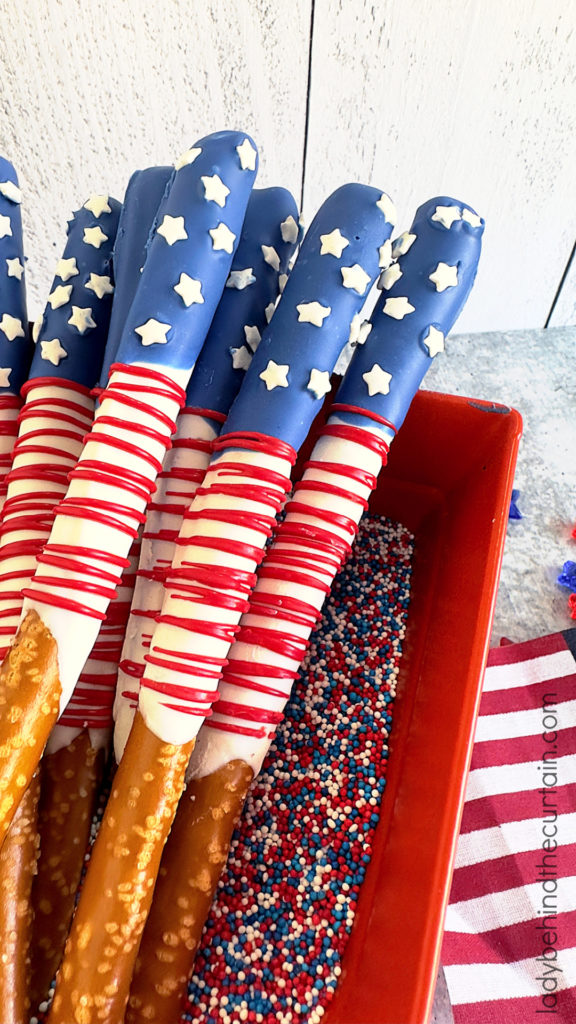
Learn how easy it is to add two colors to a pretzel rod and create these unforgettable Stars and Stripes Flag Pretzels. CLICK HERE TO GET THE STEP-BY-STEP INSTRUCTIONS→PATRIOTIC PRETZEL RODS
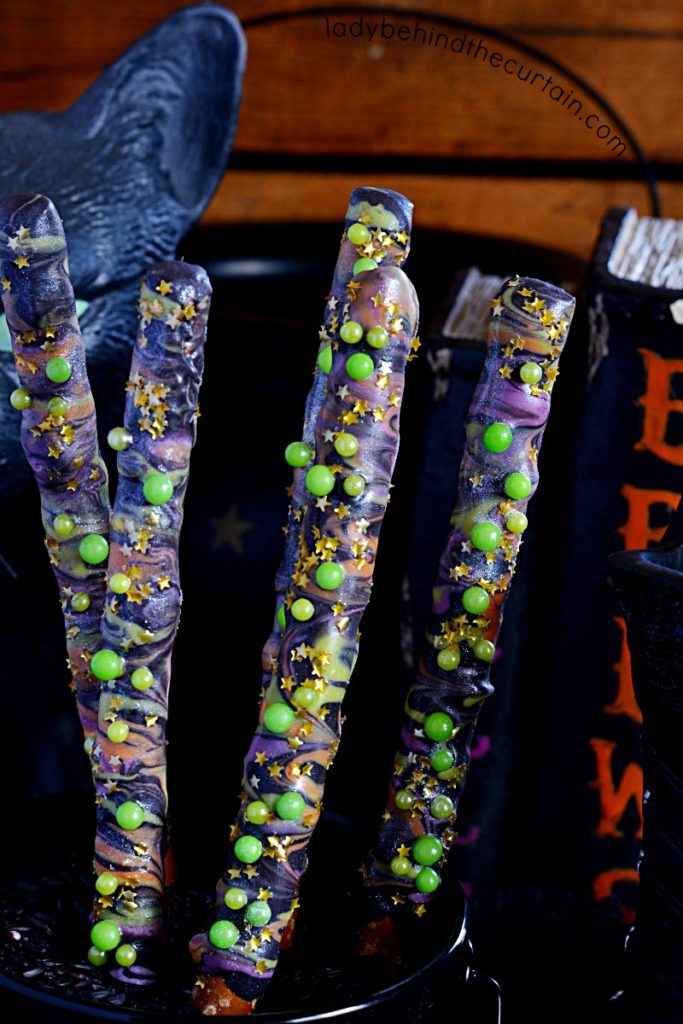
THREE Marbling Techniques
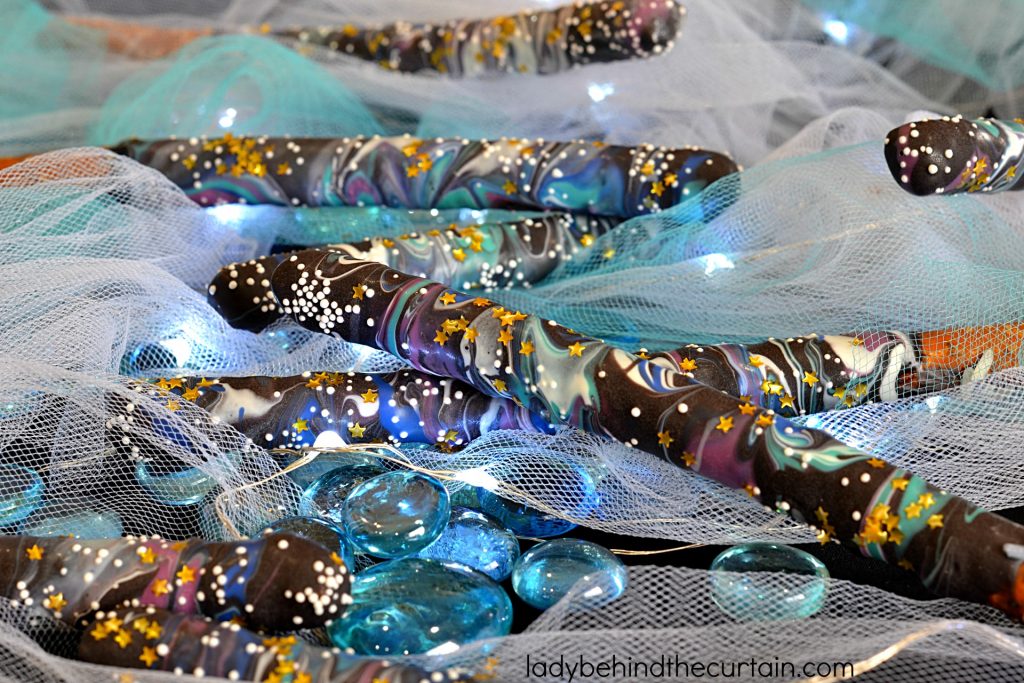
When you examine my technique for creating the marbling effect, you may notice some waste. Remember this…..you will create TWELVE incredible-looking party pretzels for under $10. Most techniques call for a tub of melted candy (the primary color), with the other colors drizzled on top, and then dipping the pretzel through the drizzled colors—it’s hard to keep the colors from becoming muddy-looking. I don’t think that technique works as well as the one I do here. View the video below for the full details—and click here for the post—->>>>OUT OF THIS WORLD GALAXY DECORATED PRETZELS
Combining Caramel and Marbling Technique
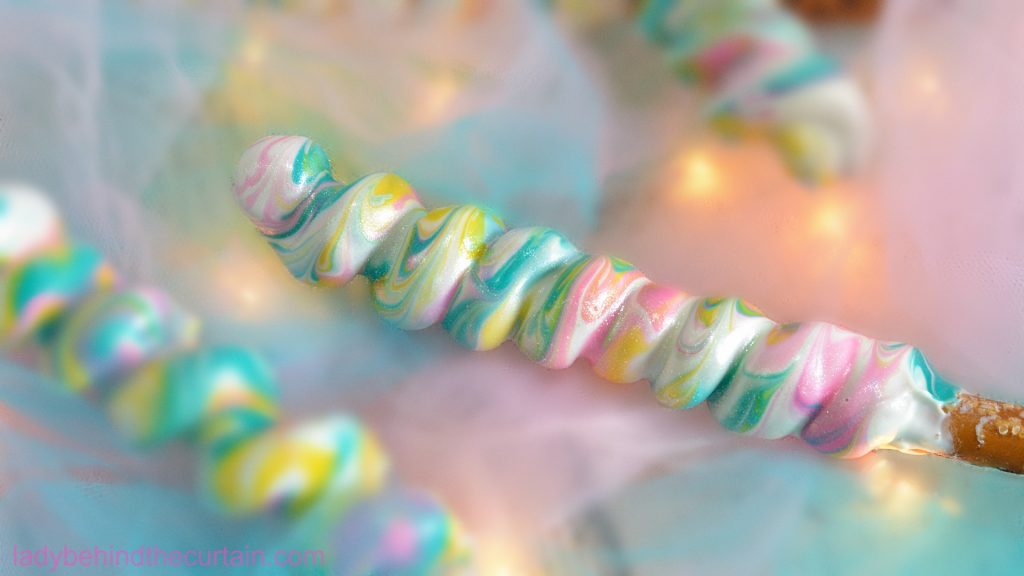
This uses two of my favorite techniques. I love caramel on my pretzels and the look of melted candy when it’s marbled. View the video below for the full details—and click here for the post—->>>> UNICORN PRETZELS
Counter Top Heating Pad Method for Marbling


- In THREE microwave-safe medium bowls, add melting wafers. Heat 6 ounces of each color separately for 1 minute each. Stir until combined and creamy.
- Place the melted candy on a heating pad. I used a bread-proofing heating pad. TIP: If you use a household heating pad, take off the cover. IF YOU DON’T HAVE A HEATING PAD, place the melted candy on pot holders or something that will block the cold countertop from lowering the temperature of your candy. A towel will work, too.
- Once all the candy is melted, move it to a towel or pot holders.
- Lay a piece of parchment paper on top of the heating pad.
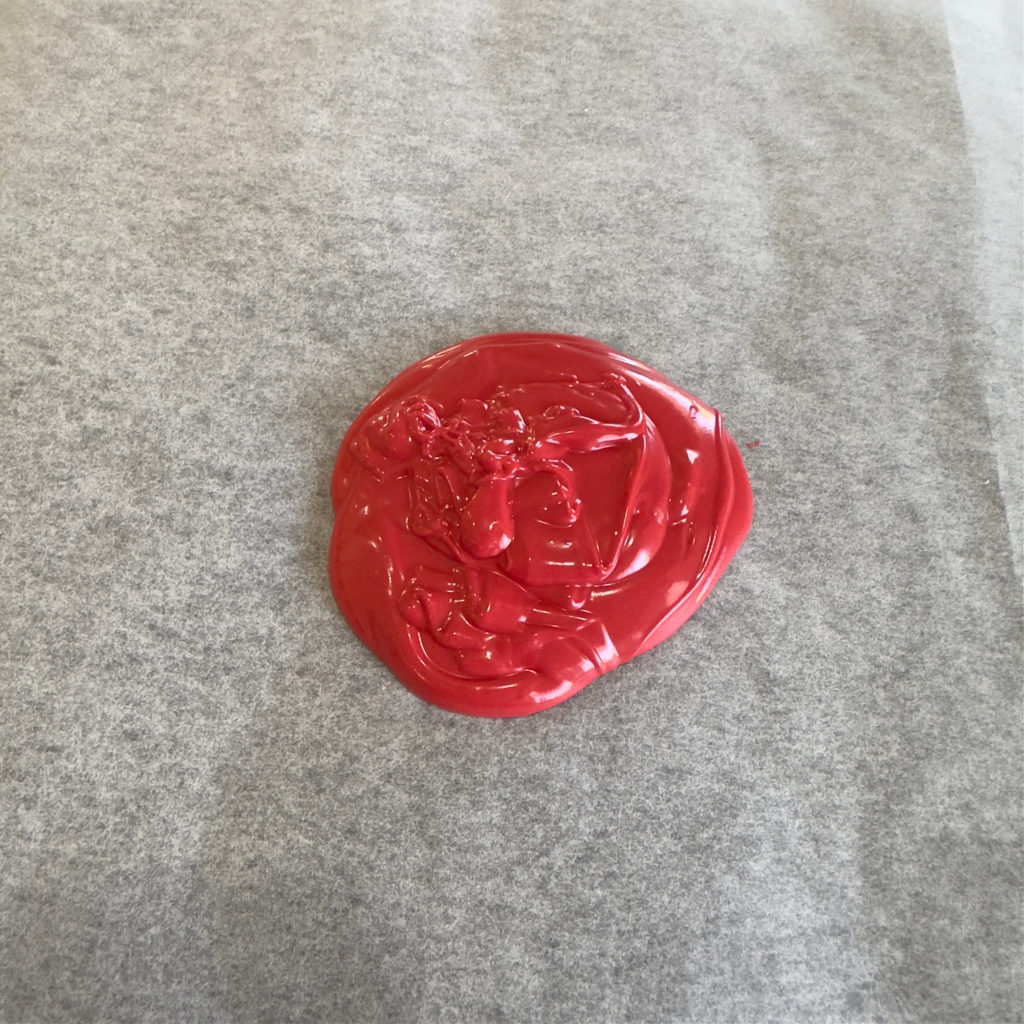
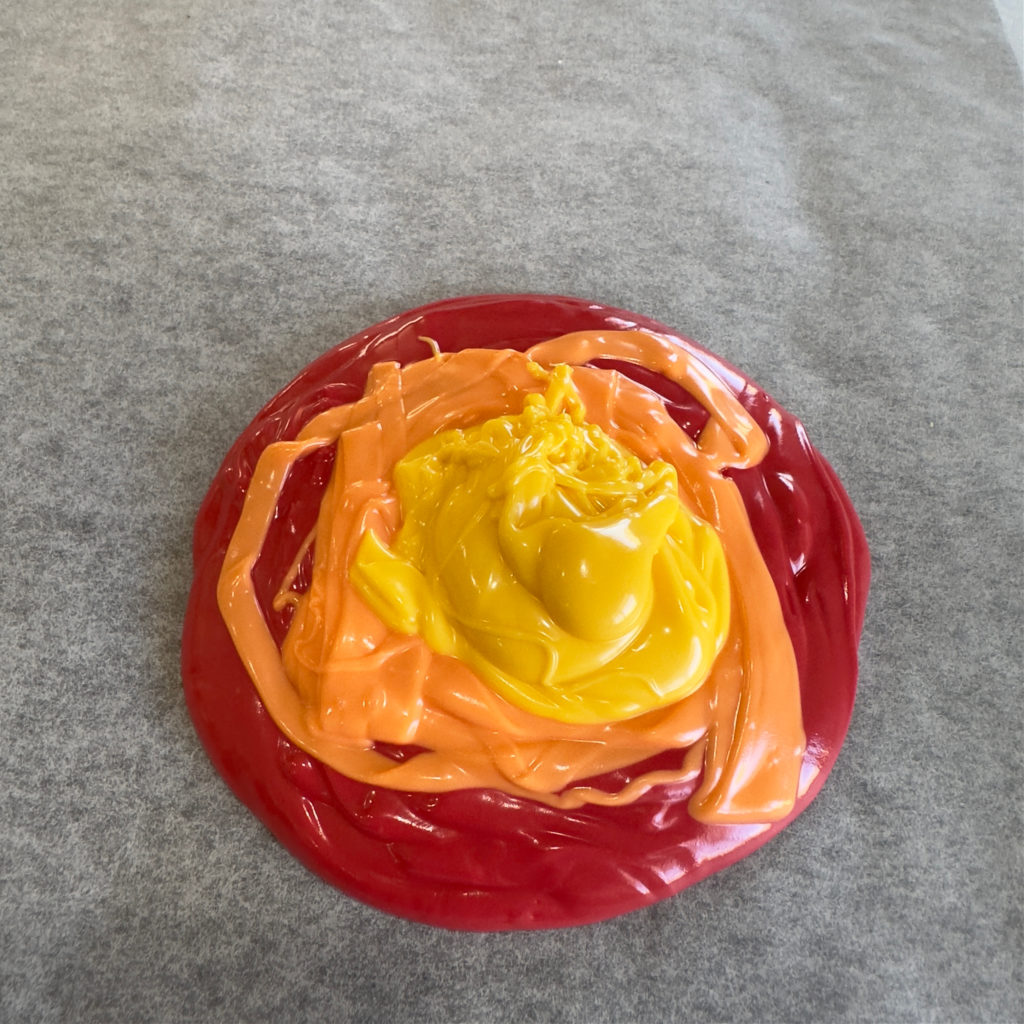
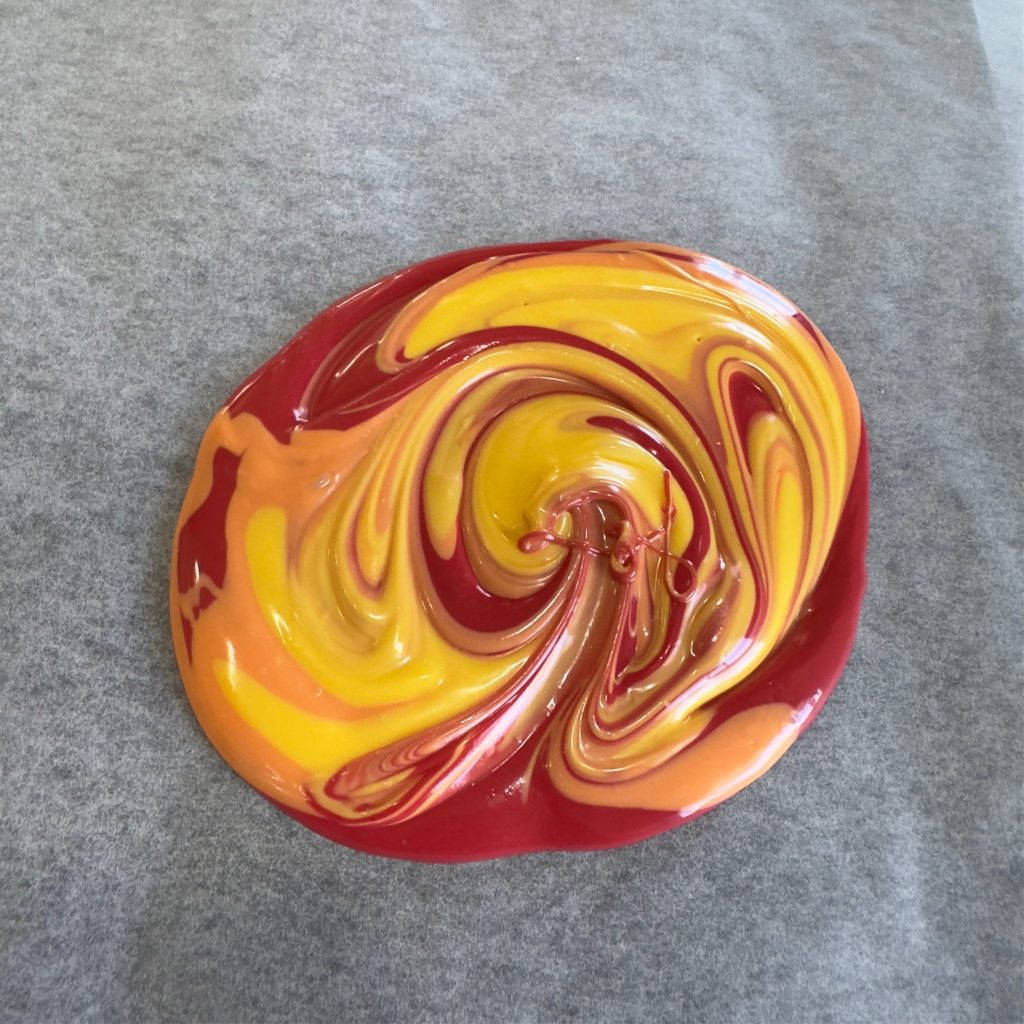
- Starting with the darkest color (in this case, red), put about half of the melted candy in the center of the parchment paper. Add half of the next color (orange), and top with the lightest color (yellow). Swirl the colors around (DO NOT MIX THE COLORS). Ensure that all three colors remain visible.
- Lay the pretzel rod flat on the melted candy and roll it through the candy to coat it evenly. Place the coated pretzel on a cookie sheet lined with parchment paper.
- As you continue with the pretzels, add the remaining melted candy to the pile. You should be able to decorate 20 Pretzel Rods.
HOW TO GET RID OF CANDY PUDDLES
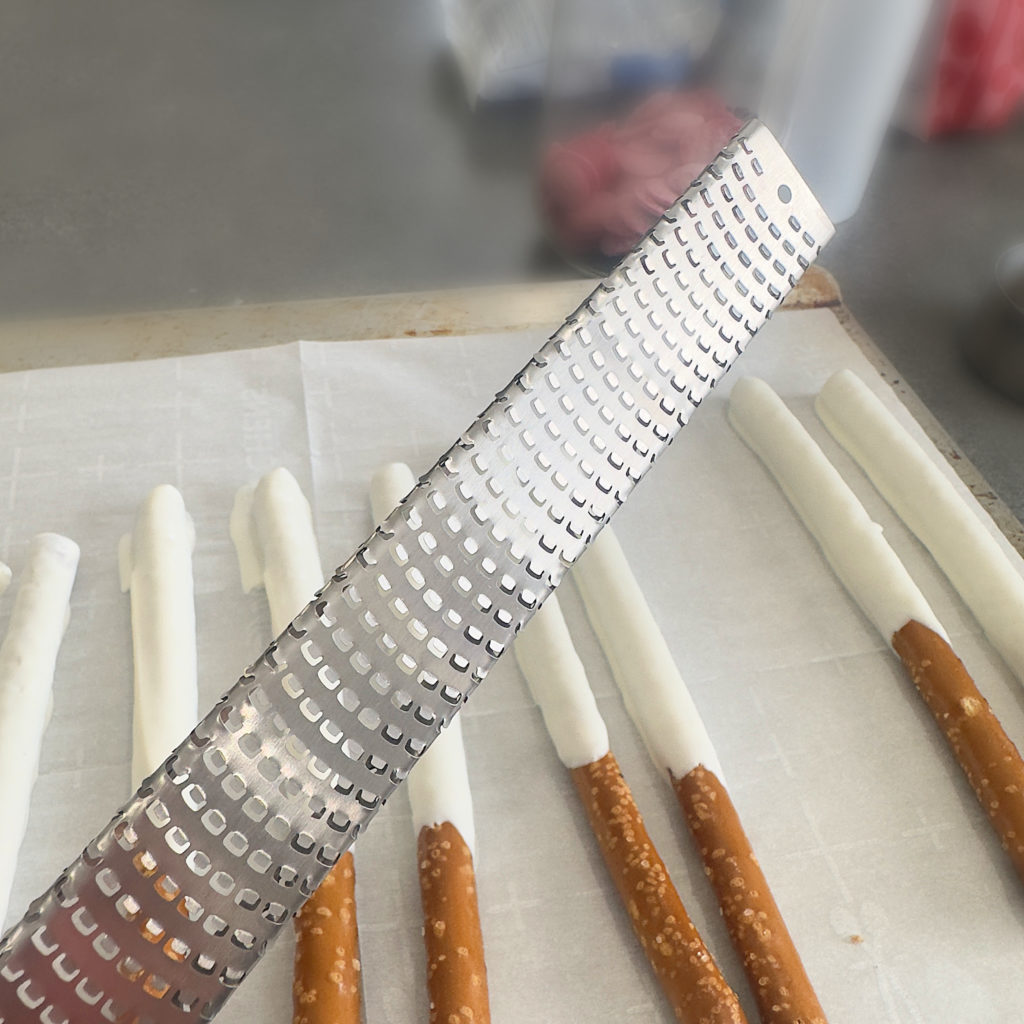
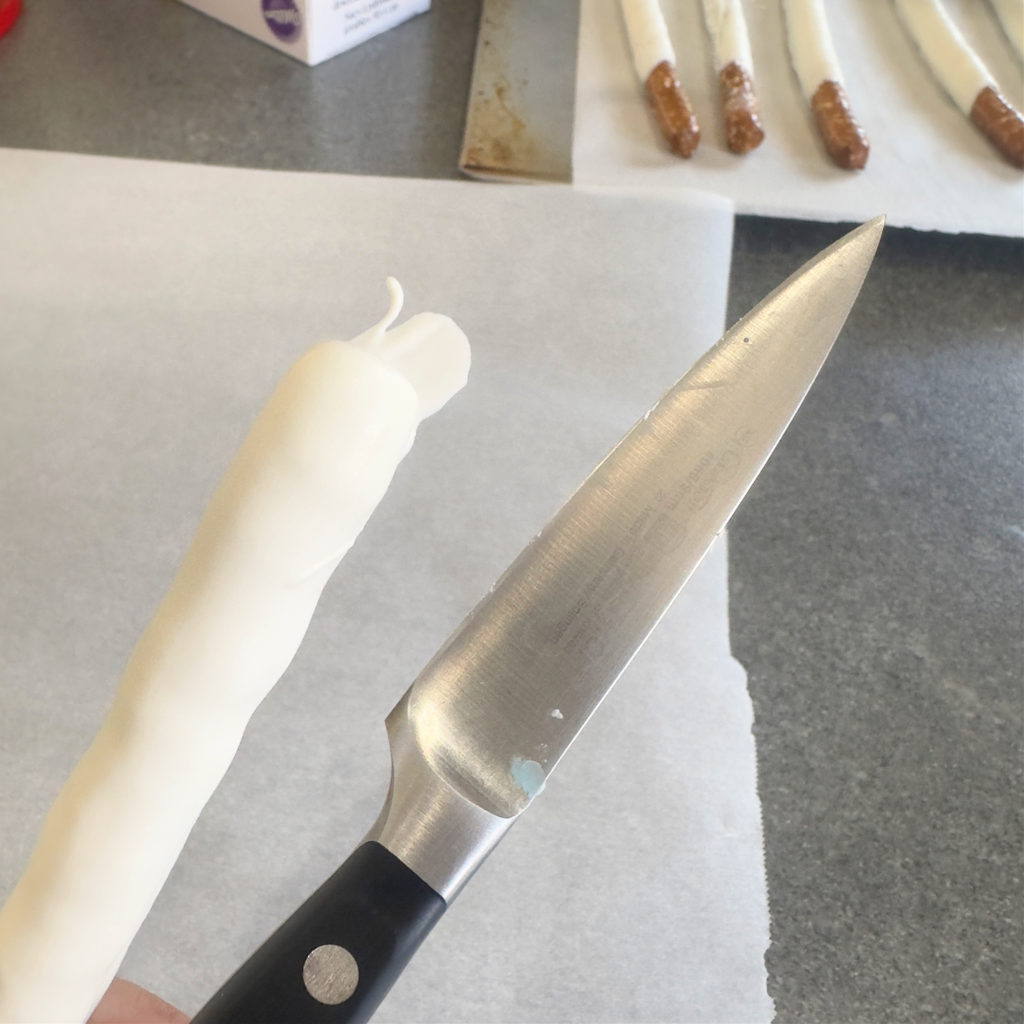
CANDY PUDDLES: HOW TO GET RID OF CANDY PUDDLES. One of my favorite tips for decorating pretzels is using a microplane tool to smooth the edges that have puddled under the pretzel. I’ve used the micro plane for years and recently switched to a paring knife. Regardless of your chosen tool, they will both get the job done. Carefully scrape off the excess melted candy. NOTE: CANDY MUST BE HARD FOR THIS TO WORK
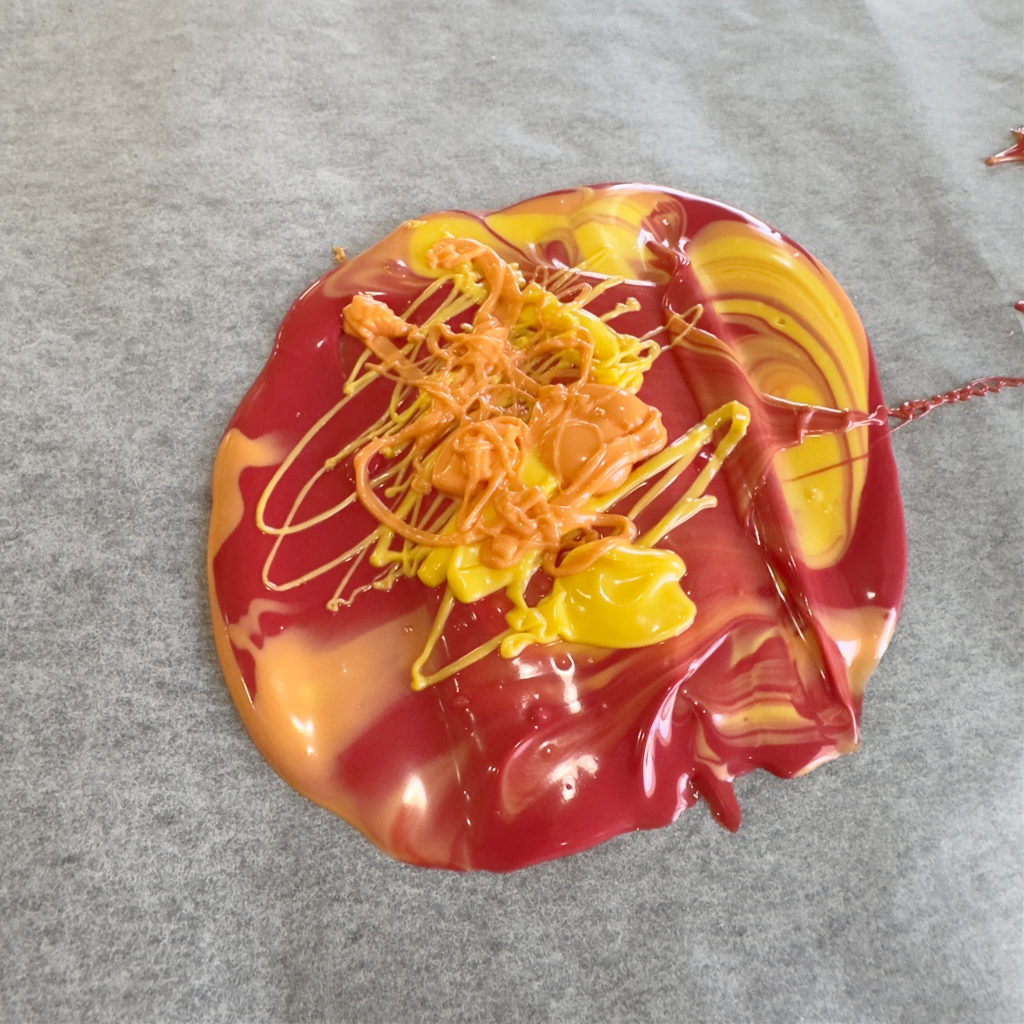
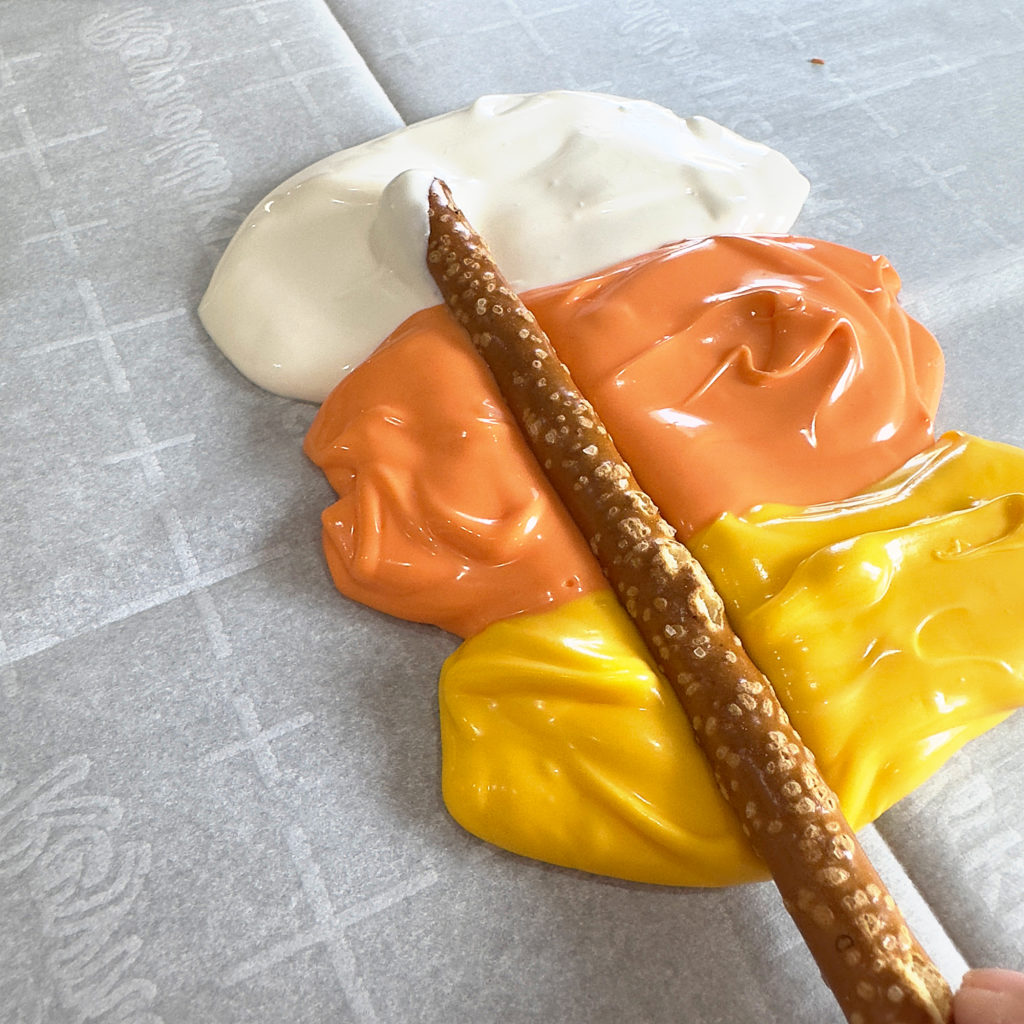
TRIPLE COLOR TECHNIQUE
- FIRST, AN IMPORTANT TIP. For the best results, use a heating pad. I used a warming pad for bread. Remove the cover if you’re using a household heating pad with a removable cover. Using a heating pad is unnecessary for marbled, decorated pretzels, but it will be a valuable addition to your pretzel-making tools. The other option is to put an oblong pot holder under the parchment paper. THE REASON FOR THE HEATING PAD: If your counter is like mine, it stays pretty cool, and because of that, the candy will harden before you have a chance to use up all the candy.
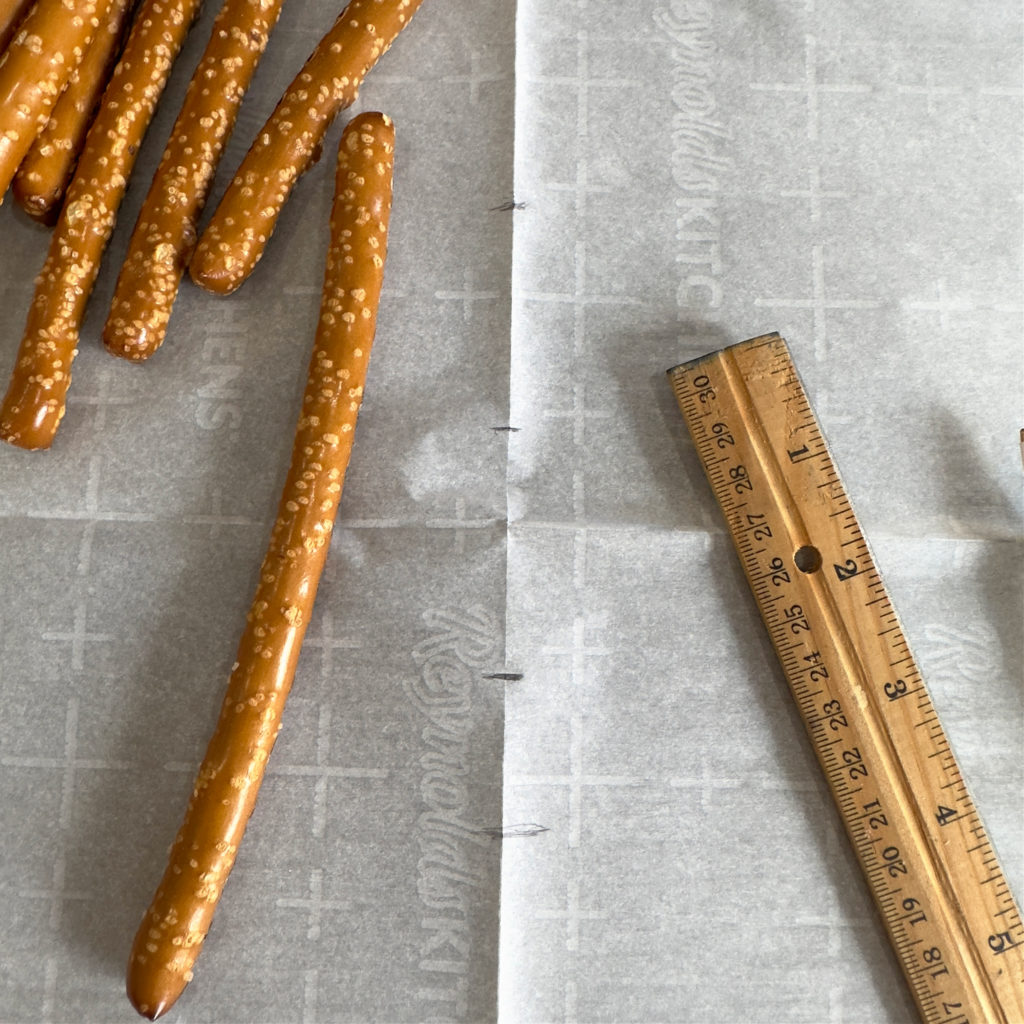
- Place a pretzel rod in the center of a piece of parchment paper. Using a pencil, mark the top, middle, and bottom of the pretzel, where the candy will end. To allow the guests to easily handle the pretzels, I like to leave a couple of inches at the bottom. This step is intended as a guideline, but it is not mandatory. Flip the paper over so the pencil marks are on the bottom.
- Place another sheet of parchment paper to the side, another one to the side, and a fourth piece on a cookie sheet.
- Pour candy melts into small microwave-safe bowls.
- Heat only one color at a time, for 1 minute each. Stir until melted and creamy.
- TIP: The countertops are cold; to keep your candy warm longer, place the bowls on a pot holder.
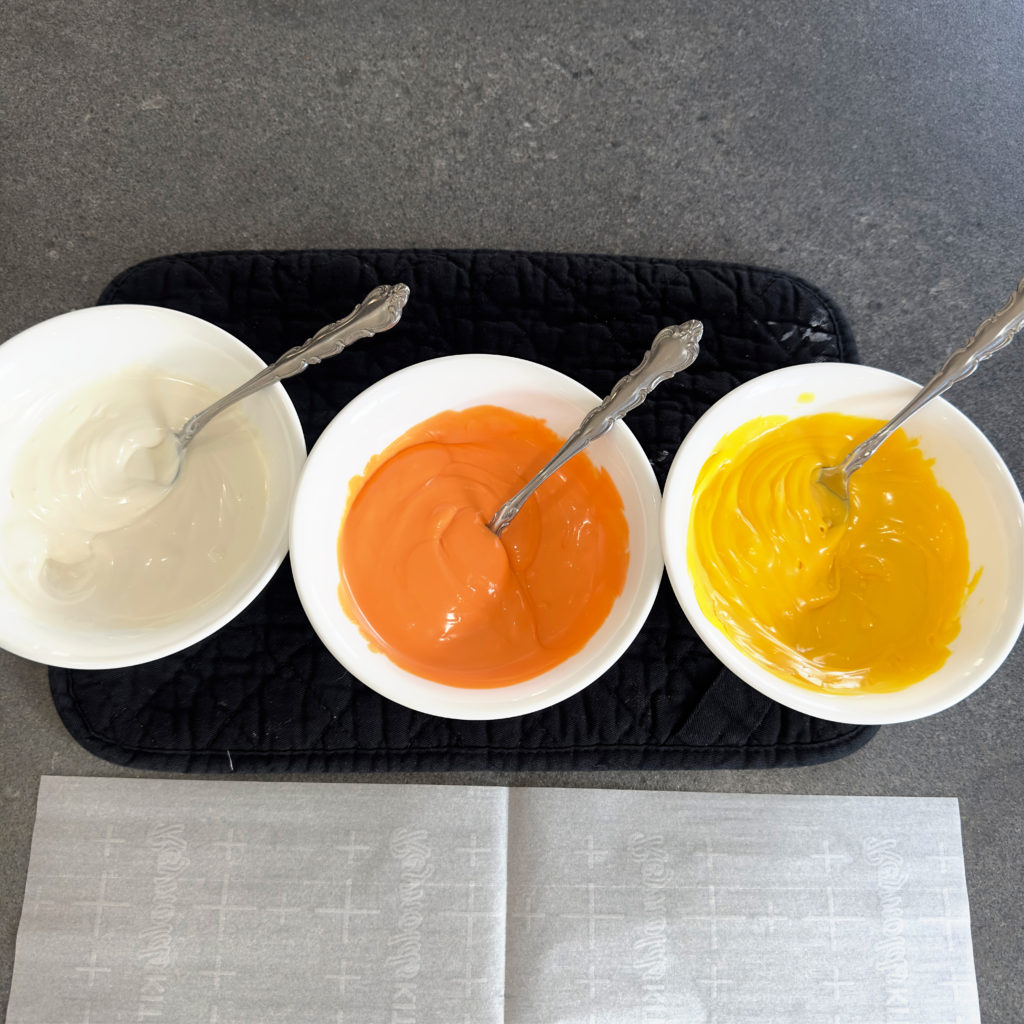
- Place a piece of parchment paper on a heating pad. Using your guideline, spoon a good amount of the white melted candy at the top, followed by the orange, and ending with the yellow, making sure to use the bottom line as your guide. NOTE: DO NOT ADD ALL THE CANDY OF EACH COLOR AT ONCE. SAVE SOME FOR LATER.
- Dip the tip of the pretzel in the white, then lay it flat and roll it in all three colors.
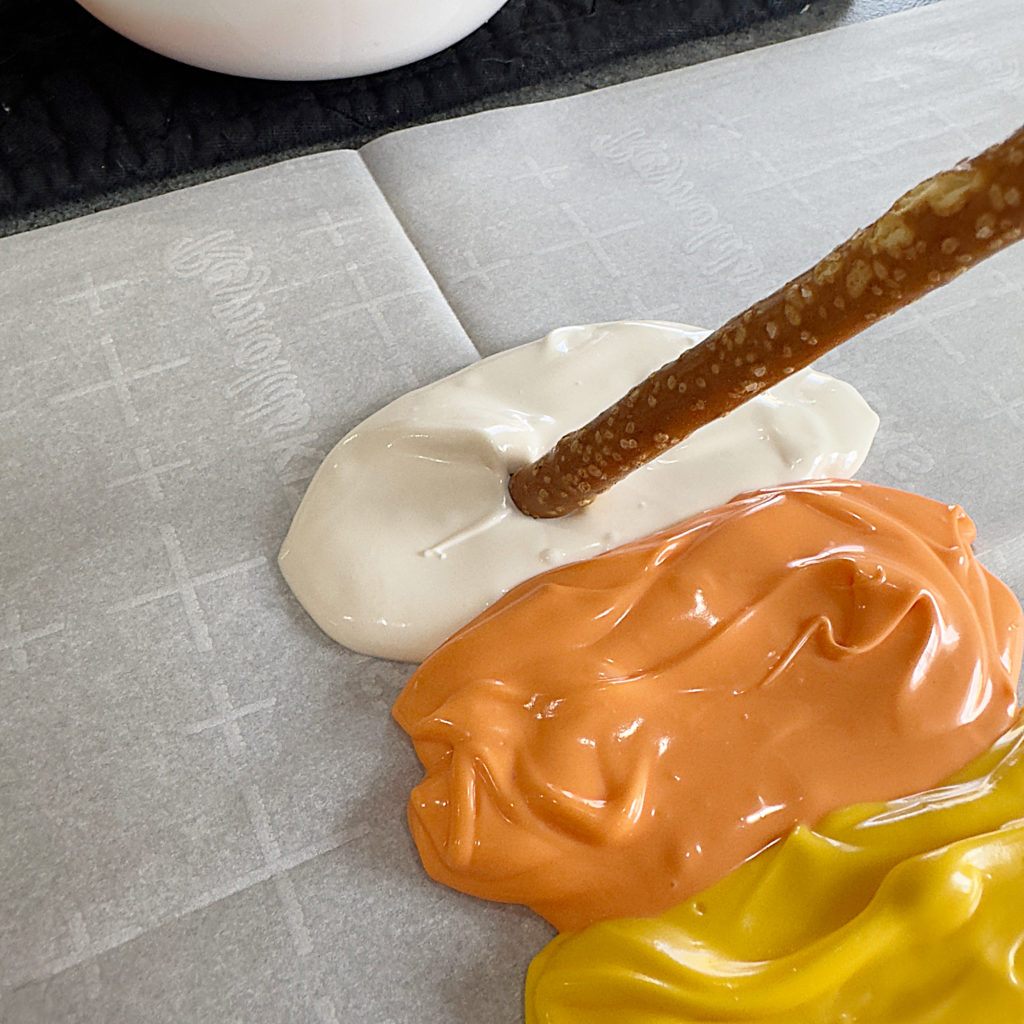
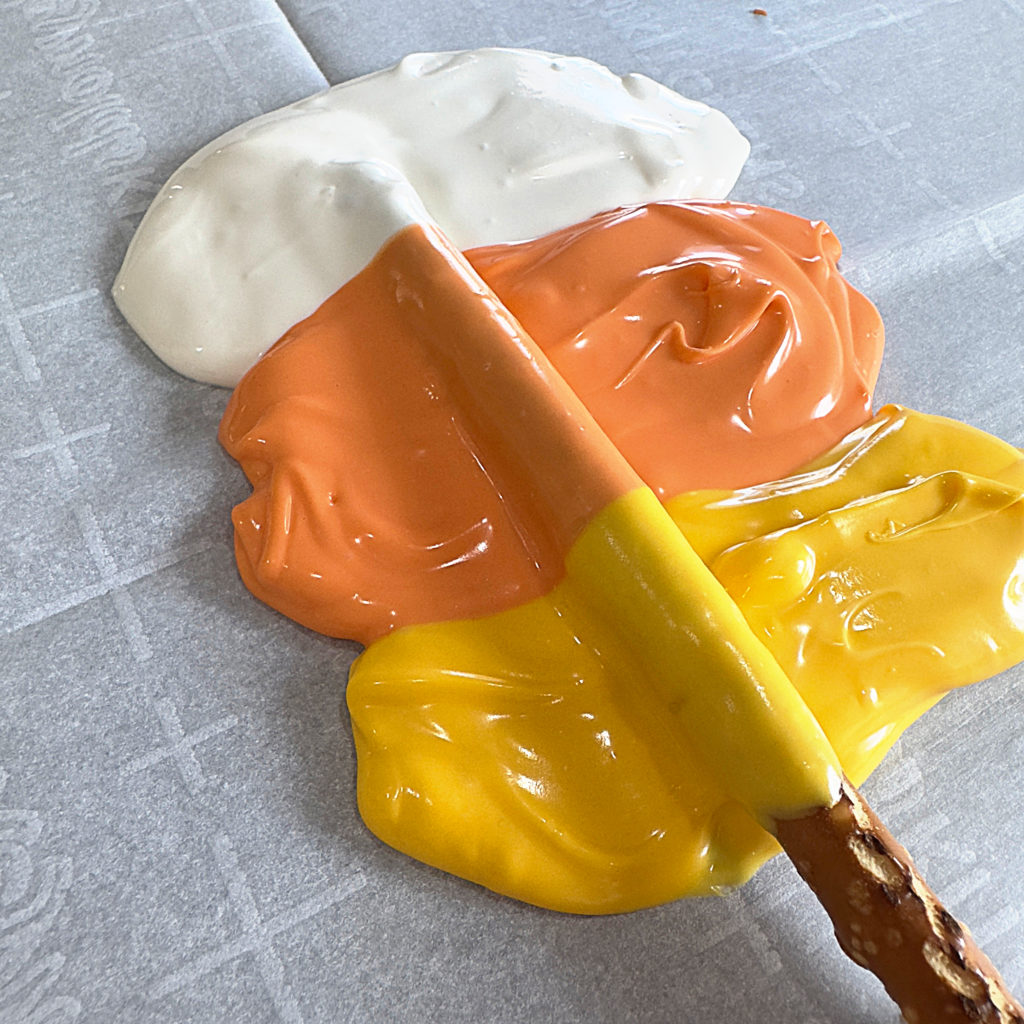
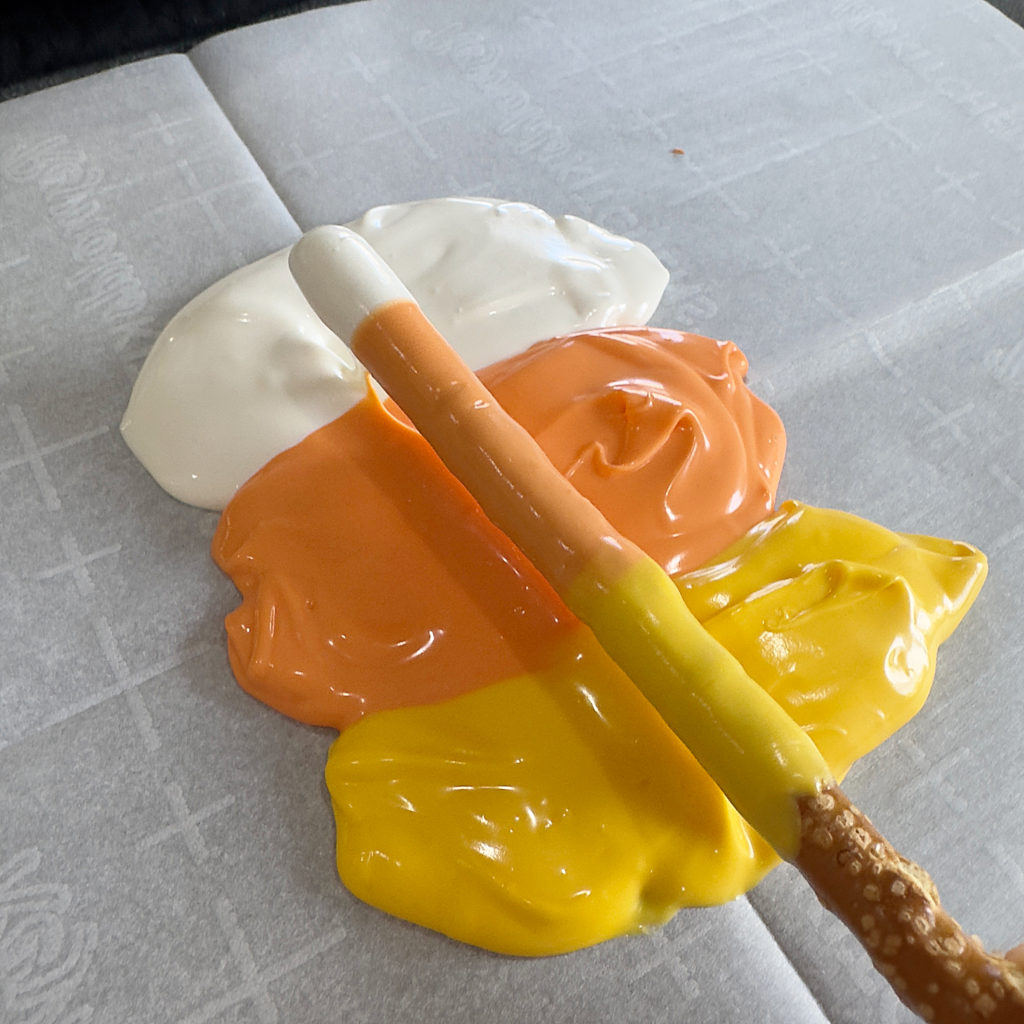
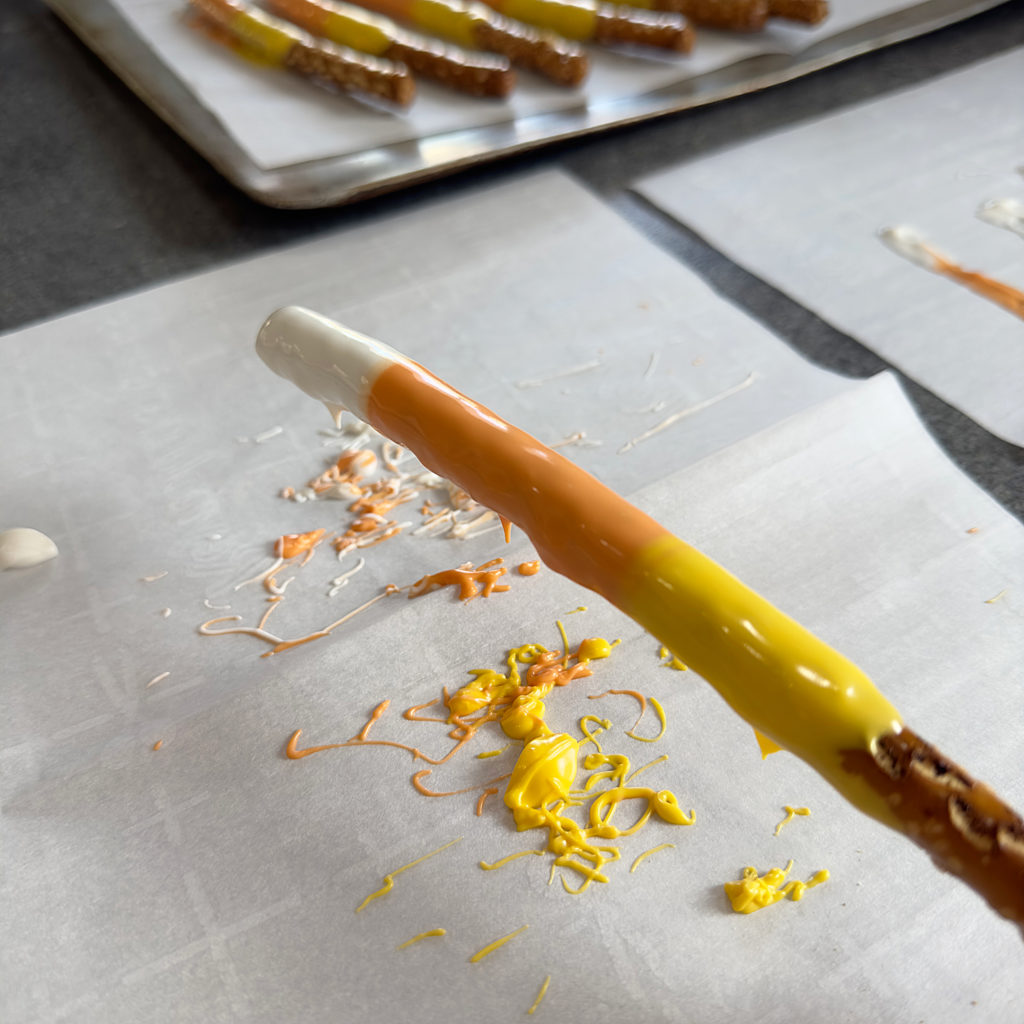
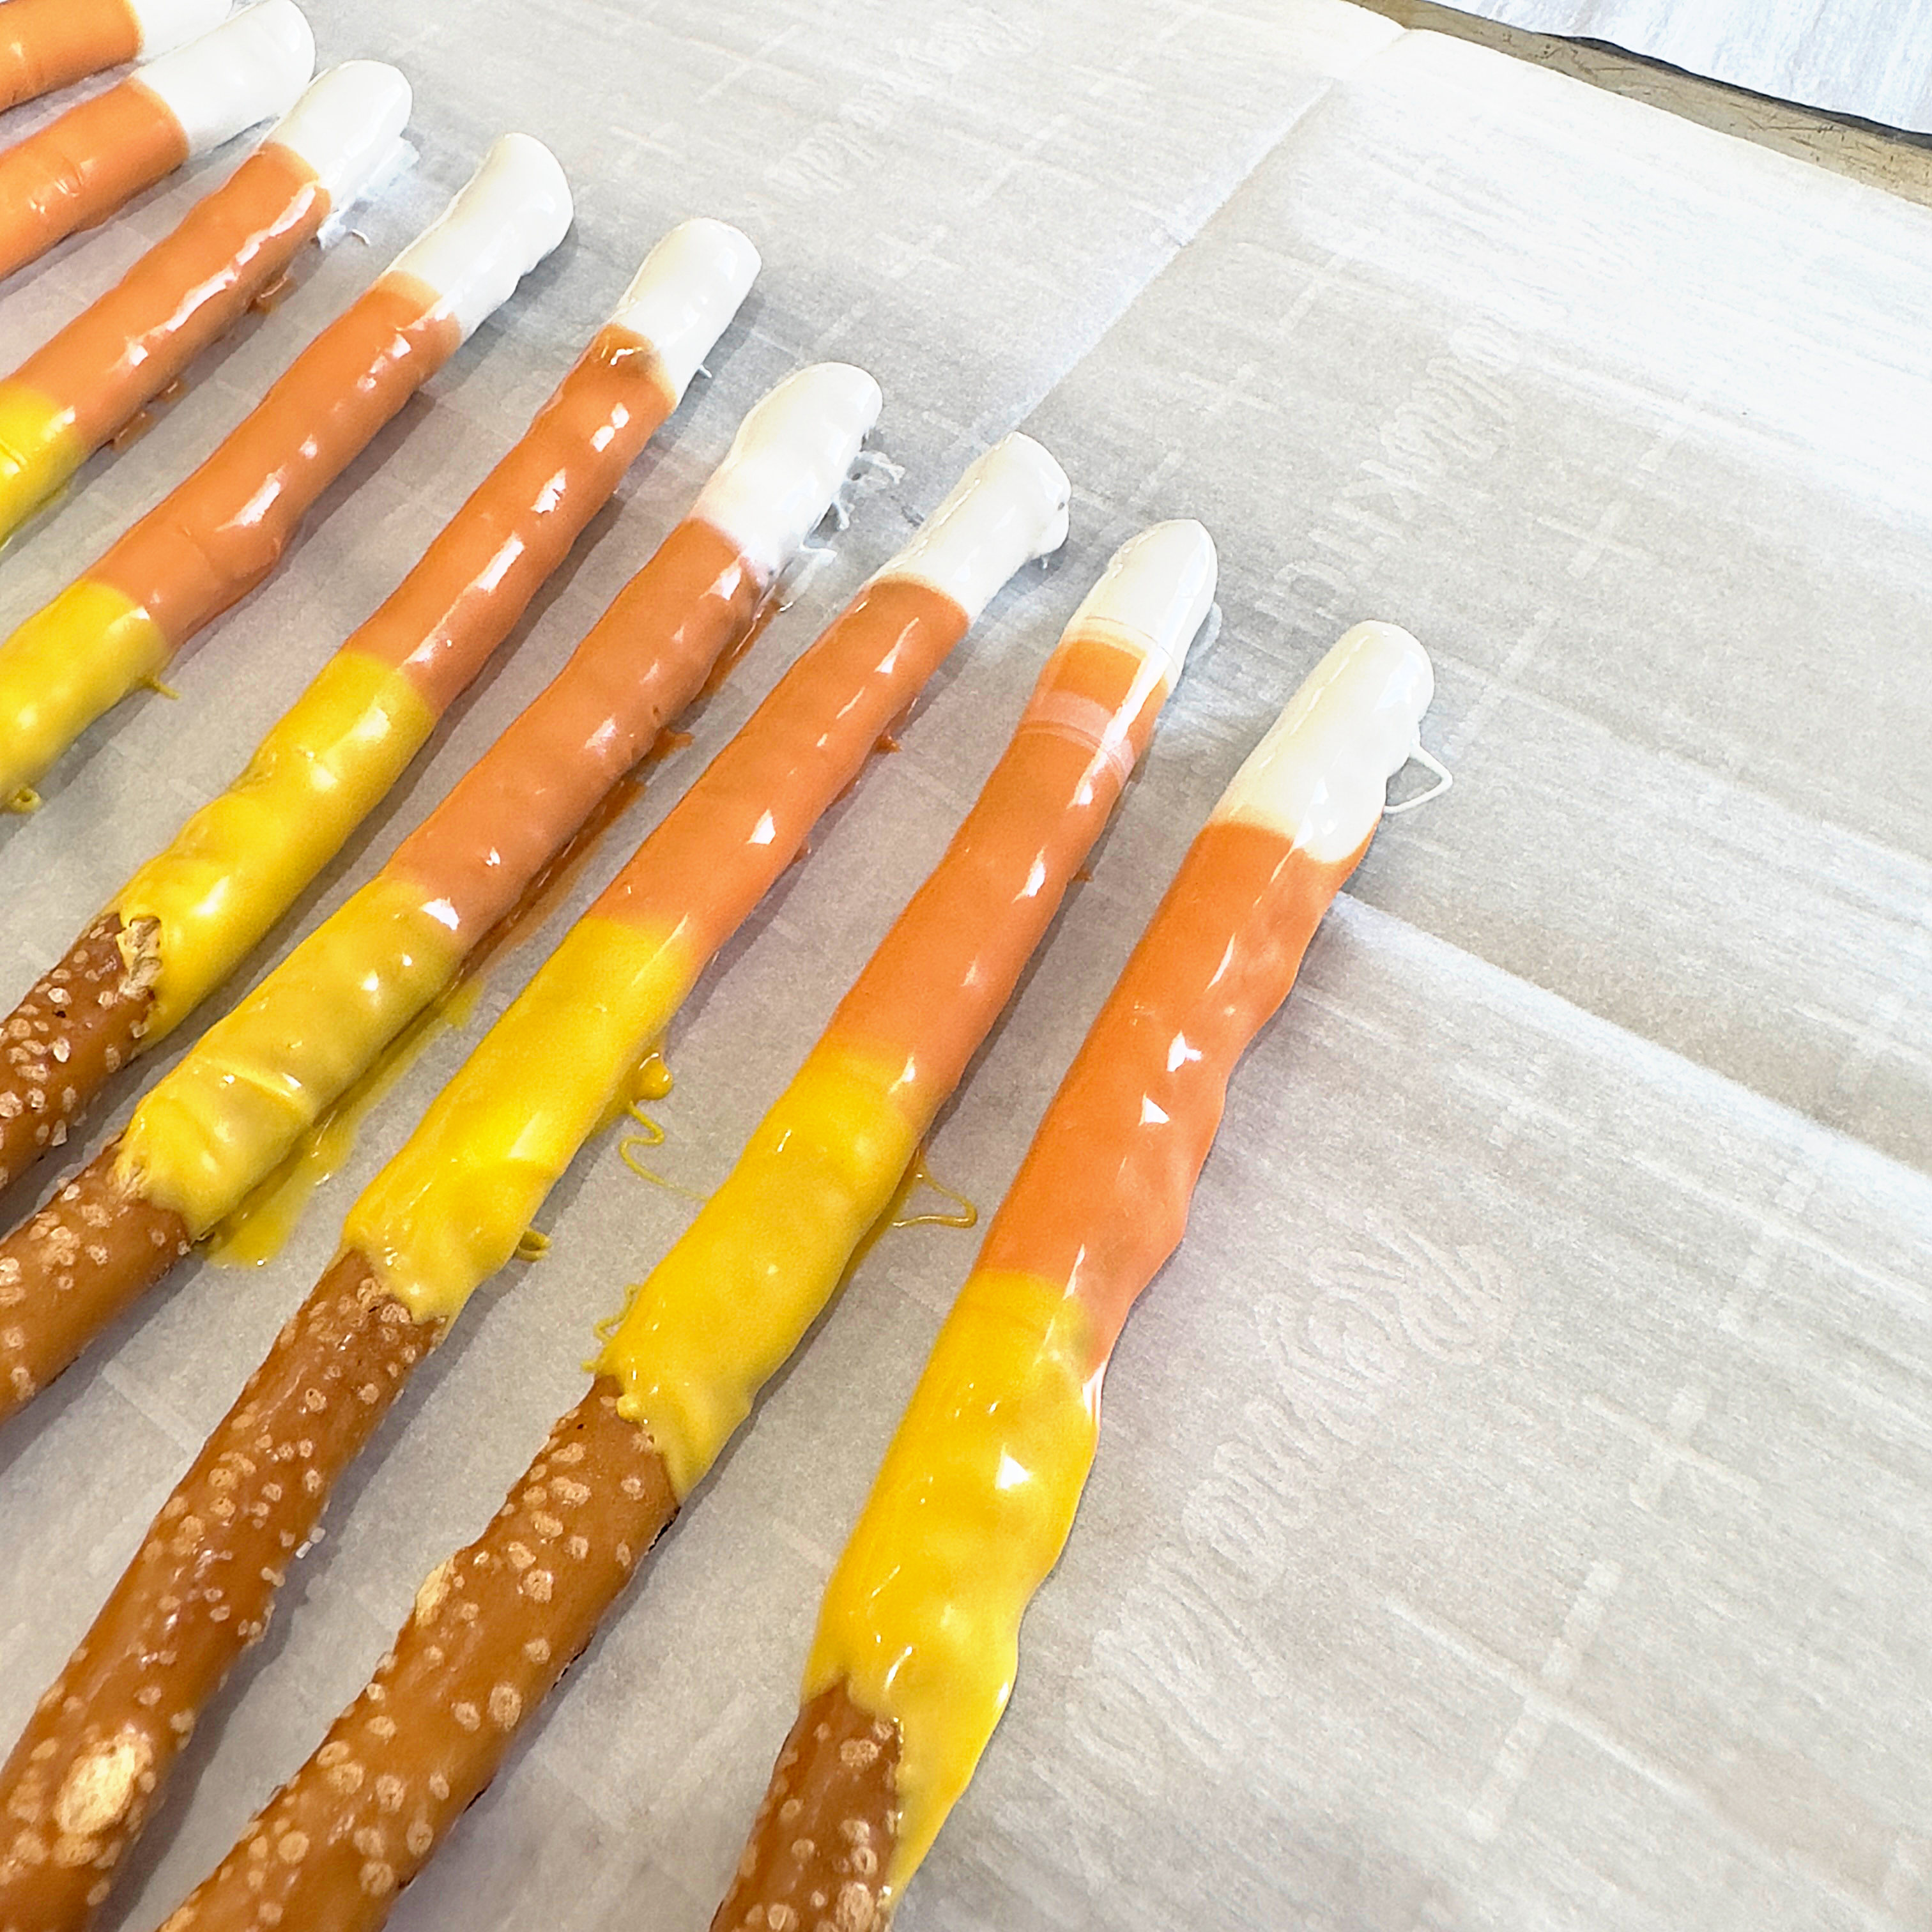
- Swiftly transfer the three colors from the parchment paper to a second piece of parchment paper, and lightly tap any excess candy off the pretzel.
- Lay the third piece of parchment paper to rest for a minute. Remember, your countertops are cold, and the candy will set up quickly. While the pretzel rests, continue coating the pretzels (about five more). Once the pretzels have rested and are still wet, pull them straight up off the third piece of parchment paper and place them on the clean piece of parchment paper on the cookie sheet. NOTE: PLACING YOUR PRETZELS CLOSE TOGETHER BUT NOT TOUCHING WILL HELP WITH THE AMOUNT OF PARCHMENT PAPER USED. Place in the refrigerator to harden (about 10 minutes. *SEE BELOW ABOUT CANDY PUDDLES
- TIP: As the piles of white, orange, and yellow deplete, spoon on the remaining candy and continue coating the pretzels.
- Once all the pretzels have been coated and the candy has hardened, if choosing, it’s time to add the dust luster.
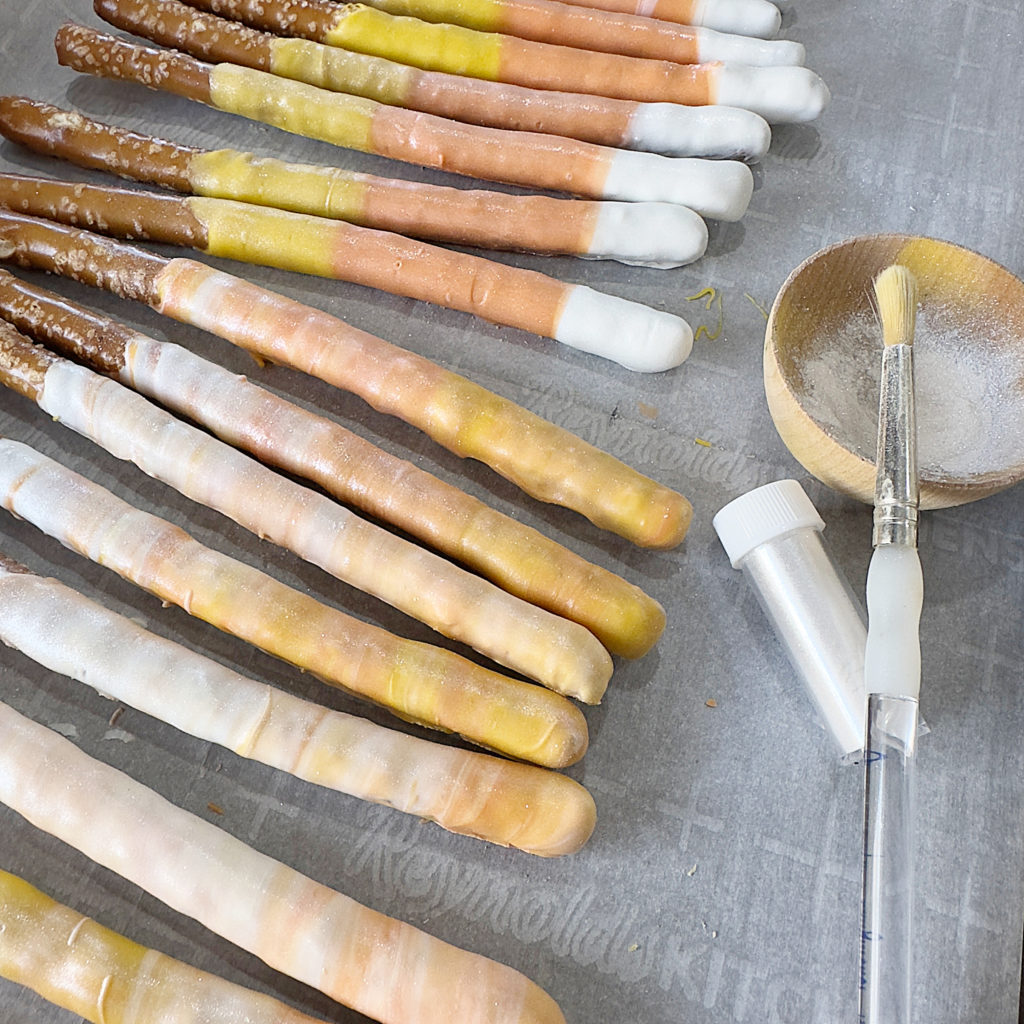
- DUST LUSTER: This step is optional but adds a wonderful iridescence to the pretzels. Mine is available in powder form, but it is also available in spray form. FOR THE POWDER: Pour some of the powder into a small bowl. Dip the brush in the powder and brush onto hardened candy using a clean brush. BEAUTIFUL!
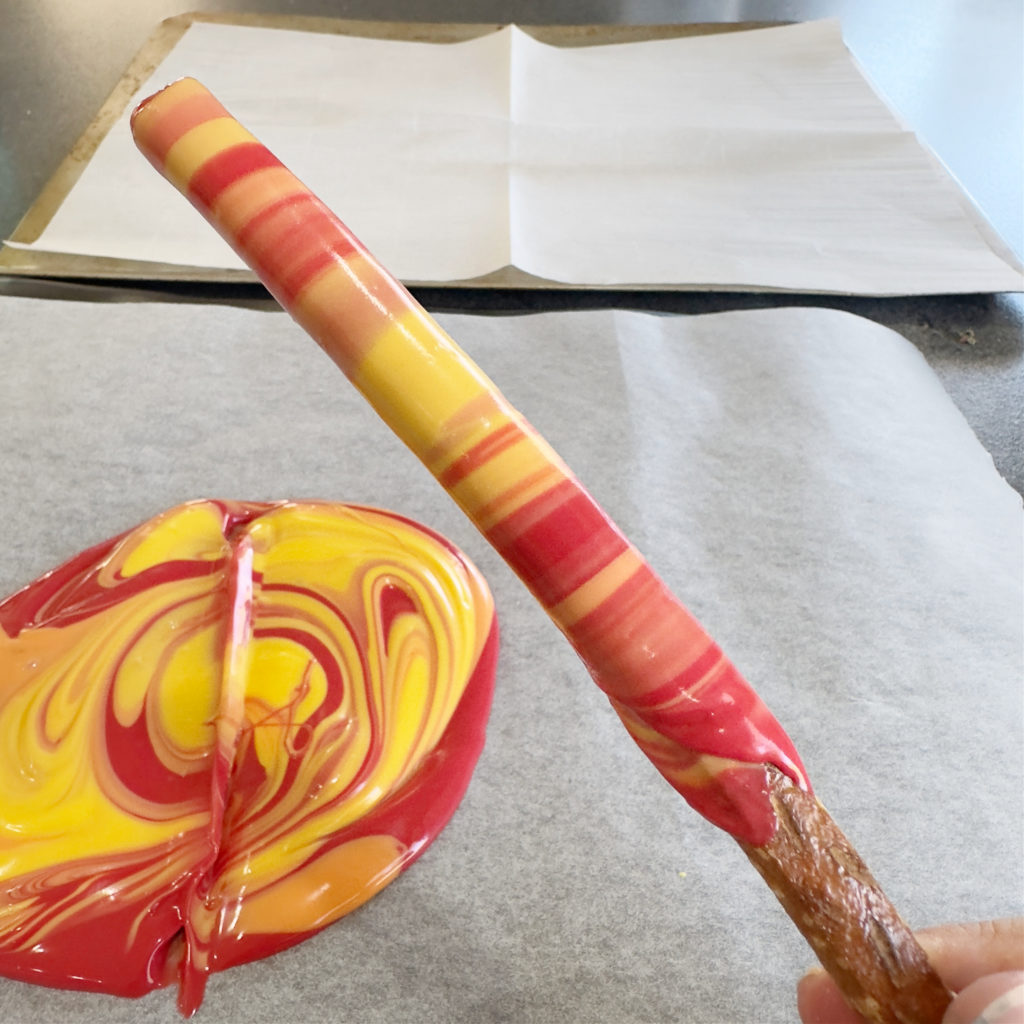
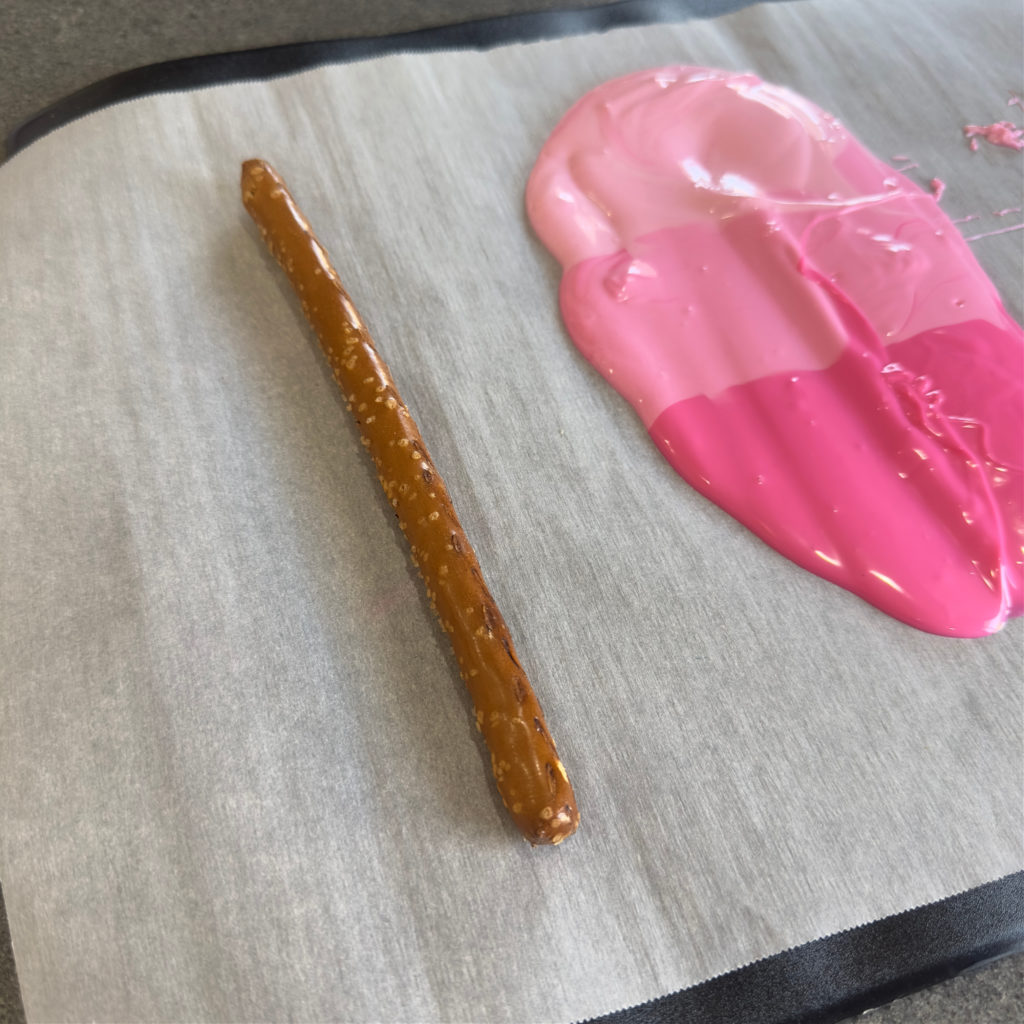
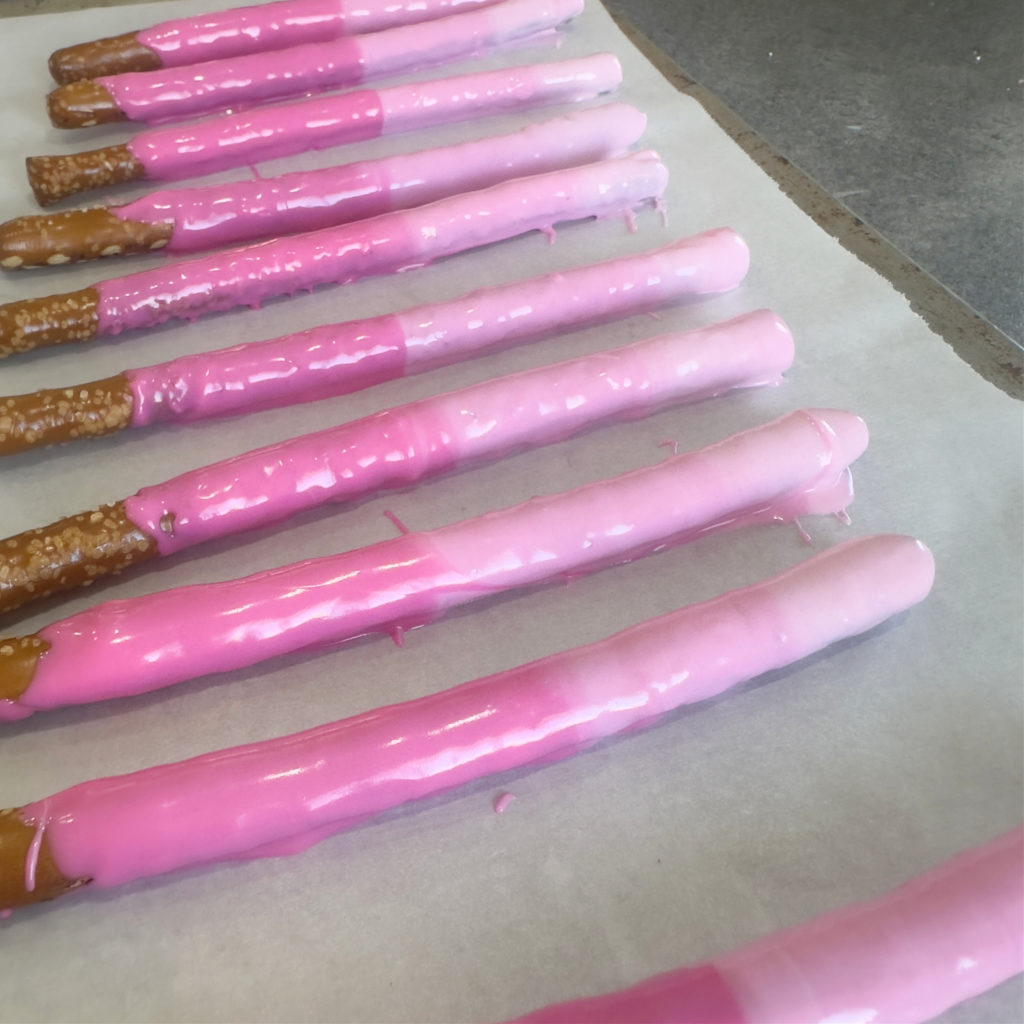
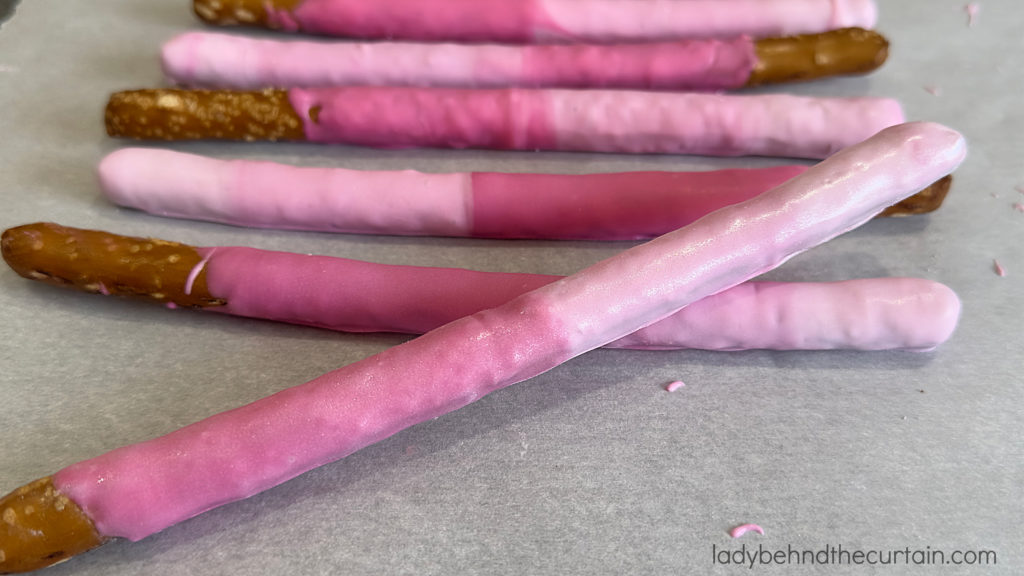
Ombré Decorated Pretzels
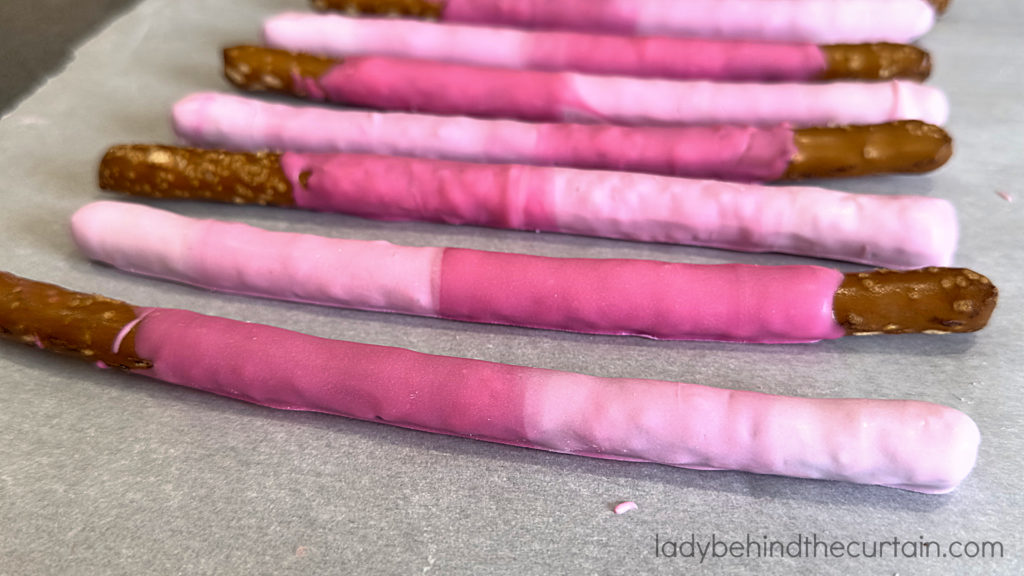
- 5 ounces white melting candy wafers, divided
- 7 ounces pink melting candy wafers, divided
- 20 pretzel rods
- In the first medium microwave-safe bowl, mix the lightest color: 3 ounces of white plus 1 ounce of pink. NOTE: This will be the top color. Heat in the microwave for 1 minute. Stir until melted and creamy. Place the candy on a heating pad, towel, or oven mitts—anything that will create a barrier between the warm candy and the cold countertop. I prefer a heating pad.
- Mix the medium color in the second medium microwave-safe bowl—2 ounces of white plus 2 ounces of pink. NOTE: This will be the center color. Follow the exact instructions for the first color.
- In the third medium microwave-safe bowl, 4 ounces of pink. NOTE: This will be the bottom color. Follow the exact instructions for the first color.
- Once all the colors have been heated and mixed, move them to a towel or an oblong pot holder. Add a piece of parchment paper to a heating pad, towel, or pot holder.
- Have another piece of wax paper ready to catch drips and a cookie sheet lined with parchment paper.
- If needed, place a pretzel on the piece of parchment paper on the counter barrier. Use a pencil to mark the locations where the three colors should be placed. Flip the paper over so the pencil mark is on the bottom and not touching the candy.
- Starting with the lightest color, pour some of the candy on the top portion of the measured space. Continue adding the medium color to the center and the darkest color to the bottom.
- Place the pretzel rod flat and roll it through the melted candy.
- Transfer the pretzel to the wax paper and gently tap off any excess candy. Place the coated pretzel on the cookie sheet lined with parchment paper.
- Once all the pretzels have been coated, place the cookie sheet in the refrigerator for 10 minutes to harden.
ADDING LUSTER DUST-BEAUTIFUL!
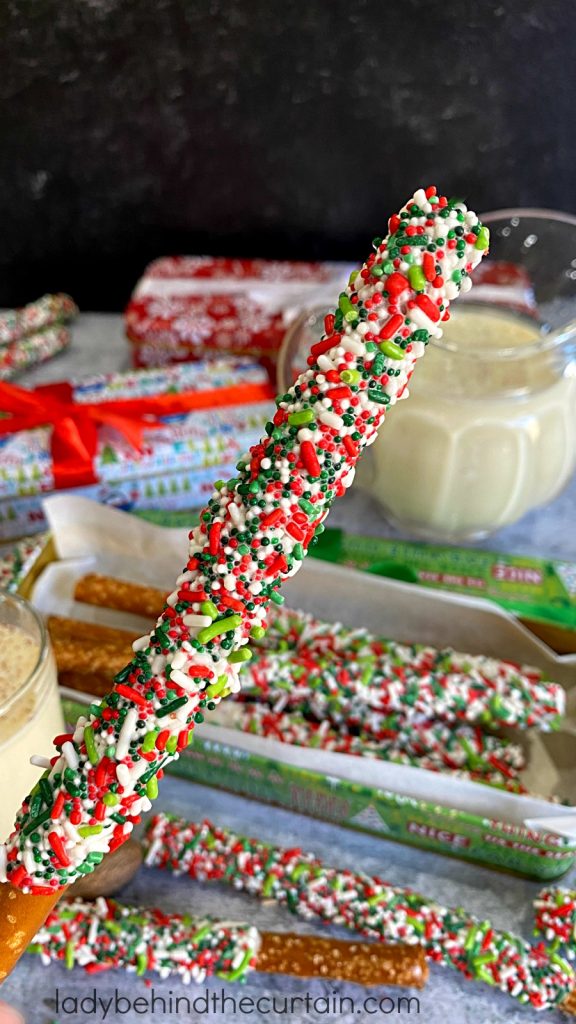
The Many Uses of Decorated Pretzels
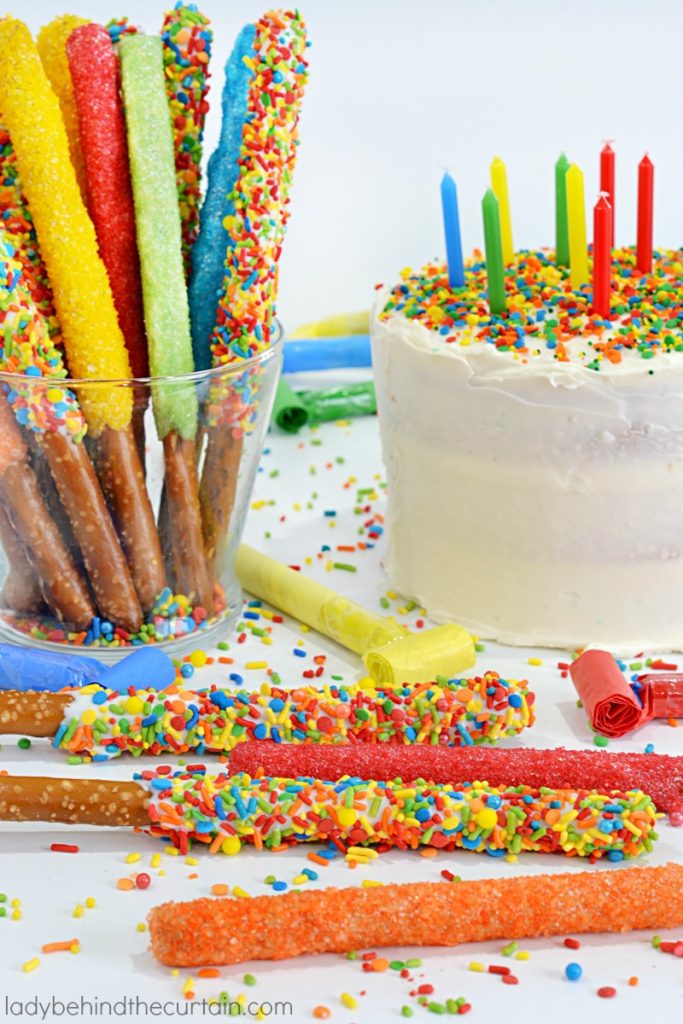
- ADD TO A DESSERT TABLE: The perfect size for small spaces and adds a pop of color.
- USE AS A CENTERPIECE ON A KIDS TABLE: Edible centerpiece? Perfect!
- FILL SMALL CONTAINERS (like buckets) AND LINE THEM DOWN THE CENTER OF A TABLE TO SERVE AS A RUNNER
- ADD DECORATED PRETZELS TO A PRETZEL TREAT BAG AND HAND THEM OUT AS PARTY FAVORS
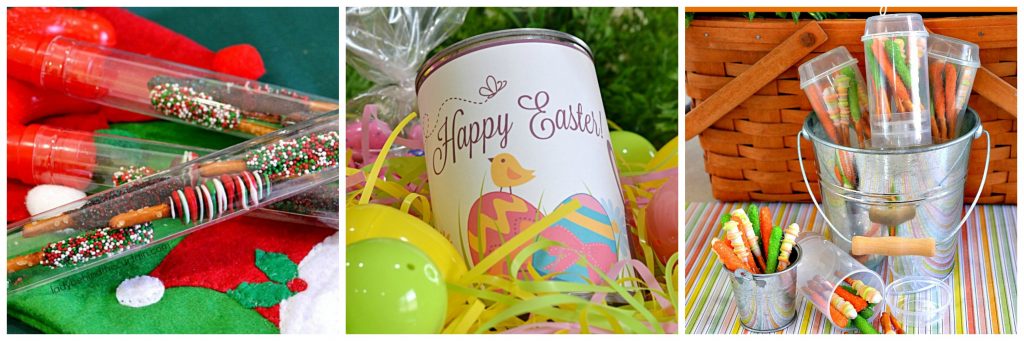
- DECORATE MINI PRETZELS AND PUT IN PLASTIC CANDY CANES (pictured above)
- FILL AN EMPTY DECORATED CAN WITH MINI PRETZELS AND GIVE AS A GIFT—MAKES A GREAT SECRET SANTA GIFT! (pictured above)
- ADD MINI DECORATED PRETZELS TO PUSH UP POPS AND CREATE A FUN DISPLAY (pictured above)
How to Store Decorated Pretzels
Scroll down to number four to see what every hostess wants to hear. To keep your decorated pretzels fresh and looking great, follow these simple storage tips:
1. Let them set completely:
Before storing, ensure the chocolate or coating is fully hardened to prevent smudging or sticking.
2. Use an airtight container:
Place the pretzels in a single layer in an airtight container. If stacking, separate layers with wax or parchment paper to avoid sticking.
3. Store in a cool, dry place:
Store the container in a cool, dry location, away from direct sunlight and heat. A pantry or cupboard works well. Avoid the refrigerator, as it can cause condensation that makes the pretzels soggy.
4. Shelf life:
Properly stored, decorated pretzels can last up to 2–3 weeks at room temperature.
Optional for gifting:
You can also individually wrap pretzels in clear treat bags and tie with ribbon for a cute and practical way to keep them fresh and ready to go!
How to Store Melted Candy

Spread the melted candy on parchment paper and let it sit until it has hardened. Break the candy into small pieces and transfer them to an airtight container or a zip-top bag. Store in a cool, dry area, such as a pantry or cabinet. When ready to use again, add the candy to a microwave-safe bowl and heat it in the microwave until melted. NOTE: BECAUSE THE CANDY HAS BEEN MELTED ONCE, IT WILL NOT TAKE AS LONG TO MELT IT AGAIN, SO KEEP A CLOSE EYE ON IT.
Decorated Pretzel Pockets
WHAT IS A PRETZEL POCKET? Take your decorated pretzels a step further by dropping them into a decorated pocket! Placing the pretzels in a pocket allows for easy handling…NO MESSY HANDS! Click the link below for FREE Pretzel Pocket Collections!
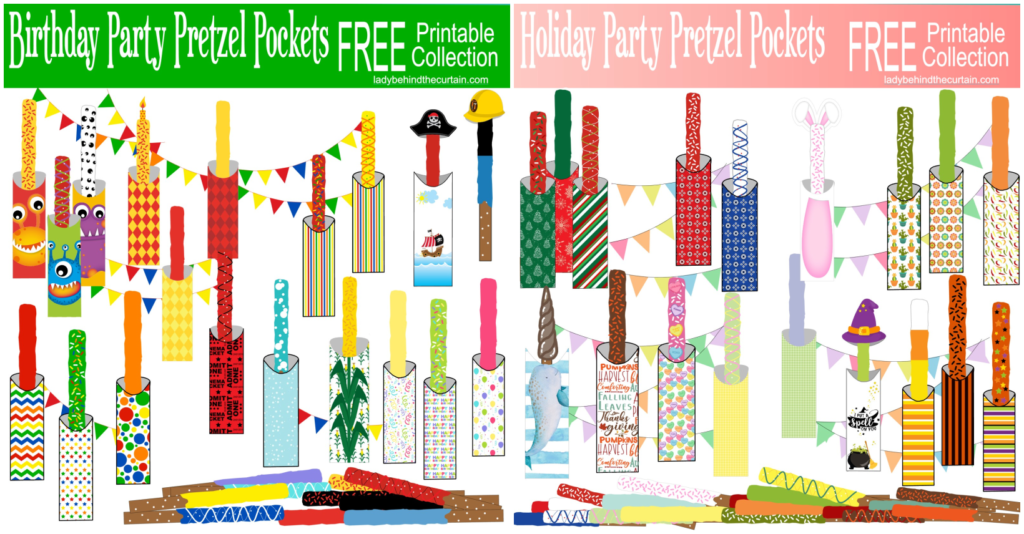
CLICK HERE FOR YOUR FREE COLLECTIONS→PRETZEL POCKET FREE PRINTABLE COLLECTIONS
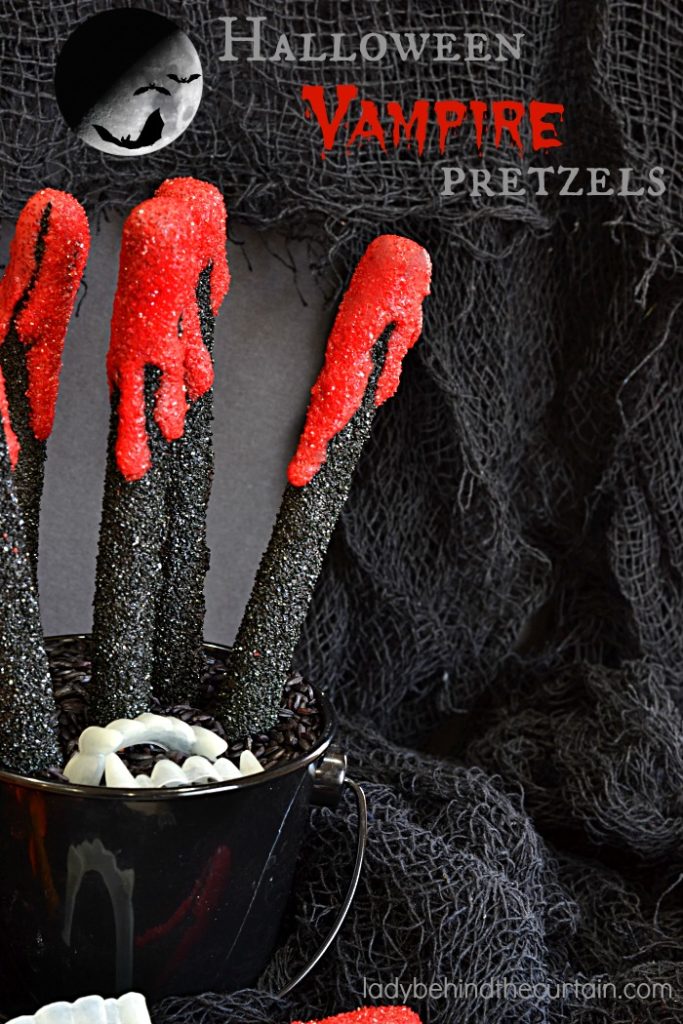
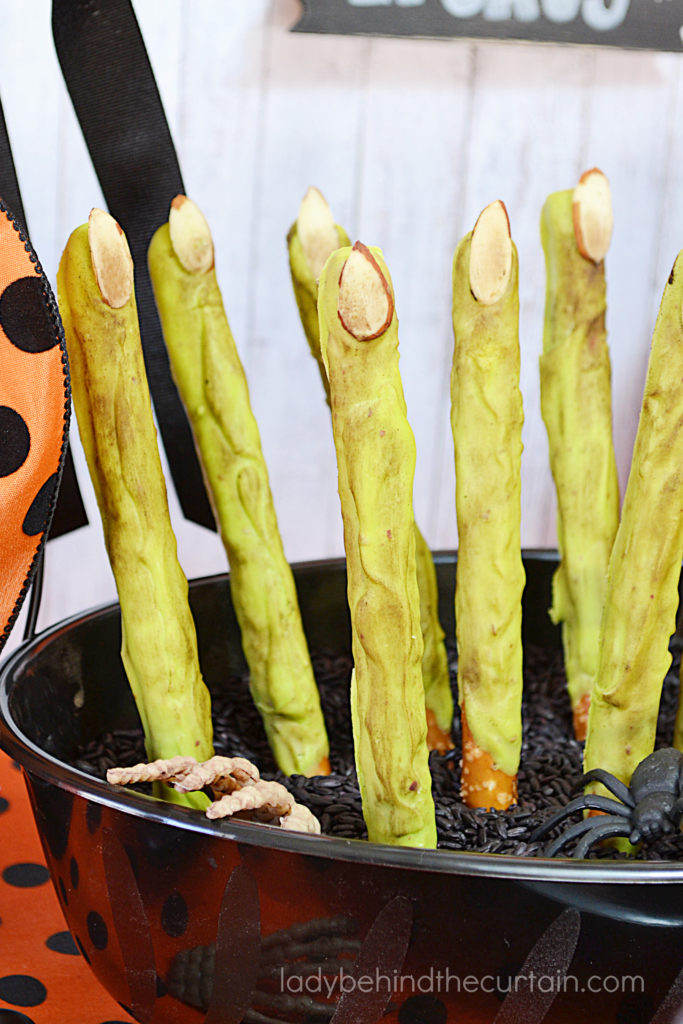
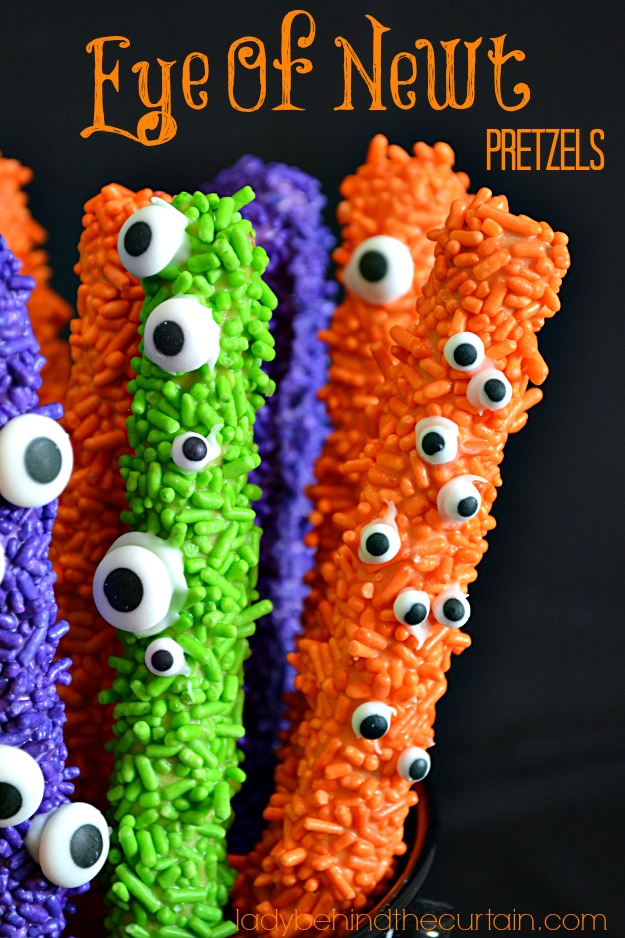
DECORATED PRETZELS—HALLOWEEN—
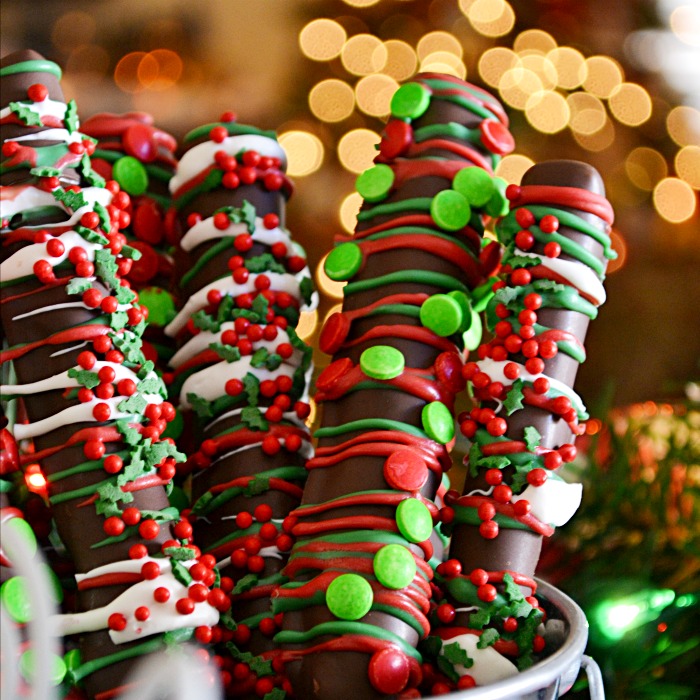
DECORATED PRETZELS—CHRISTMAS—
IF YOU HAVE ANY QUESTIONS—I WILL DO MY BEST TO ANSWER THEM! ♥


I am trying to figure out what product and method you used to paint metallic gold on the red & white oil based candy pretzels. I knew the water based gold paint I bought would likely NOT work…and I was right. I can’t seem to find oil based metallic edible paints so please… can you tell me what you used and if it is a mixture, what are you mixing? Thank you.
Hi Karen are you talking about the luster dust I used on these pretzels? Marbled Pretzels