





How to Make Caramelized White Chocolate
THE SECRET INGREDIENT THAT TASTES LIKE LIQUID GOLD: There are moments in the kitchen when a simple ingredient transforms into something so extraordinary it feels almost magical. Caramelized white chocolate is one of those moments. Imagine taking an ordinary bag of white chocolate chips and, with nothing more than gentle heat and a little patience, turning it into something with the rich flavor of buttery caramel, toasted marshmallows, dulce de leche, and browned butter- all without adding a single extra ingredient. The first time I tasted it, I couldn’t believe the difference. It was familiar enough to recognize as white chocolate, yet completely different in the best possible way.

If you’ve never made caramelized white chocolate before, don’t let the name intimidate you. This isn’t a complicated candy-making project that requires a thermometer or years of experience. Instead, it’s a simple technique that rewards patience. As the chocolate slowly changes color, it also develops incredible depth of flavor that simply can’t be found in regular white chocolate.
Whether you’re folding it into cookie dough, melting it into buttercream, stirring it into cheesecake batter, or chopping it into chunks for brownies, caramelized white chocolate adds a bakery-quality flavor that makes homemade desserts taste truly special. Once you discover what it can do, you’ll start looking for excuses to add it to all your favorite recipes.
The best part? You’re about to learn not only how to make it, but why it works. By the time you finish this guide, you’ll understand what happens during every stage of the process, how to recognize when the chocolate is ready, and why a little patience creates one of the most delicious ingredients you can keep in your pantry.
What Is Caramelized White Chocolate?
Caramelized white chocolate is exactly what it sounds like: white chocolate that has been slowly heated until its natural milk solids and sugars begin to caramelize. As this happens, the chocolate transforms from pale ivory to a warm golden caramel color while developing a completely new flavor profile.
Unlike traditional caramel, there’s no need to cook sugar separately or add butter or cream. Everything needed for this transformation is already inside the white chocolate. Gentle heat simply unlocks flavors that have been there all along, creating something richer, nuttier, and far more complex than the original ingredient.
The finished chocolate has a smooth, creamy texture once melted and a firm snap after it cools. Its flavor lands somewhere between white chocolate, dulce de leche, toasted caramel, and browned butter. It’s sweet, but not overly sweet, making it a wonderful addition to desserts where you want more depth than plain white chocolate can provide.
One of my favorite things about caramelized white chocolate is how versatile it is. You can use it almost anywhere you would use regular white chocolate, but the finished dessert will have noticeably more flavor. It brings warmth and richness without needing additional caramel sauce, extracts, or specialty ingredients.
BEHIND THE CURTAIN TIP: I always keep a batch of caramelized white chocolate in my pantry. Once it’s chopped into small pieces, it’s ready to stir into cookie dough, melt into frosting, or sprinkle over cheesecakes whenever I want to make a dessert taste a little more special.
Why You’ll Love Making Your Own
Store shelves are beginning to carry caramelized white chocolate, but it isn’t always easy to find, and when you do find it, it often comes with a premium price tag. Making your own allows you to create the same incredible ingredient using chocolate chips that are readily available at most grocery stores.
Even more importantly, making it yourself gives you complete control over the flavor. A lighter caramelization produces a delicate buttery sweetness, while a slightly deeper golden color creates richer notes reminiscent of toffee and browned butter. Learning to recognize those subtle differences means you can customize the flavor to match the dessert you’re making.
Homemade caramelized white chocolate is also an ingredient that surprises people. Serve cookies made with it at a holiday cookie exchange or fold it into homemade frosting, and you’ll almost certainly hear someone ask, “What is that amazing flavor?” It isn’t overpowering or artificial; it simply tastes richer and more complex than anyone expects from white chocolate.
Perhaps my favorite reason for making it at home is that it turns an everyday pantry staple into something that feels gourmet. With a little patience, a bag of ordinary white chocolate chips becomes an ingredient worthy of a high-end bakery.
Why This Method Is Worth Learning
There are several ways to caramelize white chocolate, including baking it in the oven for long periods. While that method works, it often requires transferring the chocolate, stirring at timed intervals, and waiting much longer for the flavor to develop.
The stovetop method you’ll find in this guide keeps you connected to the process from beginning to end. Because you’re watching the chocolate change in real time, you’ll quickly learn what each stage looks like and gain confidence with every batch you make. Once you’ve experienced the transformation firsthand, you’ll know exactly what to look for the next time.
More importantly, this technique teaches you to trust your senses. Instead of relying only on the clock, you’ll learn to recognize the color, texture, aroma, and flavor that tell you the chocolate has reached its full potential. That’s the kind of kitchen confidence that carries over into every recipe you make.
The Science Behind Caramelized White Chocolate
One of the things I love most about making caramelized white chocolate is that you’re not adding a single ingredient to create all that incredible flavor. There isn’t any caramel sauce hiding in the recipe, no brown sugar, no butter, and no special extracts. Instead, you’re simply encouraging the ingredients already inside the white chocolate to become something even better.
That’s what makes this technique so fascinating. With nothing more than gentle heat and constant stirring, ordinary white chocolate develops notes of toasted caramel, browned butter, butterscotch, and roasted nuts. Understanding why that happens not only makes the process more interesting, but it also helps you recognize exactly what you’re looking for as the chocolate transforms.
What Happens When White Chocolate Heats?
White chocolate may look simple, but it’s actually made up of several ingredients working together. Cocoa butter provides the smooth, creamy texture, while milk solids and sugar contribute sweetness and richness. As the chocolate is gently heated, those milk solids and sugars begin to toast, creating hundreds of new flavor compounds.
Those new compounds are what give caramelized white chocolate its deep, complex flavor. Instead of tasting simply sweet and creamy, it develops layers of buttery caramel, toffee, and roasted notes that weren’t present before.
This is why caramelized white chocolate tastes so different even though you haven’t added anything new. You’re simply changing the chemistry of the ingredients already in the chocolate.
WOW! I NEVER KNEW THAT! Caramelized white chocolate and browned butter have more in common than you might think. Think about what happens when you brown butter. The butter doesn’t suddenly become a different ingredient, it simply develops a deeper, nuttier, more complex flavor as the milk solids toast.
Caramelized white chocolate undergoes a remarkably similar transformation. As the milk solids and sugars gently caramelize, the familiar vanilla flavor gives way to rich notes of toasted caramel, butterscotch, roasted nuts, and browned butter.
That’s why people often describe caramelized white chocolate as tasting “nutty.” There aren’t any nuts in the chocolate at all. Those nutty flavors are created naturally during the caramelization process, just as they are when butter is browned.
If you’re already a fan of browned butter cookies, cakes, or frosting, there’s a good chance you’ll fall in love with caramelized white chocolate too.
The Secret Most Recipes Never Mention
Many recipes simply tell you to buy “good-quality white chocolate.” While quality certainly matters, there’s another factor that’s just as important, and surprisingly few recipes talk about it.
The key is the fat percentage.
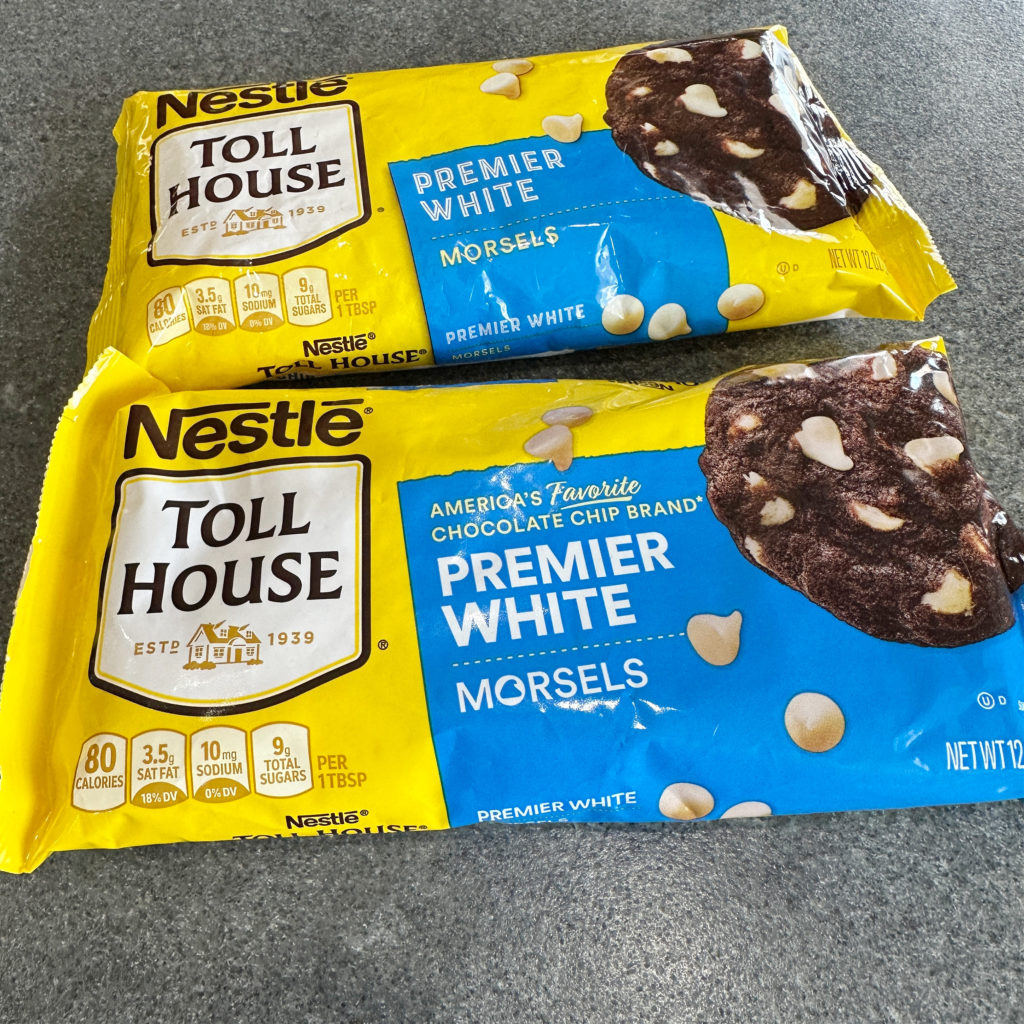
White chocolate with 36% fat or higher generally caramelizes more beautifully than lower-fat products. The higher fat content helps the chocolate melt smoothly, encourages even caramelization, and produces a richer finished texture.
Lower-fat white chocolate often contains a higher proportion of sugar and stabilizers. While it may still melt, it can become drier, grainier, or more difficult to work with as it heats.
Rather than shopping by price alone, learn to read the Nutrition Facts label. Once you know how to calculate the fat percentage, you’ll be able to compare brands with confidence instead of guessing which one will perform best.
How to Calculate the Fat Percentage
| Step | Example |
|---|---|
| Calories from fat | 36 calories (4 grams of fat × 9 calories per gram) |
| Total calories | 80 calories |
| Divide | 36 ÷ 80 = 0.45 |
| Multiply by 100 | 0.45 × 100 = 45% fat |
Formula
Calories from Fat ÷ Total Calories × 100 = Fat Percentage
Example
- 4 grams of fat = 36 calories
- 36 ÷ 80 = 0.45
- 0.45 × 100 = 45% fat
A white chocolate with a fat percentage like this is an excellent candidate for caramelizing.
BEHIND THE CURTAIN TIP: I don’t choose white chocolate by reading the front of the package. I flip it over and check the Nutrition Facts label first. Spending a few seconds calculating the fat percentage can make the difference between chocolate that caramelizes beautifully and chocolate that struggles to develop that rich, toasted flavor.
Why Does the Chocolate Suddenly Become Grainy?
If you’ve never caramelized white chocolate before, the first few minutes can be a little unsettling.
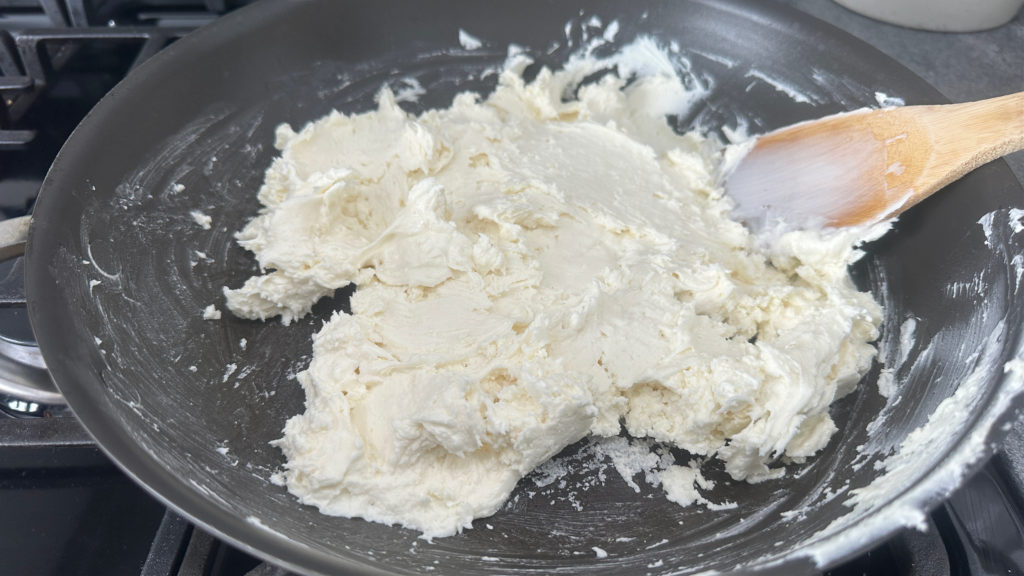
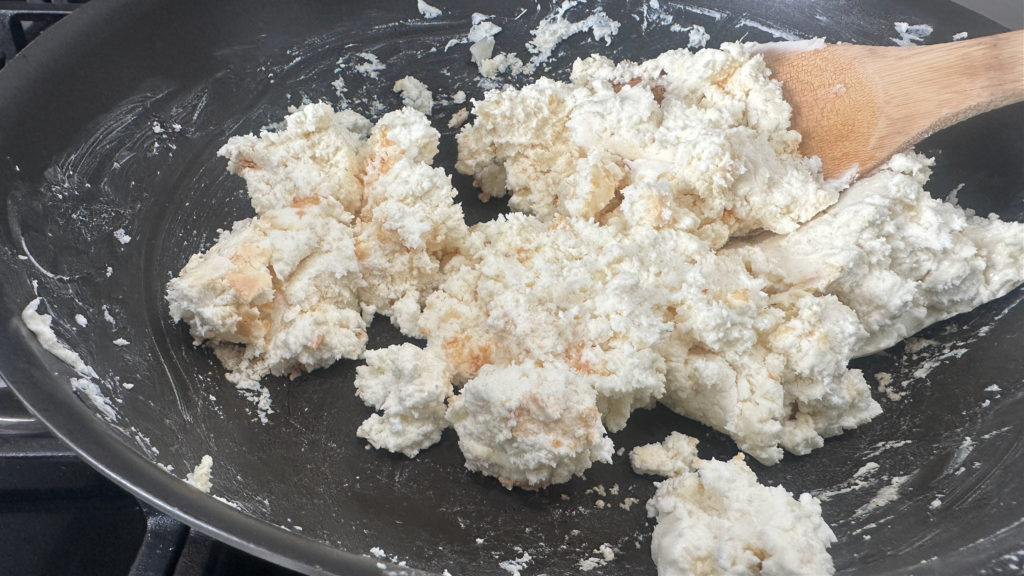
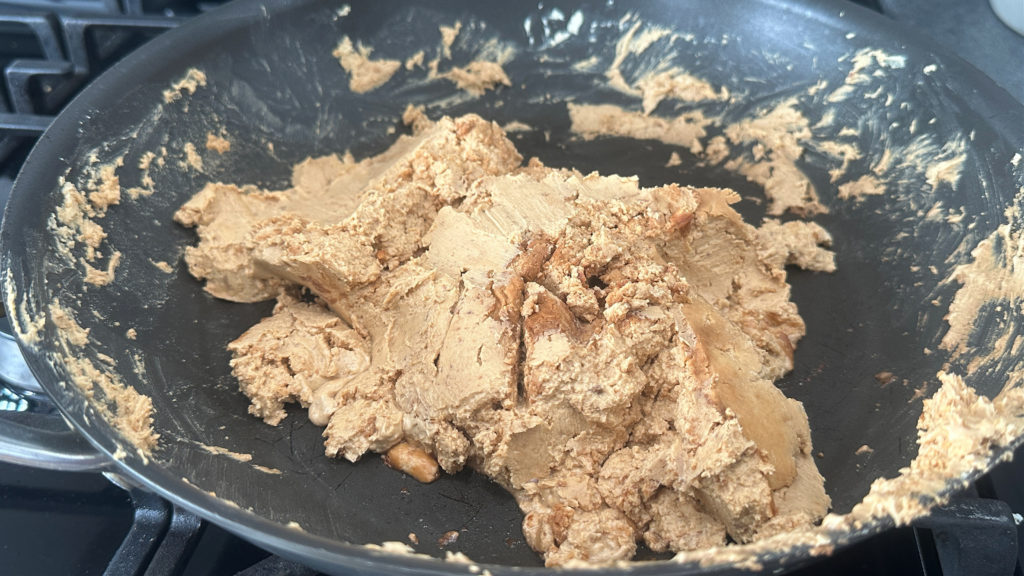
One moment the chocolate is beginning to melt, and the next it’s thick, dry, grainy, and almost impossible to stir. It looks like something has gone terribly wrong. In reality, this is one of the most important stages of the process—and it’s exactly what you want to see.
As the chocolate heats, the cocoa butter melts first while the sugar and milk solids temporarily separate. This causes the mixture to lose its silky appearance and become thick and clumpy. Many people assume they’ve ruined the chocolate at this point and stop cooking. That would be a mistake.
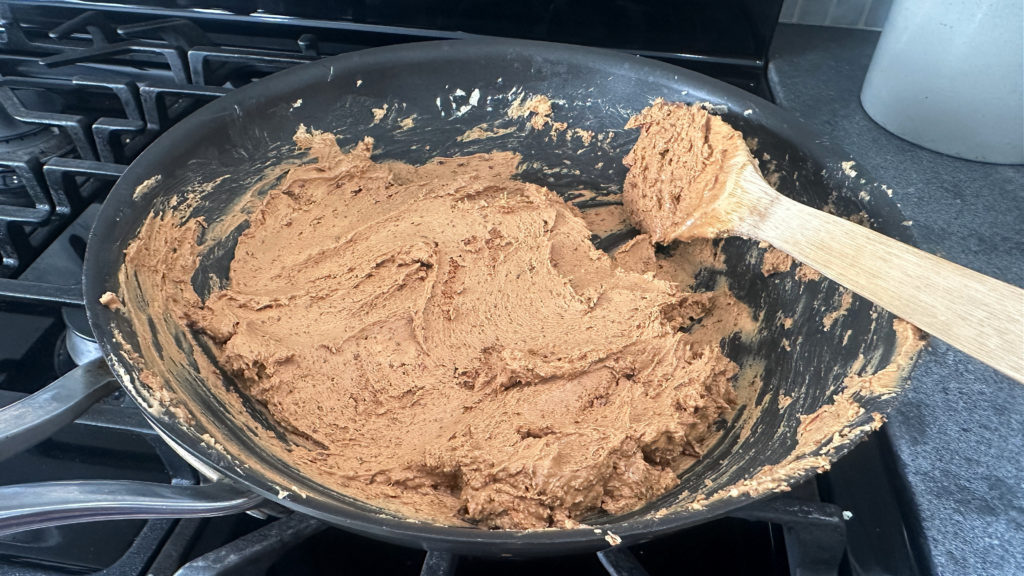
As you continue stirring, the ingredients gradually come back together. At the same time, the milk solids and sugars continue to toast, creating the beautiful caramel color and incredible flavor you’re working toward.
The grainy stage isn’t a failure. It’s a sign that caramelization is underway.
From White Chocolate to Liquid Gold: The Caramelization Timeline
One of the most rewarding parts of making caramelized white chocolate is watching the transformation happen right before your eyes. Unlike many recipes where all the magic happens inside the oven, this process lets you witness each stage as the chocolate slowly develops its signature golden color and rich, nutty flavor.
If it’s your first time making caramelized white chocolate, don’t expect it to look beautiful from beginning to end. In fact, there will be moments when you’ll be convinced you’ve ruined it. The chocolate may become dry, thick, grainy, or even resemble cookie dough before it smooths out again. Knowing what to expect removes the guesswork and gives you the confidence to keep stirring instead of giving up too soon.
The Caramelization Timeline
Use this timeline as a guide rather than an exact schedule. Cooking times can vary depending on your skillet, burner, and the brand of white chocolate you’re using.
| Time | What You’ll See | What It Means |
|---|---|---|
| 0–3 Minutes | Chocolate begins to soften and melt. | The cocoa butter is melting, preparing the chocolate for caramelization. |
| Around 3 Minutes | Thick, dry-looking clumps begin to form. | The cocoa butter, sugar, and milk solids temporarily separate. This is completely normal. |
| 5–7 Minutes | The first hints of a warm golden color appear. | The milk solids and sugars are beginning to toast, creating new flavor compounds. |
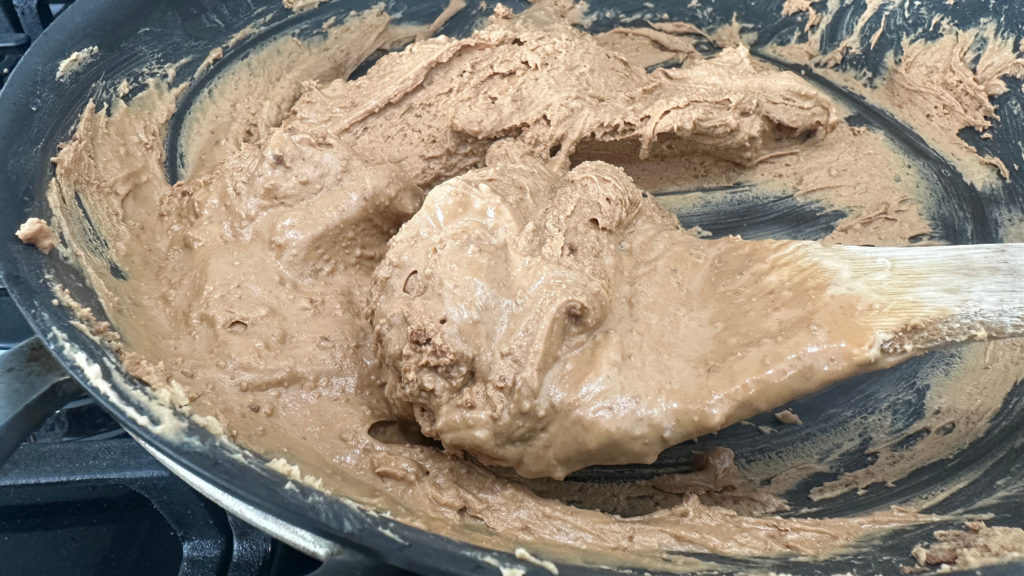
| 8–12 Minutes | The chocolate gradually becomes smoother while the caramel color deepens. | The ingredients are coming back together as caramelization continues. |
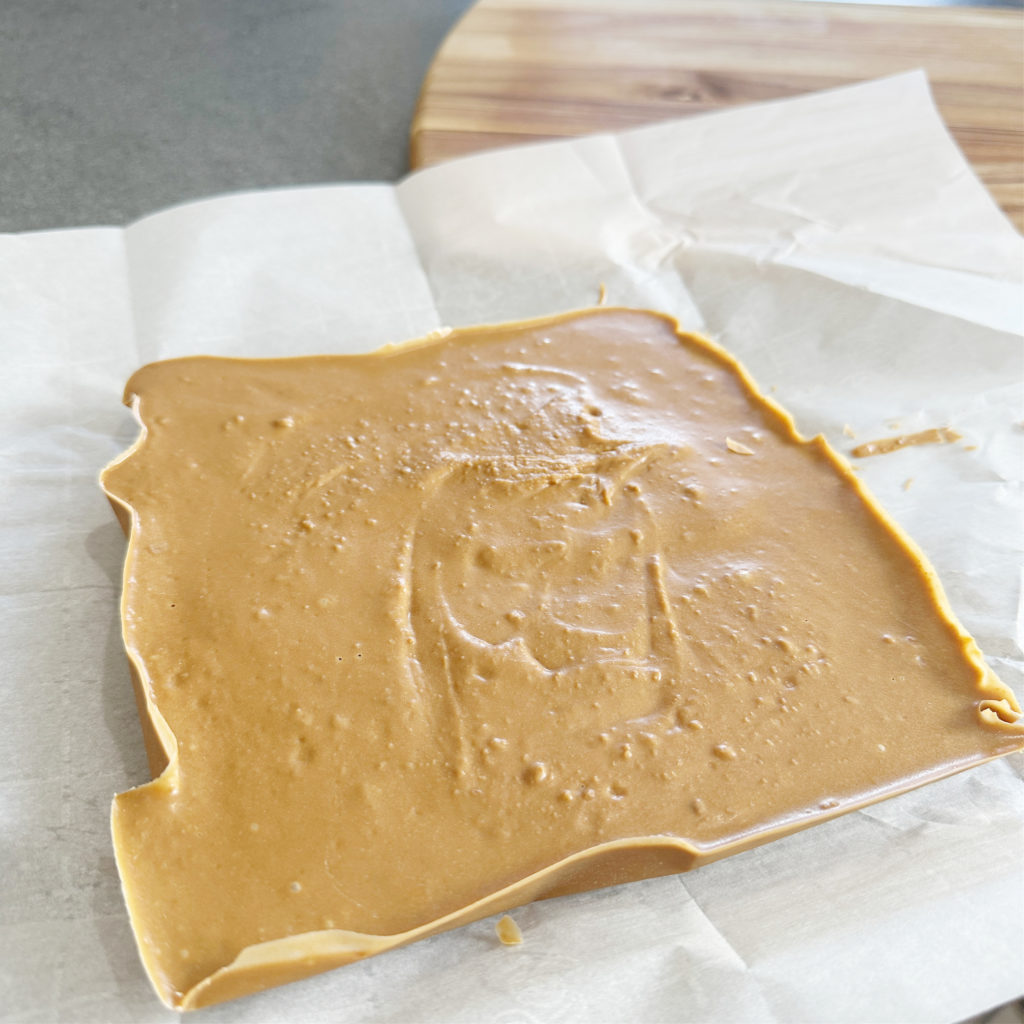
| Around 15 Minutes | Rich golden caramel color with a glossy appearance. | The chocolate has developed its signature caramelized flavor and is ready to be removed from the heat. |
BEHIND THE CURTAIN TIP: Think of caramelizing white chocolate like toasting marshmallows over a campfire. Slow and steady gives you the deepest flavor. Too much heat may brown the outside before the inside has a chance to develop those wonderful caramel notes.
STAGE ONE: IT LOOKS PERFECT: The first few minutes are reassuring. The chocolate begins melting, becoming soft and creamy as the cocoa butter liquefies. At this point, everything appears to be going exactly as expected. This stage can create a false sense of security because it won’t stay smooth for long. Keep stirring continuously so the chocolate melts evenly and doesn’t sit too long against the hot surface of the skillet.
STAGE TWO: “I THINK I RUINED IT”: This is where nearly every first-time baker panics. Suddenly the smooth chocolate thickens into a dry, grainy mass. It may look crumbly, stiff, or almost like wet sand. If you didn’t know this stage was coming, you’d probably remove the pan from the heat. Don’t. This temporary change is actually proof that the caramelization process is moving forward. The ingredients are simply reorganizing themselves as the milk solids and sugars continue to toast. Stopping now means stopping before the magic happens.
WOW! I NEVER KNEW THAT! The grainy stage is actually a sign that you’re making progress. Many people think the chocolate has seized or burned when it becomes thick and crumbly. In reality, this temporary texture change is expected. As caramelization continues and you keep stirring, the ingredients gradually come back together, revealing smooth, beautifully caramelized chocolate. Sometimes the ugliest stage produces the most delicious results.
STAGE THREE: THE COLOR BEGINS TO CHANGE: Somewhere around the halfway point, you’ll notice tiny streaks of golden color appearing throughout the chocolate. At first, they’re easy to miss. The chocolate touching the bottom of the skillet usually changes color first because it’s receiving the most direct heat. As you continue stirring, those caramel-colored streaks begin blending into the rest of the chocolate until the entire mixture gradually takes on a warm golden hue. This is one of my favorite moments because it’s the first visual confirmation that all your patience is paying off. You’ll probably notice another change to the aroma. Instead of smelling simply sweet like white chocolate, the kitchen begins to fill with notes of toasted sugar, warm vanilla, buttery caramel, and browned butter. That’s when you know something special is happening.
STAGE FOUR: THE FLAVOR COMES ALIVE: As the color deepens, the flavor changes just as dramatically. The simple sweetness of white chocolate gives way to a richer, more layered taste. You’ll notice hints of caramel, butterscotch, toasted milk, browned butter, and subtle roasted nuttiness. If you’ve ever wondered why professional bakeries create desserts with such incredible depth of flavor, this is one of their secrets. They’re often building flavor instead of simply adding sweetness. Caramelized white chocolate does exactly that.
HOW DO YOU KNOW IT’S FINISHED? Forget the timer for a moment. The best indicator isn’t the number of minutes that have passed—it’s what your senses are telling you. Your caramelized white chocolate is ready when:
- The color is a rich golden caramel.
- The aroma is warm, buttery, and slightly nutty.
- The chocolate has become smooth enough to spread easily.
- A small cooled taste has flavors of caramel, browned butter, and toffee instead of plain white chocolate.
If the chocolate is still pale and tastes mostly like regular white chocolate, give it another minute or two while continuing to stir. If it begins turning dark brown or develops a bitter aroma, it’s gone a little too far. You’re aiming for golden caramel, not coffee brown.
BEHIND THE CURTAIN TIP: I always taste a tiny cooled smear before pouring the chocolate into the pan to harden. The flavor should make you pause for a second and think, “That tastes completely different than when I started.” If it doesn’t, I let it caramelize just a little longer.
Patience Is the Secret Ingredient
Common Mistakes to Avoid
Caramelized white chocolate is one of those recipes that rewards patience more than experience. Once you understand what the chocolate is supposed to do, the process becomes surprisingly easy. Most problems happen because bakers think something has gone wrong when, in reality, everything is unfolding exactly as it should.
- The number one mistake is trying to rush the process. White chocolate is delicate. The milk solids and sugars need time to slowly toast and develop those incredible caramel flavors. Increasing the heat may seem like a good way to save a few minutes, but it often results in scorched chocolate with a bitter flavor instead of the rich, buttery notes you’re trying to create.
- Another common mistake is giving up too soon. During the first several minutes, the chocolate will become thick, dry, and grainy. It’s an awkward stage that doesn’t look very appetizing, but it’s also one of the most important parts of the transformation. Keep stirring and trust the process.
- Finally, avoid judging the chocolate by the clock alone. Cooking times can vary depending on the type of skillet, your stovetop, and even the brand of white chocolate you’re using. Instead, let the color, aroma, and flavor tell you when it’s ready.
WOW! I NEVER KNEW THAT! Most people think caramelized white chocolate is ruined when it becomes dry and crumbly. That’s actually one of the best signs you’re on the right track. The temporary grainy texture means the cocoa butter, sugars, and milk solids are reorganizing as they caramelize. With a little patience and continuous stirring, they’ll come back together into smooth, creamy chocolate with an amazing caramel flavor.
Troubleshooting Guide
Even experienced bakers occasionally run into a batch that doesn’t behave exactly as expected. Fortunately, most issues have simple solutions.
| Problem | What Happened | How to Fix It |
|---|---|---|
| The chocolate became thick and grainy. | This is a normal stage of caramelization. | Keep stirring. The chocolate should gradually become smooth again. |
| The chocolate is browning too quickly. | The heat is too high. | Lower the heat immediately and continue stirring constantly. |
| The chocolate still tastes like regular white chocolate. | It hasn’t caramelized long enough. | Continue cooking until the color deepens and the flavor becomes richer. |
| The chocolate turned dark brown. | It caramelized too far. | Remove it from the heat immediately. If it smells burnt or bitter, it’s best to start over. |
| The chocolate doesn’t melt smoothly. | The chocolate may have a lower fat percentage or a different formulation. | Choose white chocolate with at least a 36% fat percentage for the best results. |
BEHIND THE CURTAIN TIP: If you ever feel tempted to turn up the heat, don’t. I know it’s hard to watch the chocolate sit in that grainy stage, but that’s usually when the best flavor is developing. I’d much rather spend a few extra minutes stirring than throw away a burned batch and start all over again.
Choosing the Best White Chocolate
Walk down the baking aisle, and you’ll find dozens of brands of white chocolate. Some are labeled baking chips, while others are simply called white morsels or premium white chocolate. It can be confusing to know which one will produce the best caramelized flavor.
While quality certainly matters, I don’t choose my white chocolate based on the brand name alone. I turn the package over and read the label.
Earlier, we talked about why the fat percentage plays such an important role. White chocolate with 36% fat or higher generally melts more smoothly and caramelizes more evenly because it contains enough fat to support the transformation. Lower-fat products often contain more sugar and stabilizers, making them more difficult to caramelize successfully.
That’s why learning to read the Nutrition Facts label is one of the most valuable baking skills you can develop. Instead of relying on someone else’s favorite brand, you’ll know exactly what to look for no matter where you shop.
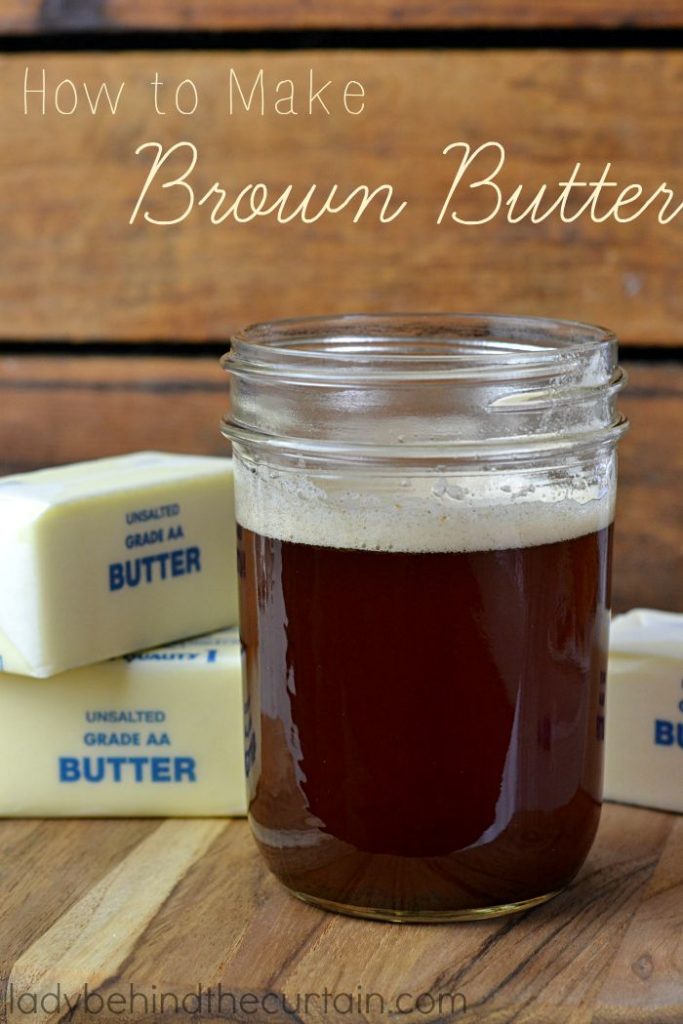
How to Make Brown Butter
What Does Caramelized White Chocolate Taste Like?
This is the question everyone asks before making their first batch. Imagine taking everything you love about white chocolate and giving it more depth, more richness, and a warm toasted finish.
The creamy sweetness becomes softer and more balanced. The vanilla notes take a step back while flavors of buttery caramel, butterscotch, toasted milk, and toffee move to the front. Then, right at the end, you’ll notice a subtle roasted nuttiness that lingers on your palate. If that nutty flavor sounds familiar, there’s a good reason. It’s very similar to what happens when you brown butter.
As the milk solids toast, they create new flavor compounds that transform the ingredient into something far more complex. That’s why browned butter has that unmistakable nutty aroma, and it’s why caramelized white chocolate develops those same warm, roasted notes.
They don’t taste exactly alike, but they create the same kind of rich, comforting flavor that makes people stop after the first bite and wonder what your secret ingredient is.
Ways to Bake with Caramelized White Chocolate Chunks
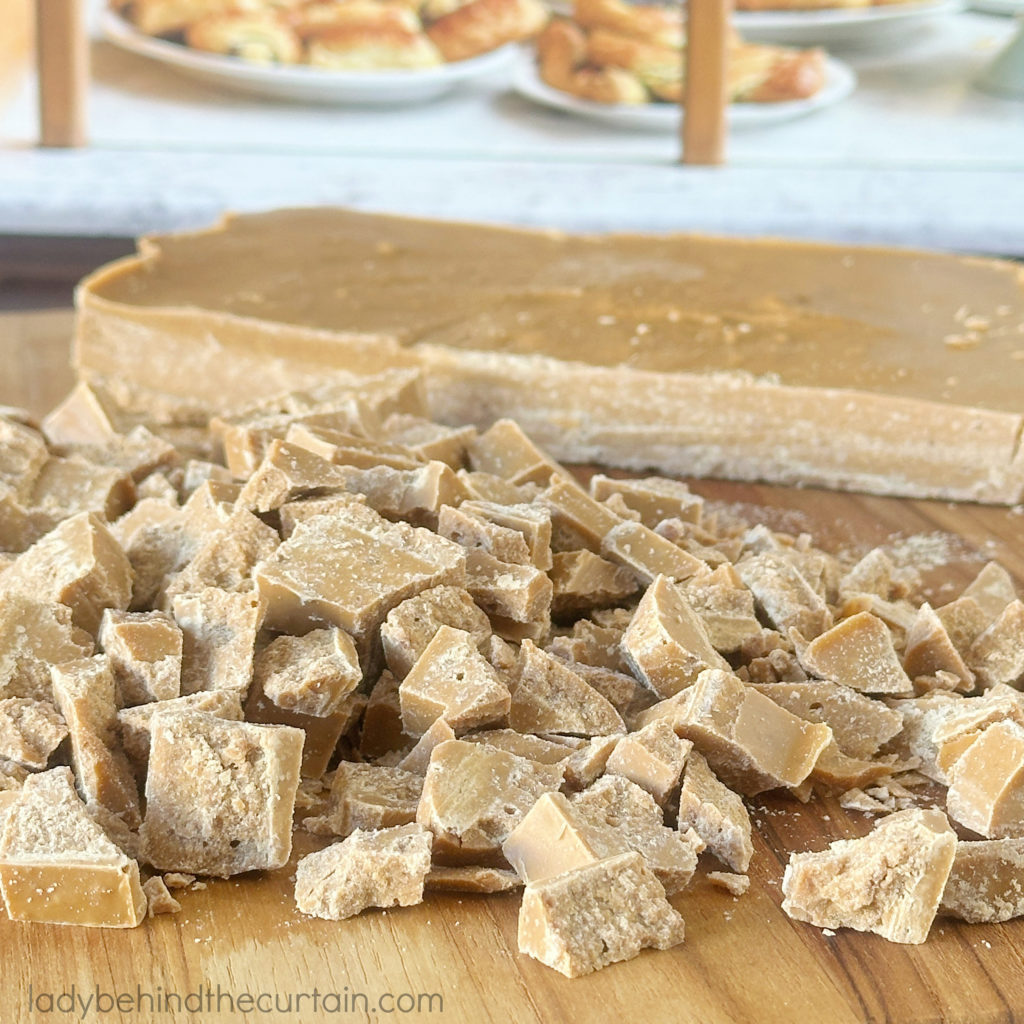
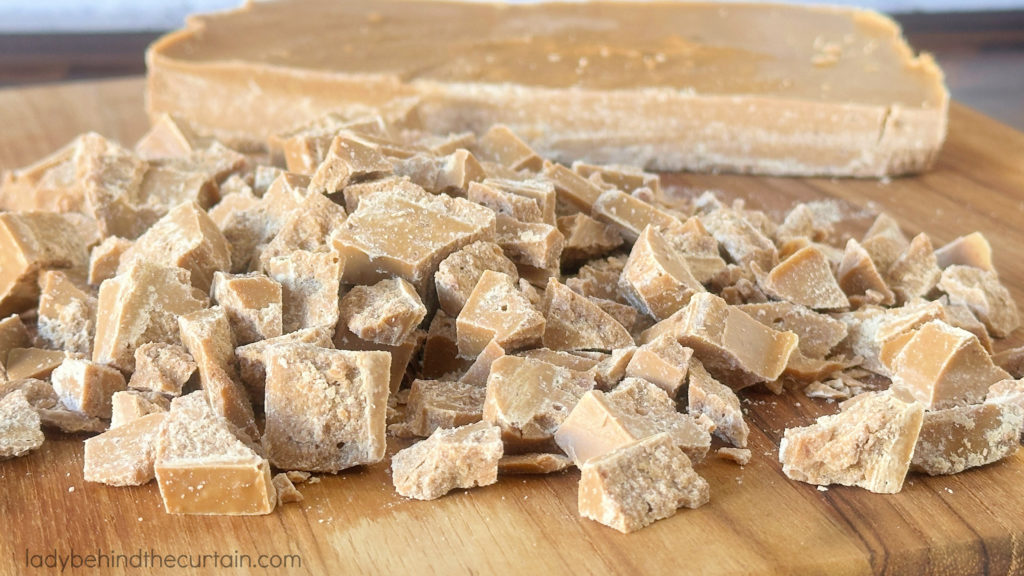
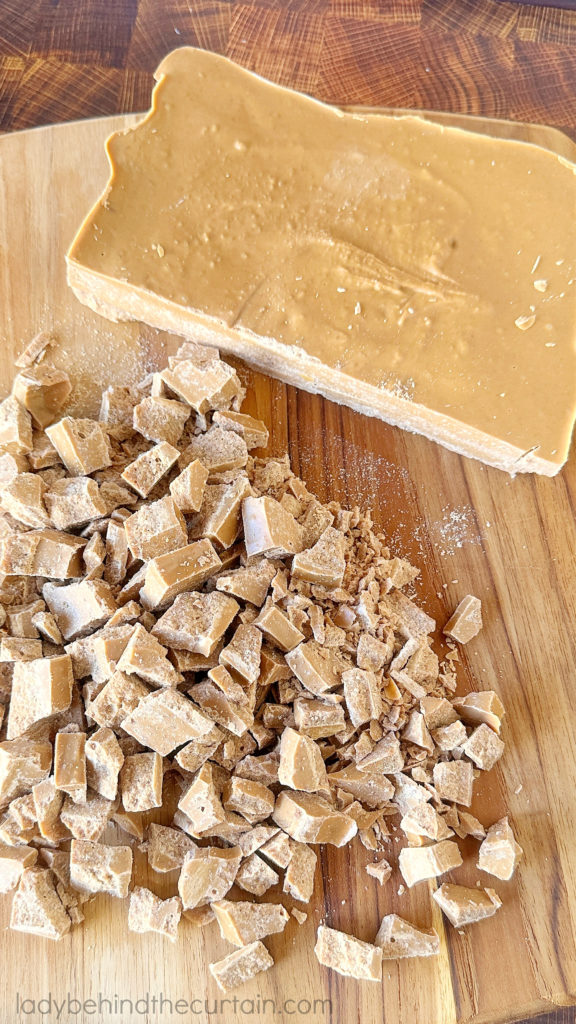
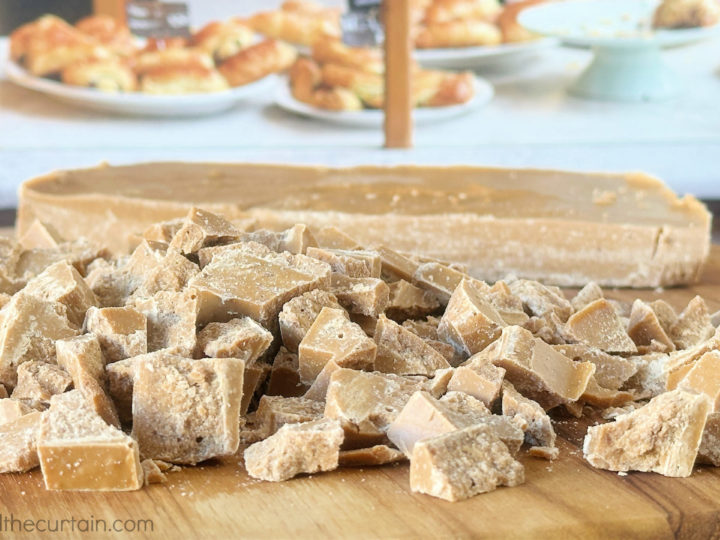
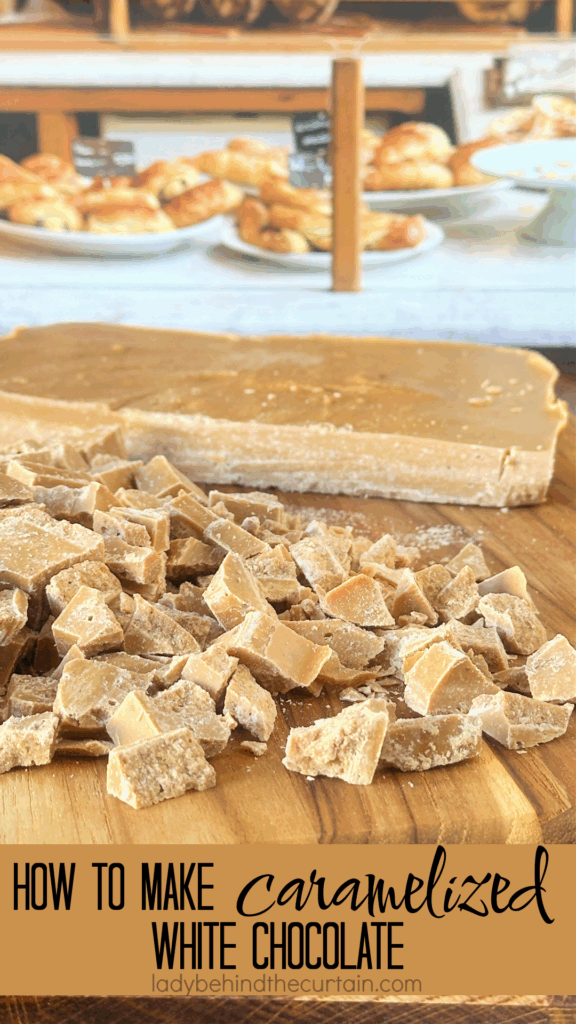
Once your caramelized white chocolate has cooled and hardened, it’s ready to be chopped into chunks and used just like your favorite baking chocolate, but with far more flavor.
- COOKIE DOUGH: Fold the chunks into cookie dough for pockets of buttery caramel in every bite. They pair especially well with browned butter cookies, oatmeal cookies, snickerdoodles, pumpkin cookies, and spice cookies, where their rich, toasted flavor complements the warm spices beautifully.
- SCONES: If you’re a fan of bakery-style scones, try adding chopped caramelized white chocolate to vanilla, cinnamon, apple, cranberry-orange, or maple pecan scones. As the scones bake, the chocolate softens into little bursts of creamy caramel flavor that make every bite feel extra special.
- QUICK BREADS AND MUFFINS: Stir the chunks into banana bread, zucchini bread, pumpkin bread, or your favorite muffin batter. Blueberry, apple cinnamon, pear, and cranberry muffins all benefit from the subtle caramel notes that regular white chocolate simply can’t provide.
- BROWNIES, BARS, BLONDIES: Caramelized white chocolate is also wonderful in blondies, brownies, and dessert bars. Instead of relying on sweetness alone, the toasted chocolate adds layers of buttery caramel and toffee flavor that make homemade treats taste like they came from a specialty bakery.
- COFFEE AND CRUMB CAKES: Don’t stop there. Sprinkle chopped pieces over coffee cakes or crumb cakes before baking, fold them into sweet yeast dough for breakfast rolls, or mix them into homemade granola for an unexpected touch of caramel richness.
- ANY BAKED GOOD THAT CALLS FOR WHITE CHOCOLATE CHIPS: One of my favorite ways to use caramelized white chocolate is anywhere a recipe calls for white chocolate chips. By making one simple substitution, you can transform a familiar recipe into something that tastes completely new.
BEHIND THE CURTAIN TIP: I like to chop the chocolate into a variety of sizes instead of perfectly uniform pieces. The smaller bits melt into the baked good, adding caramel flavor throughout, while the larger chunks create irresistible pockets of creamy caramelized white chocolate.
Recipes That Would Be Amazing with Caramelized White Chocolate
| Try It In… | Why It Works |
|---|---|
| Chocolate Chip Cookies | Adds buttery caramel flavor without extra sweetness. |
| Brown Butter Cookies | Enhances the nutty, toasted notes. |
| Blueberry Muffins | Balances the bright fruit with rich caramel. |
| Apple Cinnamon Scones | Tastes like caramel apples in every bite. |
| Pumpkin Bread | Deepens the warm fall spices. |
| Blondies | Creates bakery-style caramel flavor. |
| Banana Bread | Adds richness and toffee notes. |
| Cheesecake | A delicious alternative to white chocolate. |
LATEST POSTS
How to Store Caramelized White Chocolate
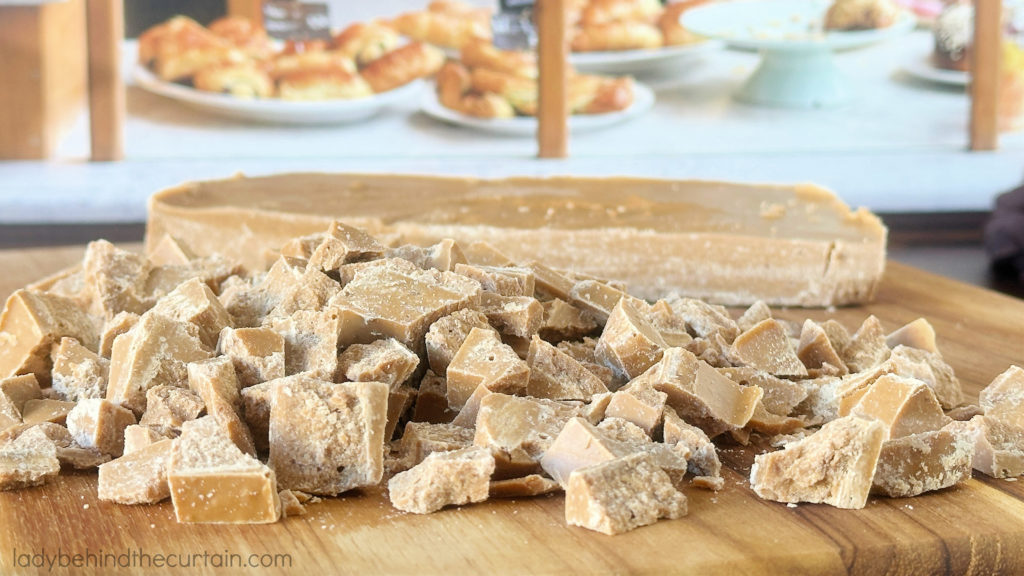
AIRTIGHT CONTAINER: Once the caramelized white chocolate has completely cooled and hardened, it’s ready to become one of the most useful ingredients in your baking pantry. Store the chocolate in an airtight container in a cool, dry place away from direct sunlight and heat. If your kitchen stays relatively cool year-round, there’s no need to refrigerate it. Just like regular baking chocolate, it will keep its flavor and texture best when stored at room temperature. If you live in a warm or humid climate, you may prefer to refrigerate it during the summer months to prevent it from becoming too soft. Just be sure to let it come back to room temperature before chopping or baking with it for the best results.
SHELF LIFE: Because caramelized white chocolate doesn’t contain any fresh dairy ingredients, it has a surprisingly long shelf life. When stored properly in an airtight container, it can last for several months while maintaining its rich caramel flavor. The exact storage time will depend on the freshness of the white chocolate you started with and how it is stored after caramelizing. The hardest part isn’t keeping it fresh; it’s resisting the temptation to use it all before your next baking project.
FREEZE: Yes! In fact, freezing is a great way to make sure you always have caramelized white chocolate on hand. Place the hardened chocolate chunks in a freezer-safe container or zip-top freezer bag, removing as much air as possible before sealing. Properly stored, the chocolate can be frozen for several months.
DEFROST: When you’re ready to bake, simply transfer the chocolate to the refrigerator overnight or let it sit at room temperature until it has completely thawed. Once thawed, chop it into chunks and use it just as you would freshly made caramelized white chocolate.
WOW! I NEVER KNEW THAT! Caramelizing white chocolate doesn’t shorten its shelf life. Since you’re simply transforming the ingredients already in the chocolate rather than adding cream, butter, or other perishable ingredients, it stores much like regular baking chocolate. That means you can make a batch ahead of time and have it ready whenever inspiration strikes.
Make It Easy to Use
Instead of storing one large block of chocolate, consider chopping it into baking-size chunks before putting it away. The next time you’re making cookies, muffins, scones, or blondies, you can simply measure out what you need without having to chop an entire block first. You can even divide the chocolate into different sizes. Smaller pieces melt throughout the batter, creating subtle caramel flavor in every bite, while larger chunks create irresistible pockets of creamy caramelized white chocolate.
BEHIND THE CURTAIN TIP: I like to make a double batch and keep a container of chopped caramelized white chocolate in my pantry. It’s one of those ingredients that instantly elevates everyday recipes, and having it ready to go means I can turn an ordinary batch of cookies or muffins into something that tastes like it came from a specialty bakery with almost no extra effort.
Why You’ll Want to Make This Recipe Again and Again
If you’ve made it this far, you’ve probably realized that caramelized white chocolate is much more than a fun kitchen experiment.
It’s an ingredient that can completely change the flavor of your baking without adding complicated steps or specialty ingredients. A single batch can elevate cookies, muffins, scones, blondies, quick breads, cheesecakes, frostings, and so much more.
Best of all, you’re learning a technique instead of simply following a recipe.
Once you understand why the chocolate changes, what to look for during each stage, and how to recognize when it’s perfectly caramelized, you’ll have the confidence to make it whenever you want—and you’ll never look at a bag of white chocolate chips the same way again.
One of my favorite things about sharing recipes is introducing readers to techniques they may have never tried before. Caramelized white chocolate is one of those little kitchen discoveries that makes you stop and think, “Why didn’t I know about this sooner?”
The first time I watched white chocolate slowly transform into a rich golden caramel, I couldn’t believe that such an incredible flavor could come from a simple bag of baking chips. Now it’s an ingredient I always try to keep in my pantry because I know it can turn an ordinary batch of cookies or muffins into something that tastes like it came from a bakery.
I hope this guide has given you the confidence to give it a try. Don’t be afraid of the grainy stage, trust the process, and enjoy watching the transformation happen right before your eyes. I have a feeling that once you’ve tasted homemade caramelized white chocolate, you’ll already be thinking about what you’re going to bake with your next batch.
Happy Baking,
Sheryl
Why This Recipe Is Worth Making
If you’ve only tasted regular white chocolate, you’re in for a wonderful surprise. With nothing more than gentle heat and a little patience, you’ll create an ingredient with incredible depth of flavor- rich caramel, buttery toffee, toasted milk, and subtle nutty notes that simply can’t be found in a bag of ordinary white chocolate chips.
Whether you fold it into cookie dough, stir it into muffin batter, add it to scones, or save it for your favorite holiday baking, homemade caramelized white chocolate is an easy way to make your desserts taste richer, warmer, and truly bakery-worthy.
Now that you know the science behind the transformation, what each stage should look like, and the secrets to success, you’re ready to make your own batch with confidence.
How to Make Caramelized White Chocolate
Ingredients
- 2 (12 ounce) bags white chocolate chips (I used Nestle Toll House)
Instructions
Time Stamp
- 3 minutes: the chocolate starts to clump
- 7 minutes: the chocolate starts to turn color
- 15 minutes: the chocolate is fully done; turn off the heat
How to Make Caramelized White Chocolate:
- Pour the white chocolate chips into a large skillet.
- Turn the heat to medium and stir continuously.
- At first, the chocolate will be thick, grainy, and chunky. Don't worry, that's normal.
- Continue stirring the chocolate. As you stir the portion of chocolate sitting in the pan, it should have a caramel color. Any darker means you need to turn down the heat.
- NEVER STOP STIRRING, OR THE CHOCOLATE COULD BURN.
- Continue moving the chocolate around until it reaches a beautiful caramel color.
- Taste test before stopping. Dip a small spoon into the melted chocolate, then set it aside to cool (the chocolate is very hot and can burn you). If the chocolate has a wonderful nutty flavor, it's done!
- Turn the heat off, LEAVE THE CHOCOLATE IN THE PAN while you line the 8x8 baking pan with parchment paper.
- As the chocolate sits in the hot pan, it will liquefy again, making it easy to pour into the prepared pan.
- Once the chocolate is easy to pour, pour it into the prepared pan.
- Place the pan in the refrigerator to harden.
- When the chocolate has hardened, place it on the counter to come to room temperature before attempting to cut it.
- Cut it into small chunks, store in a sealed container in a cool spot (like the pantry).
- The chocolate will stay fresh according to the expiration date on the chocolate chip bags. YIELDS ABOUT 1 POUND 5.7 OUNCES

Frequently Asked Questions-HOW TO MAKE CARAMELIZED WHITE CHOCOLATE
By now, you know how to transform ordinary white chocolate into rich, caramelized baking chocolate. But you may still have a few questions about using it in your favorite recipes. Here are answers to some of the most common questions that didn’t fit anywhere else in this guide.
- Can I remelt caramelized white chocolate? Yes. Once the chocolate has hardened, you can gently remelt it just as you would regular white chocolate. Use low heat or short intervals in the microwave, stirring frequently to prevent it from overheating. Melted caramelized white chocolate is delicious drizzled over cookies, brownies, cheesecakes, and dessert bars or stirred into frostings and glazes.
- Can I use caramelized white chocolate to make candy? Absolutely! After it hardens, it can be used in many candy recipes that call for white chocolate. Try it in homemade bark, candy clusters, truffles, or molded candies for a rich caramel flavor that’s sure to surprise everyone who takes a bite.
- Can I use it in place of chocolate chips? Yes! Caramelized white chocolate can be substituted for white chocolate chips in most recipes. Fold the chopped chunks into cookies, muffins, scones, quick breads, blondies, or dessert bars to give familiar recipes a deeper, bakery-style flavor.
- Why doesn’t every brand of white chocolate caramelize the same way? Every manufacturer uses a slightly different recipe. The amount of cocoa butter, milk solids, sugar, emulsifiers, and other ingredients can affect how the chocolate melts and caramelizes. That’s why checking the fat percentage and choosing a quality white chocolate makes such a difference.
- Can I use caramelized white chocolate in no-bake desserts? Yes! Chopped pieces are delicious folded into cheesecake fillings, layered dessert parfaits, dessert dips, cookie balls, and no-bake bars. You can also melt the chocolate and use it as a flavorful coating or drizzle for countless desserts.
- Can I add caramelized white chocolate to homemade granola or trail mix? Definitely. Once the chocolate has completely hardened, chop it into small pieces and stir it into homemade granola or trail mix after everything has cooled. The caramel flavor pairs especially well with toasted oats, pecans, almonds, dried cranberries, cherries, and coconut.
- Does caramelized white chocolate have to be used in sweet recipes? While it’s most often found in desserts, don’t be afraid to think outside the cookie jar. A few chopped pieces can add an unexpected touch of sweetness to a gourmet cheese board, pair beautifully with roasted nuts, or be used as a finishing garnish on specialty brunch pastries and sweet breakfast breads.
Comments
How to Make Caramelized White Chocolate — No Comments
HTML tags allowed in your comment: <a href="" title=""> <abbr title=""> <acronym title=""> <b> <blockquote cite=""> <cite> <code> <del datetime=""> <em> <i> <q cite=""> <s> <strike> <strong>