





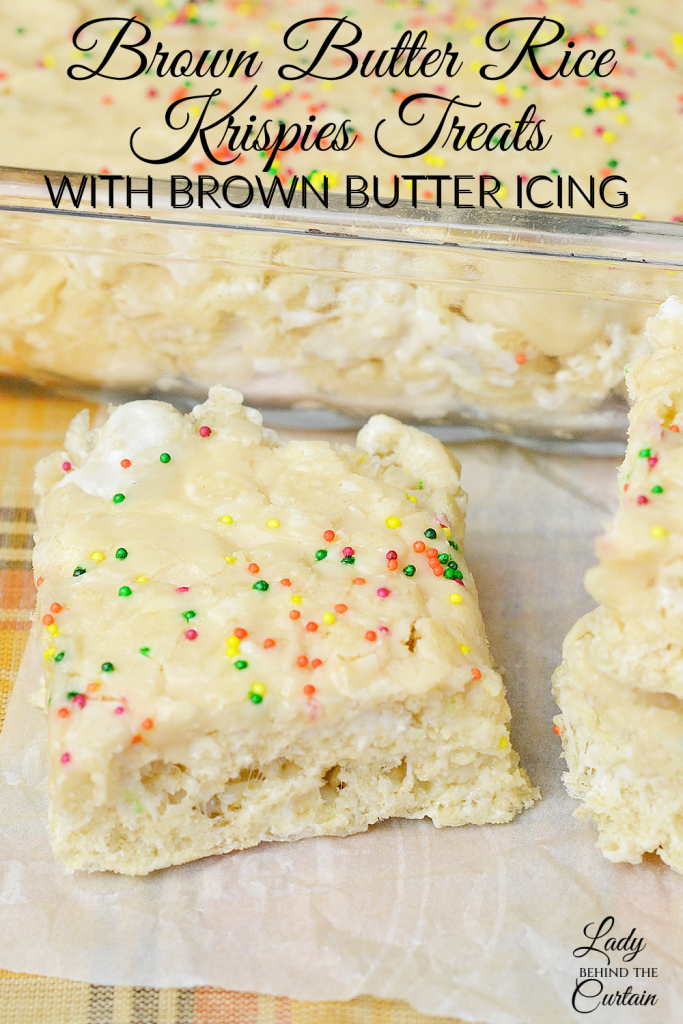
Brown Butter Rice Krispies Treats with Brown Butter Icing
Some recipes don’t need to be reinvented; they just need the right upgrade. Rice Krispies Treats have been a family favorite for generations. They’re one of the first desserts many of us learned to make as kids, and even now they’re the dessert that disappears first from a potluck table, bake sale, or holiday party. Their appeal has always been their simplicity. With just a few pantry staples and a few minutes on the stove, you have a dessert that’s chewy, buttery, sweet, and loved by almost everyone.
Why This Recipe Works
One of the reasons Rice Krispies Treats have remained popular for so many decades is because they’re built on balance. Every ingredient has a specific job.
- The butter coats the cereal and carries flavor throughout the treats.
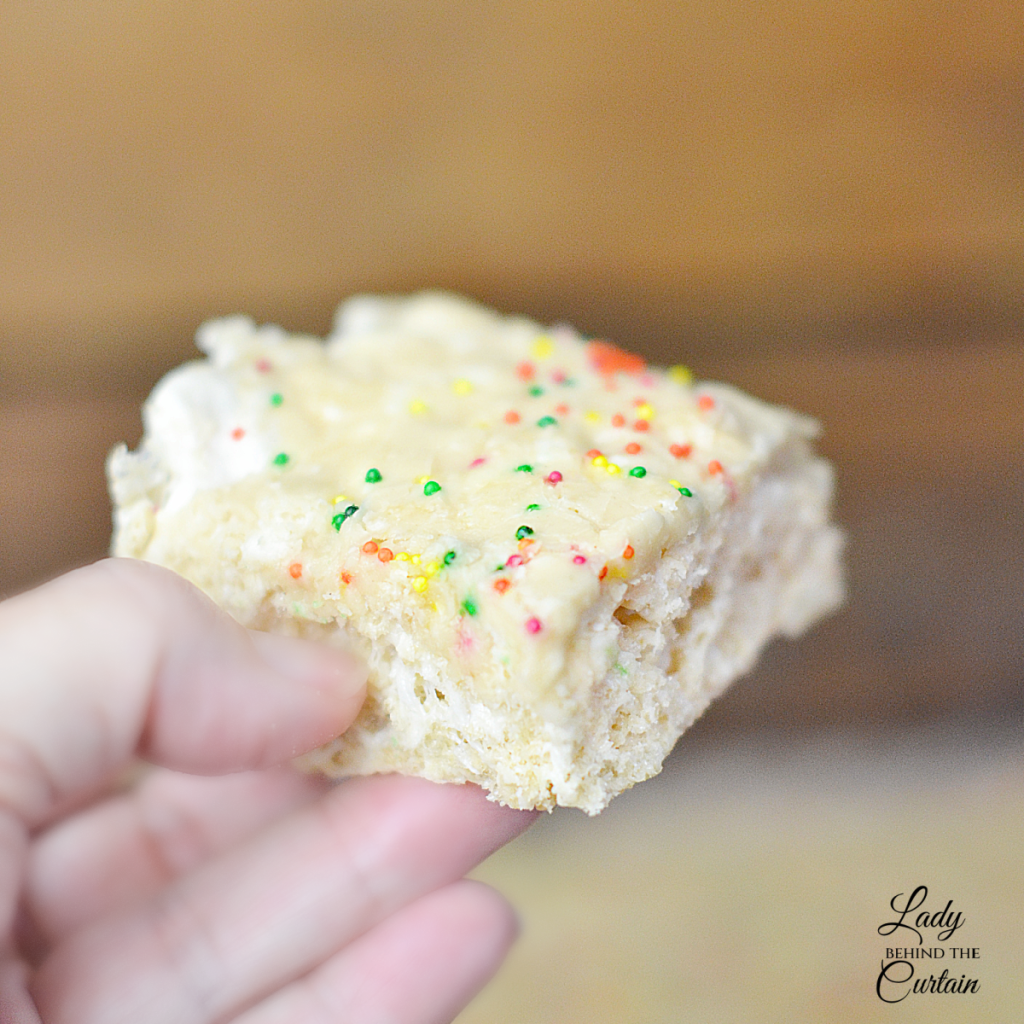
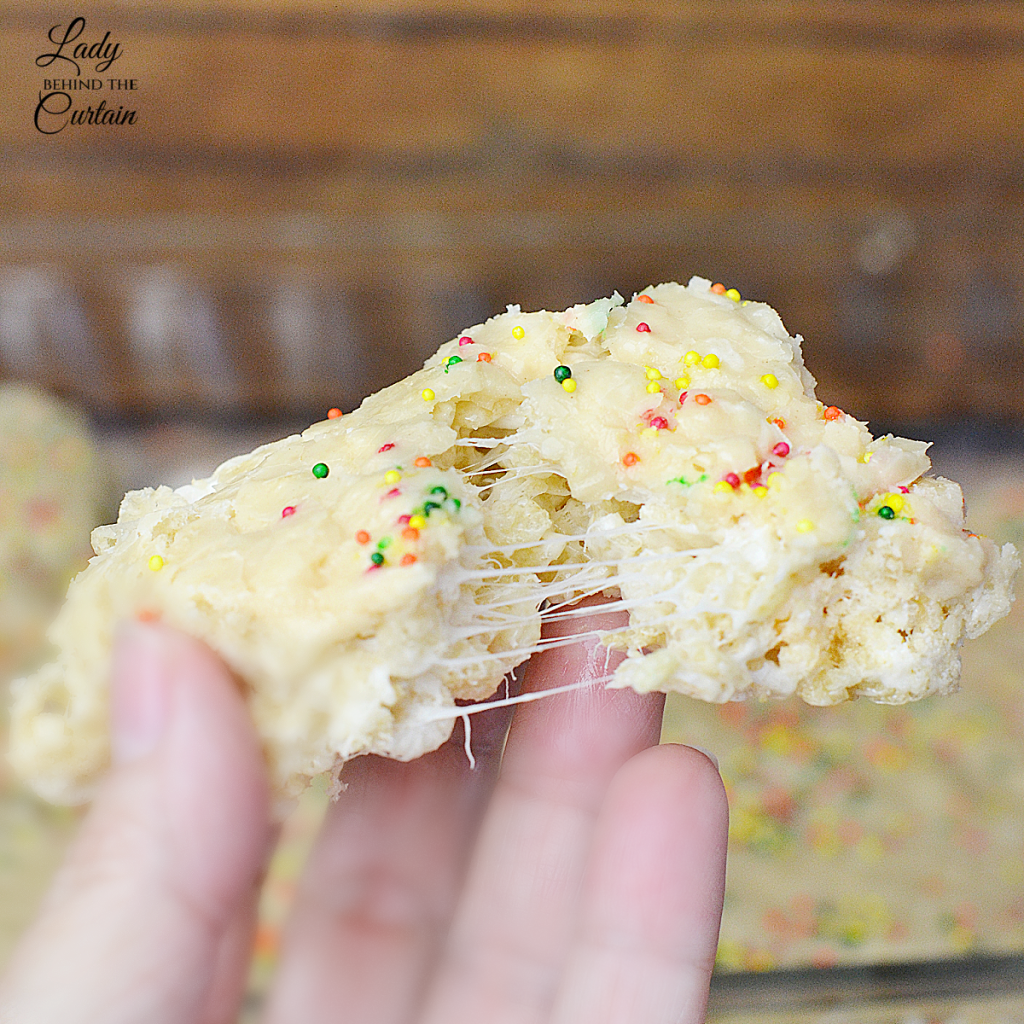
- The marshmallows hold everything together while providing sweetness and that signature chewy texture.
- The crispy rice cereal brings lightness and crunch, preventing the dessert from becoming overly rich or sticky.
- When a recipe contains only a handful of ingredients, there isn’t any room for mediocre ingredients or mediocre techniques to hide. Every decision you make affects the finished product.
- That’s exactly why browning the butter makes such a dramatic difference.
Instead of adding another ingredient, you’re improving one that’s already there. As butter browns, it develops flavors that simply don’t exist in melted butter. Those deeper flavors spread through every bite because the butter coats every piece of cereal before the mixture is pressed into the pan. It’s a simple example of working smarter instead of adding more.
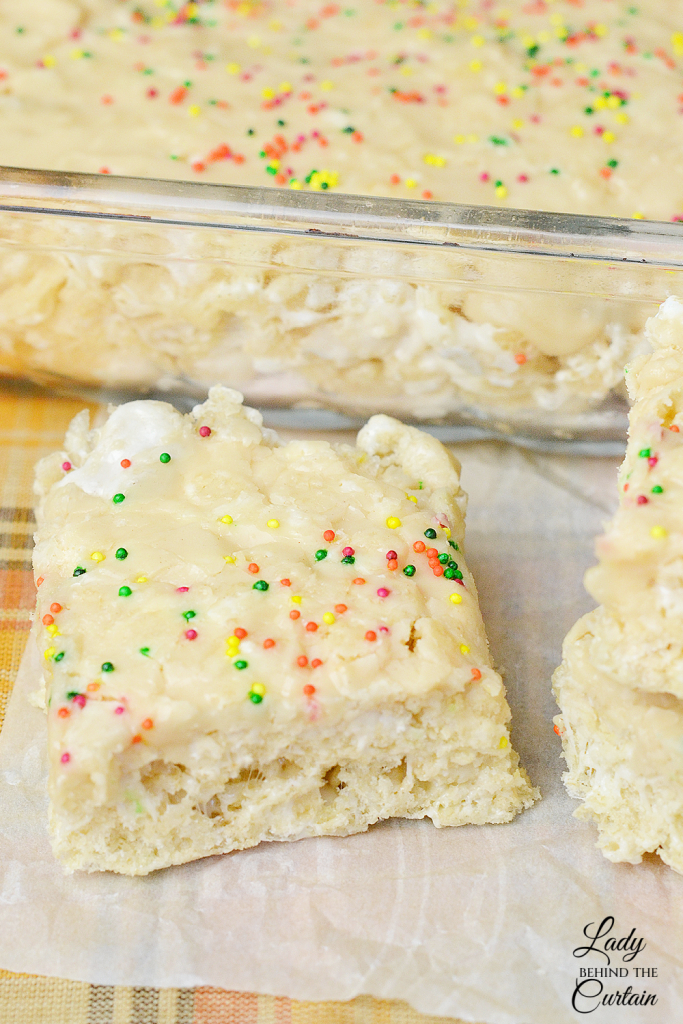
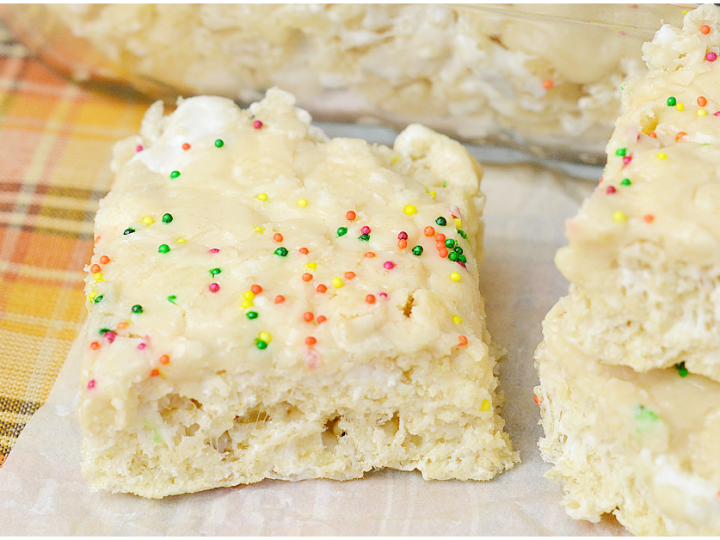
Another detail that sets this recipe apart is the icing drizzle. Traditional Rice Krispies Treats are usually served plain, but a light drizzle of brown butter icing transforms them from an everyday snack into a dessert that feels intentional. The icing doesn’t overwhelm the marshmallow flavor; it complements it. Think of it as the finishing touch that ties everything together, much like a glaze on a coffee cake or a drizzle over a pan of cinnamon rolls. This recipe isn’t trying to replace the classic version. It’s simply showing what happens when a beloved recipe grows up a little.
Behind the Curtain: One thing I’ve learned over the years is that readers don’t always want an entirely new recipe they want a better version of the one they already love. That’s how many of my favorite recipes begin. I ask myself, “If I could only change one thing, what would make the biggest impact?” In this case, it wasn’t adding more marshmallows, extra vanilla, or fancy mix-ins. It was giving the butter a few extra minutes in the pan. Sometimes the best recipe development isn’t about adding ingredients; it’s about getting more flavor from the ones you already have.
What Is Brown Butter?
If you’ve never browned butter before, you’re in for one of the easiest—and most rewarding—kitchen techniques you’ll ever learn. Brown butter, sometimes called beurre noisette in French cooking, is simply butter that’s cooked beyond the melting stage. Instead of removing it from the heat once it’s liquid, you continue cooking it until the milk solids naturally found in butter toast and turn a beautiful golden brown. That transformation changes both the aroma and the flavor.
Freshly melted butter has a clean, creamy smell. Brown butter, on the other hand, fills your kitchen with an aroma that’s rich, warm, and unmistakably nutty. Many people describe it as smelling like toasted pecans, warm caramel, butterscotch, or freshly baked cookies. The reason this happens is surprisingly simple.
Butter is made up of three basic components:
- Butterfat
- Water
- Milk solids
As butter melts, the water begins evaporating. Once most of that moisture is gone, the tiny milk solids settle to the bottom of the pan where they begin to toast. Those toasted milk solids are what create brown butter’s signature flavor. Those little brown specks at the bottom of the pan? Don’t strain them out. They’re the best part.
Every tiny browned bit carries concentrated flavor, and when they’re stirred into your marshmallows, they distribute that rich, toasted taste throughout the entire batch.
One of the biggest misconceptions about brown butter is that it’s difficult to make. It isn’t. The only real challenge is paying attention during the final minute or two. Butter melts quietly for several minutes, then gently simmers before everything suddenly happens at once. The foam begins to subside, the color deepens quickly, and the aroma changes almost instantly.
That’s why it’s important to stay nearby once the butter begins bubbling. Brown butter has a very short window between perfectly toasted and burnt.
When done correctly, the butter should have a rich golden amber color with medium-brown specks on the bottom of the pan. If the specks turn black or the butter smells bitter rather than nutty, it’s gone too far and should be started over.
Using a light-colored saucepan or Dutch oven makes this much easier because you can actually watch the milk solids change color. Dark cookware hides those visual cues, making it easier to accidentally overcook the butter.
The beauty of brown butter is that it lends complexity without making a recipe more complicated. It’s one extra technique that delivers the kind of flavor people usually associate with desserts that took hours to prepare.
Butter Comparison
This immediately gives readers a visual understanding of why brown butter changes the recipe.
| Regular Melted Butter | Brown Butter |
|---|---|
| Creamy flavor | Toasted, nutty flavor |
| Pale yellow | Golden amber with brown specks |
| Mild aroma | Caramel, toffee aroma |
| Adds richness | Adds richness and complexity |
| Ready when melted | Requires a few extra minutes |
Behind the Curtain: Brown butter has become one of those ingredients I find excuses to use. It started with cookies, then frostings, then cakes, and eventually I began wondering where else it could make a difference. Rice Krispies Treats seemed almost too simple to benefit from it but after one batch, I knew there was no going back. The marshmallows mellow the butter’s richness just enough, letting the toasted flavor come through without overpowering the dessert. It’s one of those recipes where people may not immediately identify what’s different, but they’ll absolutely notice that it tastes better.
The Science Behind Brown Butter
At first glance, brown butter doesn’t seem like much of a transformation. After all, you’re starting with butter and ending with…butter. But inside that saucepan, something remarkable is happening.
Butter is made up of three components: butterfat, water, and milk solids. When butter first melts, those three components exist together in a pale yellow liquid. As the temperature rises, the water begins to evaporate, creating the bubbling and foaming you see across the surface of the pan.
Many home cooks think those bubbles mean the butter is finished melting. In reality, the best part hasn’t even begun.
As more water cooks away, the milk solids slowly sink to the bottom of the pan. These tiny particles contain proteins and natural sugars. Once they’re exposed to enough heat, they begin to toast, changing from ivory to light tan and eventually to a rich golden brown. This is where the magic happens.
As those milk solids brown, hundreds of new flavor compounds develop. Food scientists refer to this as the Maillard Reaction, the same reaction responsible for the rich crust on a loaf of bread, the deep flavor of roasted coffee, and the beautiful sear on a steak. While the Maillard Reaction is often associated with meats and baked goods, it also plays an important role in browned butter, creating layers of flavor that simply don’t exist in melted butter.
That’s why browned butter doesn’t just taste “more buttery.” It tastes nuttier, warmer, and almost caramel-like. Some people notice hints of toasted pecans, while others describe flavors similar to butterscotch, hazelnuts, or toffee. Those subtle notes pair beautifully with marshmallows because they balance sweetness rather than compete with it.
One of the easiest ways to know you’re getting close isn’t by watching the butter; it’s by paying attention to the aroma. Your nose often notices the transformation before your eyes do. The smell changes from plain melted butter to something that resembles fresh-baked cookies. Once you notice that rich, nutty aroma, watch the pan closely, because the butter can go from perfectly browned to burnt in less than a minute.
This is also why many bakers recommend using a light-colored saucepan instead of a dark one. A stainless-steel pan lets you see the milk solids clearly as they change color. In a black or dark nonstick pan, those tiny brown specks are much harder to see, increasing the chance that they’ll burn before you realize they’ve reached the perfect stage. Another common misconception is that darker always means better. It doesn’t.
Perfect brown butter should be a rich amber color with medium-brown specks scattered across the bottom of the pan. If those specks become black or the butter develops a sharp, bitter smell, it has gone too far. Unfortunately, burnt butter can’t be rescued. Starting over may feel frustrating, but it takes only a few minutes and makes all the difference in the final flavor. The good news is that once you’ve successfully browned butter a few times, you’ll begin to recognize the visual and aromatic cues almost instinctively. It’s one of those kitchen skills that quickly becomes second nature.
How to Tell When Brown Butter Is Ready
| What You Notice | What It Means | What You Should Do |
|---|---|---|
| Butter has completely melted | Water is beginning to evaporate | Continue cooking |
| Thick white foam covers the surface | Moisture is still cooking off | Stir occasionally and be patient |
| Foam begins to disappear | Milk solids are starting to toast | Watch closely |
| Golden butter with brown specks on the bottom | Brown butter is ready | Remove from the heat immediately |
| Dark brown or black specks with a bitter smell | Butter has burned | Discard and begin again |
One final tip: don’t leave those browned bits behind when you pour the butter into your marshmallows.
Those little specks are often called “liquid gold” by bakers because they contain the most concentrated flavor in the entire pan. Scrape every last bit into the recipe. They may not look impressive, but they’re responsible for much of what makes these Rice Krispies Treats taste so different from the classic version.
Behind the Curtain: I’ll admit, the first time I browned butter, I thought I had ruined it. Seeing little brown flecks floating through the butter felt wrong because I had spent years trying to keep butter smooth and perfectly yellow. I almost strained them out. Thankfully, curiosity won. Those tiny specks ended up being the very thing that transformed the recipe. Now, if I don’t see them in the pan, I know I haven’t gone far enough. It’s funny how something we once thought was a mistake becomes the part we value most once we understand what it’s doing.
Why the Brown Butter Icing Is Worth the Extra Step
A classic Rice Krispies Treat doesn’t need frosting to be delicious, so why add an icing drizzle? The answer isn’t simply to make them sweeter. The purpose of the drizzle is to reinforce the very flavor that makes these treats unique—brown butter.
Because Rice Krispies Treats are made with so few ingredients, every flavor is easy to recognize. The toasted, nutty notes from the brown butter shine through in the marshmallow mixture, but adding a thin layer of brown butter icing carries that same flavor all the way to the last bite. Instead of tasting like two separate components, the treats and the glaze work together as one dessert. The icing also changes the overall eating experience.
Rather than piling on a thick layer of frosting, this recipe uses a thin drizzle that’s gently spread over the top. The result is a delicate glaze that adds just enough sweetness without overpowering the marshmallow flavor. As it sets, the icing creates a smooth finish that makes these treats look polished enough for a holiday dessert tray while still keeping the soft, chewy texture everyone loves. Another advantage is presentation.
Rice Krispies Treats are naturally rustic, and there’s nothing wrong with that. But if you’re serving them at a baby shower, holiday gathering, bake sale, or cookie exchange, that simple drizzle instantly gives them a more finished appearance. It’s a small detail that makes them look like they came from a bakery rather than a cereal-box recipe.
If you don’t have additional brown butter on hand, don’t let that stop you from making the icing. Regular melted butter will still produce a smooth, delicious glaze. You’ll lose a little of the toasted flavor, but the treats will still be every bit as enjoyable.
Brown Butter Drizzle vs. Plain Rice Krispies Treats
| Plain Rice Krispies Treats | Brown Butter Icing Drizzle |
|---|---|
| Classic buttery flavor | Reinforces the brown butter flavor |
| Rustic appearance | Bakery-style finish |
| Sweet marshmallow flavor | Balanced sweetness with toasted notes |
| Great for everyday snacking | Perfect for parties, holidays, and gift trays |
Behind the Curtain: The first batch I made stopped at the brown butter. Everyone loved them, but something still felt unfinished. They looked almost too plain for the richer flavor hiding inside. The drizzle of icing wasn’t meant to cover the treats—it was meant to hint at what was waiting underneath. Sometimes the finishing touch isn’t about making a dessert prettier; it’s about telling people this isn’t an ordinary version of a familiar favorite.
How to Store Brown Butter Rice Krispies Treats
One of the best things about Rice Krispies Treats is that they’re just as convenient to store as they are to make. Since they’re a no-bake dessert, there’s no need to worry about refrigeration or complicated storage methods.
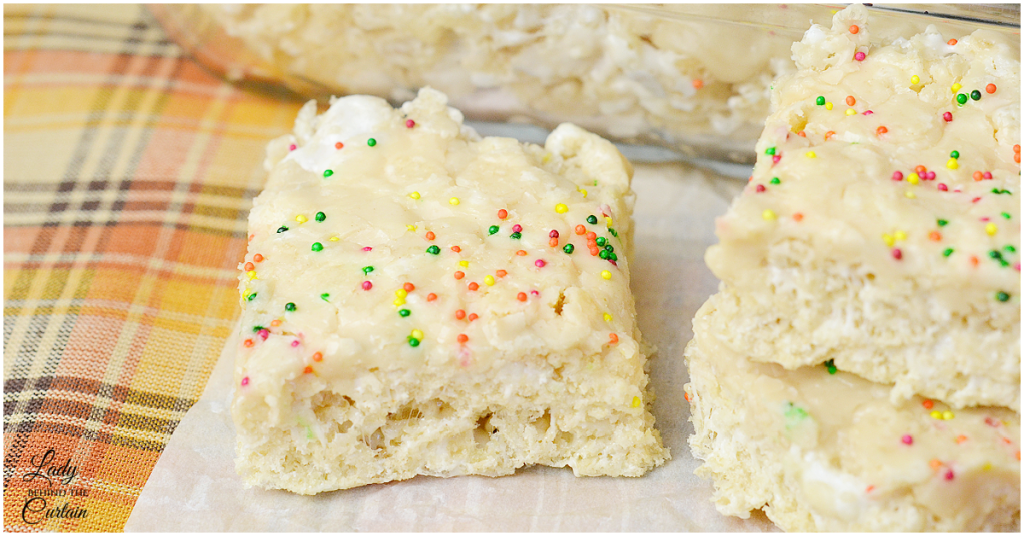
Once the icing has completely set, cut the treats into squares and transfer them to an airtight container. If you’re stacking multiple layers, place a sheet of wax paper or parchment paper between them to prevent sticking.
For the freshest texture, store them at room temperature. Refrigeration isn’t recommended because cold temperatures cause the marshmallows to firm up, making the treats less soft and chewy. If your kitchen is especially warm, keep the container in a cool, dry place out of direct sunlight.
These treats also freeze surprisingly well. Wrap individual squares or place layers between sheets of parchment paper before sealing them in a freezer-safe container. When you’re ready to enjoy them, let them thaw at room temperature while still wrapped to help preserve their soft texture.
Whether you’re making them a day ahead for a party or saving a few squares for later, proper storage helps maintain the chewy texture that makes these treats so irresistible.
Storage Guide
| Storage Method | How Long | Best Practice |
|---|---|---|
| Room Temperature | 3–4 days | Store in an airtight container. |
| Refrigerator | Not recommended | Chilling can make the treats firm and less chewy. |
| Freezer | Up to 6 weeks | Wrap well and thaw at room temperature before serving. |
Classic Rice Krispies Treats have earned their place as one of America’s favorite no-bake desserts, and for good reason. They’re quick, simple, and always a crowd-pleaser.
This version doesn’t try to replace the original. Instead, it builds on everything people already love by introducing one simple technique that creates remarkable flavor. Browning the butter adds a rich, nutty depth that pairs beautifully with sweet marshmallows, while the brown butter icing drizzle ties everything together with a smooth, bakery-inspired finish.
It’s proof that sometimes the best recipe upgrades don’t come from adding more ingredients they come from looking at familiar ingredients in a new way. If you’ve never tried brown butter before, these Rice Krispies Treats are the perfect place to start. After one bite, you may find yourself wondering why you ever made them any other way. Sheryl
LATEST POSTS
Brown Butter Rice Krispies Treats with Brown Butter Icing
Ingredients
How to Brown Butter:
- 1 ½ cups unsalted butter
For the Treats:
- 4 tablespoons unsalted brown butter
- 1 (10 ounce) bag mini marshmallows
- ¼ teaspoon salt
- 6 cups rice krispy cereal
- 1 cup mini marshmallows
For the Brown Butter Icing:
- 1 ½ cups powdered sugar
- 2 tablespoons brown butter, melted
- 1 tablespoon vanilla extract
- 1 tablespoon hot water
- non-stick cooking spray
Instructions
How to Brown Butter:
- In a small saucepan, bring the butter to a boil over medium-high heat, stirring constantly (about 5 to 6 minutes).
- Once the butter starts to foam, you know you're close (like 30 seconds close).
- Use
the spoon to pull away the top coat (foam) of the butter; when you can
see that the butter has reached a caramel color, it is done! - Pour the mixture into a jar; let it cool on the counter.
- Place a lid on and store in the refrigerator.
For the Treats:
- Spray a 9x13-inch baking dish with non-stick cooking spray.
- Melt butter in a large pot; add the marshmallows and salt; stir until melted. Take off the heat; pour in the cereal; stir until combined, then add the remaining 1 cup of mini marshmallows and stir until evenly dispersed.
- Pour into prepared pan; press into place. Cool completely before adding icing drizzle.
- Drizzle icing on treats; use an offset spatula and spread evenly.
- Cut into squares.
For the Brown Butter Icing:
- Add sugar to a small bowl; add the brown butter, vanilla, and water.
- Stir until smooth and creamy.

Frequently Asked Questions-BROWN BUTTER RICE KRISPIES TREATS
- Can I skip browning the butter? Yes, but you’ll be missing the ingredient that makes this recipe special. Regular melted butter will still produce soft, chewy Rice Krispies Treats, while browned butter adds a rich, nutty flavor with subtle notes of caramel and toffee. Since it only takes a few extra minutes, it’s well worth the effort.
- Can I use salted butter instead of unsalted butter? You can. Because salted butter already contains salt, you may want to reduce or omit the additional salt called for in the recipe. The finished treats will still be delicious, but using unsalted butter gives you more control over the final flavor.
- Can I use large marshmallows instead of mini marshmallows? Absolutely. Large marshmallows melt just as well as mini marshmallows. If you’re substituting, cut them into smaller pieces to help them melt more quickly and evenly.
- Can I use regular butter in the icing drizzle? Yes. Brown butter gives the drizzle the same warm, toasted flavor found in the treats, but regular melted butter makes a perfectly smooth and delicious glaze. It’s an easy substitute if you don’t want to brown another small amount of butter.
- Can I make these ahead of time? Yes. Brown Butter Rice Krispies Treats are a great make-ahead dessert for parties, bake sales, and holiday gatherings. Prepare them a day in advance, allow the icing to set completely, then store them in an airtight container until you’re ready to serve.
- Can I freeze Brown Butter Rice Krispies Treats? Yes. Once they’ve been cut into squares, place parchment or wax paper between the layers and store them in a freezer-safe container or bag for up to six weeks. Let them thaw at room temperature before serving.
- Why did my brown butter burn?
- Brown butter changes very quickly during the final minute of cooking. Once the butter develops a nutty aroma and the milk solids turn golden brown, remove it from the heat immediately. If the specks become black or the butter smells bitter, it has burned and should be discarded.
- Why is my icing too thick or too thin? The consistency is easy to adjust. If the icing is too thick to drizzle or spread, stir in a few drops of hot water at a time until it reaches the desired consistency. If it becomes too thin, add a little more confectioners’ sugar until it thickens.
- How long will Brown Butter Rice Krispies Treats stay fresh? Stored in an airtight container at room temperature, they’ll stay soft and chewy for about 3 to 4 days. For the best texture, avoid refrigerating them, as the cold can make the marshmallows firm.
- Can I add other mix-ins? You certainly can, but keep in mind that the star of this recipe is the rich brown butter flavor. If you’d like to customize the treats, consider adding toasted pecans, toffee bits, mini chocolate chips, or a sprinkle of flaky sea salt. Choose mix-ins that complement the brown butter rather than compete with it.
Oh yum! I’ve never thought to frost Rice Krispies Treats….genius!
I haven’t had too many brown butter treats but I bet these are amazing!