

Cherry Coke Decorated Pretzels
Cherry Coke Decorated Pretzels – A Sweet, Fizzy Treat in Three Layers. If you’re a fan of classic soda shop flavors and love a good salty-sweet snack, these Cherry Coke Decorated Pretzels are going to be your new favorite treat!
These colorful pretzels are inspired by the iconic taste of Cherry Coke and layered with three delicious candy coatings: creamy vanilla, bright cherry, and bold Coke flavor. They’re as fun to look at as they are to eat, making them perfect for summer parties, movie nights, or as gifts for soda lovers.

A WALK DOWN MEMORY LANE
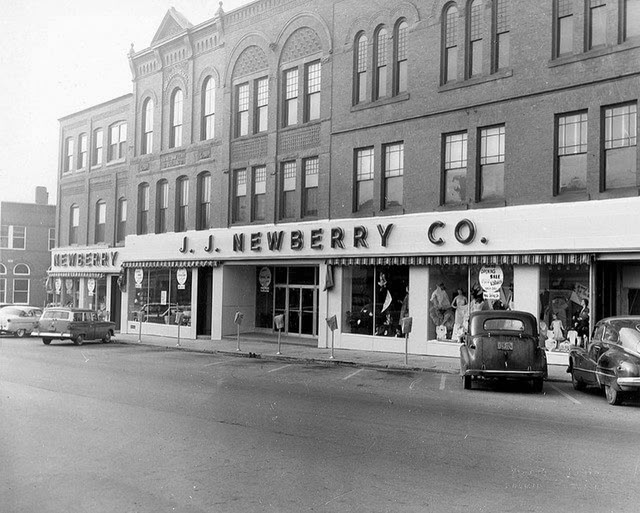
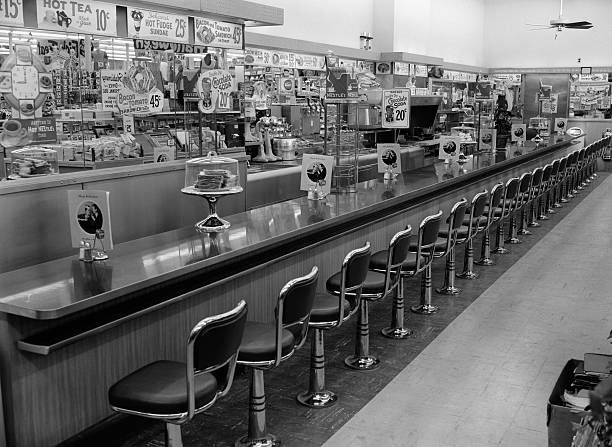
I was born in the 50’s….DO NOT DO THE MATH☺️❣️ Some of my sweetest childhood memories are of shopping trips with my grandma to J.J. Newberry’s in downtown Brawley, California. After browsing the aisles and picking out little treasures, we’d always end our visit with a stop at the lunch counter, where the old-fashioned soda fountain stood like a promise of something special. Without fail, I’d order a cherry Coke—back when the cherry flavor was added by hand, syrup poured right into the glass before the Coke was added. I can still remember watching the fizz rise as the syrup swirled through the soda, and that first sweet sip tasted like pure happiness. Those moments with my grandma—laughing, sipping cherry Coke, and sitting side by side on the vinyl stools—are memories I’ll always hold close. This fun pretzel is dedicated to my grandma’s memory. Do you have a sweet memory from sitting at the lunch counter? Perhaps it was a different store for you, such as Woolworth’s.
How to Make Cherry Coke Decorated Pretzels
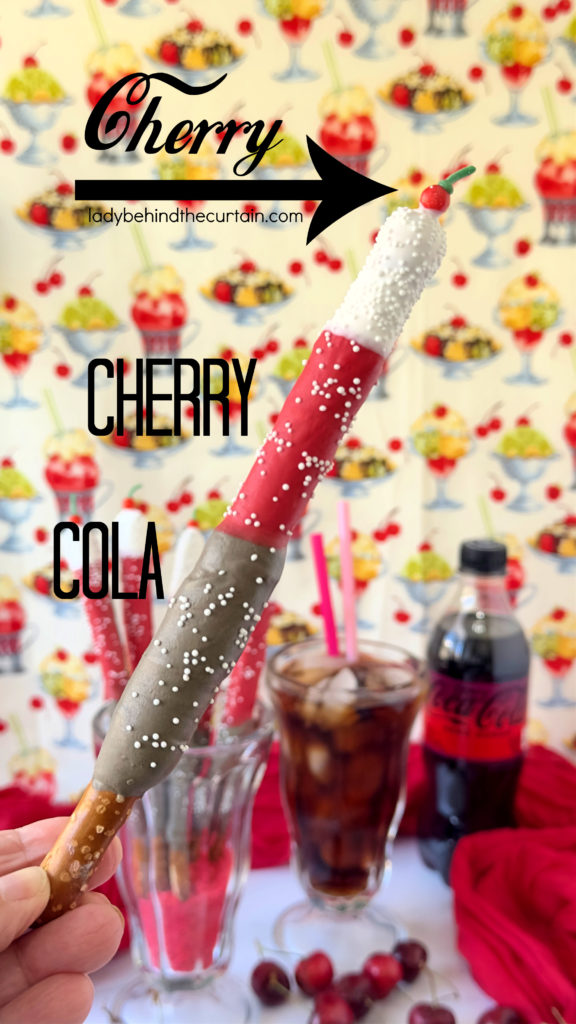
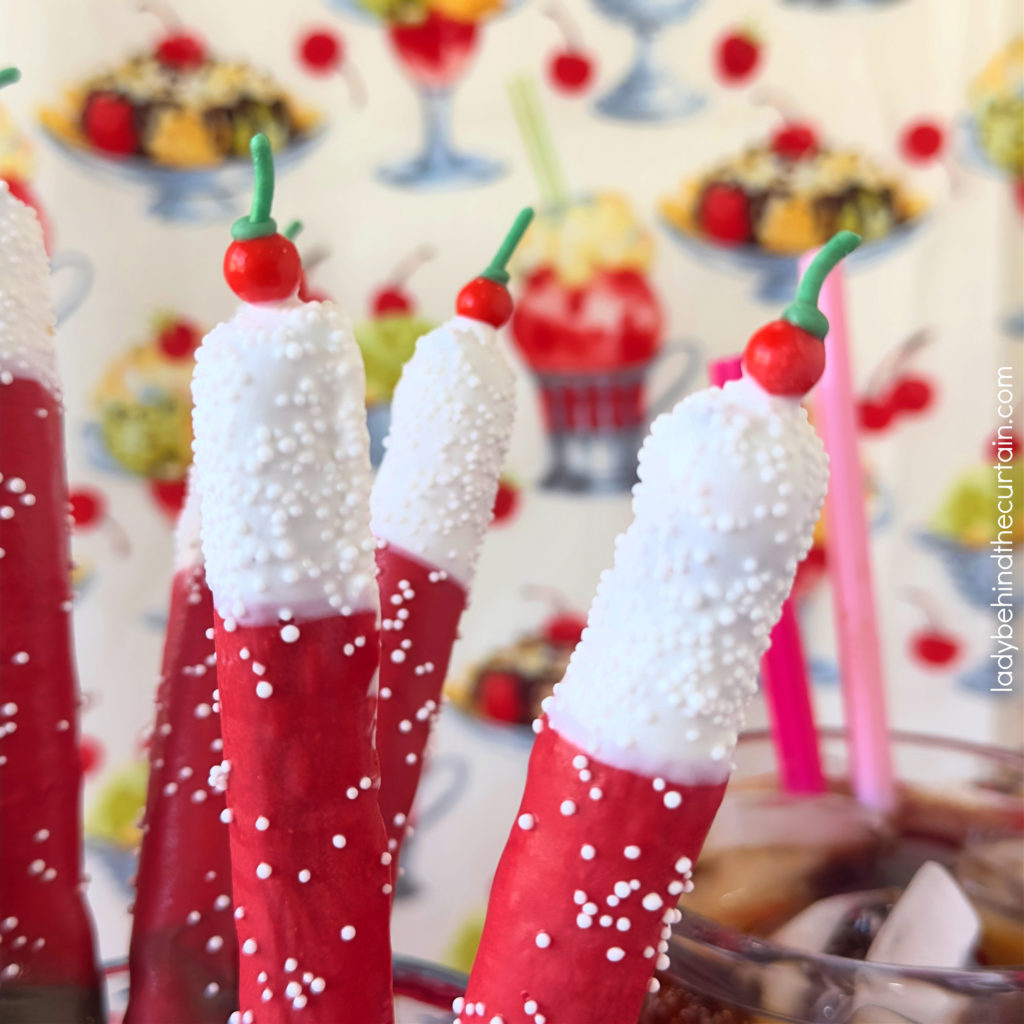
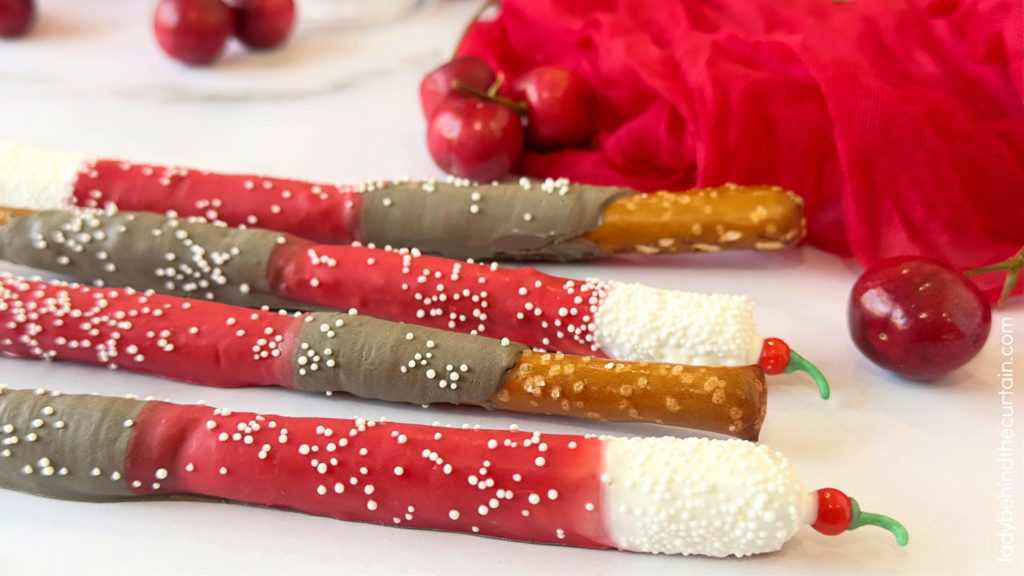
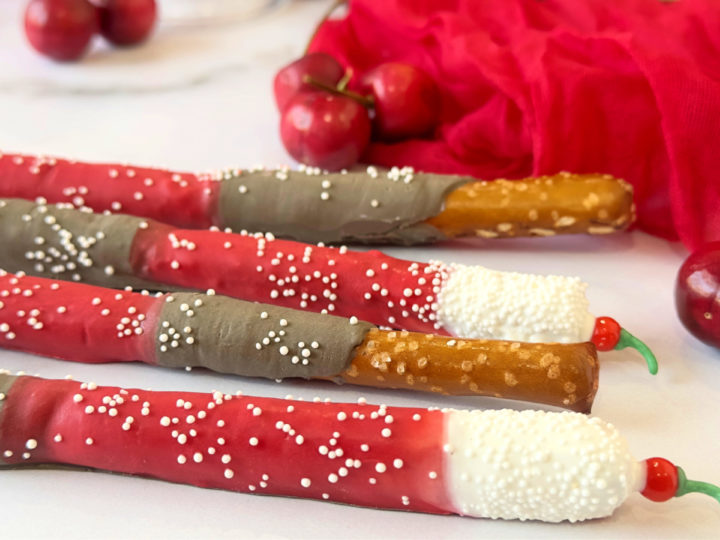
Each pretzel rod begins with a smooth, vanilla-flavored coating on top, providing a sweet, creamy start to each bite. The middle section introduces a vibrant cherry flavor, a fruity flair, and a pop of red color that catches the eye. The bottom finishes with a rich Coke-flavored candy layer, adding depth and a nostalgic soda-shop twist. Together, these three layers mimic the fizzy favorite’s flavor and create a beautiful ombré effect that’s eye-catching and fun to serve.

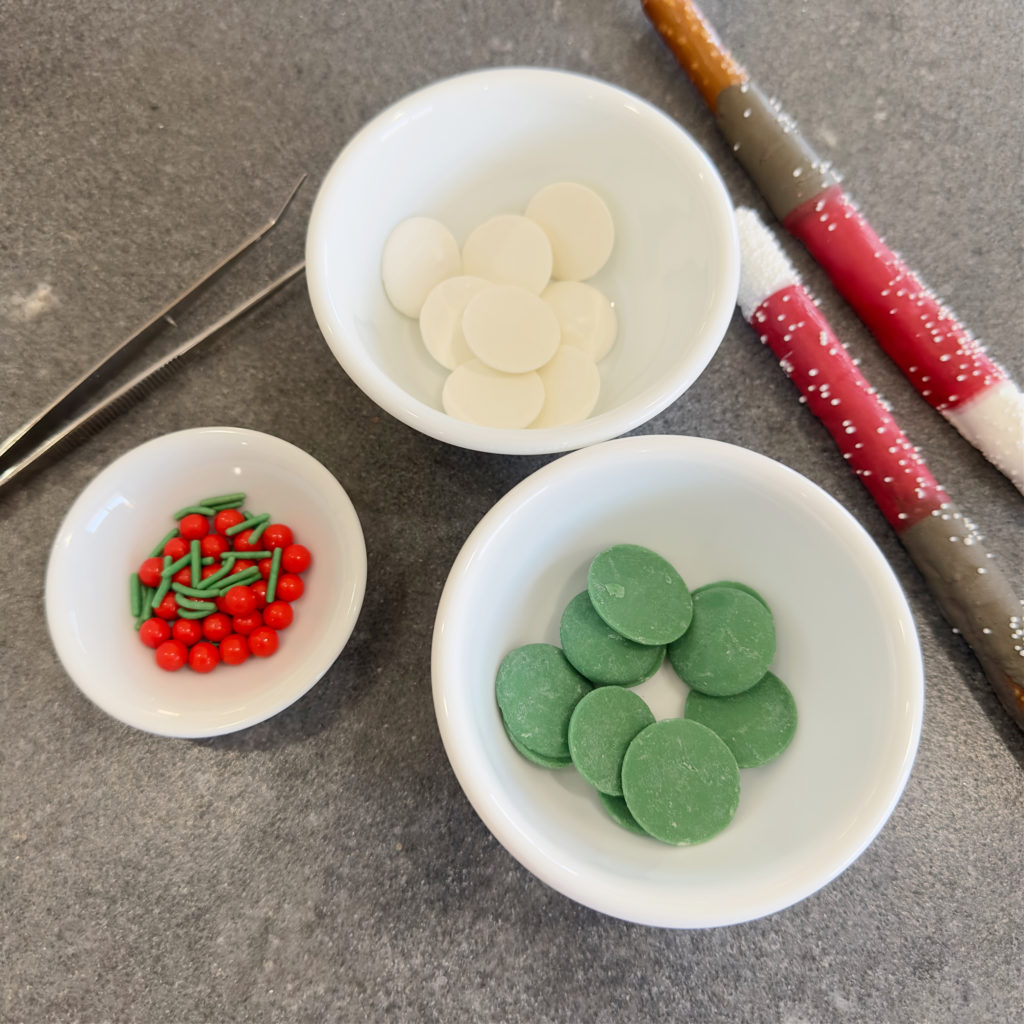
CHERRY COKE DECORATED PRETZEL RODS INGREDIENTS LIST- full printable recipe below on recipe card
- 8 ounces vanilla-flavored red melting wafers
- 6 ounces vanilla-flavored white melting wafers
- 2 ounces vanilla-flavored yellow melting wafers
- 2 ounces vanilla-flavored royal blue melting wafers
- 3 tablespoons vegetable shortening
- ¼ teaspoon LorAnn cherry flavoring
- ¼ teaspoon LorAnn cola flavoring
- white nonpareil sprinkles
- 15 pretzel rods
CHERRY COKE FLAVORED PRETZELS INSTRUCTIONS
HOW TO TRANSFORM VANILLA-FLAVORED CANDY WAFERS INTO A BROWN COLOR WITHOUT USING FOOD COLORING OR CHOCOLATE
If you have oil-based brown food coloring, you can use it. Most of us don’t, so here is a solution that doesn’t require chocolate-flavored melting wafers.
In a medium-sized microwave-safe bowl, add equal amounts of red, yellow, and royal blue melting wafers, along with one tablespoon of vegetable shortening. Heat for one minute and stir until the candy is melted and creamy. If the candy is not melted, return it to the microwave and continue to heat in 15-second increments. You should end up with a beautiful dark brown color.
FOR THE COLA FLAVORED LAYER

- To the brown color of the melted candy, add the ¼ teaspoon of cola flavor. Mix to combine. Set aside and keep warm. Look below for my tip about keeping it warm and melted.
FOR THE CHERRY FLAVORED LAYER

- Add 6 ounces of red melting wafers to a medium microwave-safe bowl along with 1 tablespoon of vegetable shortening.
- Heat for 1 minute, stirring until melted and creamy. If the candy is not melted, heat in 15-second increments. Stir in the cherry flavoring. Set aside and keep warm. Look below for my tip about keeping it warm and melted.
FOR THE VANILLA (foam) LAYER
- Add 6 ounces of red melting wafers to a medium microwave-safe bowl along with 1 tablespoon of vegetable shortening.
- Heat for 1 minute, stirring until melted and creamy. If the candy is not melted, heat in 15-second increments. Set aside and keep warm. Look below for my tip about keeping it warm and melted.
PUTTING IT ALL TOGETHER


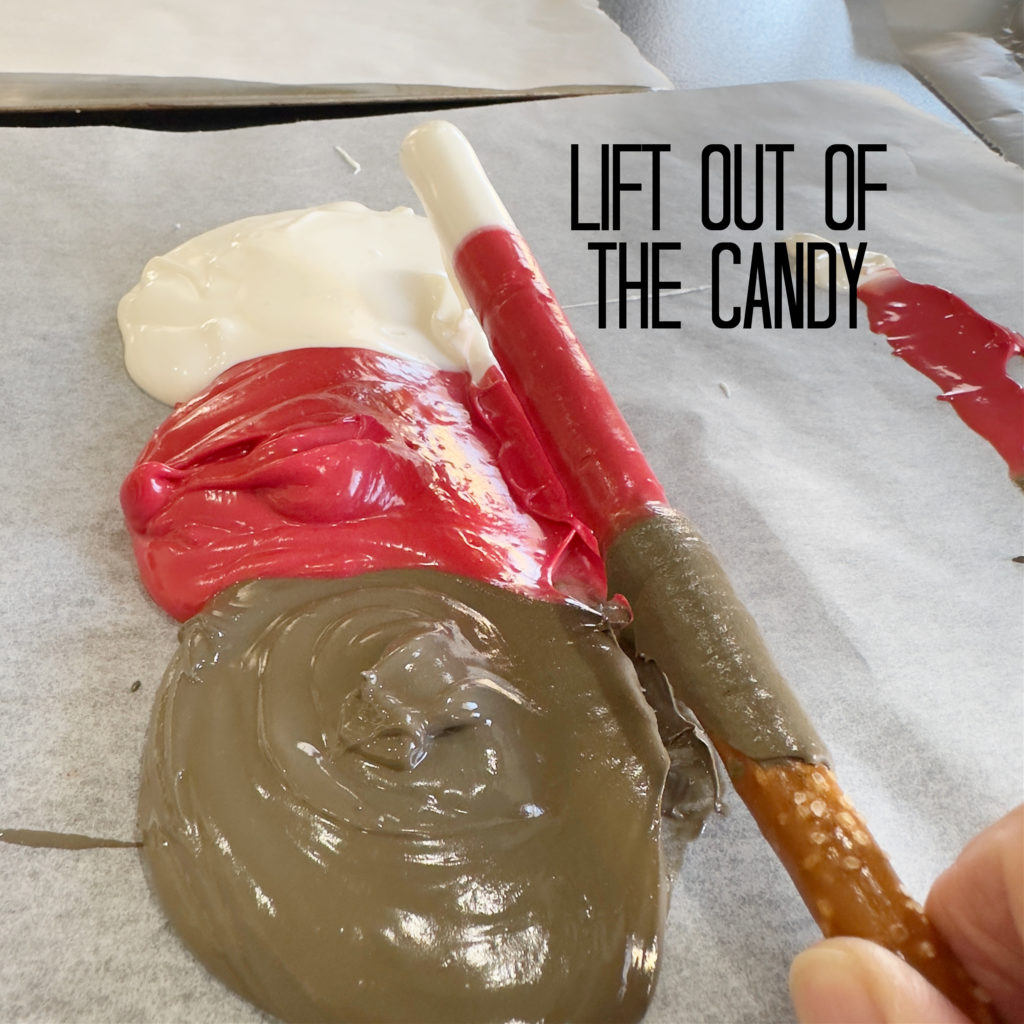

- On a piece of parchment paper, pour a pile of melted white, red, and brown candy from top to bottom. NOTE: Don’t add all the melted candy at once. To keep the candy warm, place the bowls with the candy on a potholder (I use an oblong potholder).
- Lay the pretzel rod flat and roll or pull through the candy, adding a line of white, red, and brown.
- While the candy is still wet, add the white nonpareil sprinkles mostly to the white, with a little falling down the red and brown. The sprinkles represent soda bubbles.
- Place coated pretzels on a cookie sheet lined with parchment paper. Set aside to harden or refrigerate for 5 to 10 minutes. You can stop here or look below for instructions on how to make a cherry for the top of your soda fountain drink pretzel.
How to Make Edible Cherry Topping


Making an edible cherry topper couldn’t be easier—and it adds the sweetest finishing touch to your cherry Coke decorated pretzel rods! All you need is a red pearl sprinkle for the cherry and a green jimmies sprinkle for the stem. With just a tiny dab of melted candy, the two pieces come together in seconds to create a mini cherry that looks almost too cute to eat. These tiny toppers are simple to assemble, fun to make, and instantly recognizable, adding a playful, soda-fountain charm to your treats. Whether you’re making a batch for a party or just for fun, these little cherries are the perfect way to tie the whole theme together.
EDIBLE CHERRY TOPPER SUPPLIES– full printable recipe in the recipe card below
- 10 white melting wafers
- 10 green melting wafers
- 15 red pearl sprinkles
- 15 green jimmies sprinkles
- tweezers
MINI CHERRY PRETZEL TOPPER INSTRUCTIONS
- Add the white wafers to a small microwave-safe bowl. Heat for 30 seconds, stir, and heat an additional 15 seconds. Stir until the candy is melted and creamy.
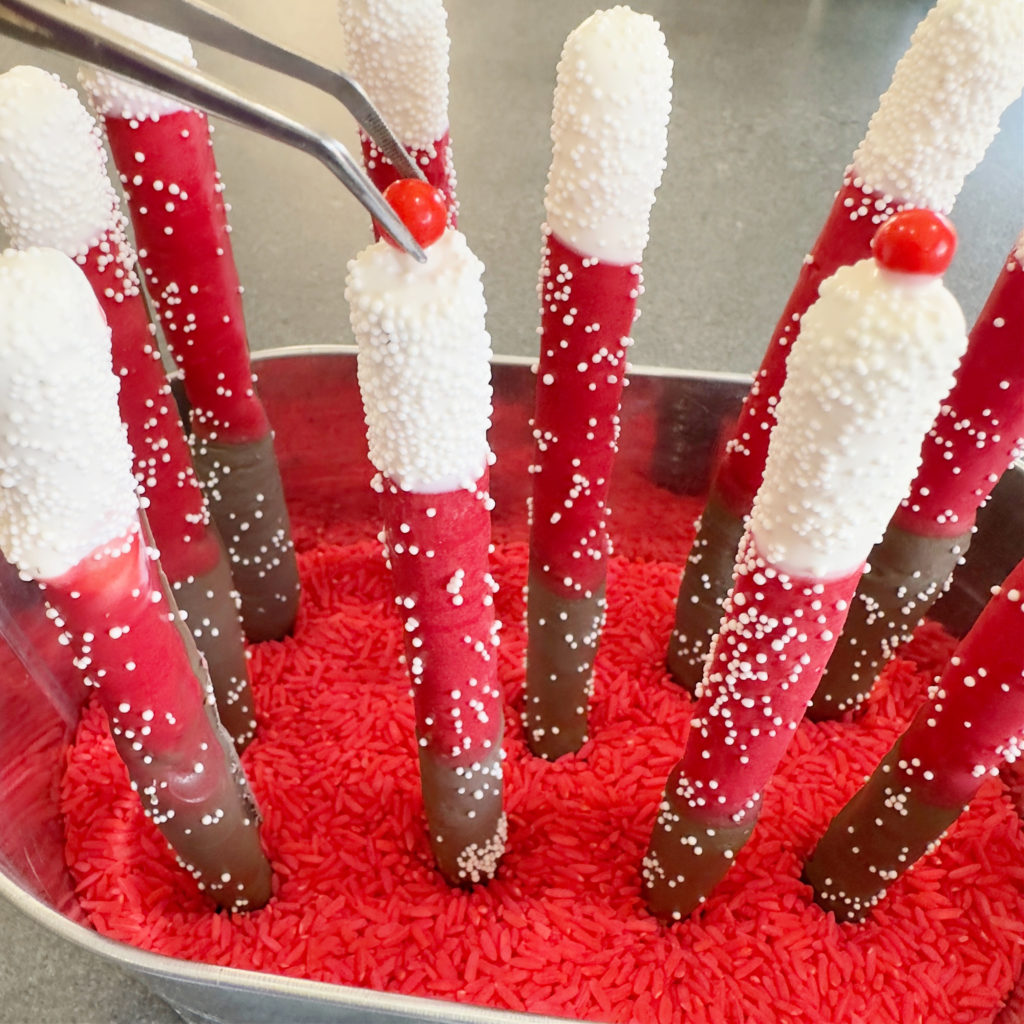
- Place the hardened, decorated pretzels in a container that allows them to stand upright. This can be a container with rice or a pretzel stand.
- Dip the tip of a wooden toothpick into the melted candy and add a dollop to the top of a pretzel (tip: add the candy to only one pretzel at a time). Then, add a red pearl sprinkle. Continue with the remaining pretzels. Once all the pretzels have a cherry, it’s time to move on to adding the stem.
- Add the green wafers to a small microwave-safe bowl. Heat for 30 seconds, stir, and heat an additional 15 seconds. Stir until the candy is melted and creamy.
- Using another wooden toothpick, add a dollop of the melted green candy to the top of a red pearl sprinkle. (TIP: Don’t add the green to more than three pretzels.)
- While the candy is still wet, add one green jimmie to the top. Continue with the remaining decorated pretzels.
ANOTHER EDIBLE CHERRY TOPPER
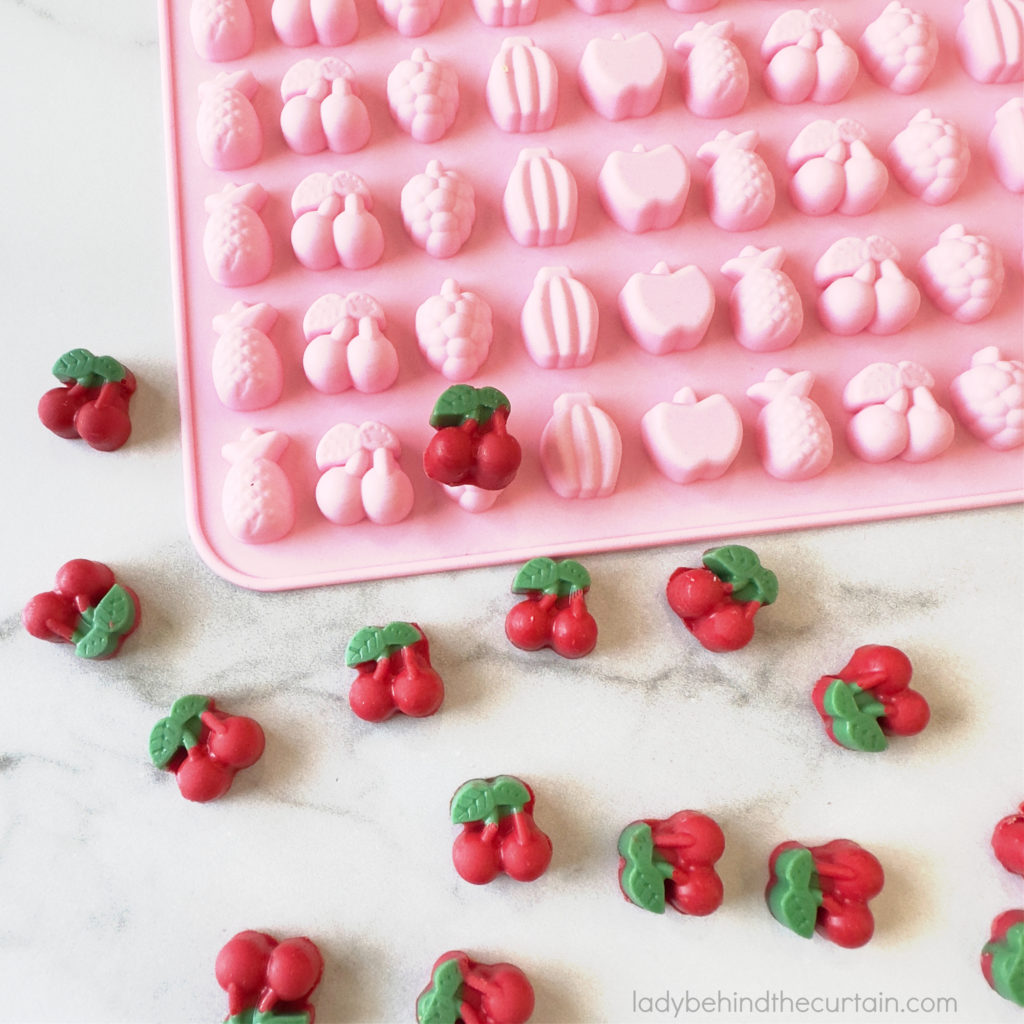
Using a silicone mold to make edible cherry-shaped candy is super easy and so much fun! Just melt your favorite red and green candy wafers.❤️ These adorable cherry candies are the perfect topper for your cherry Coke decorated pretzel rods, adding a playful and polished touch that looks just as good as it tastes!
I found the fruit-shaped candy mold mat at Hobby Lobby. Fun fact: All the baking goods at Hobby Lobby are always 50% off. The mold I used for this recipe costs $1.24!
- You will need a mold with mini cherries, red melting wafers, and green melting wafers.
- Add the red wafers to a medium microwave-safe bowl. Heat for 1 minute, stirring until melted and creamy; set aside. Follow the exact instructions for the green except pour the melted candy into a squeeze bottle.
- Take your time adding the green to the stem portion of the mold. Once all the stems have been added, fill in with the red melted candy.
- Place the candy mold in the refrigerator to harden (about 15 minutes), and pop the candy out of the silicone mold. Set aside until ready to decorate the pretzel tops.
Can I use regular grocery store flavorings?

When it comes to flavoring melting wafers (like candy melts or chocolate-flavored coatings), oil-based flavorings are generally preferred over water-based extracts or standard “store-bought” flavorings (which are often alcohol-based).
Oil-Based Flavorings (also called candy flavoring or chocolate flavoring):
- Prevent Seizing: Melting wafers, like real chocolate, can seize (become thick and clumpy) if they come into contact with too much water. Oil-based flavorings don’t introduce water and are specifically formulated for use in fat-based applications, thereby preventing this issue.
- Stronger and More Concentrated: Oil-based flavorings are often more potent and offer a more intense flavor than traditional extracts.
- Suitable for Fat-Based Applications: They are ideal for applications such as dipping, coating, and molding with melting wafers.
- I get all my oil-based flavorings from LorAnn Oils. The flavors are incredible. There are a ton of flavors, and the flavoring comes in two super concentrated sizes. CLICK HERE TO VISIT→LORANN (this is not an affiliate link; I just love their products!). You can also find the Lorann products at Hobby Lobby, Michaels, and Walmart.
Store-Bought Flavorings (often water or alcohol-based extracts):
- Risk of Seizing: Many store-bought flavorings, like extracts, contain water or alcohol, which can cause melting wafers to seize.
- Less Ideal for Chocolate Applications: While they may work for other baking applications (such as batters or frostings), they are not the best choice for directly flavoring melted chocolate.
In summary:
- Use oil-based flavorings for the best results when flavoring melting wafers.
- Avoid water-based extracts or standard alcohol-based flavorings to prevent the product from seizing.
- Check the ingredient list to ensure the flavoring is oil-based and doesn’t contain water.
- Use sparingly, as oil-based flavors are potent.
What’s the Earliest I Can Make Decorated Pretzels?
One of the best things about decorated pretzels (aside from their taste) is the convenience of making them ahead of your party. It’s every hostess’s dream to be able to create something this tasty before the craziness of the party prep starts. Ultimately, taking some of the stress away from hosting a party. These adorable pretzels can be made as early as a week in advance of the party.
How to Keep Your Candy Coating Smooth, Glossy, and Ready for Decorating
- Use a Candy Melting Pot: A candy melting pot or mini slow cooker is ideal for maintaining a steady, warm temperature for melts. Most have a “warm” setting that prevents overheating or burning. The one I have is made from Wilton.
- Electric Mug Warmer: Place your bowl of melted candy on a mug warmer plate to keep it fluid without further cooking. It’s a compact and affordable option.
- Microwave Briefly as Needed: If the candy starts to thicken, microwave in 10–15-second bursts at 50% power, stirring each time until smooth again.
- Work in Small Batches: Melt small amounts at a time so it doesn’t sit too long and harden before use. This also reduces waste.
- Cover When Not in Use: Cover the bowl with a lid or plastic wrap between uses to help retain warmth and prevent a skin from forming on top.
AN IMPORTANT TOOL FOR THE ROLLING TECHNIQUE

What is my all-time favorite tool for using the rolling technique? My all-time favorite tool is a HEATING PAD. I used my bread dough proofing heating pad. A cheap heating pad works too. The only thing I recommend is taking off the cover. This trick works incredibly, especially if you have cold countertops. To protect my counter, I put an oblong pot holder under the heating pad, then place a piece of parchment paper on top.
How to Store Decorated Pretzels
The easiest way to store decorated pretzels is in an airtight container at room temperature. Provided everything is fresh to begin with and the container is clean, dry, and has a tight seal, partially covered pretzel rods can stay fresh for about 2 weeks, sometimes even longer.
How to Store Leftover Melted Candy


If you have melted too much candy for your project, don’t worry; melted candy can be stored to use again. STORAGE: Pour the melted candy into a zip-top bag, remove all the air from the bag, zip it closed, and set it aside until hardened. OR….Place a piece of parchment paper on the counter, pour the leftover candy onto the paper, and let it harden before breaking it into manageable pieces. Then, place the pieces into a zip-top bag. USE AGAIN: Pull the hardened candy out of the bag, chop, put it in a microwave-safe bowl, heat for 30 seconds, stir, and continue heating in 30-second intervals until the candy is melted and creamy. NOTE: Reheated candy melts will heat faster than the first time they were melted.
FOR MORE INFORMATION ABOUT DECORATED PERTZELS, VISIT THESE POSTS


NOT ALL CANDY IS CREATED EQUAL – TOP CHOICES
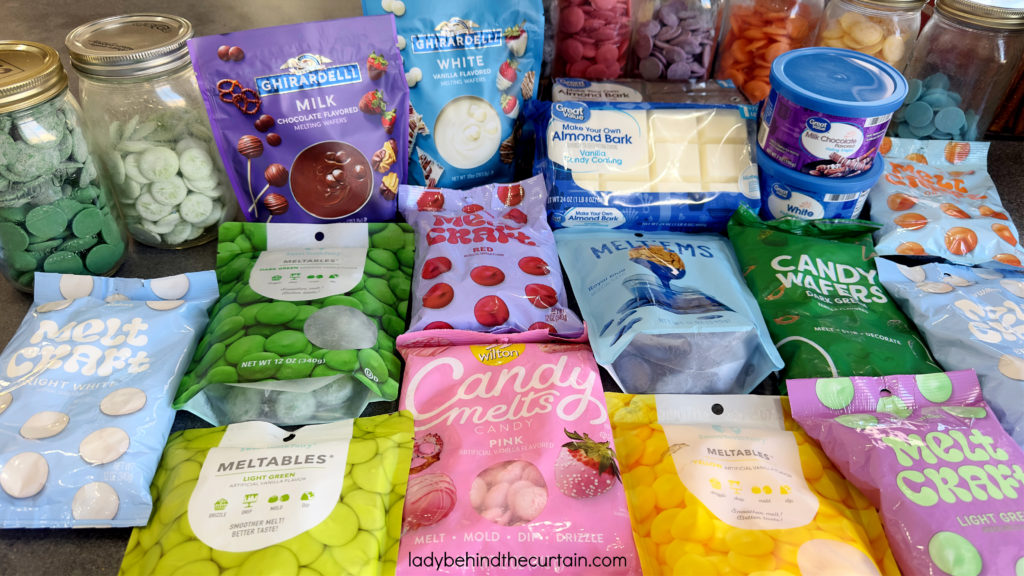
My list is based on brands I can find locally. I have heard great things about popular candy-making brands on Amazon, specifically Merkens.
- GHIRARDELLI: I rate this melting candy the best. The candy melts beautifully and has excellent flavor.
- MELT CRAFT: The newest addition to Michaels, these candy wafers are the best brand they’ve carried. They have a decent flavor and melt beautifully.
- SWEET TOOTH FAIRY: No longer available at Michaels, these candy wafers were good and far better than Wilton Candy Melts, which they carried before this brand.
- GREAT VALUE: Cheap melting candy from Walmart.
- CHOC MAKER: Not bad, a step up for Candy Melts.
- CANDY MELTS: The melting process of Wilton candy melts is not consistent. Whether shortening is needed depends on the color; unlike Ghirardelli or Melt Craft, which don’t need any shortening added to be creamy.
- ALMOND BARK: Cheap but melts beautifully.
LATEST POSTS
- Homemade Pistachio Ice Cream Cake
- 50+ Easy Frosting Recipes Every Home Baker Needs in Their Back Pocket
- Easy Focaccia Bread Using Rhodes Frozen Dinner Rolls
- Green Bean Casserole Soup
- Dressed Up Potato Salad
In conclusion, making Cherry Coke decorated pretzel rods is a fun and flavorful way to add a pop of nostalgia and creativity to your treat table. With their eye-catching red, white, and dark hues, hints of cherry and vanilla, and playful edible toppers like cherries and fizzy bubbles, these pretzels are just as delightful to look at as they are to eat. Whether you’re making them for a party, holiday, or to enjoy a sweet and salty snack with a retro twist, these treats will surely impress. Simple to create yet packed with charm and flavor, Cherry Coke pretzel rods are a cheerful tribute to a classic soda fountain favorite.❤️ Sheryl
Cherry Coke Decorated Pretzel Rods
Ingredients
For the Cherry Coke Pretzels:
- 8 ounces vanilla-flavored red melting wafers
- 6 ounces vanilla-flavored white melting wafers
- 2 ounce vanilla-flavored yellow melting wafers
- 2 ounces vanilla-flavored royal blue melting wafers
- 3 tablespoons vegetable shortening
- ¼ teaspoon LorAnn cherry flavoring
- ¼ teaspoon LorAnn cola flavoring
- white nonpareil sprinkles
- 15 pretzel rods
For the Cherry Topper:
- 10 vanilla-flavored white melting wafers
- 10 vanilla-flavored green melting wafers
- 15 red pearl sprinkles
- 15 green jimmies sprinkles
- tweezers
Instructions
How to Make Brown Colored Melting Wafer without Using Chocolate
If you have oil-based brown food coloring, you can use it. Most of us don't, so here is a solution without using chocolate-flavored melting wafers.
Add equal amounts of red, yellow, and royal blue melting wafers in a medium-sized microwave-safe bowl and one tablespoon vegetable shortening. Heat for one minute and stir until the candy is melted and creamy. If the candy is not melted, return it to the microwave and continue to heat in 15-second increments. You should end up with a beautiful dark brown color.
For the Cola Layer:
- To the brown color of the melted candy, add the ¼ teaspoon of cola flavor. Mix to combine. Set aside and keep warm. Look below for my tip about keeping it warm and melted.
For the Cherry Layer:
- Add the 6 ounces of red melting wafers to a medium microwave-safe bowl and one tablespoon of vegetable shortening.
- Heat for 1 minute, stirring until melted and creamy. If the candy is not melted, heat in 15-second increments. Stir in the cherry flavoring. Set aside and keep warm. Look below for my tip about keeping it warm and melted.
For the Vanilla Layer:
- Add the 6 ounces of red melting wafers to a medium microwave-safe bowl and one tablespoon of vegetable shortening.
- Heat for 1 minute, stirring until melted and creamy. If the candy is not melted, heat in 15-second increments. Set aside and keep warm. Look below for my tip about keeping it warm and melted.
Putting it all Together:
- On a piece of parchment paper, pour a pile of white, red, and brown melted candy from the top to the bottom. NOTE: Don't add all the melted candy at once. To keep the candy warm, place the bowls with the candy on a potholder (I use an oblong potholder).
- Lay the pretzel rod flat and roll or pull through the candy, adding a line of white, red, and brown.
- While the candy is still wet, add the white nonpareil sprinkles mostly to the white, with a little falling down the red and brown. The sprinkles represent soda bubbles.
- Place coated pretzels on a cookie sheet lined with parchment paper. Set aside to harden or in the refrigerator for 5 to 10 minutes. You can stop here or look below for instructions on how to make a cherry for the top of your soda fountain drink pretzel.
HOW TO MAKE EDIBLE CHERRY TOPPING:
- Add the white wafers to a small microwave-safe bowl. Heat for 30 seconds, stir, and heat an additional 15 seconds. Stir until the candy is melted and creamy.
- Place the hardened, decorated pretzels in something that will allow them to stand upright. This can be a container with rice or a pretzel stand.
- Dip the tip of a wooden toothpick into the melted candy and add a dollop to the top of a pretzel (TIP: Only add the candy to one pretzel at a time). Then, add a red pearl sprinkle. Continue with the remaining pretzels. Once all the pretzels have a cherry, it's time to move on to adding the stem.
- Add the green wafers to a small microwave-safe bowl. Heat for 30 seconds, stir, and heat an additional 15 seconds. Stir until the candy is melted and creamy.
- Using another wooden toothpick, add a dollop of the melted green candy to the top of a red pearl sprinkle. (TIP: Don't add the green to more than three pretzels.)
- While the candy is still wet, add one green jimmie to the top. Continue with the remaining decorated pretzels.
Notes
IMPORTANT TOOL FOR THE ROLLING TECHNIQUE
What is my all-time favorite tool for using the rolling technique? My all-time favorite tool is a HEATING PAD. I used my bread dough proofing heating pad. A cheap heating pad works too. The only thing I recommend is taking off the cover. This trick works incredibly, especially if you have cold countertops. To protect my counter, I put an oblong pot holder under the heating pad, then place a piece of parchment paper on top.
REFER TO THE POST FOR INFORMATION ABOUT HOW TO MAKE CANDY CHERRY TOPPERS USING A CANDY MOLD, HOW TO STORE PRETZELS AND MORE.


Comments
Cherry Coke Decorated Pretzels — No Comments
HTML tags allowed in your comment: <a href="" title=""> <abbr title=""> <acronym title=""> <b> <blockquote cite=""> <cite> <code> <del datetime=""> <em> <i> <q cite=""> <s> <strike> <strong>