

Homemade Chocolate Easter Bunnies
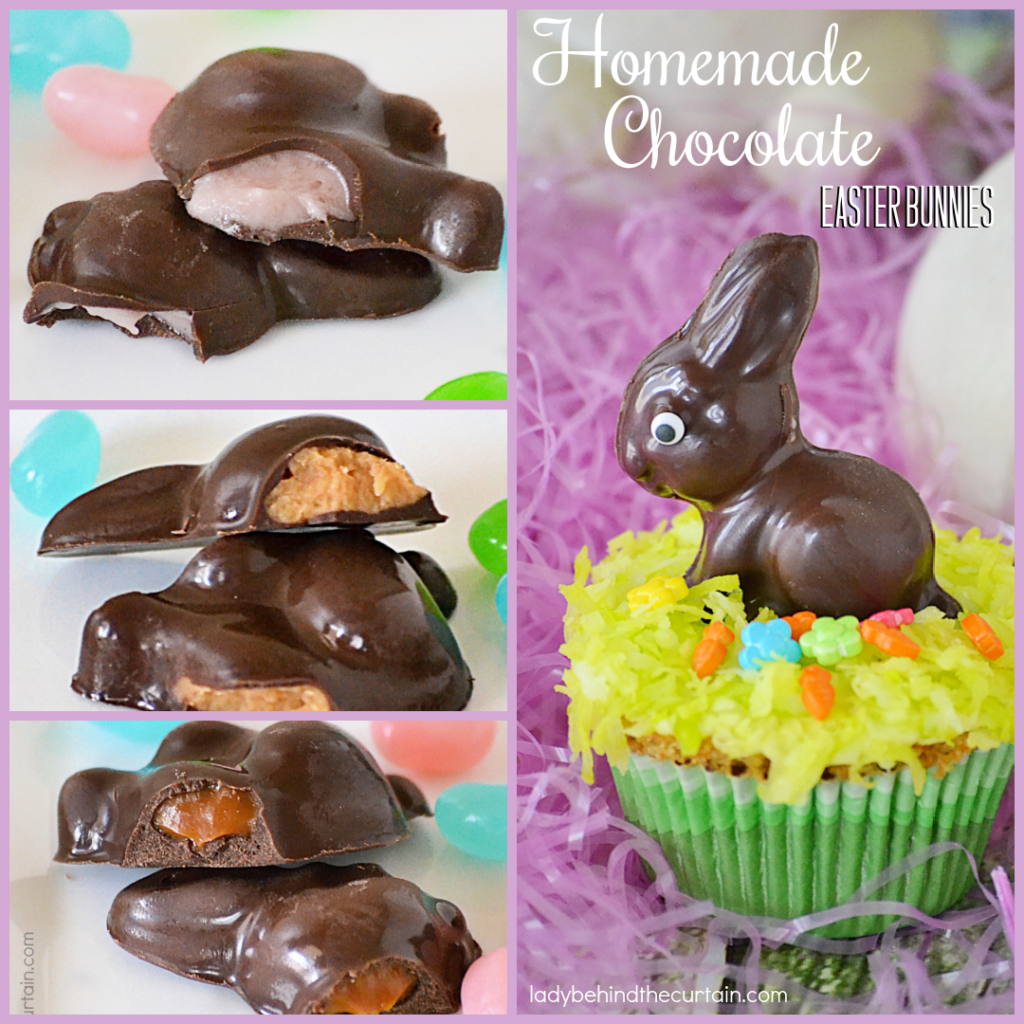
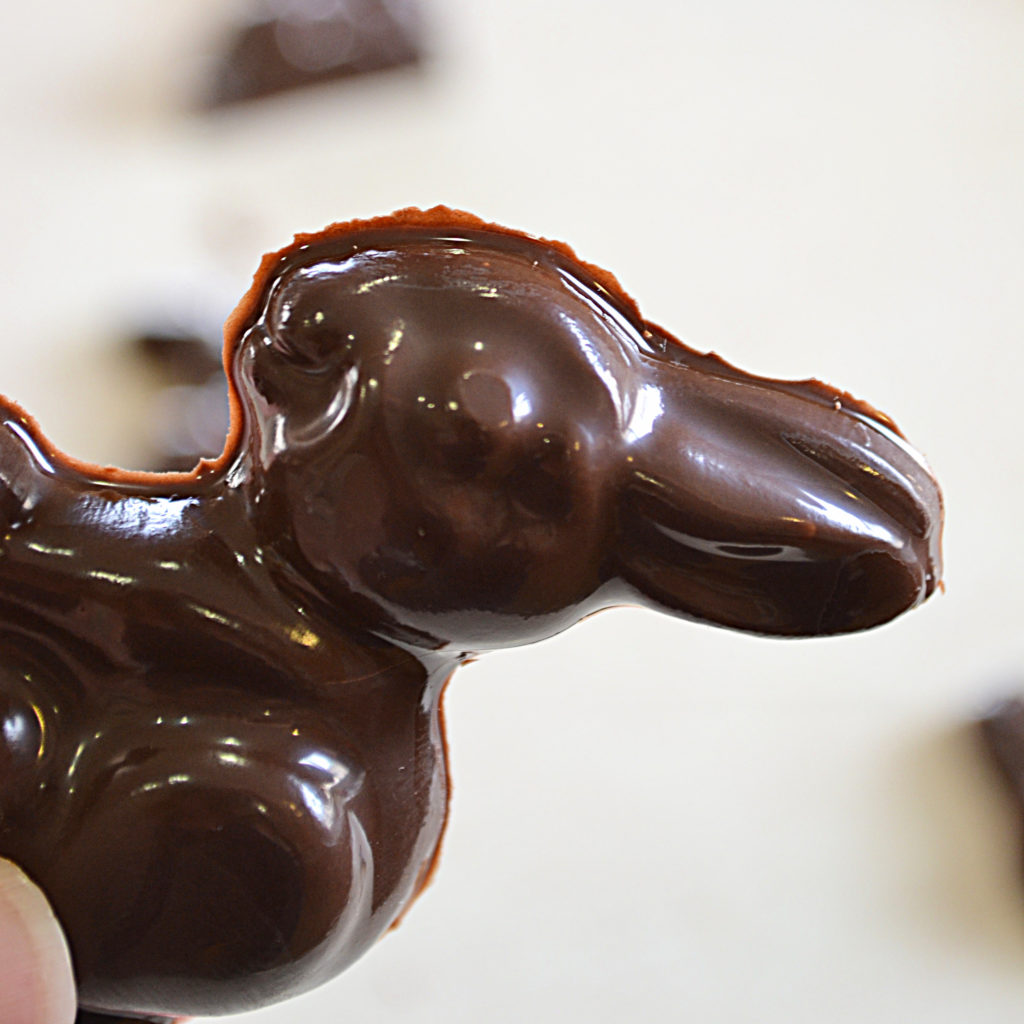
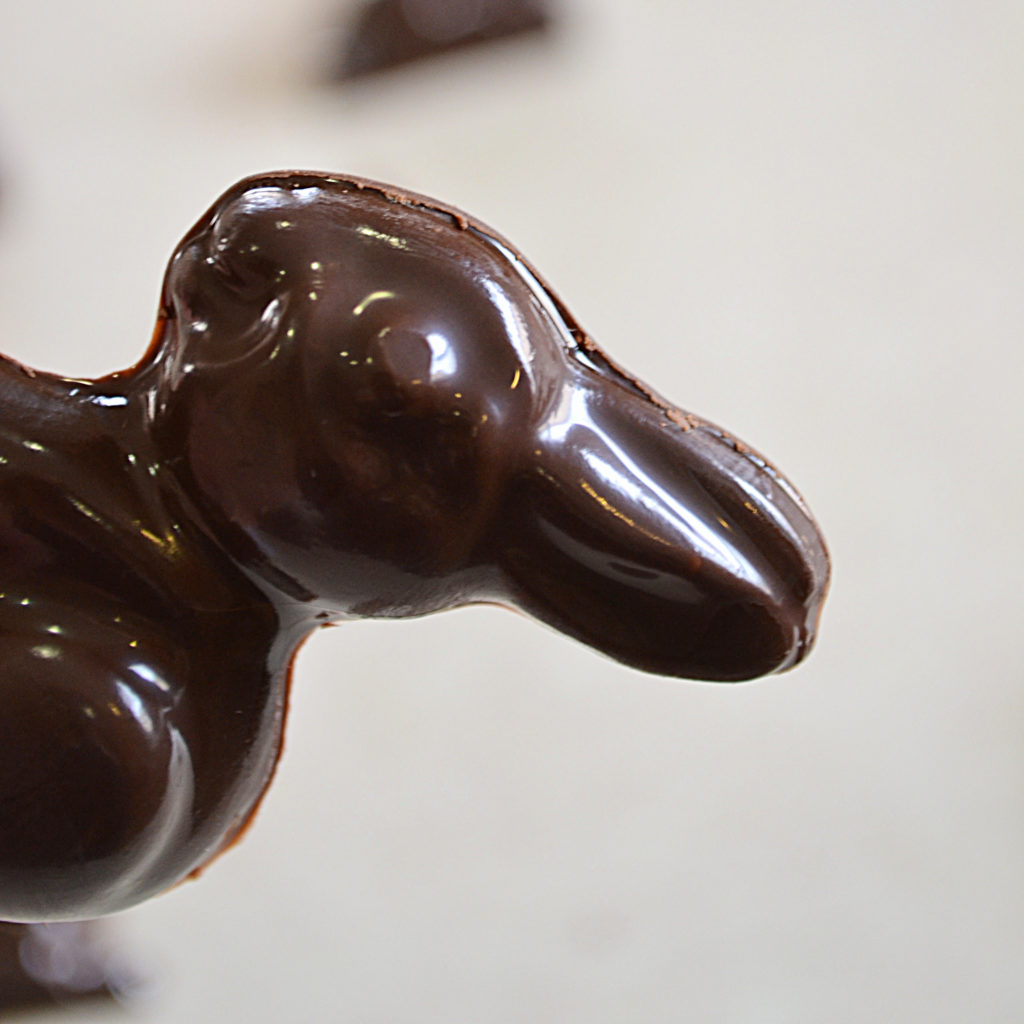
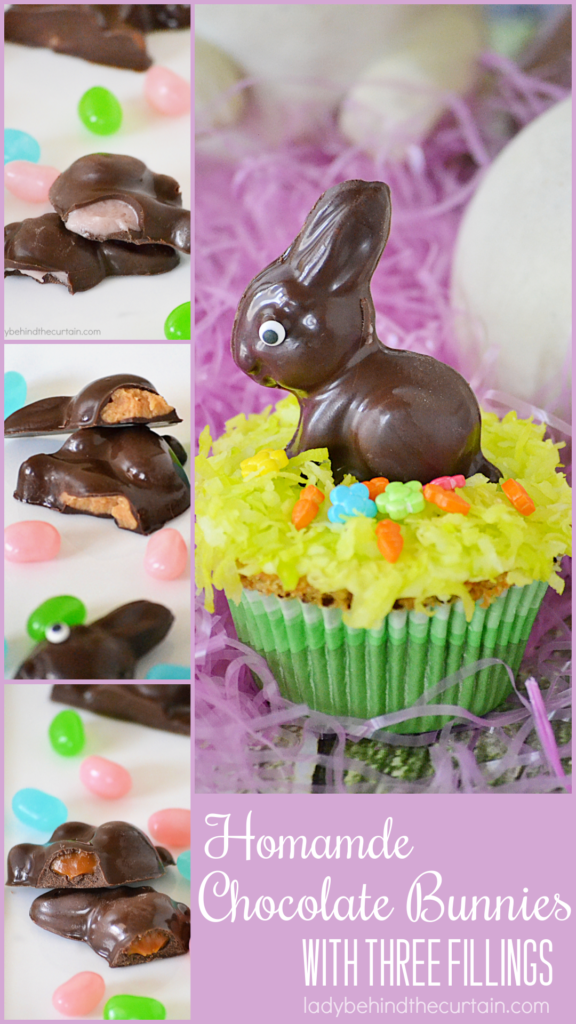
Homemade Chocolate Easter Bunnies: In this post you will learn how easy it is to make your own homemade chocolate Easter bunnies. Get ready for some delicious flavors too! There are FOUR TYPES of chocolate bunny recipes. Solid chocolate, raspberry filled, caramel cream filled, and peanut butter cream filled. Not only will you have total control over the ingredients, but you’ll also have the satisfaction of creating something special for your loved ones. You’ll also learn how to choose the right type of chocolate for mastering the molding process. Get ready to hop into the world of chocolate making and surprise your family and friends with your very own handmade chocolate treats.
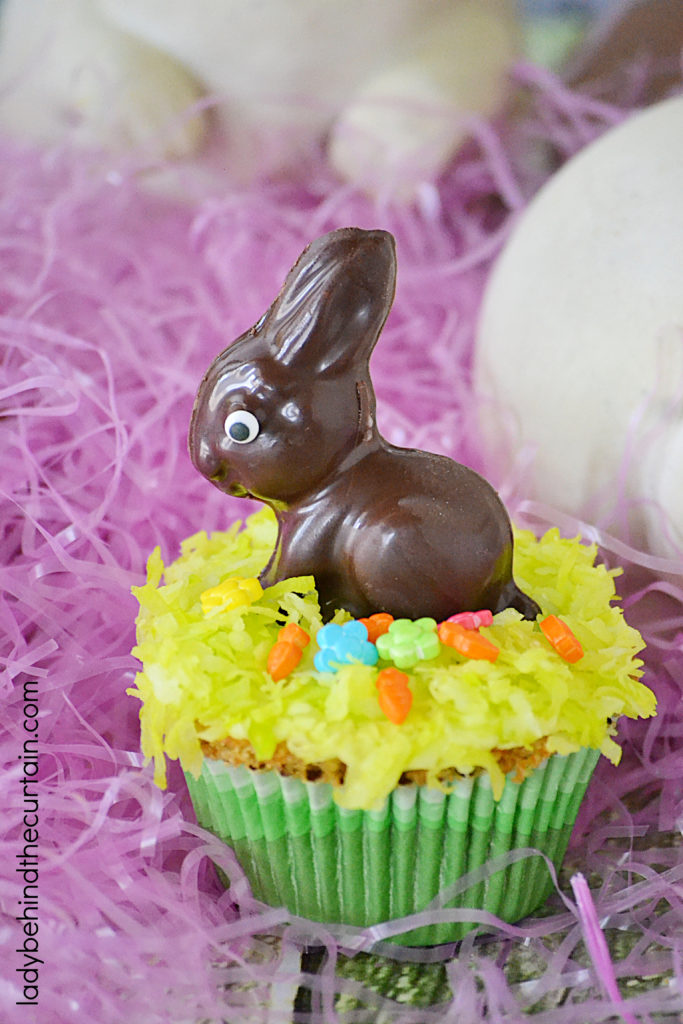
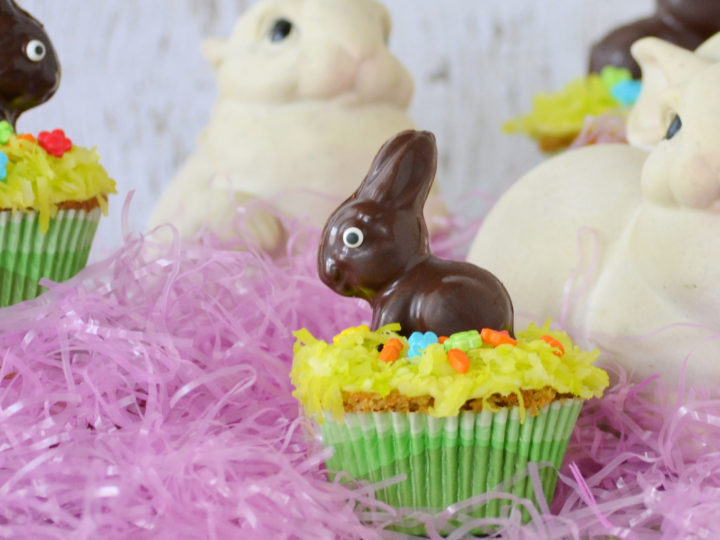
You only need a few ingredients and cute chocolate molds to create these adorable melt in your mouth Chocolate Easter Bunnies. BONUS! They’re filled with easy to make cream fillings. Coated with a creamy dark or milk chocolate and filled with caramel, peanut butter and raspberry cheesecake. The kids will love these chocolate bunnies in their Easter Baskets!
I’ll show you how easy it is to customize your homemade chocolate Easter bunnies along with lots of tips and tricks. This year instead of using store bought chocolate Easter Bunnies, be in charge of your ingredients and make your own chocolate creations! MAKE ALL FOUR OPTIONS OR PICK AND CHOOSE WHICH ONES TO MAKE ACCORDING TO YOUR CHILDS LIKES AND DISLIKES.
How to Make Homemade Solid Chocolate Easter Bunnies
Making your own homemade chocolate bunny is a great way to customize Easter candy for each child. Some may not like peanut butter or caramel but love raspberry cheesecake! Follow along with my easy step by step tutorial on how to make Filled Chocolate Easter Bunnies.
SOLID CHOCOLATE BUNNIES INGREDIENT LIST-full printable recipe below in recipe card
- 3-D Fat sitting bunny mold or any chocolate bunny mold that is deep enough to add filling.
- Good quality dark or milk melting chocolate This is my favorite→VERMONT DARK CHOCOLATE—VERMONT MILK CHOCOLATE– this chocolate is a bit pricey, check below for my chocolate list.
- OPTIONAL: Edible candy eyes
- OPTIONAL: Foil chocolate wrappers (found on the candy making isle of your craft store)
SOLID CHOCOLATE BUNNIES INSTRUCTIONS
- Pour chocolate melts into a microwave safe bowl, heat 1 minute on high. Stir until creamy. If chocolate is not melted, continue heating at 60% power in 30 second intervals, stirring between until melted and creamy.
- Add a small amount (about 1 teaspoon for this mold) of the melted chocolate to the mold. Using a small clean paint brush, bring the chocolate up the sides of the mold and to the edges.
- Hold plastic chocolate mold upside down and tap out any excess chocolate.
- Lay right side up on the counter and lightly tap chocolate back into position (this will also get rid of any air bubbles).
- Place in the refrigerator until hardened about 5 minutes or until the chocolate is no longer shiny.
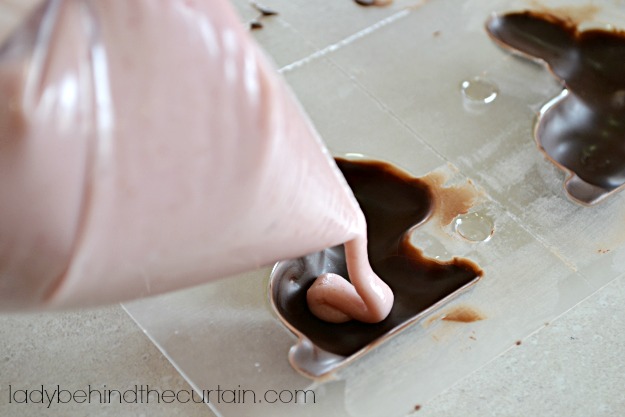
- Add your favorite filling (find three options below)
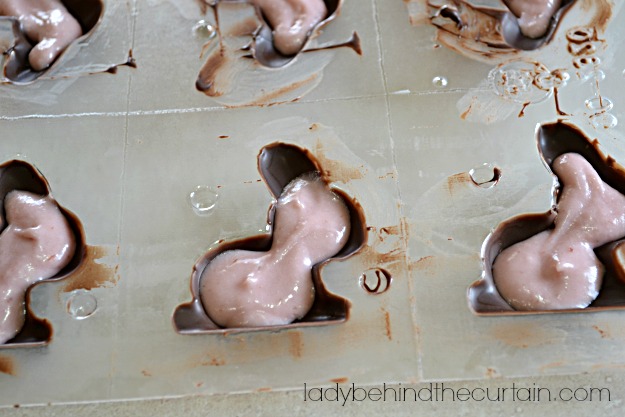
- Cover with remaining melted chocolate NOTE: If chocolate is too hard, heat again in the microwave. This time only 30 seconds.
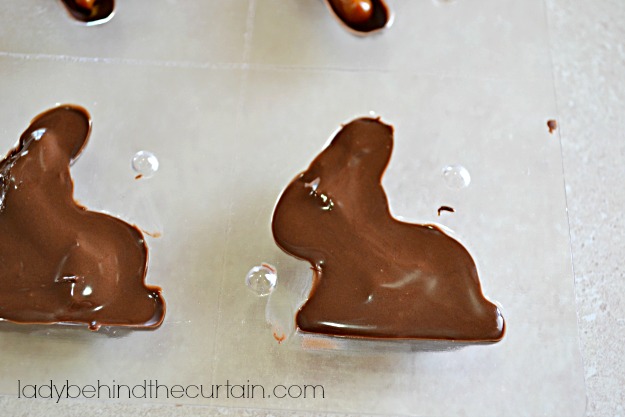
- Place in the refrigerator to harden.
- Using some of the chocolate, add a dollop where the eye will go, press and hold eye in place until chocolate has hardened enough to hold the eye.
- Wrap solid bunny with foil chocolate wrapper
WHAT ARE THE BEST MOLDS FOR CHOCOLATE?
PLASTIC MOLDS: Most plastic chocolate molds are relatively easy to wash, and are available in numerous varieties. It is also easy to release the candy from a plastic mold. Candy molds can be found at most craft stores that also sell melting chocolate and at bakery supply stores. The most notable different is: PLASTIC CANDY MOLDS CREATE A GLOSSY CHOCOLATE
SILICONE MOLD: There is a great variety of silicone molds available. Most of them have deep wells which will allow you to create 3D subjects. You can also find silicone candy molds at most craft stores that also sell melting chocolate and at bakery supply stores. The most notable different is: SILICONE MOLDS ALLOWS YOU TO CREATE BOTH MATT AND GLOSSY CHOCOLATE.
HOW TO KEEP CHOCOLATE FROM STICKING TO THE CANDY MOLD
It is also very important that there is no dirt, dust, or even fingerprints since that can cause the chocolate to stick. Therefore, it is recommended that you clean and dry the mold with a cotton cleaning cloth. DO NOT SPRAY OR GREASE THE MOLDS.
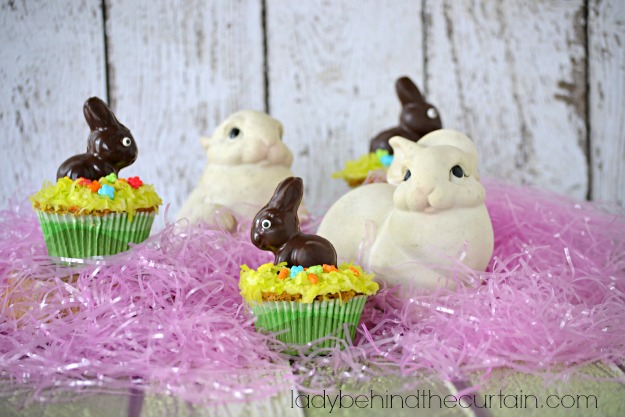
Candy Eyes—Chocolate Easter Bunny Gift Options
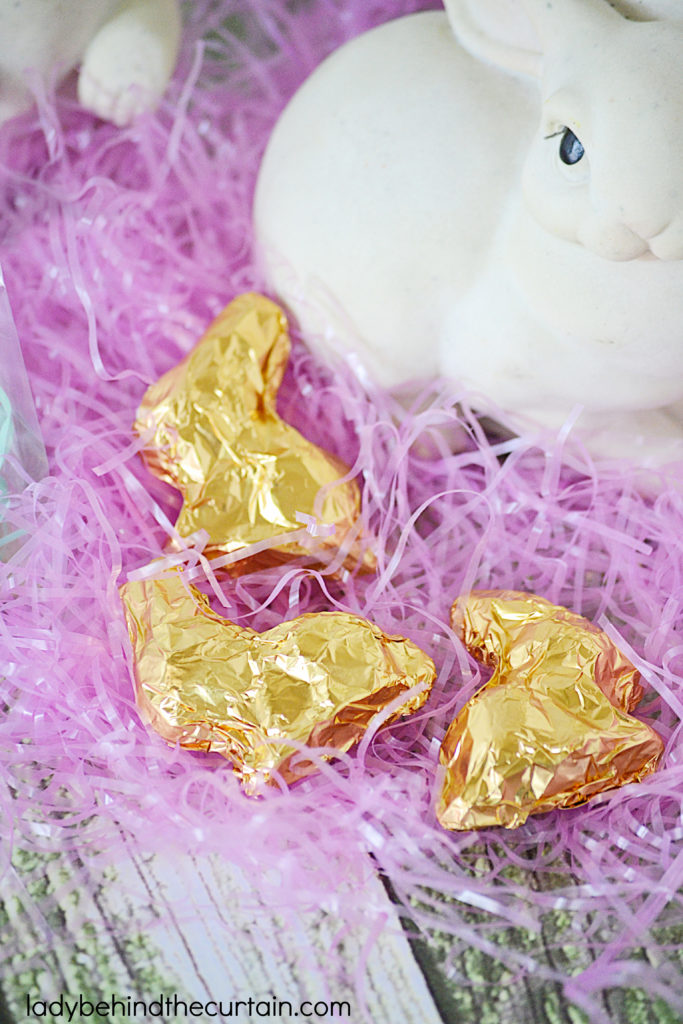
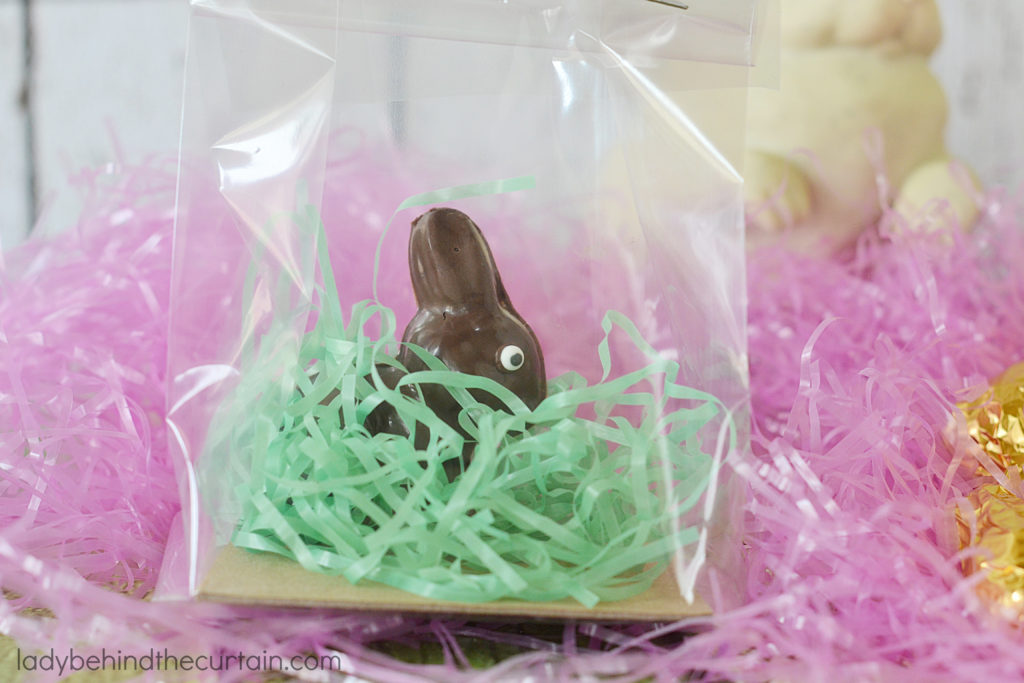
Here’s how I address the eyes. If I plan on placing the chocolate bunny on a cupcake or in a clear gift bag where the bunny will be seen, I add an eye. If the bunny will be placed in something that isn’t see through like an Easter tin, I leave off the eye and wrap it in a foil chocolate wrapper (I found my wrappers on the candy making isle at my local craft store).
Pro Tip for Chocolate with Jagged Edges
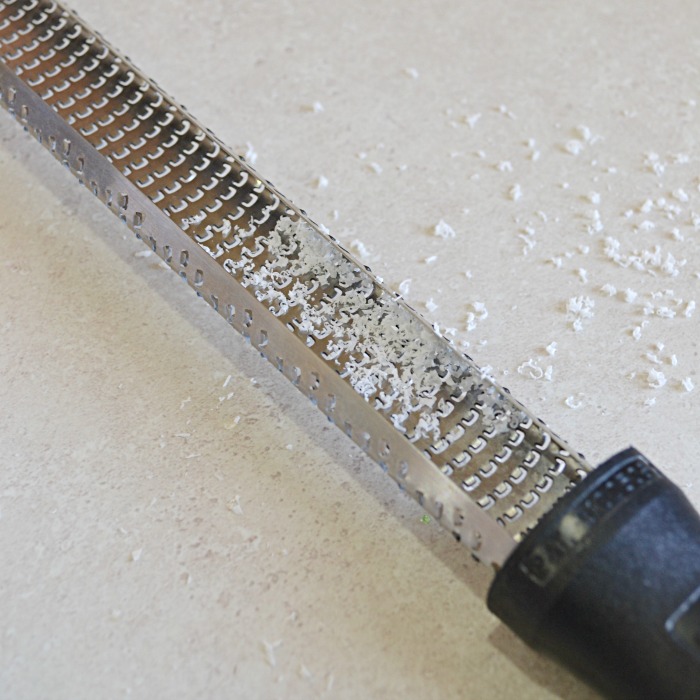
SMALL LACY EDGES: If the edges are thin and can be easily removed. Use the warmth of your finger to make the edges smooth (lightly run around the edges). THICK EDGES: If the edges are thick then I recommend using a micro plainer. In a back and forth motion lightly trim the edges.
Cute Easter Gift Idea
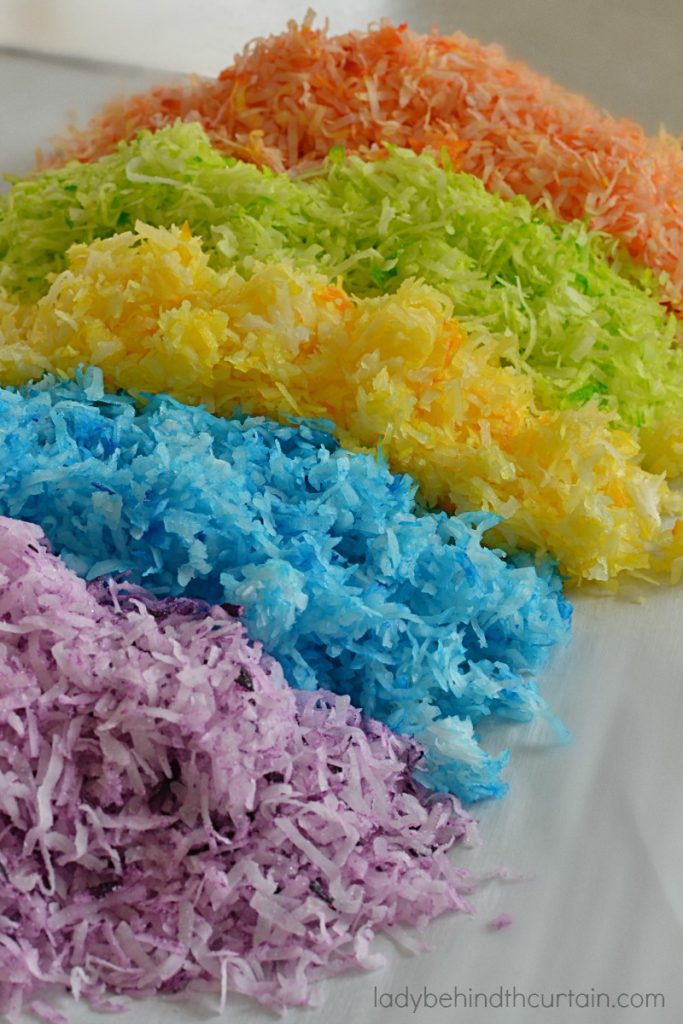
HOW TO COLOR COCONUT
How to Make Raspberry Cheesecake Cream Filling

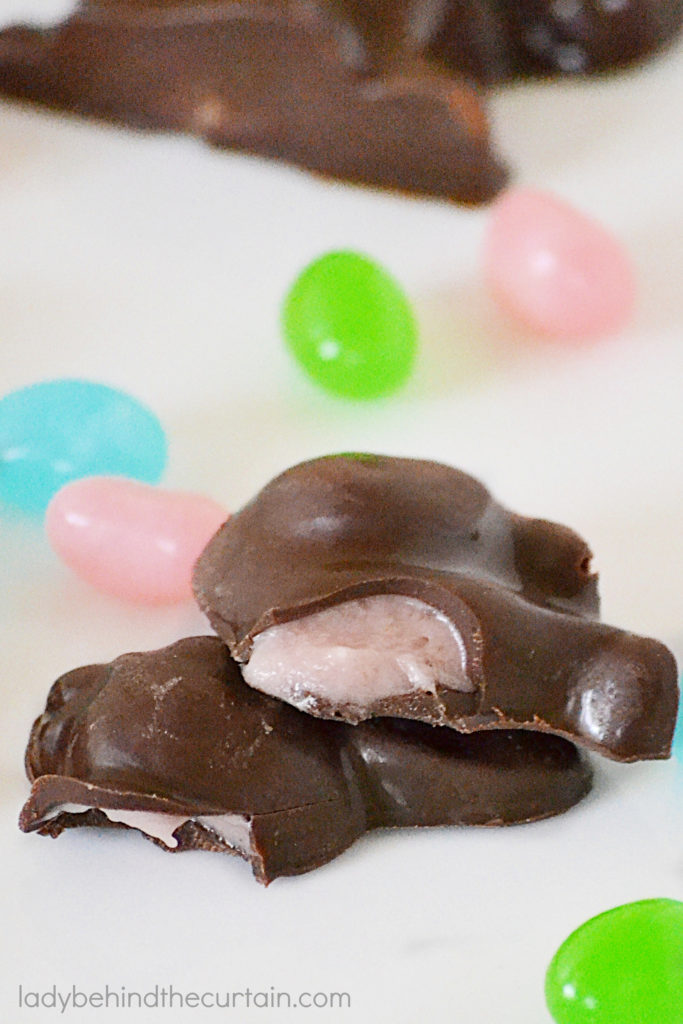
CHOCOLATE EASTER BUNNY RASPBERRY CHEESECAKE CREAM FILLING INGREDIENT LIST-full printable recipe below in recipe card-NOTE: THIS RECIPE WOULD BE DELICIOUS WITH DARK CHOCOLATE, MILK CHOCOLATE, OR WHITE CHOCOLATE
- 4 ounces cream cheese, softened
- 2 tablespoons seedless raspberry preserves
- ¾ cup powered sugar
RASPBERRY CREAM CHEESE FILLING INSTRUCTIONS
- In a medium mixing bowl beat the cream cheese until fluffy.
- Place raspberry preserves in a microwave safe bowl and heat 15 seconds.
- Add preserves to cream cheese, blend until combined.
- Add powdered sugar, mix well.
- Spoon raspberry cream filling into a piping bag or a zip top bag with the corner snipped and pipe into chocolate cavity.
- Spoon a layer of chocolate over the top of the filling.
- Set aside to harden or place in the refrigerator 10 minutes.
- Once you are satisfied that the chocolate is hard, pop out your own chocolate bunnies.
How to Make Caramel Cream Filling
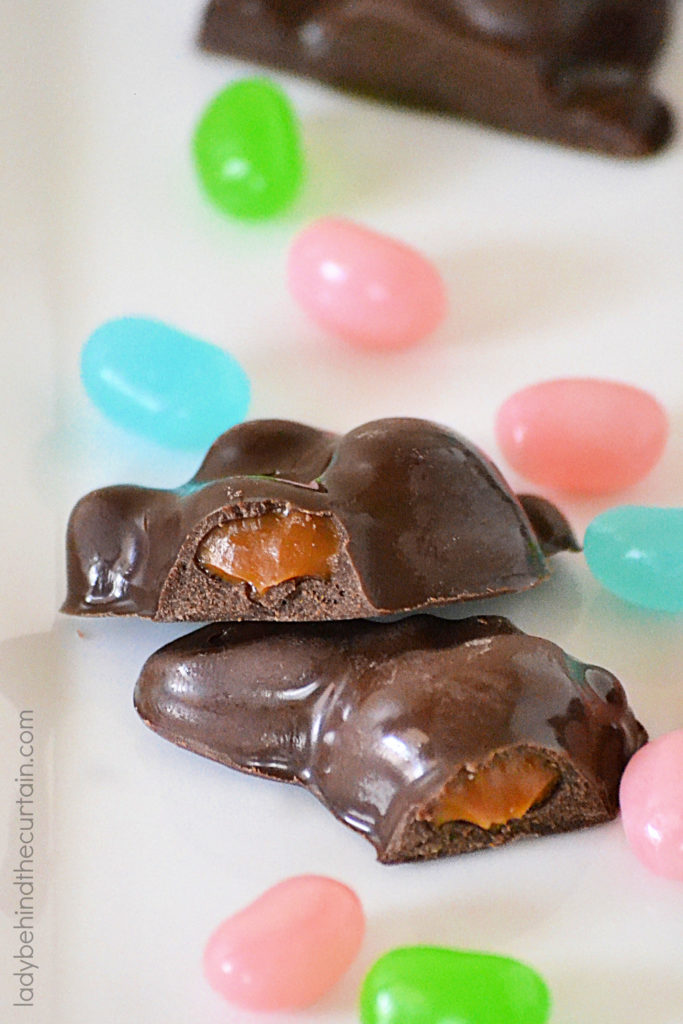
CHOCOLATE EASTER BUNNY CARAMEL CREAM FILLING INGREDIENT LIST-full printable recipe below in recipe card
- 1 (13.4 ounce) can Dulce de Leche Caramel
CARAMEL CREAM FILLIGN INSTRUCTIONS
- Spoon caramel filling into a piping bag or a zip top bag with the corner snipped and pipe into chocolate cavity.
- Spoon a layer of chocolate over the top of the filling.
- Set aside to harden or place in the refrigerator 10 minutes.
- Once you are satisfied that the chocolate is hard, pop the chocolate out of the Easter bunny mold.
How to Make Peanut Butter Cream Filling
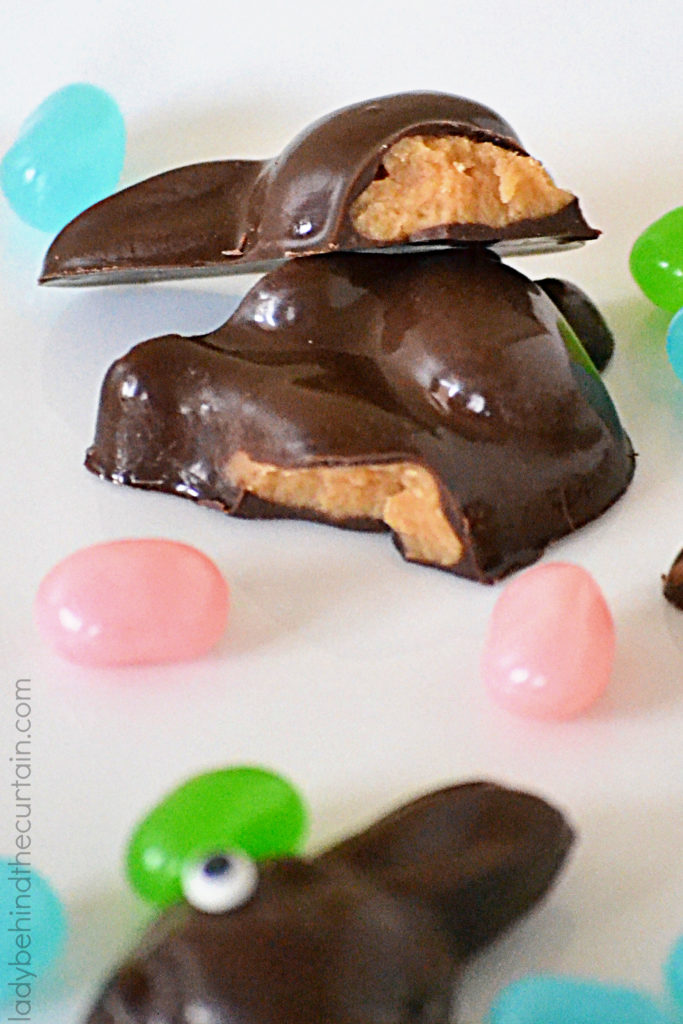
CHOCOLATE EASTER BUNNY PEANUT BUTTER CREAM FILLING INGREDIENT LIST-full printable recipe below in recipe box
- ½ cup creamy peanut butter
- 1½ tablespoons unsalted butter
- ¾ cup powdered sugar
- 1 tablespoon water or milk
PEANUT BUTTER CREAM FILLING INSTRUCTIONS
- Add the peanut butter and butter to a small saucepan.
- On low heat melt the peanut butter and butter.
- Remove peanut butter mixture from heat and stir in the powdered sugar and water. Set aside to cool.
- Spoon peanut butter filling into a piping bag or a zip top bag with the corner snipped and pipe into chocolate cavity.
- Spoon a layer of chocolate over the top of the filling.
- Set aside to harden or place in the refrigerator 10 minutes.
- Once you are satisfied that the chocolate is hard, pop the adorable bunnies out of the mold.
What is the BEST Chocolate for Candy Molds?

The best advise I can give is to use good quality chocolate. That being said, let’s dive into the best chocolate down to the cheapest and no so great chocolate.
| Callebaut Couverture Chocolate | Belgian 54.5% semisweet dark chocolate. |
| Ghirardelli Melting Wafers | Dark chocolate and white vanilla-favored wafers. |
| Merckens Milk Chocolate | 6-8% cocoa milk chocolate wafers. |
| Wilton Candy Melts Set | Light cocoa and white candy melts. |
| Enjoy Life Foods Chocolate Morsels | 69% dairy-free dark chocolate morsels. |
| Guittard Organic Chocolate Wafers | 74% cocoa bittersweet chocolate wafers. |
| Baker’s Premium Chocolate Baking Bar | 100% unsweetened cacao chocolate. |
| Toll House Chocolate Morsels | 53% cacao dark chocolate morsels. |
| Beyond Good Chocolate | 70% pure dark chocolate. |
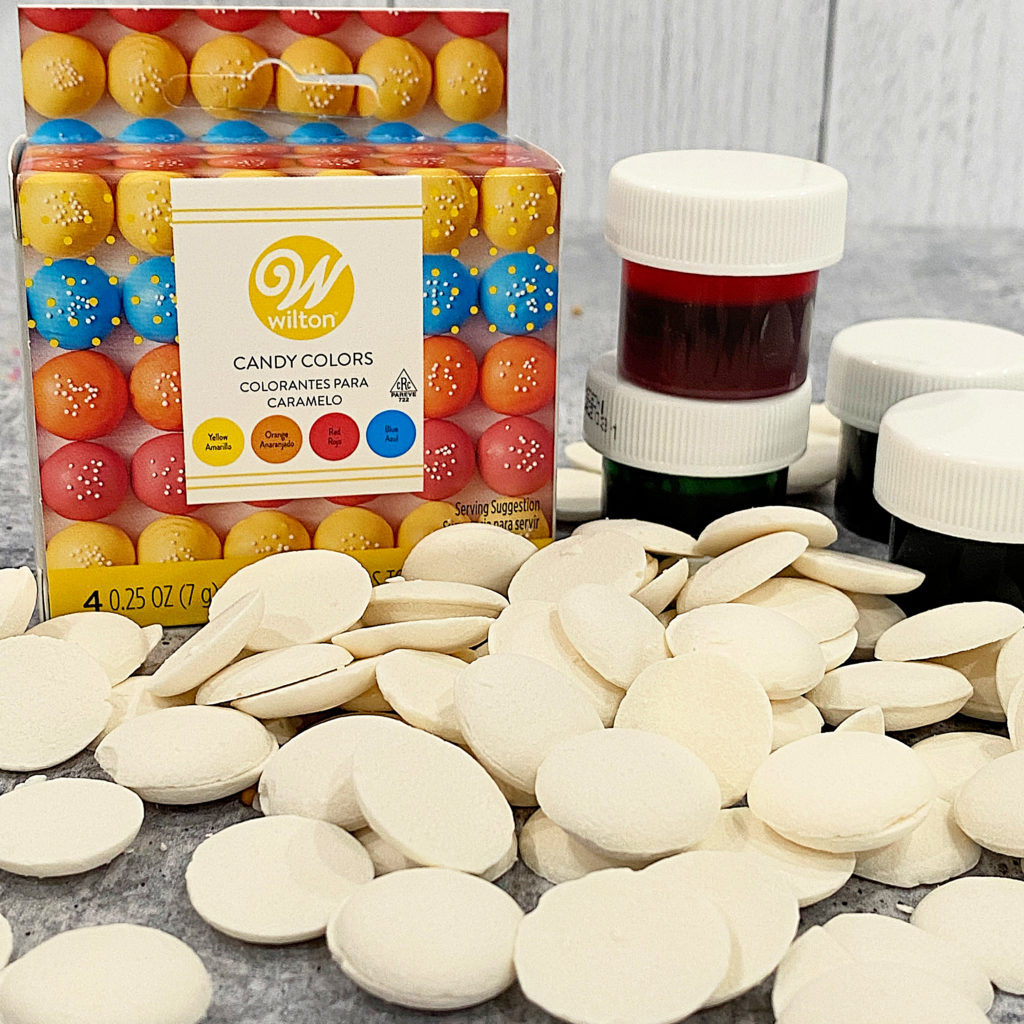
CAN I USE CANDY MELTS TO MAKE CHOCOLATE BUNNIES?
YES YOU CAN! But a note of caution….while the colors are wonderful the flavor is not that great. The dark chocolate candy melts are okay too. If you want to go for the less inexpensive chocolate but still have good flavor I suggest using Ghirardelli melting wafers. The chocolate comes in dark chocolate, milk chocolate and white. The white chocolate can be colored to match the candy melts colors. See below about how to color melting candy.
HOW TO COLOR MELTING CANDY
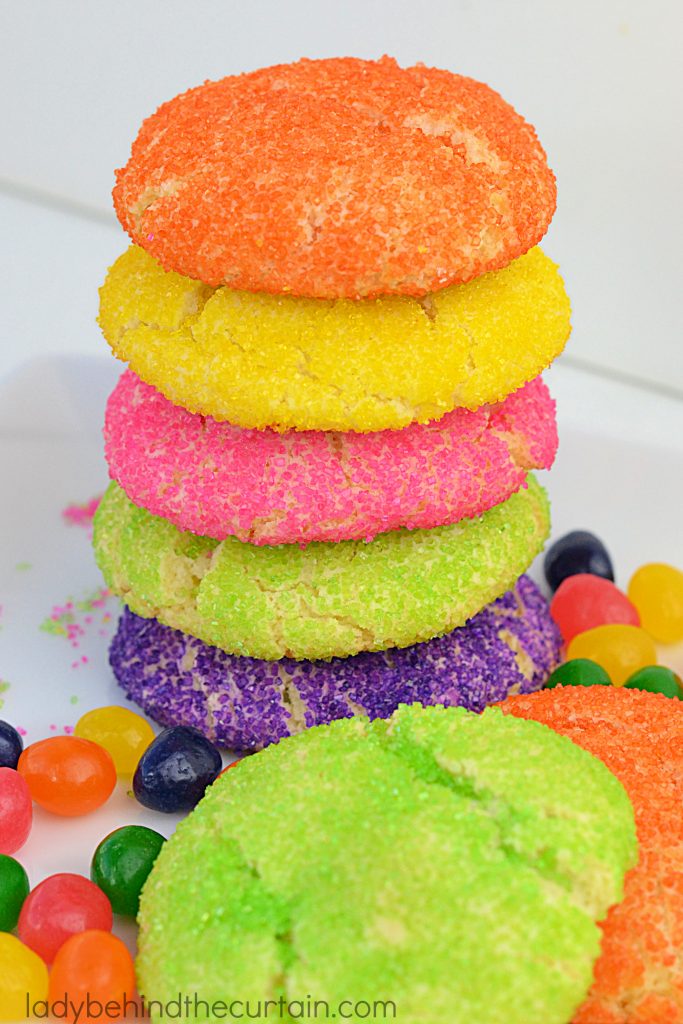
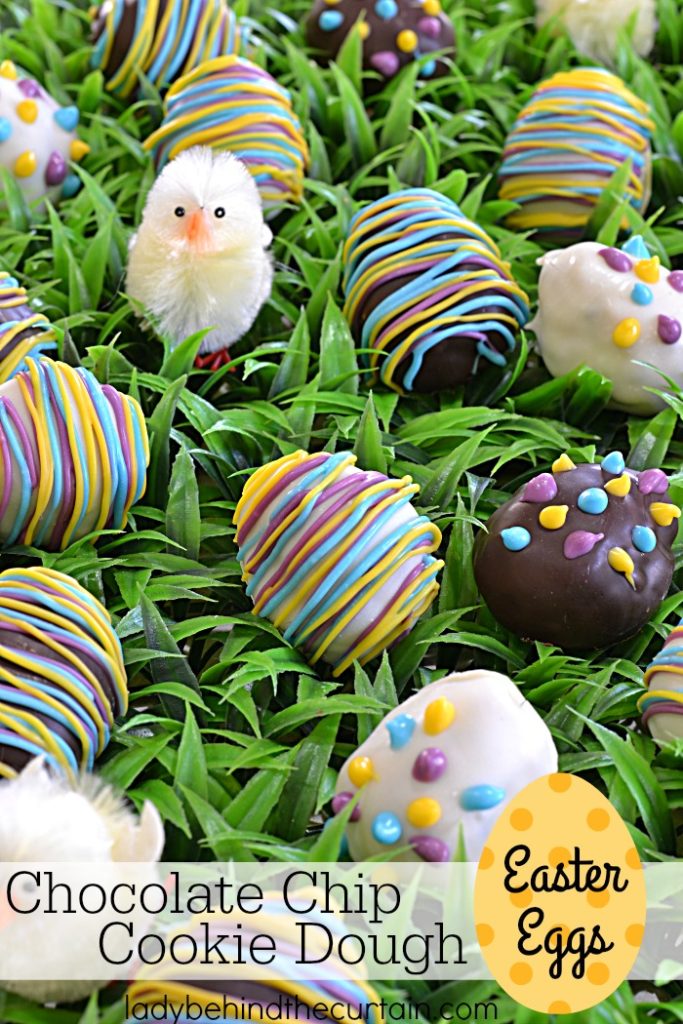
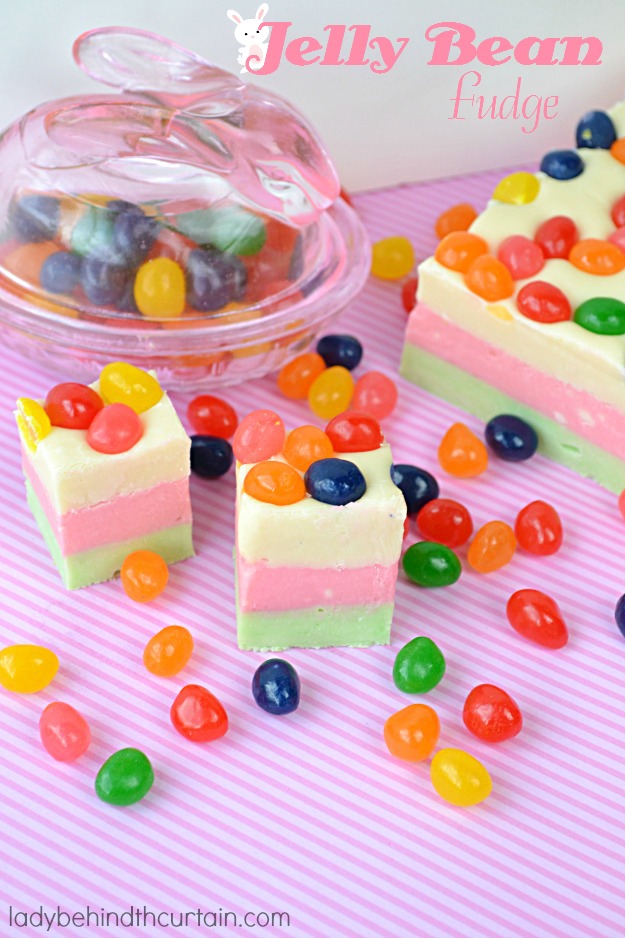
MORE EASTER BASKET TREATS

EASTER PARTY FREE PRINTABLE COLLECTION
LATEST POSTS
In conclusion, homemade chocolate Easter bunnies are not just a fun and delicious holiday tradition, but also a creative way to add a personal touch to your celebrations. By following these tips and tricks, you can easily make your own bunnies at home and surprise your loved ones with a unique and thoughtful treat. As we’ve learned, using high-quality ingredients, proper techniques, and a little bit of creativity can result in a bunny that not only tastes great but also looks impressive. So, this Easter, consider putting in the extra effort and making your own homemade chocolate bunnies. Your family and friends will thank you for it. Happy Easter and happy chocolate-making! ????Sheryl
Homemade Chocolate Easter Bunnies
FOUR ideas! Make all four or pick and choose and customize to each child.
Ingredients
For the Solid Chocolate Bunnies:
- 3-D Fat Sitting Bunny Mold or any chocolate mold (see link below)
- Good quality dark or milk melting chocolate (see link below)
- Optional: edible candy eyes (found at your local craft store on the baking isle)
- Optional: foil chocolate wrappers (found at your local craft store on the baking isle)
For the Raspberry Cheesecake Cream Filling:
- 4 ounces cream cheese, softened
- 2 tablespoons seedless raspberry preserves
- ¾ cup powered sugar
For the Caramel Filling:
- 1 (13.4 ounce) can Dulce de Leche Caramel
For the Peanut Butter Cream Filling:
- ½ cup creamy peanut butter
- 1½ tablespoons unsalted butter
- ¾ cup powdered sugar
- 1 tablespoon water or milk
Instructions
For the Solid Chocolate Bunnies:
Making solid chocolate bunnies is super easy.....just fill the mold and let the chocolate harden!
The Basics:
These steps are for all the filled chocolates.
Pour chocolate into a microwave safe bowl, heat 1 minute on high. Stir until creamy. If chocolate is not melted, continue heating at 60% power in 30 second intervals, stirring between until melted and creamy.
Add a small amount (about 1 teaspoon for this mold) of the melted chocolate to the mold. Using a small clean paint brush, bring the chocolate up the sides and to the edges.
Hold mold upside down and tap out any excess chocolate.
Lay right side up on the counter and lightly tap chocolate back into position (this will also get rid of any air bubbles).
Place in the refrigerator until hardened about 5 minutes or until the chocolate is no longer shiny.
Add your favorite filling (find three options below)
Cover with remaining melted chocolate NOTE: If chocolate is too hard, heat again in the microwave. This time only 30 seconds.
Place in the refrigerator to harden.
Using some of the chocolate, add a dollop where the eye will go, press and hold eye in place until chocolate has hardened enough to hold the eye.
Wrap with foil chocolate wrapper
For the Raspberry Cheesecake Cream Filling:
In a medium mixing bowl beat the cream cheese until fluffy. Place raspberry preserves in a microwave safe bowl and heat 15 seconds. Add preserves to cream cheese, blend until combined. Add powdered sugar, mix well. Place filling in a zip top bag, snip one corner and pipe into chocolate cavity.
For the Carmel Cream Filling:
Place filling in a zip top bag, snip one corner and pipe into chocolate cavity.
For the Peanut Butter Cream Filling:
Add the peanut butter and butter to a small saucepan. On low heat melt the peanut butter and butter. Remove from heat and stir in the powdered sugar and water. Set aside to cool. Place filling in a zip top bag, snip one corner and pipe into chocolate cavity.
SIGN UP FOR THE LADY BEHIND THE CURTAIN NEWSLETTER

NEWSLETTER: Receive (twice a month) seasonally themed newsletters full of recipes, tips and tricks. Sometimes even FREE gifts! Click here for the Newsletter→CURTAIN CALL NEWSLETTER
THANKS FOR VISITING♥
Comments
Homemade Chocolate Easter Bunnies — No Comments
HTML tags allowed in your comment: <a href="" title=""> <abbr title=""> <acronym title=""> <b> <blockquote cite=""> <cite> <code> <del datetime=""> <em> <i> <q cite=""> <s> <strike> <strong>