

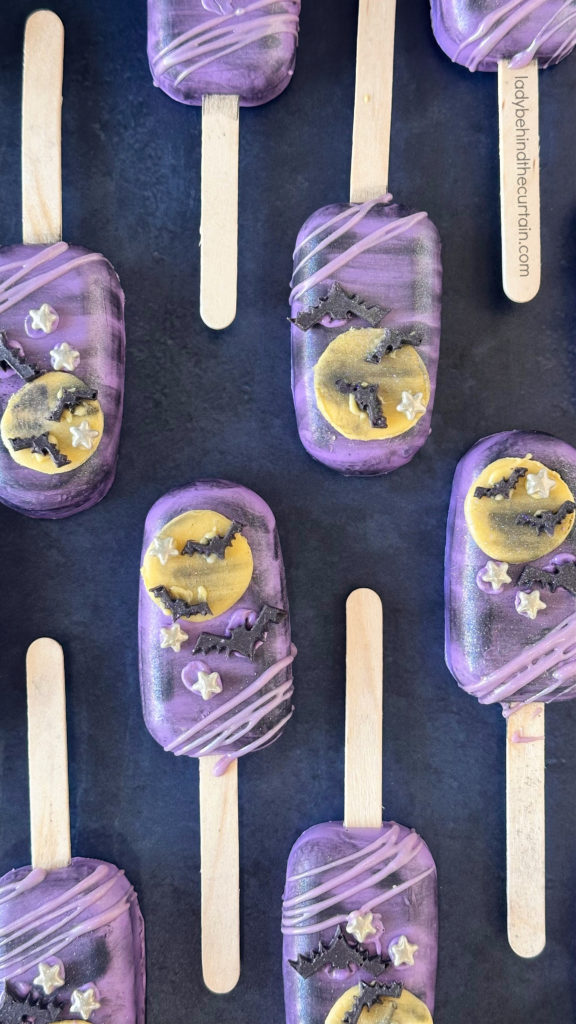
Spooky Night Halloween Cakesicles
If you’re looking for a Halloween dessert that’s equal parts spooky and stunning, these Spooky Night Halloween Cakesicles are just the treat! Filled with rich chocolate cake pop dough and coated in a hauntingly beautiful purple candy shell, these Halloween cakesicles look like they came straight out of a moonlit graveyard scene. They’re the perfect no-bake Halloween dessert idea for parties, trick-or-treat gatherings, or spooky movie nights.
How to Make Spooky Night Halloween Cakesicles
These Spooky Night Halloween Cakesicles are a fun and festive way to celebrate Halloween! Each one is filled with rich, fudgy chocolate cake pop dough and coated in a glossy purple candy shell brushed with black petal dust for that eerie night-sky look. Decorated with a yellow candy moon, tiny candy bats, and sparkling star sprinkles, they’re the perfect mix of spooky and sweet. Whether you’re making them for a Halloween party, dessert table, or just a fun fall baking project, these Halloween cakesicles are sure to impress with both their hauntingly beautiful design and delicious chocolate flavor.
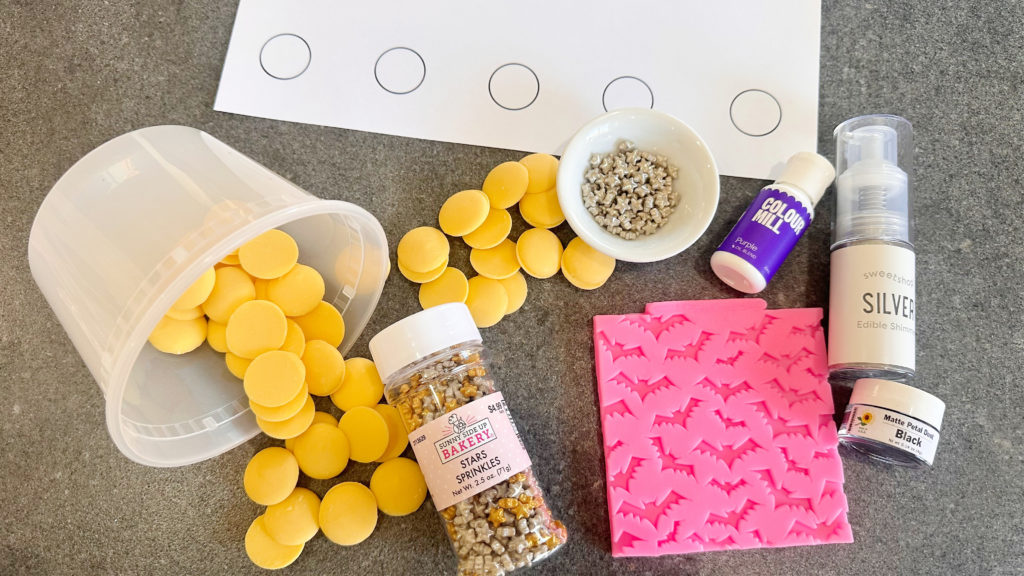
HALLOWEEN PARTY CAKE POP DOUGH INGREDIENTS LIST- full printable recipe below in recipe card
DID YOU NOTICE SOMETHING MISSING FROM THE CAKE POP DOUGH RECIPE? There’s no added store-bought frosting. This dough thrives on the moisture created from the hot cake, so there is no need to add frosting.
- 1 chocolate cake mix
- 2 large eggs
- ½ cup milk
- 4 tablespoons unsalted butter, melted
- ¾ cup water
HALLOWEEN CAKESICLE DECORATION INGREDIENTS LIST
- 15 ounces of white candy wafers or purple wafers
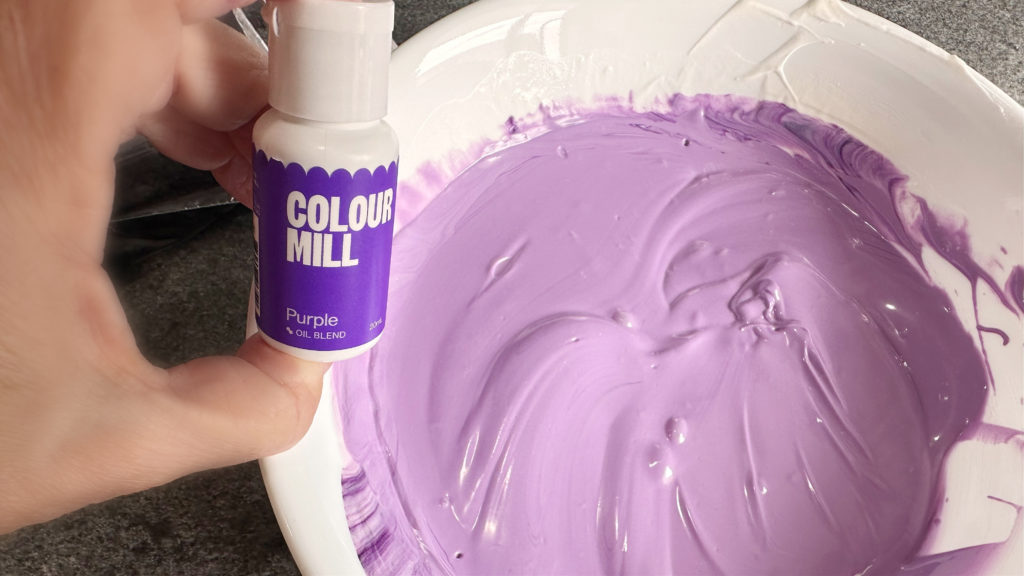
- Colour Mill Oil-Based Food Coloring-Purple
- 4 ounces black candy wafers
- 4 ounces yellow candy wafers
- ½ cup light purple candy wafer (for optional corner drizzle)
- silver star candy sprinkles (from Hobby Lobby)
- Silver Edible Shimmer from Sweetshop (found at Michaels)
HALLOWEEN PARTY CAKESICLE RECIPE INSTRUCTIONS
CAKE POP DOUGH INSTRUCTIONS- full printable recipe below in recipe card
- Preheat oven to 325℉. Spray a 9×13-inch baking pan with nonstick cooking spray. Line the bottom with parchment paper and set aside.
- In a medium mixing bowl, add the cake mix, eggs, milk, melted butter, and water.
- Mix until all the ingredients are combined.
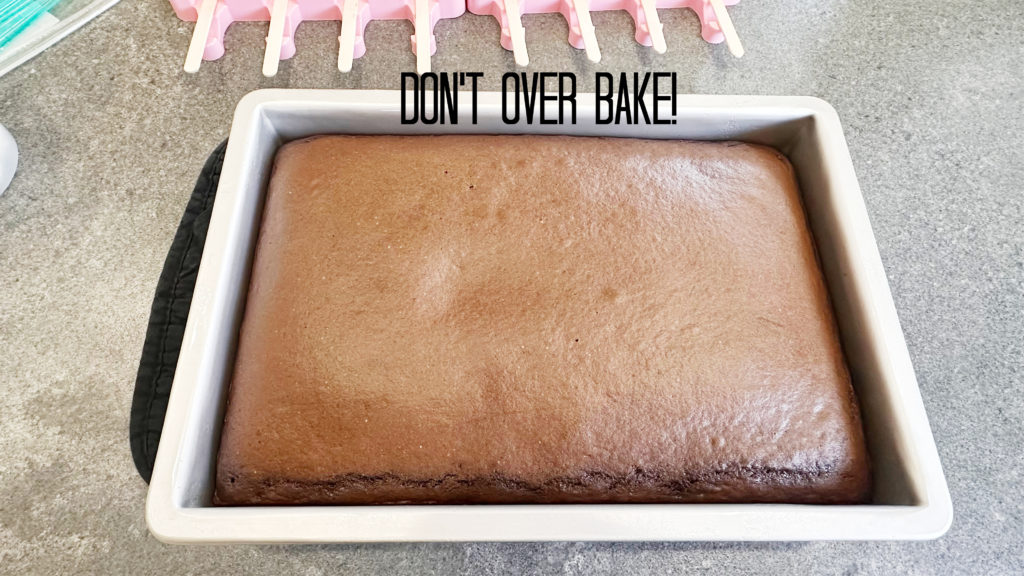
- Pour cake batter into the prepared pan. Bake 25 minutes or until a wooden toothpick inserted into the center comes out clean.
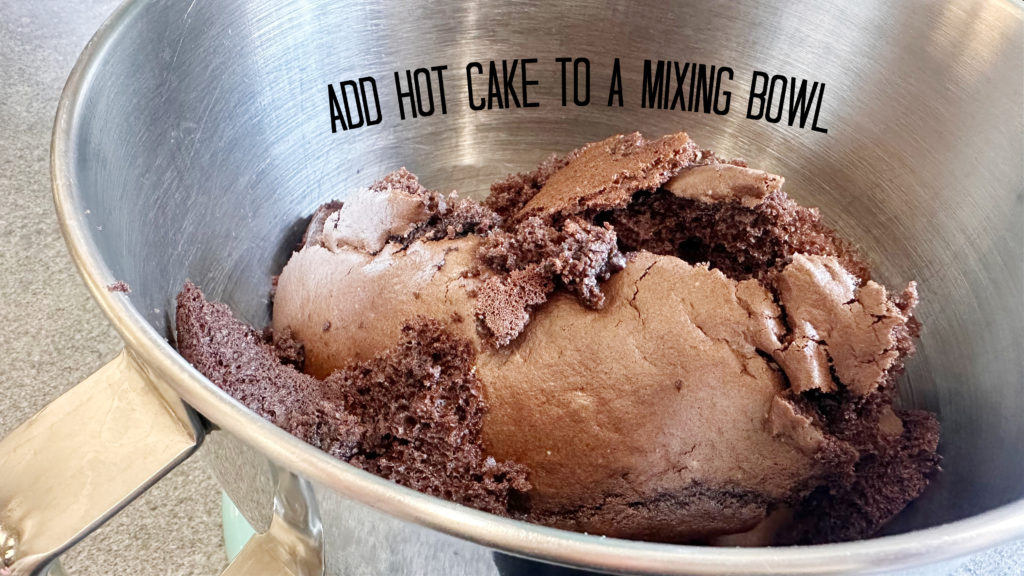
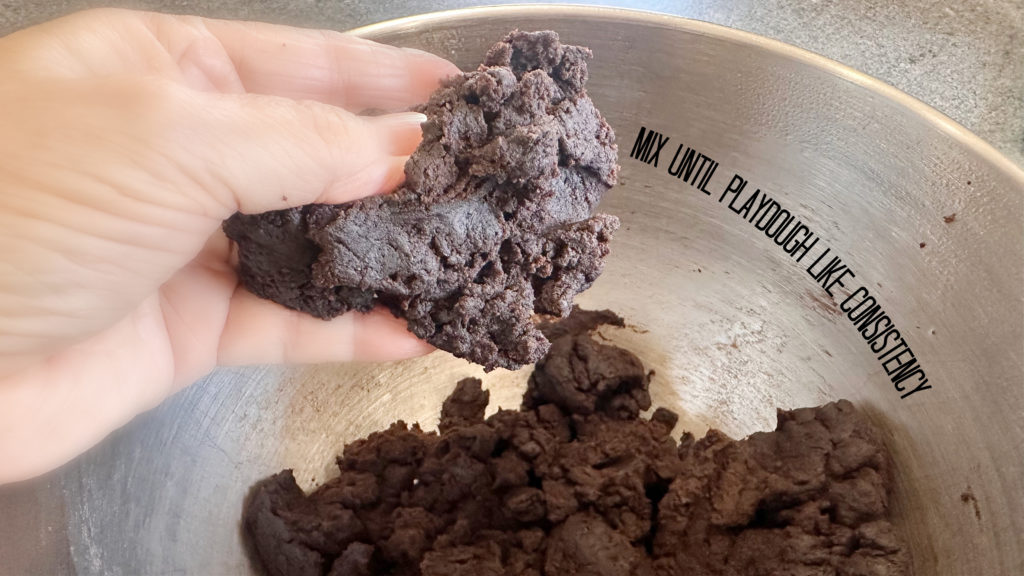
- Transfer the hot cake to a large mixing bowl. Using a paddle attachment, mix the hot cake until the cake goes from crumbs to dough (the cake should pull from the sides of the bowl). The texture should feel like playdough.
- Remove the dough from the mixing bowl into a zip-top bag. Set aside to cool for a least 2 hours or until completely cooled. The moisture from the steam will create a soft, moist cake pop dough.
While the dough is cooling, put the decorating supplies together. If you’re adding candy moons, make them (instructions below); if you’re adding candy bats, make them (instructions below)
CAKEPOP MOON DECORATION

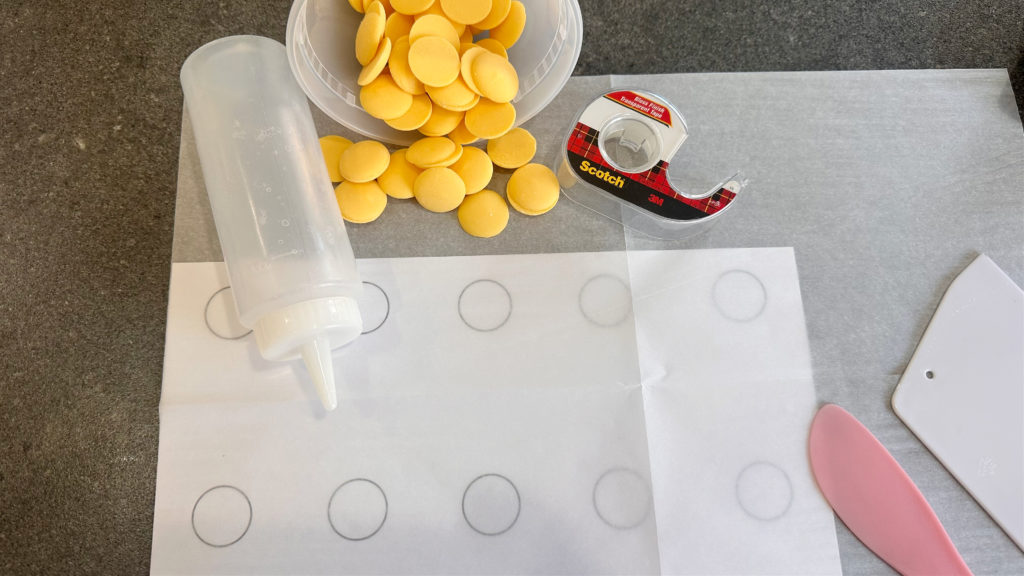
- Print the template.
- Tape the printout to a piece of parchment paper.
- Place the parchment paper on a cookie sheet with the moo template under.
- Melt yellow melting wafers in the microwave (about 1 minute).
- Pour melted candy into a squeeze bottle or a plastic bag without pleats. If using a bag, snip one corner of the bag.
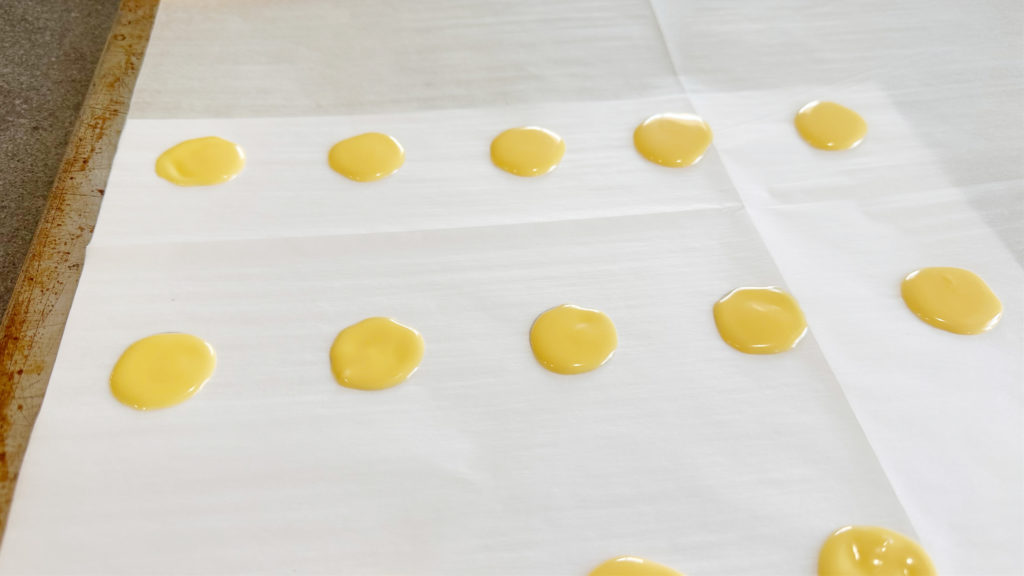
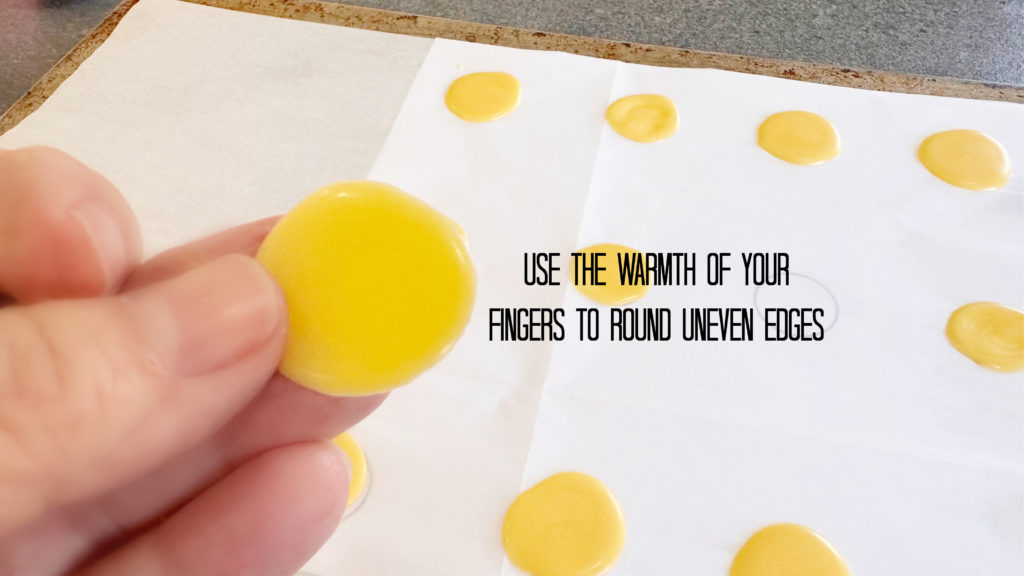
- Outline the circle and then fill in the moon. Set aside to harden.
HOW TO MAKE THE CANDY BATS:

- Pour black candy wafers into a microwave-safe bowl, heat for 1 minute, and stir until melted and creamy. If the candy is not melted, heat for an additional 30 seconds.
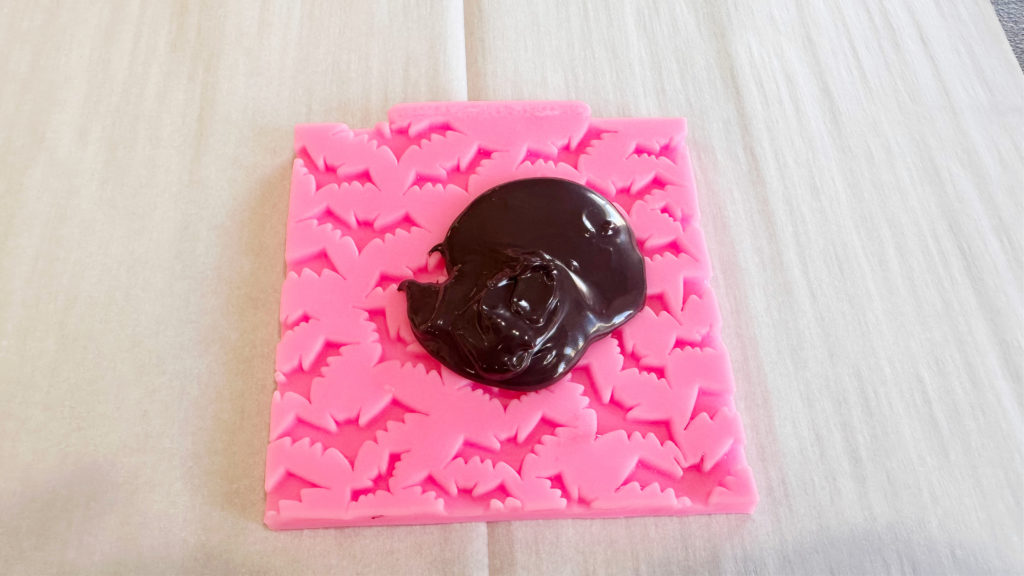
- Add a big spoonful of the melted candy onto the top of the silicone bat mold. Use a plastic scraper tool to fill the cavities and remove any extra candy. Set aside for the candy to harden or for a speedier time, put it in the refrigerator for 15 minutes.
- Once the candy has hardened, carefully pop out the bats.
HOW TO MAKE A CAKESICLE:
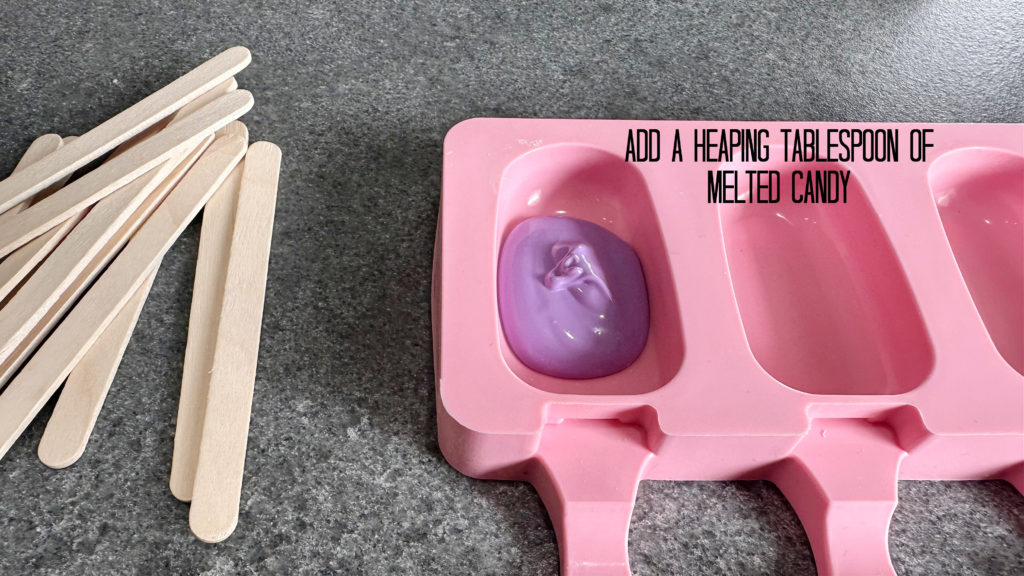
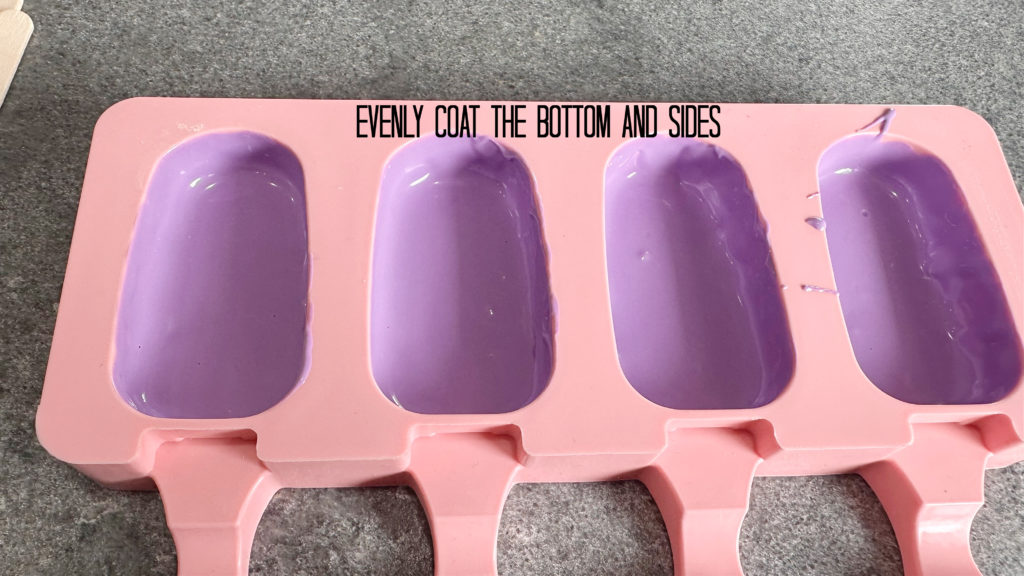
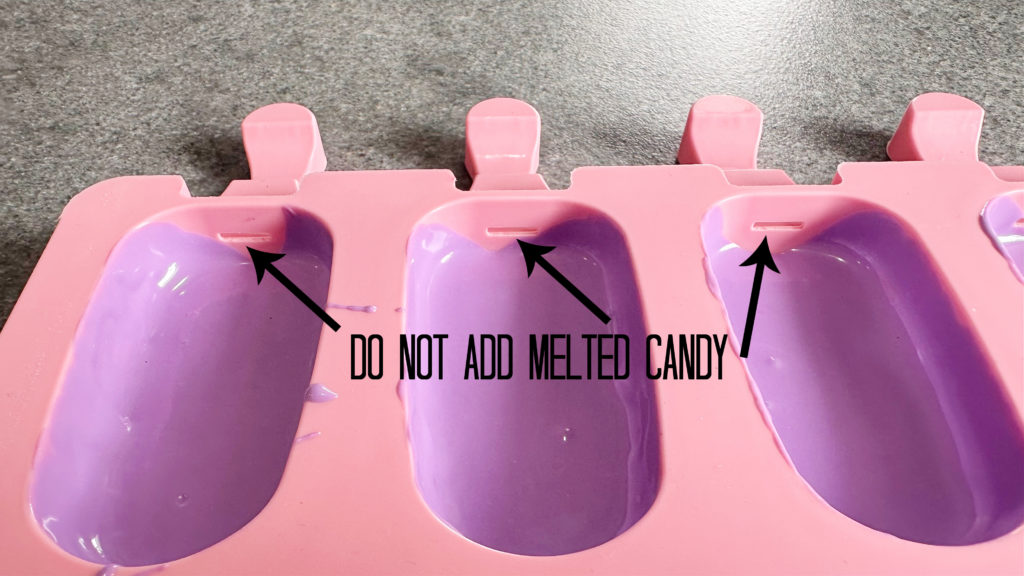
- Pour a generous tablespoon of the melted purple candy into a popsicle mold (only add to one at a time). THIS IS A VERY IMPORTANT STEP. DO NOT COVER THE HOLE FOR THE STICK( see photos in post as a reference). Using a clean paintbrush, move the candy up the sides of the mold. Also, make sure the bottom of the mold, which will eventually be the front, is smooth.
- Once all the cakesicle molds have been coated with the melted candy, place them in the refrigerator to harden. About 15 minutes. You’ll know the candy is ready when it turns an opaque color. NOTE: The shell of the cakesicle needs to be strong, so make sure there is enough added candy to create a strong base.
- The sides of each popsicle need to be reinforced. Using the paintbrush, add more melted candy up the sides of each mold. Refrigerate again for 15 minutes.
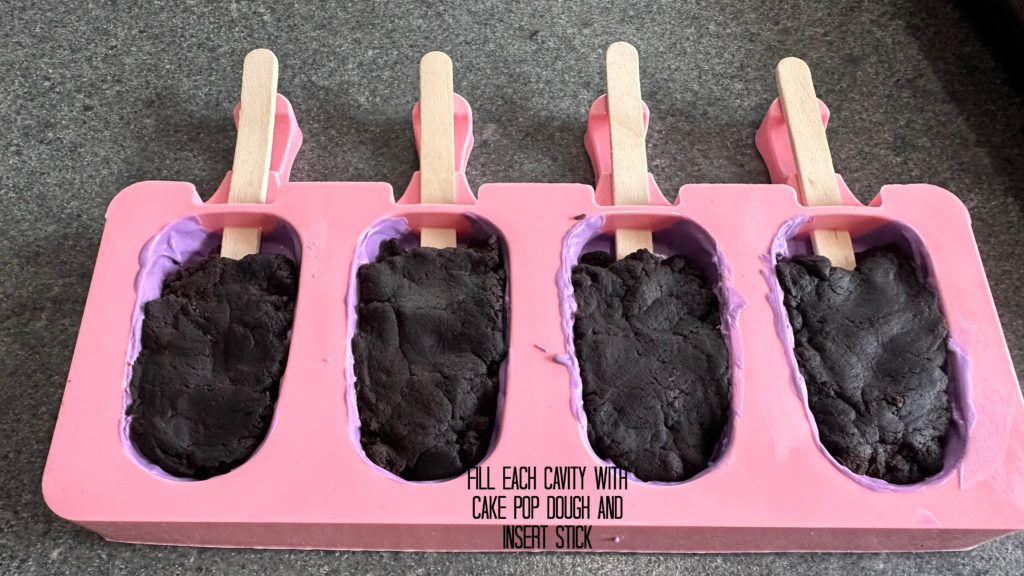
- Press a small amount of the cakepop dough into each popsicle mold (about .8 of an ounce). IMPORTANT: LEAVE THE END NEAR THE STICK HOLDER EMPTY (see photos in post as a reference). Make sure there is enough room left at the top for a layer of melted candy.
- Once the cakepop dough has been added, carefully insert a popsicle stick into each cakesicle.
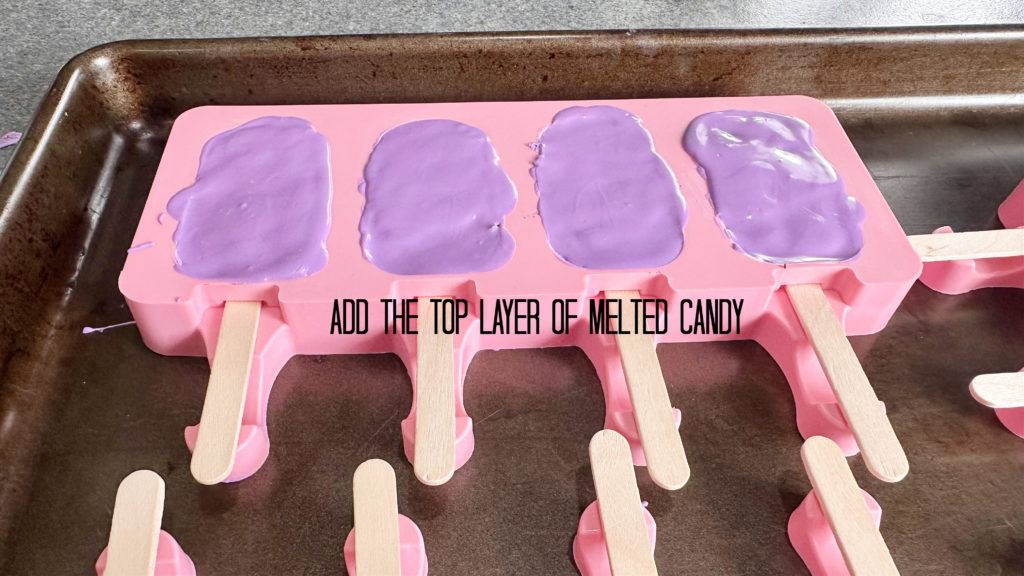
- Now it’s time to add the final layer of melted candy. By now, the candy has probably hardened. Reheat the candy for 30 seconds or until it is creamy with no lumps when stirred. Spoon the melted candy on top of the cake pop dough, making sure to fill the empty portion left by the popsicle stick.
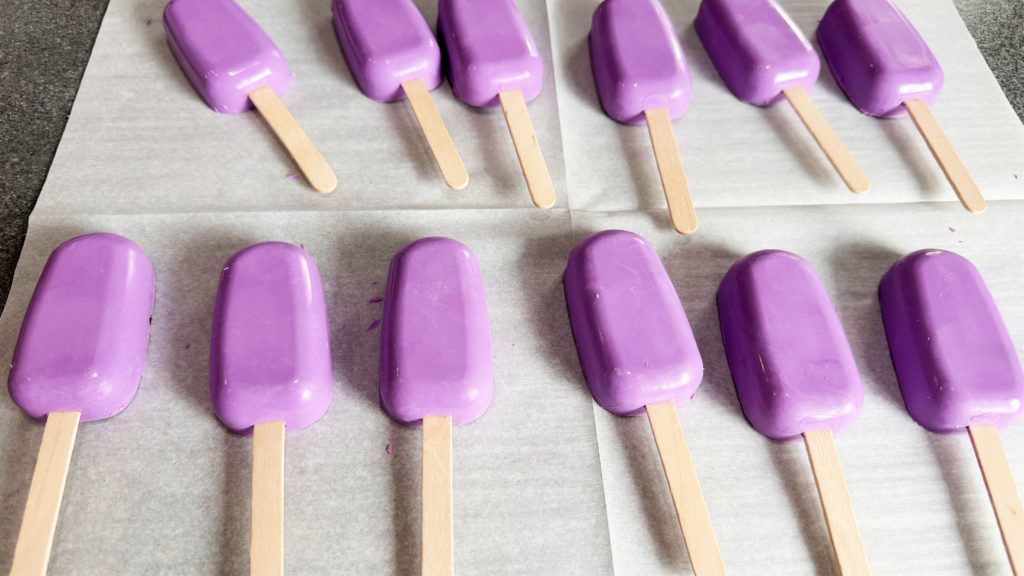
- Place molds in the refrigerator to harden (about 15 minutes). Remove the cakesicles from their molds. TIP: To avoid leaving fingerprints on the molds, wear food-safe gloves when removing them from the silicone molds. NOW THE FUN CAN BEGIN…..DECORATING!
HOW TO DECORATE SPOOKY NIGHT HALLOWEEN CAKESICLES
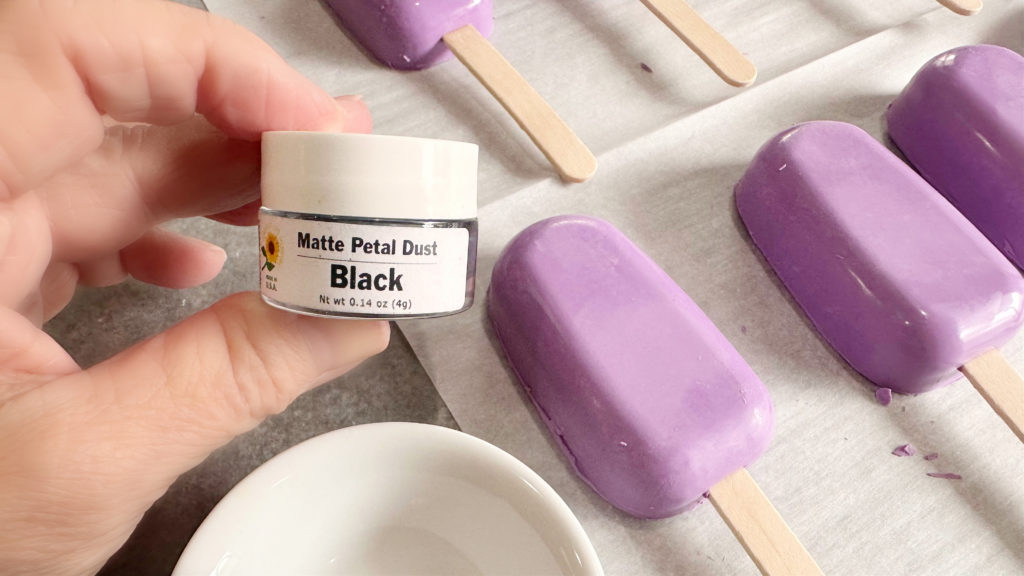
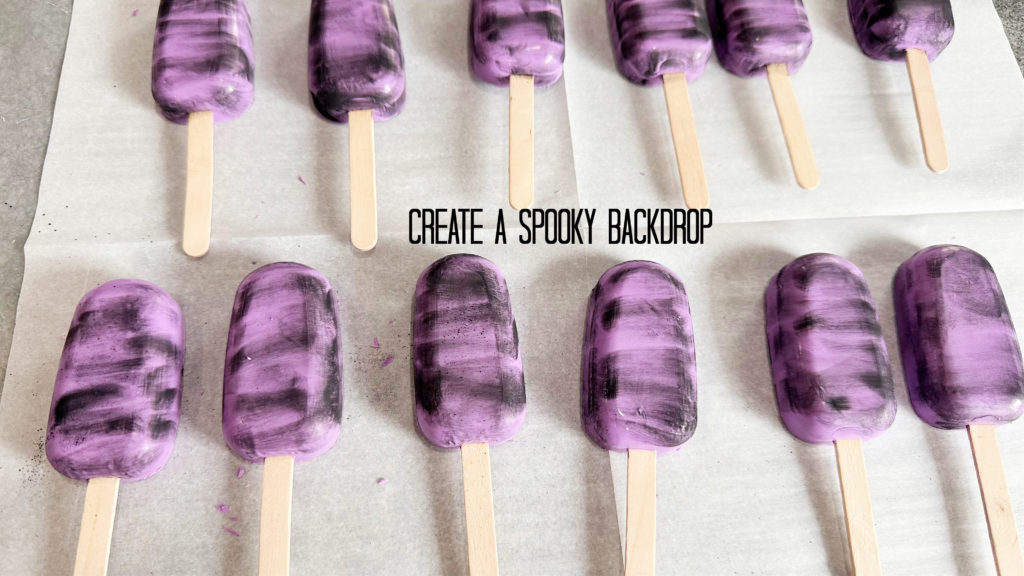
- Lightly brush on some of the black petal dust with a clean paintbrush.
- Reheat the yellow candy (about 30 seconds), stir until melted and creamy. Add a small dollop where you want to place the moon. Lightly press the moon in place, and add a couple of strokes of the black on top.
- Decide where you want the bats and stars. For the moon, use yellow melted candy as the glue, and for the cakesicle, use purple candy as the glue.
- For the optional drizzle, melt the light purple candy in a small microwave-safe bowl ( about 1 minute). Pour melted candy into a squeeze bottle or a zip-top bag without pleats. Snip the end of the bag and, in a back-and-forth motion, add a few drizzle lines to one corner.
- Once all the candy has hardened, give each pop a spray of the edible shimmer powder. This recipe makes 12 small cakesicles
WHAT CAN I DO WITH THE LEFTOVER CAKE POP DOUGH?

Don’t let that extra chocolate cake pop dough go to waste; this recipe only uses half of the cake pop dough. There are plenty of fun and delicious ways to use it! Here are a few creative ideas to make the most of every crumb:
1. Make Classic Cake Pops
Roll the leftover dough into small balls, dip them in melted candy coating, and decorate with Halloween sprinkles. You’ll have bite-sized Halloween cake pops ready in minutes, perfect for party trays or trick-or-treat snacks.
2. Create Mini Truffles
Skip the sticks and roll the dough into truffles! Dip them in chocolate, drizzle with colored candy melts, or dust them with cocoa powder for an easy no-bake treat.
3. Layer in a Dessert Cup
Add small pieces of cake pop dough to a cup layered with pudding, whipped cream, or mousse. It creates a Halloween dessert parfait that looks festive and tastes incredible.
4. Freeze for Later
Wrap leftover dough tightly in plastic wrap and store it in an airtight container or freezer bag. It will keep for up to 2 months. Thaw in the fridge when you’re ready to make more cake pops or cake slices.
5. Mix into Ice Cream
Break chilled cake pop dough into chunks and stir it into vanilla or chocolate ice cream for a rich, chewy mix-in like homemade “cake batter ice cream.”
6. Make Cake Pop Bites
Press small pieces of dough into candy molds or silicone ice cube trays, chill, then dip in candy melts for bite-sized treats.
Leftover cake pop dough is super versatile; it’s basically a shortcut to several fun desserts! Whether you roll, dip, or layer it, you’ll end up with something sweet, festive, and perfect for Halloween.
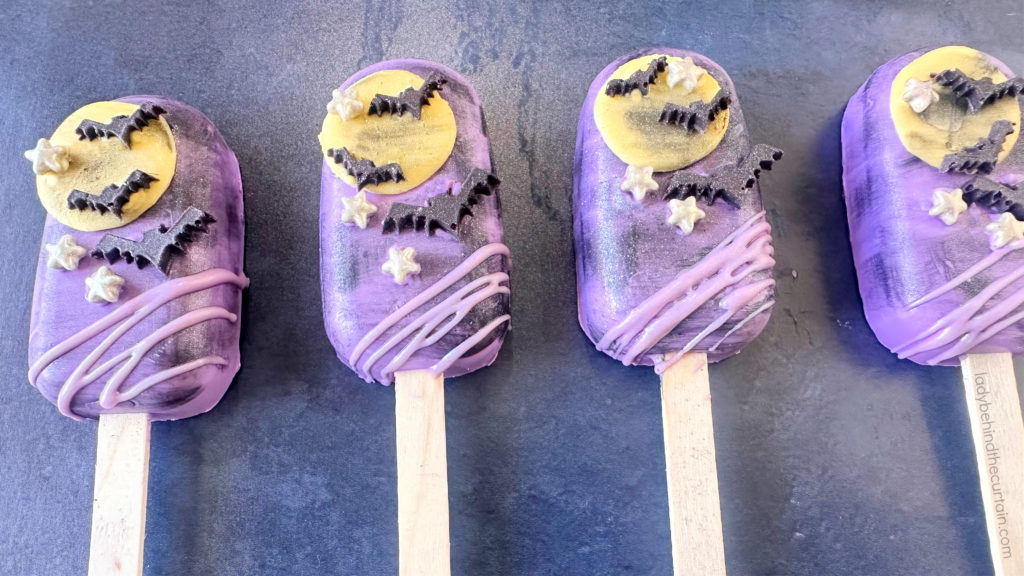
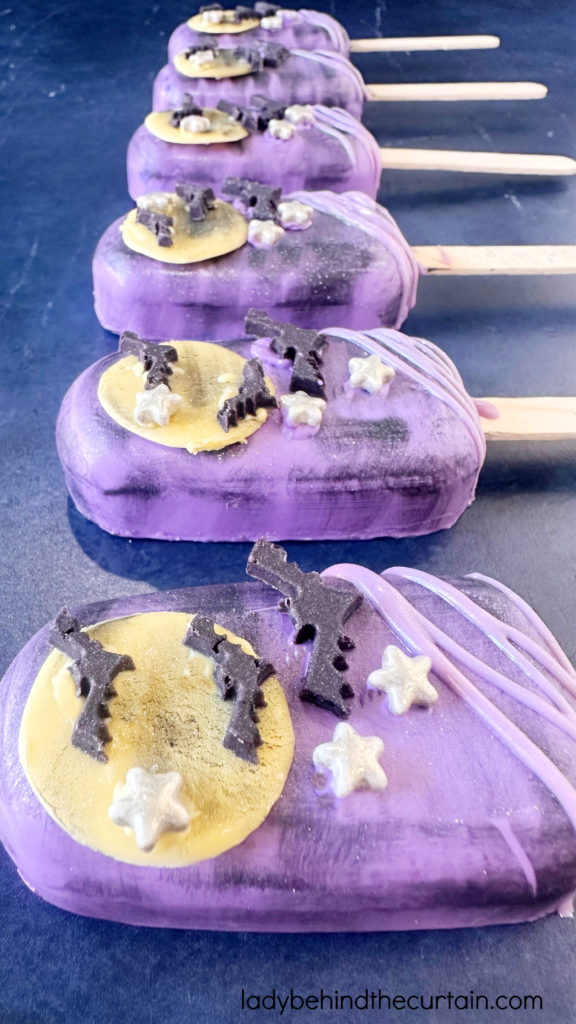
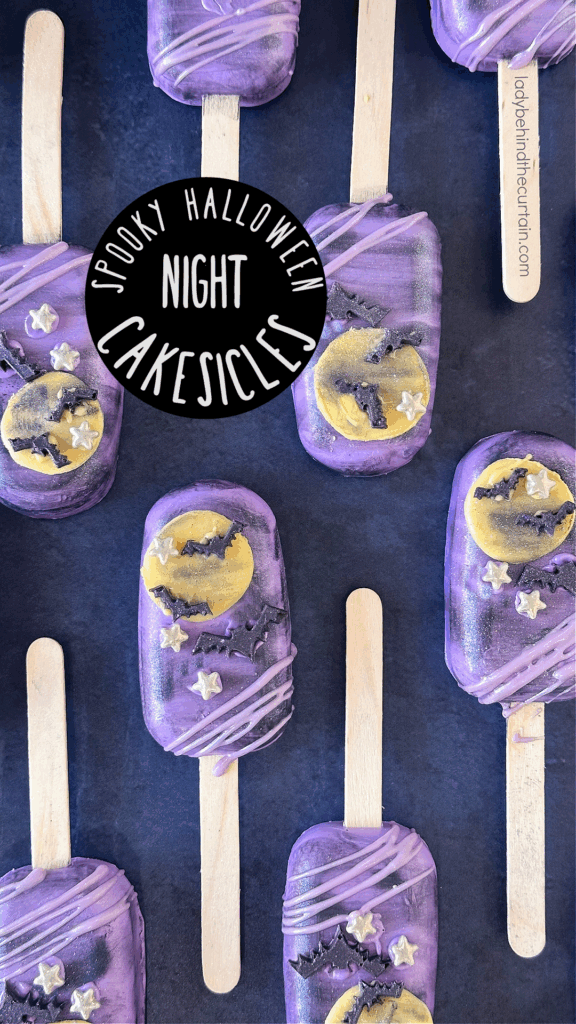
Stunning Spooky Night Backdrop
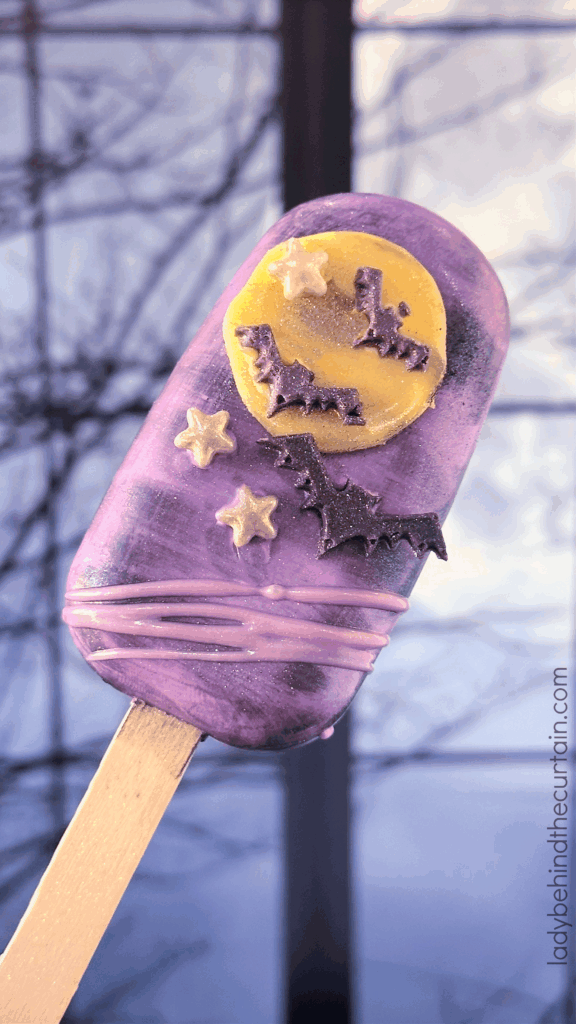
Each cakesicle is dipped in melted purple candy coating, then brushed with a touch of black petal dust to create a shadowy night-sky effect. A bright yellow candy moon, shimmering star sprinkles, and a few tiny candy bats complete the eerie yet adorable Halloween backdrop. The design is simple enough for beginners but looks professionally made, making these Halloween cakesicles a true showstopper.
Easy Halloween Treat with a Chocolate Surprise
Inside each cakesicle is a soft, decadent chocolate cake pop filling, a mix of crumbled chocolate cake that’s perfectly fudgy and sweet. The creamy texture contrasts beautifully with the crunchy candy shell, creating a bite-sized treat that both kids and adults will love. These Halloween cakesicles with chocolate filling are easy to make ahead of time, and they hold up beautifully for parties or dessert tables.
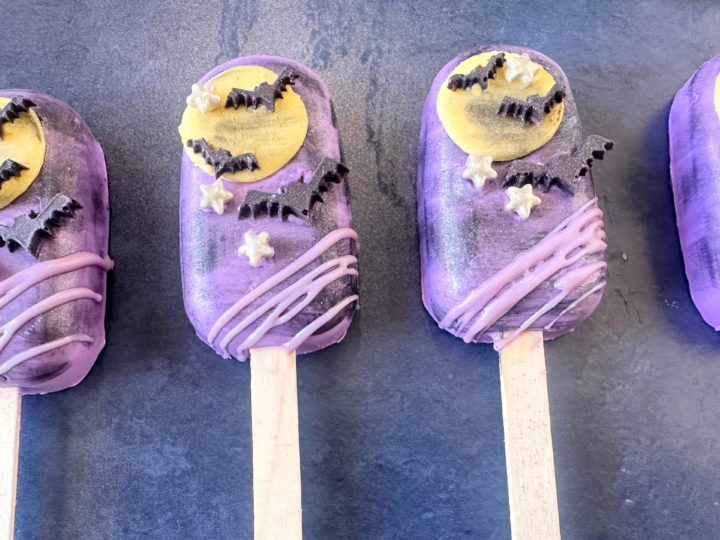
Decorating Tips for the Perfect Spooky Vibe
To get that dreamy, spooky night look, use a clean brush to lightly dust black petal dust across the hardened purple coating. Add a small amount of melted yellow candy and press it onto the candy moon. Add edible stars and candy bats for texture and dimension. You can also use edible glitter for an extra touch of Halloween sparkle.
SUPPLIES
Below is a download template for the moon. 1. Print the template. 2. Tape the printout to a piece of parchment paper. 3. Place the parchment paper on a cookie sheet. 4. Melt yellow melting wafers, and pour the melted candy into a squeeze bottle. 5. Outline the circle and then fill in the moon. 6. Set aside to harden. CLICK HERE FOR THE DOWNLOAD→ CANDY MOON
CANDY BATS: These cuties were made with melted black candy and a silicone mold. CLICK HERE FOR THE MOLD→ MINI HALLOWEEN MOLDS
CANDY STARS: The candy star sprinkles are from Hobby Lobby.
BLACK PETAL DUST: The dust is highly pemented and adds that perfect touch of spookiness to the cakesicles. CLICK HERE FOR THE DUST→ BLACK PETAL DUST, PURE BLACK MATTE POWDER
CANDY COLORING: Don’t settle for the limited colors of melting wafers available in stores; create custom colors instead. I used Colour Mill Oil-Based Food Coloring to make the beautiful purple color of the cakesicles. CLICK HERE FOR THE FOOD COLORING→ COLOUR MILL OIL-BASED FOOD COLORING
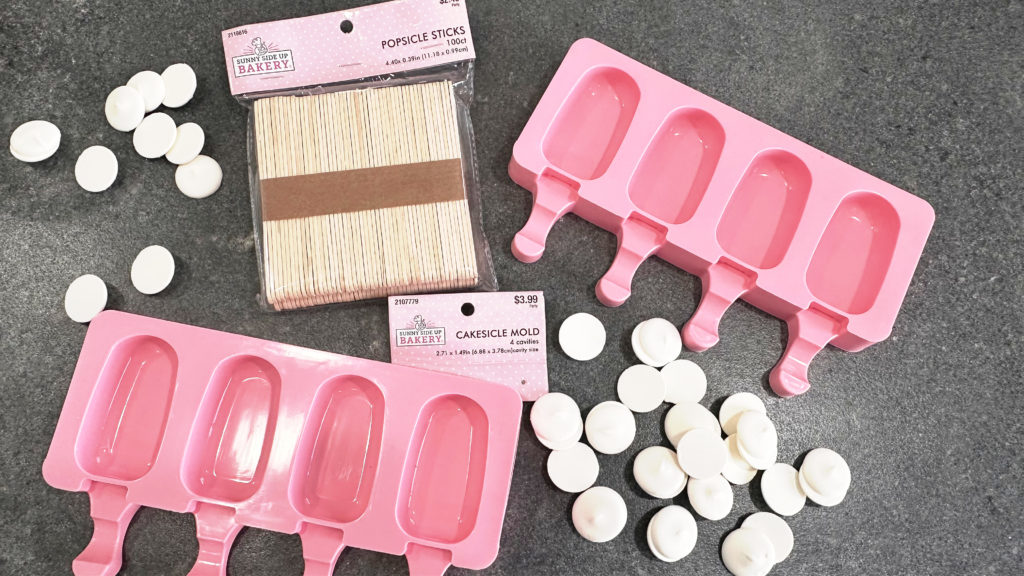
CAKESICLE MOLDS: The molds I used are small, 2.71 x 1.49 inches. I found them at Hobby Lobby. Little molds need little popsicle sticks. I found the small popsicle sticks at Hobby Lobby. They are 4.40 x .39 inches.
Why You’ll Love These Halloween Cakesicles
- Fun and festive: A creative way to celebrate the spooky season.
- Kid-friendly: Perfect for Halloween parties, bake sales, or classroom treats.
- Customizable: Change the color palette, candy shapes, or filling flavor.
- Make ahead: These cakesicles stay fresh in the fridge for several days.
Spooky, Sweet, and Totally Instagram-Worthy
Whether you’re hosting a haunted house bash or want to impress your guests with something sweet and seasonal, these Spooky Night Halloween Cakesicles deliver both flavor and flair. The deep purple candy coating, chocolatey interior, and playful Halloween decorations make them one of the best Halloween dessert ideas you’ll try this year.
Recipe Alternatives
These Spooky Night Halloween Cakesicles are a blast to customize, you can easily mix up the flavors, colors, and decorations to match your Halloween theme or personal style. Here are a few delicious and creative variations to try:
Different Cake Flavors:
Instead of chocolate cake pop filling, try red velvet, funfetti, or pumpkin spice cake for a fall twist. Each flavor pairs beautifully with the candy coating and adds a unique surprise inside every bite.
Candy Coating Colors:
Swap the purple candy melts for black, orange, or midnight blue for a different spooky backdrop. Add a touch of edible shimmer dust or glitter to make your cakesicles sparkle under the party lights.
Halloween-Themed Decorations:
Go beyond the spooky night sky! Try topping your cakesicles with tiny candy ghosts, eyeballs, witch hats, or edible tombstones. You can even drizzle melted white chocolate across the top to look like cobwebs.
Filling Alternatives:
If you’re not a chocolate lover, fill your cakesicles with vanilla cake pop dough, cookies and cream, or brownie batter. Each variation brings a different flavor and texture to this fun Halloween dessert.
Mini Version:
For party platters or treat bags, make mini cakesicles using smaller molds. They’re the perfect bite-sized option and look adorable when displayed together in a mix of designs.
No matter which version you try, these Halloween cakesicle ideas are guaranteed to wow your guests and add a magical, spooky touch to your dessert spread.
Make Ahead & Storage
One of the best things about these Spooky Night Halloween Cakesicles is that they’re perfect for making ahead! Whether you’re prepping for a Halloween party or building your dessert table in advance, these Halloween cakesicles hold up beautifully with just a little care.
You can prepare the chocolate cake pop filling a day or two ahead and refrigerate it until you’re ready to decorate. Once coated in candy melts, your cakesicles will stay fresh for up to 3 days in an airtight container at room temperature (if it’s cool) or in the refrigerator if it’s warm.
For longer storage, refrigerate them for up to a week or freeze them for up to 2 months. To freeze, wrap each cakesicle individually in plastic wrap, then place them in a freezer-safe container. When ready to serve, let them thaw in the fridge overnight and bring them to room temperature before unwrapping to avoid condensation.
These make-ahead Halloween treats are perfect for busy bakers who want a stunning dessert ready to go on party day, spooky, sweet, and stress-free!

LATEST POSTS
- Layered Lemon Cream Shortcake Parfaits (or Push-Up Pops)
- How to Create a Perfect Sprinkle Border with a Clean Center on a Frosted Cake
- Homemade Pistachio Ice Cream Cake
- 50+ Easy Frosting Recipes Every Home Baker Needs in Their Back Pocket
- Easy Focaccia Bread Using Rhodes Frozen Dinner Rolls
FAQ-Spooky Night Halloween Cakesicles
A cakesicle is a fun twist on a traditional cake pop, it’s made from cake and frosting rolled together into dough, shaped in a popsicle mold, and coated in melted candy or chocolate. They’re easy to decorate and make a perfect party treat.
Any type of chocolate cake works great! You can use homemade cake, a boxed mix, or even leftover cake. Crumble it up and mix it and mix until it forms a soft, moldable dough.
Make sure your candy melts are fully melted and slightly thinned with a small amount of vegetable shortening or candy melt thinner. Pour the coating into the mold, spread it evenly, and let it set before adding the cake filling.
Yes! You can make them up to 3 days in advance and store them in an airtight container in the refrigerator. For the best look, decorate them once they’ve fully chilled so the details stay crisp.
The spooky night theme is super versatile! Try adding candy ghosts, tombstones, or edible glitter for extra Halloween magic. You can also change the base color, black, orange, or midnight blue candy melts all make great alternatives.
A silicone cakesicle mold makes the process much easier and ensures a smooth finish, but if you don’t have one, you can shape the cake dough by hand and dip it like a traditional cake pop.
These Spooky Night Halloween Cakesicles are more than just a dessert, they’re a show-stopping centerpiece for your Halloween celebration! With their deep purple candy coating, glowing yellow moon, and candy bats flying across a starlit sky, they perfectly capture the magic of Halloween night. Inside, that rich chocolate cake pop filling makes every bite irresistibly sweet and fudgy.
Whether you’re hosting a haunted house party, planning a classroom treat, or just want a fun baking project to kick off spooky season, these Halloween cakesicles are guaranteed to be a hit. Plus, they’re easy to make ahead, store beautifully, and can be customized in endless ways.
Try them this Halloween and tag your spooky creations! Share your photos or ideas in the comments below, I’d love to see your versions of these Spooky Night Halloween Cakesicles. And don’t forget to check out my other Halloween dessert ideas for more sweet, spooky inspiration! ❤️Sheryl
Spooky Night Halloween Cakesicles
Ingredients
For the Cake Pop Dough:
- 1 chocolate cake mix
- 2 large eggs
- ½ cup milk
- 4 tablespoons unsalted butter, melted
- ¾ cup water
For the Decorations:
- 15 ounces of white candy wafers or purple wafers
- Colour Mill Oil Based Food Coloring-Purple
- 4 ounces black candy wafers
- 4 ounces yellow candy wafers
- ½ cup light purple candy wafer (for optional corner drizzle)
- silver star candy sprinkles (from Hobby Lobby)
- Silver Edible Shimmer from Sweetshop (found at Michaels)
Instructions
For the Cake Pop Dough:
- Preheat oven to 325℉. Spray a 9x13-inch baking pan with nonstick cooking spray. Line the bottom with parchment paper and set aside.
- In a medium mixing bowl, add the cake mix, eggs, milk, melted butter, and water.
- Mix until all the ingredients are combined.
- Pour cake batter into the prepared pan. Bake 25 minutes or until a wooden toothpick inserted into the center comes out clean.
- Transfer the hot cake to a large mixing bowl. Using a paddle attachment, mix the hot cake until the cake goes from crumbs to dough (the cake should pull from the sides of the bowl). The texture should feel like playdough.
- Remove the dough from the mixing bowl into a zip-top bag. Set aside to cool for a least 2 hours or until completely cooled. The moisture from the steam will create a soft, moist cake pop dough.
While the dough is cooling, put the decorating supplies together. If you're adding candy moons, make them (instructions below); if you're adding candy bats, make them (instructions below)
For the Moons:
- Print the template supplied in the post.
- Tape the printout to a piece of parchment paper.
- Place the parchment paper on a cookie sheet with the moo template under.
- Melt yellow melting wafers in the microwave (about 1 minute).
- Pour melted candy into a squeeze bottle or a plastic bag without pleats. If using a bag, snip one corner of the bag.
- Outline the circle and then fill in the moon. Set aside to harden.
For the Candy Bats:
- Pour black candy wafers into a microwave-safe bowl, heat for 1 minute, and stir until melted and creamy. If the candy is not melted, heat for an additional 30 seconds.
- Add a big spoonful of the melted candy onto the top of the silicone bat mold. Use a plastic scraper tool to fill the cavities and remove any extra candy. Set aside for the candy to harden or for a speedier time, put it in the refrigerator for 15 minutes.
- Once the candy has hardened, carefully pop out the bats.
For the Cakesicle:
- Pour a generous tablespoon of the melted purple candy into a popsicle mold (only add to one at a time). THIS IS A VERY IMPORTANT STEP. DO NOT COVER THE HOLE FOR THE STICK( see photos in post as a reference). Using a clean paintbrush, move the candy up the sides of the mold. Also, make sure the bottom of the mold, which will eventually be the front, is smooth.
- Once all the cakesicle molds have been coated with the melted candy, place them in the refrigerator to harden. About 15 minutes. You'll know the candy is ready when it turns an opaque color. NOTE: The shell of the cakesicle needs to be strong, so make sure there is enough added candy to create a strong base.
- The sides of each popsicle need to be reinforced. Using the paintbrush, add more melted candy up the sides of each mold. Refrigerate again for 15 minutes.
- Press a small amount of the cakepop dough into each popsicle mold (about .8 of an ounce). IMPORTANT: LEAVE THE END NEAR THE STICK HOLDER EMPTY (see photos in post as a reference). Make sure there is enough room left at the top for a layer of melted candy.
- Once the cakepop dough has been added, carefully insert a popsicle stick into each cakesicle.
- Now it's time to add the final layer of melted candy. By now, the candy has probably hardened. Reheat the candy for 30 seconds or until it is creamy with no lumps when stirred. Spoon the melted candy on top of the cake pop dough, making sure to fill the empty portion left by the popsicle stick.
- Place molds in the refrigerator to harden (about 15 minutes). Remove the cakesicles from their molds. TIP: To avoid leaving fingerprints on the molds, wear food-safe gloves when removing them from the silicone molds. NOW THE FUN CAN BEGIN.....DECORATING!
How to Decorate Spooky Night Halloween Cakesicles:
- Lightly brush on some of the black petal dust with a clean paintbrush.
- Reheat the yellow candy (about 30 seconds), stir until melted and creamy. Add a small dollop where you want to place the moon. Lightly press the moon in place, and add a couple of strokes of the black on top.
- Decide where you want the bats and stars. For the moon, use yellow melted candy as the glue, and for the cakesicle, use purple candy as the glue.
- For the optional drizzle, melt the light purple candy in a small microwave-safe bowl ( about 1 minute). Pour melted candy into a squeeze bottle or a zip-top bag without pleats. Snip the end of the bag and, in a back-and-forth motion, add a few drizzle lines to one corner.
- Once all the candy has hardened, give each pop a spray of the edible shimmer powder. This recipe makes 12 small cakesicles
Recommended Products
The products listed below are not affiliated links. I just love the products! ❤️Sheryl


Comments
Spooky Night Halloween Cakesicles — No Comments
HTML tags allowed in your comment: <a href="" title=""> <abbr title=""> <acronym title=""> <b> <blockquote cite=""> <cite> <code> <del datetime=""> <em> <i> <q cite=""> <s> <strike> <strong>