
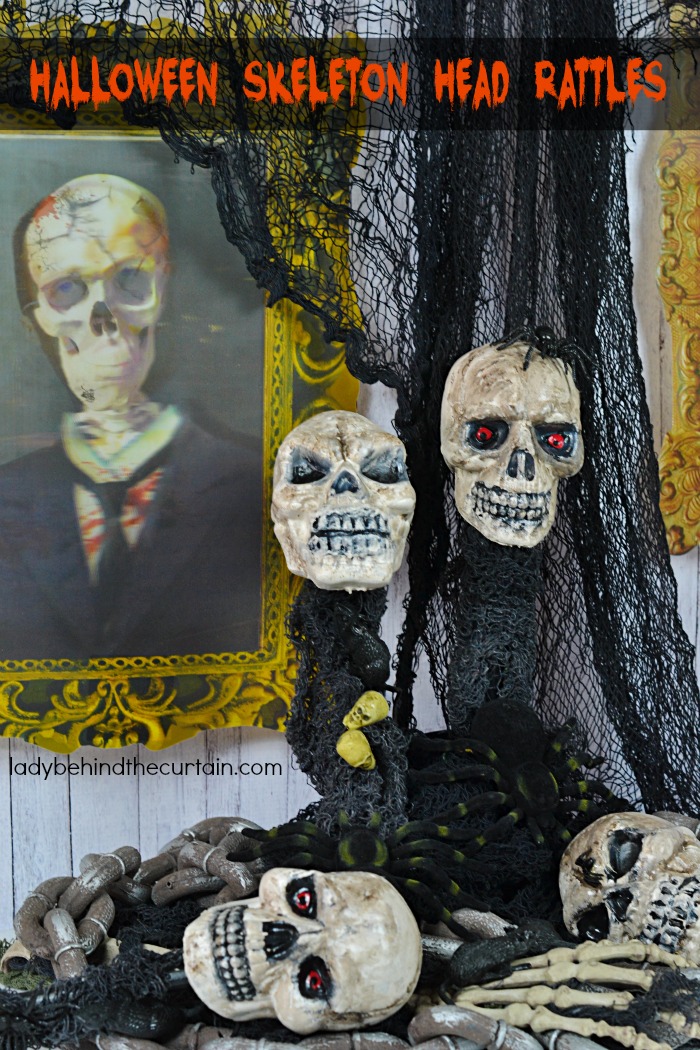
Dollar Tree Halloween Party Skeleton Head Rattle Party Favors
Dollar Tree Halloween Party Skeleton Head Rattle Party Favors: Make your own spooky rattles that can be added to a costume, given away as party favors or placed in a haunted fun house. How creepy they turn out is up to you! These easy to create Halloween Skeleton Heads would also be amazing as yard decorations. With just a few supplies you’ll be able to create your own Halloween Party Favors. Scroll down to view the video↓
How to Make Halloween Party Skeleton Head Rattles
- SUPPLIES
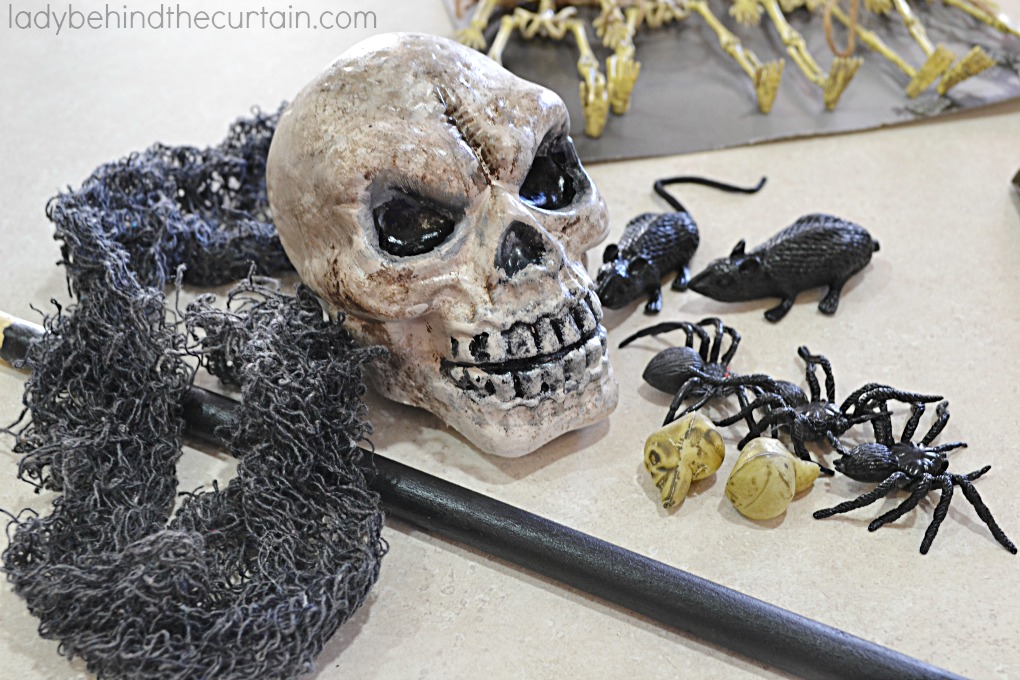
- skeleton head glow in the dark yard stakes from Dollar Tree
- ½ inch dowels cut into 12 inch pieces
- black, dark brown (I used bittersweet), white multi surface pain (I used Americana) and red
- sponge brushes
- clear acrylic sealer spray
- rice
- funnel
- hot glue gun and glue sticks
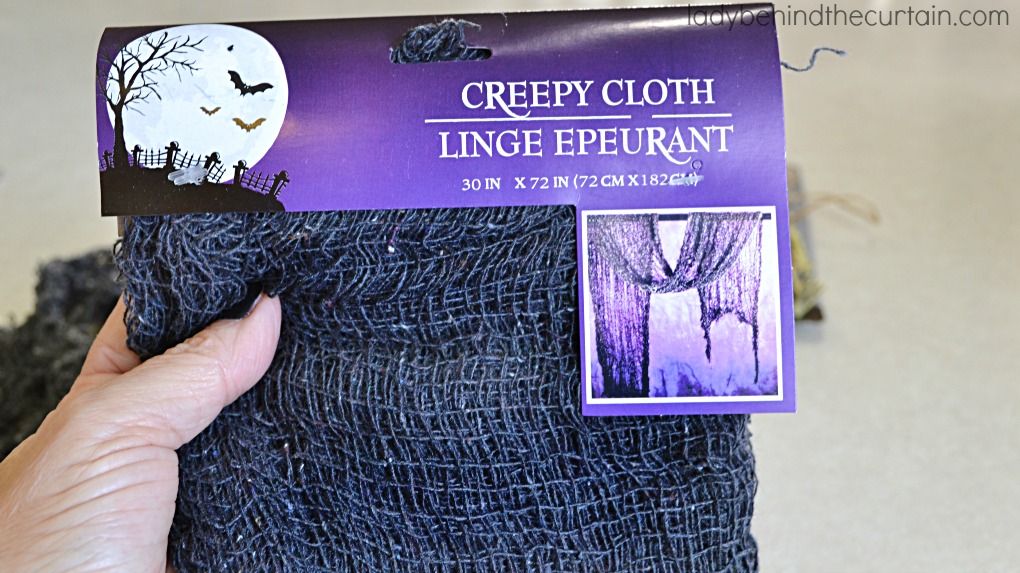
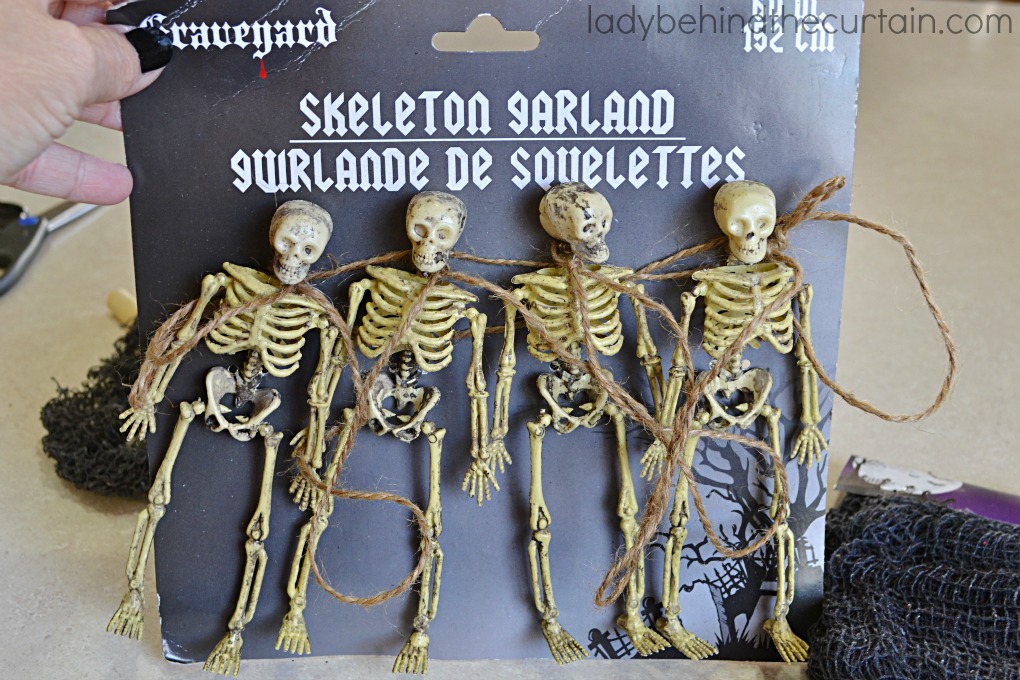
- assorted embellishments (creepy gauze, rubber spiders, rubber mice, mini skeleton head garland—taken off the garland— all found at Dollar Tree
Halloween Party Skeleton Head Rattle Directions


SCROLL DOWN TO PRINTABLE SUPPLY LIST AND DIRECTIONS↓
WATCH MY VIDEO BELOW FOR A LIVE DEMONSTRATION ON HOW TO MAKE THESE HALLOWEEN SKELETON HEAD RATTLES!

Dollar Tree Halloween Party Skeleton Head Rattle Party Favors
Yield:
AS MANY AS YOU NEED
Perfect for a costume, party favor, yard or party decoration. All items from Dollar Tree!
Materials
- glow in the dark skeleton yard stakes
- ½ inch dowels cut into 12 inch pieces
- multi surface paint (colors I used: black dark brown (bittersweet) white and red
- clear acrylic sealer (spray)
- rice
- glue sticks
- assorted embellishments all from Dollar Tree ( gauze, rubber spiders, rubber mice, mini skeleton head garland)
Tools
- sponge brushes (one per color)
- hot glue gun
- funnel
- saw
Instructions
- Paint cut dowels with black paint. Once the dowels are dry, spray them with clear acrylic sealer and set aside.
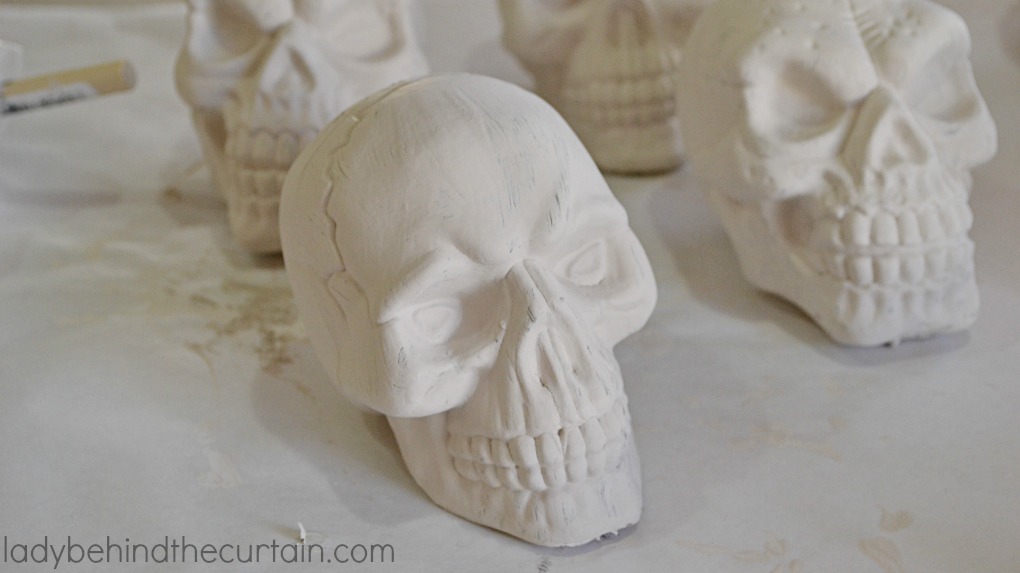
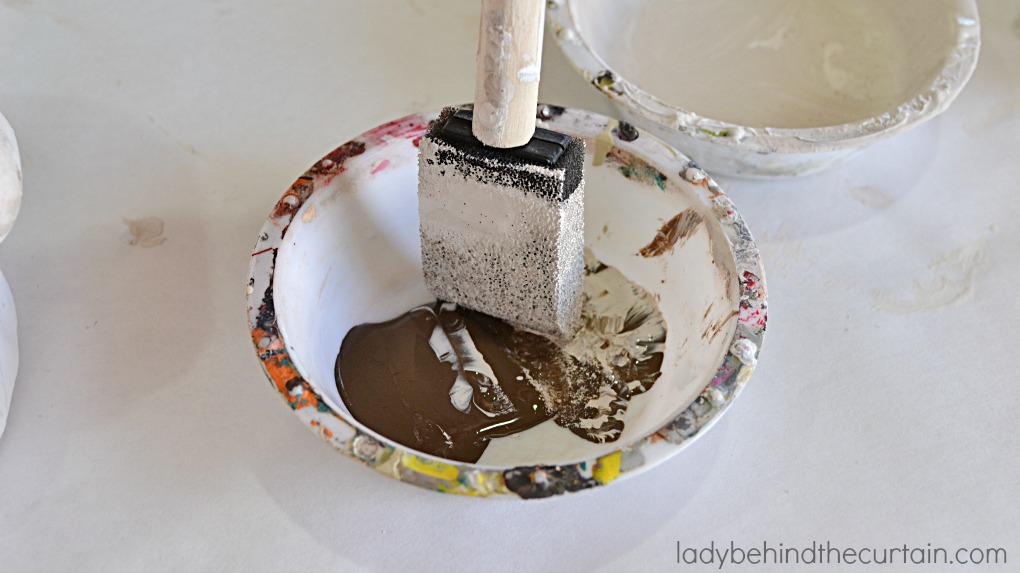
- Mix together your white paint and dark brown to make a very light cream
color. All you want to do is mute the white so it’s not so bright so
only add a drop of the brown at a time (I used a popsicle stick to mix
together). Completely cover the entire head. NOTE: If some of it
comes off don’t worry this project is very forgiving. Just touch it up
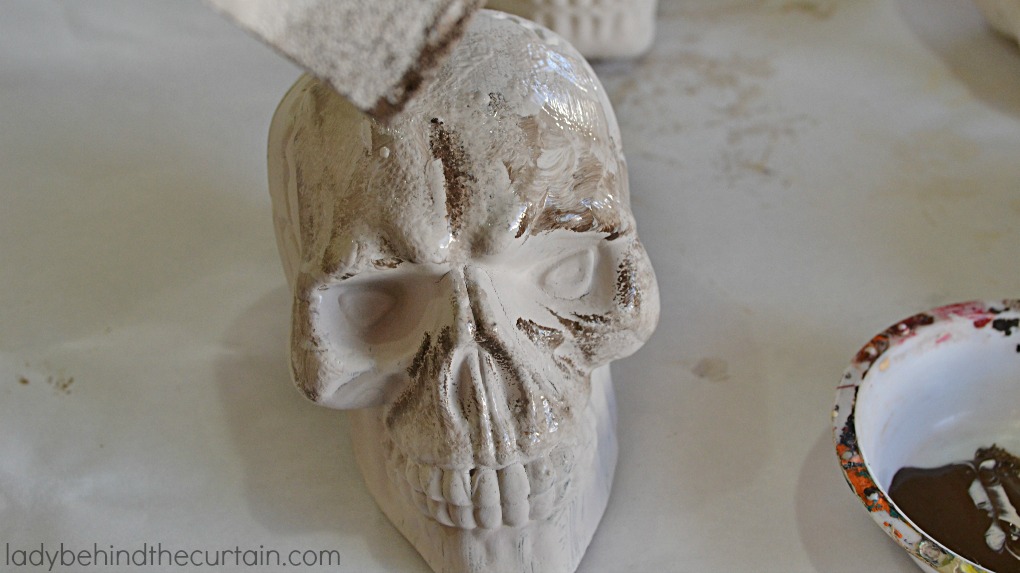
with of your cream paint. Once that is dry you can start adding depth
with the darker colors. - Use a sponge brush; fully load the brush with the cream color, dip the
tip into the dark brown and dab it on in different spots of the head.
This makes it look old and dirty while it also adds depth. Pull it back
and examine it to make sure you have it the way you like it. Do this
step while it’s still wet. So if you don’t like something you can
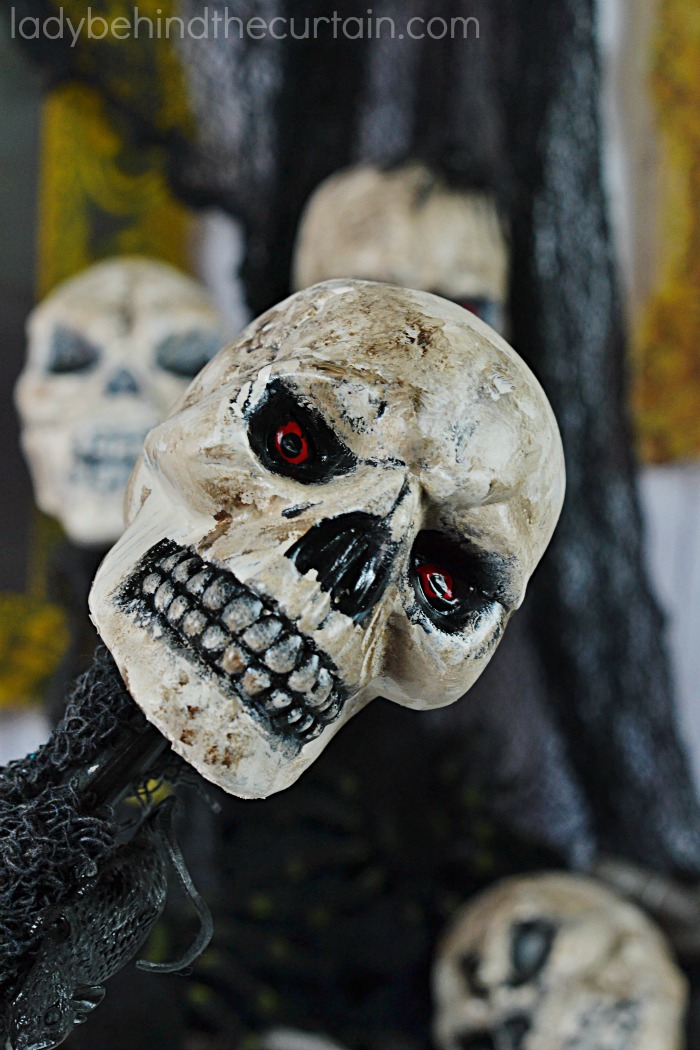
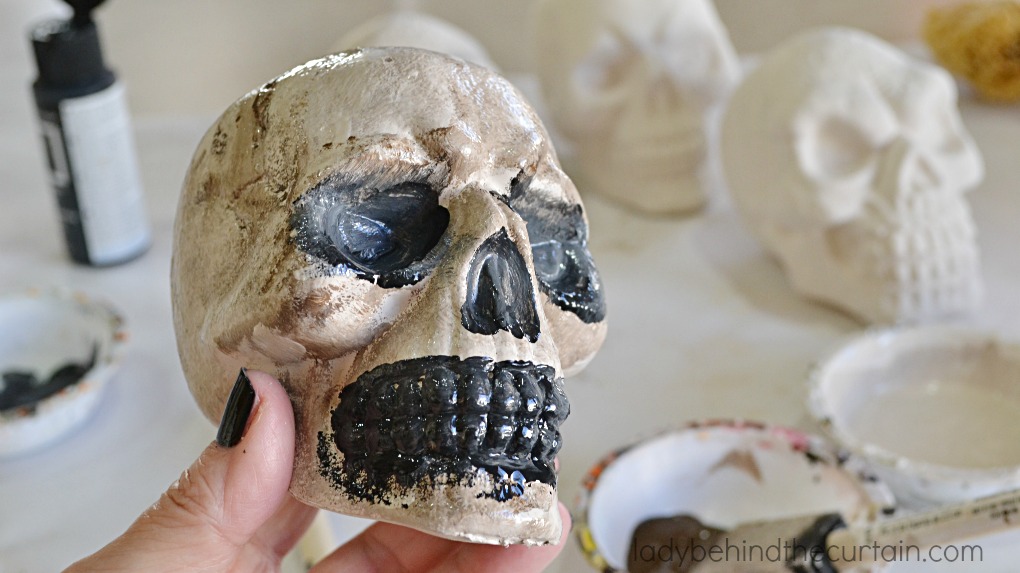
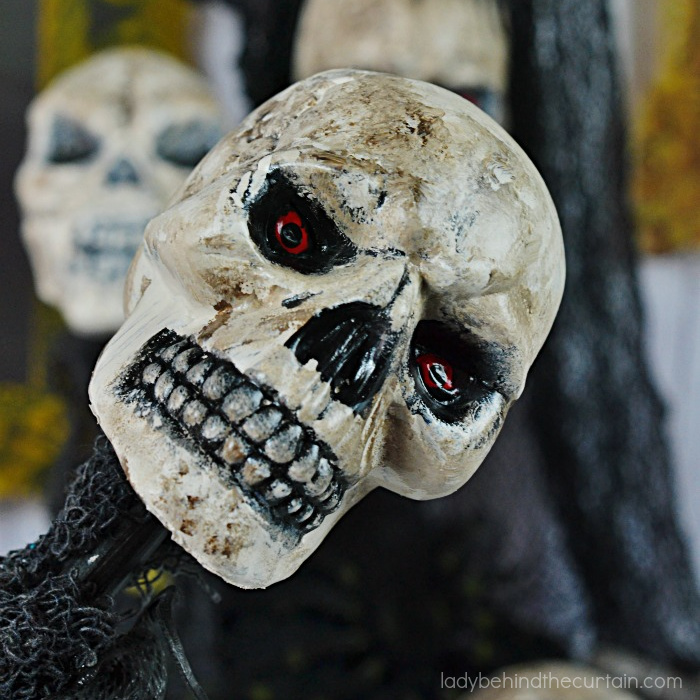
simply cover it up with paint or add more. Set aside to dry. - Once it is dry add the black; fill in the hollowed eyes and the teeth
area. Make sure to fill in between the teeth with black this step is
very important for the end result. If you over filled the eye area you
can take some of your cream color touched into the dark brown and
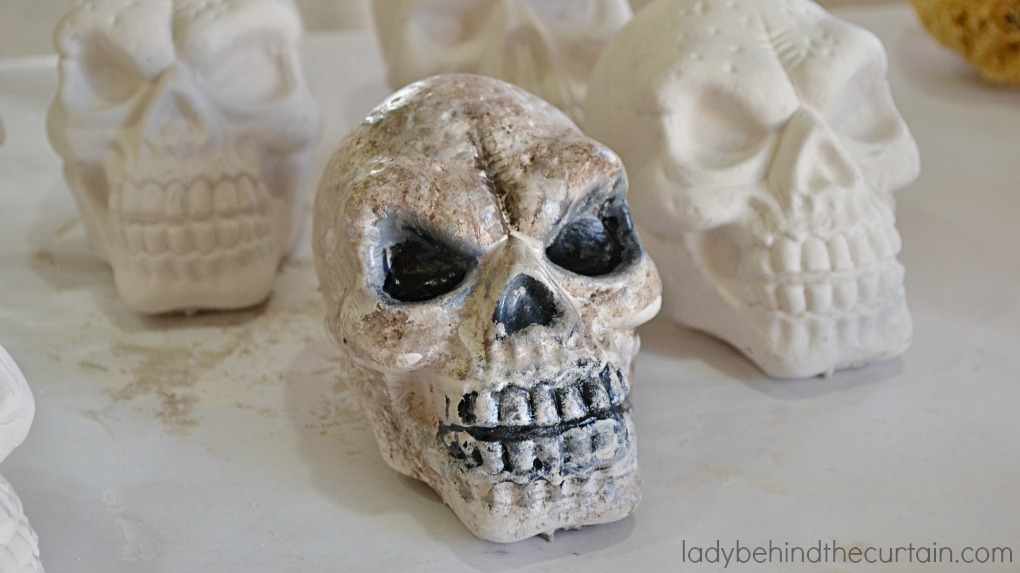
correct it. Let that dry. - Fill your brush with the cream color and lightly pat it onto the top of the teeth making sure not to fill in between the teeth.
- If you chose skeleton heads with eyes, dip the tip of a regular brush
into some red paint and add a dot of red to the center. Spray clear
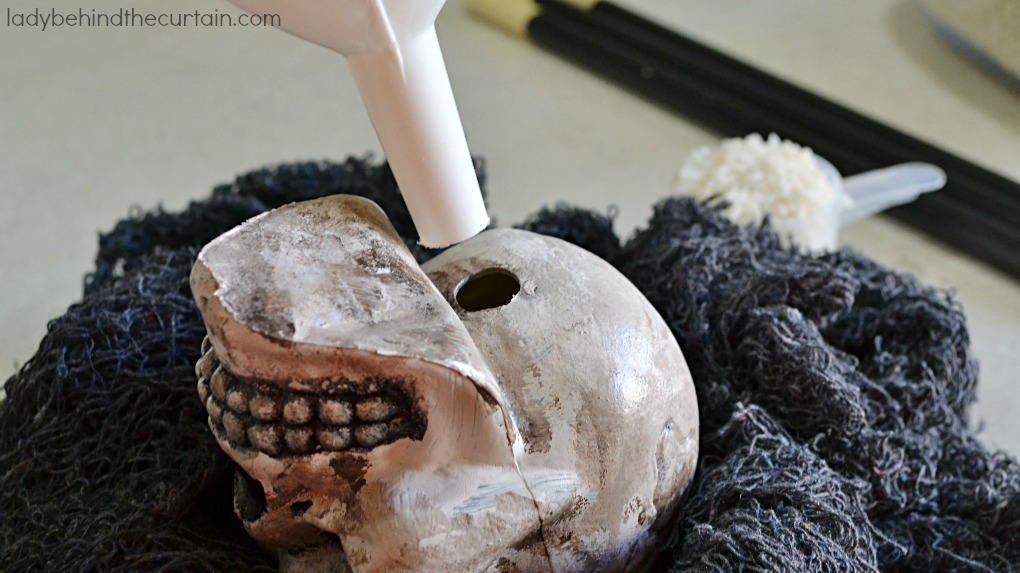
acrylic sealer all over the skeleton heads; let dry completely. - Use a funnel and add some rice into the head (about ¼ cup).
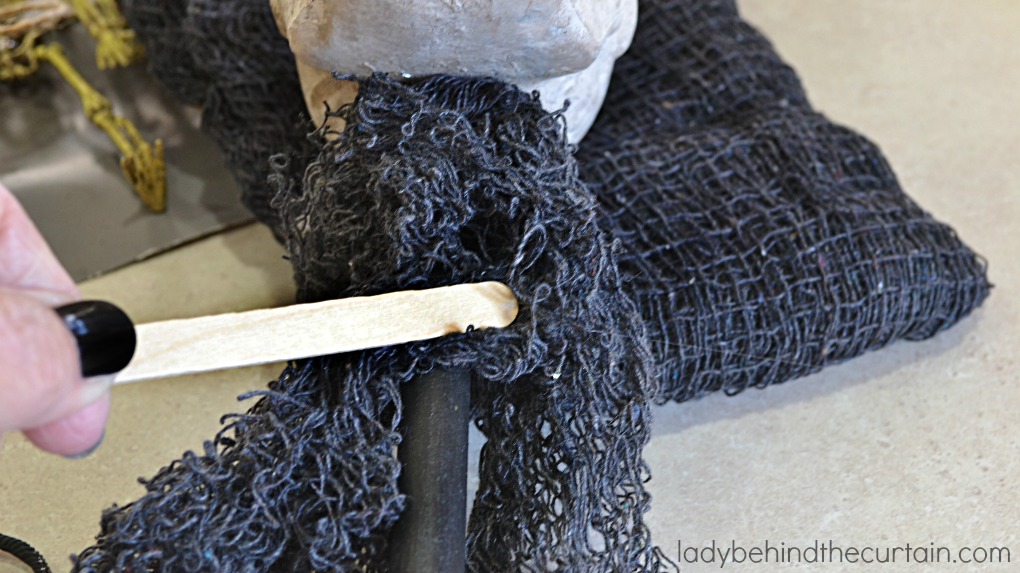
- Stick the dowel into the hole at the bottom as far as it will go. Use a hot glue gun to glue the dowel in place.
- Wrap gauze around and down the dowel to hide the glue where the skull was glued to the dowel and glue.
- Decorate with different embellishments.
MORE DIY HALLOWEEN PARTY DECORATIONS

NEVER MISS A POST

Comments
Dollar Tree Halloween Party Skeleton Head Rattle Party Favors — No Comments
HTML tags allowed in your comment: <a href="" title=""> <abbr title=""> <acronym title=""> <b> <blockquote cite=""> <cite> <code> <del datetime=""> <em> <i> <q cite=""> <s> <strike> <strong>