Mini Toilet Paper Roll Piñata Party Favors
THE COLORFUL SURPRISE THAT TURNS EVERY GUEST INTO A KID AGAIN: There are certain party details that guests remember long after the cake has been eaten and the decorations have been packed away. Sometimes it’s a beautiful dessert table. Sometimes it’s a clever game. And sometimes it’s the smallest detail of all. A handmade party favor that brings a smile before it’s even opened.

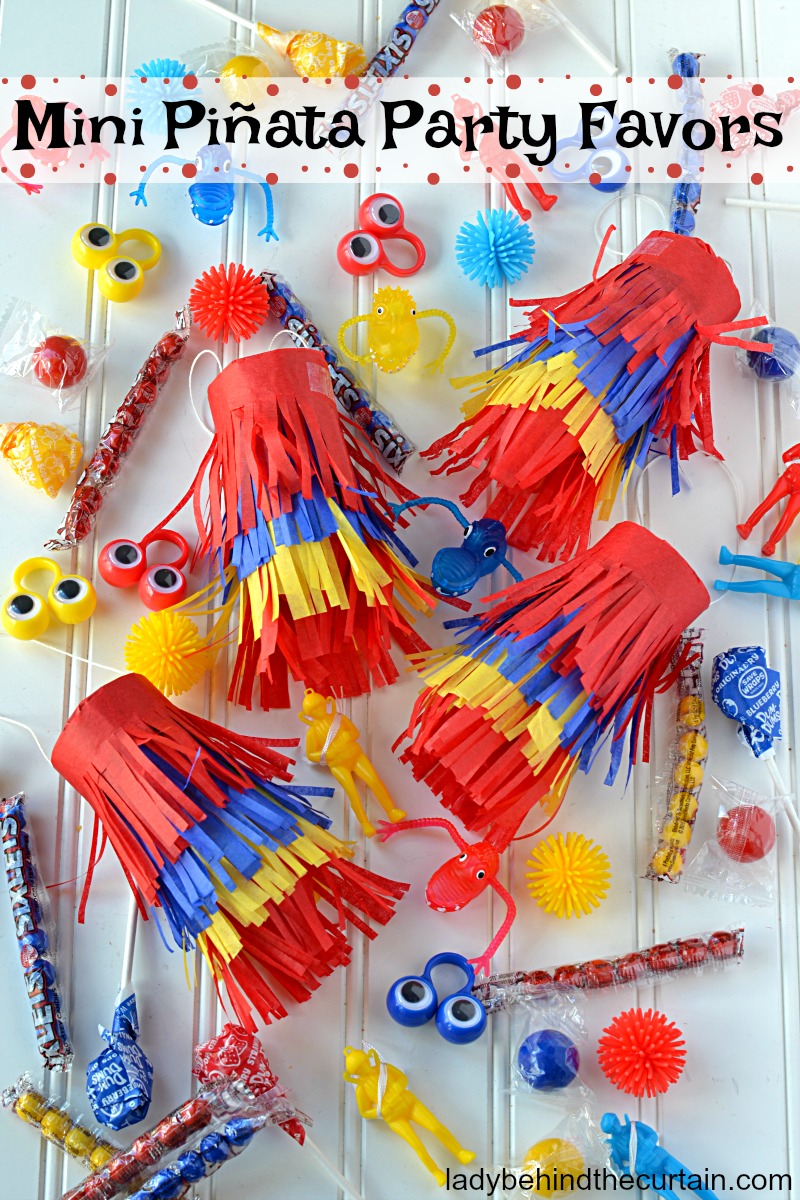
That’s exactly what these Mini Piñata Party Favors do. Instead of handing guests an ordinary favor bag filled with candy, imagine placing a colorful little piñata at every place setting or arranging dozens of them in a festive display near the dessert table. At first, everyone thinks they’re simply adorable decorations. Then they discover each one is filled with treats, tiny toys, or even a little surprise tucked inside. The best part is that everyone gets to open their own piñata without waiting in line or competing for candy.
Whether you’re planning a birthday party, Cinco de Mayo celebration, school carnival, baby shower, graduation party, or neighborhood gathering, these miniature favors instantly become part of the celebration instead of an afterthought. They’re inexpensive to make, easy to customize, and create the kind of excitement that guests of every age enjoy.
The best parties aren’t always remembered because they cost the most money. They’re remembered because they include thoughtful little touches that make people feel special. These colorful mini piñatas do exactly that.
Why Are Mini Piñatas Better Than Traditional Favor Bags?
Traditional favor bags certainly have their place, but they’re often picked up on the way out the door without much thought. Guests usually glance inside, say thank you, and toss them into the car. Mini piñatas create an entirely different experience because they’re interactive.
Instead of immediately seeing what’s inside, guests enjoy a little anticipation. Children love wondering what treasures are hidden inside, while adults can’t resist the nostalgic feeling of opening something that reminds them of childhood birthday parties. That element of surprise makes the favor feel more like part of the entertainment than simply another gift.
Another advantage is that mini piñatas double as decorations throughout the event. Scatter them across a dessert table, line them down the center of a dining table, or place one on every plate. Before they’re opened, they add bright pops of color to your party. Afterward, they become the keepsake everyone takes home.
Because each guest receives their own piñata, everyone enjoys the experience equally. There are no disappointed children who missed collecting candy from a traditional hanging piñata and no worries about swinging bats or cleaning candy off the ground afterward. Every guest gets their own little celebration.
What Makes These Mini Piñatas Look So Special?
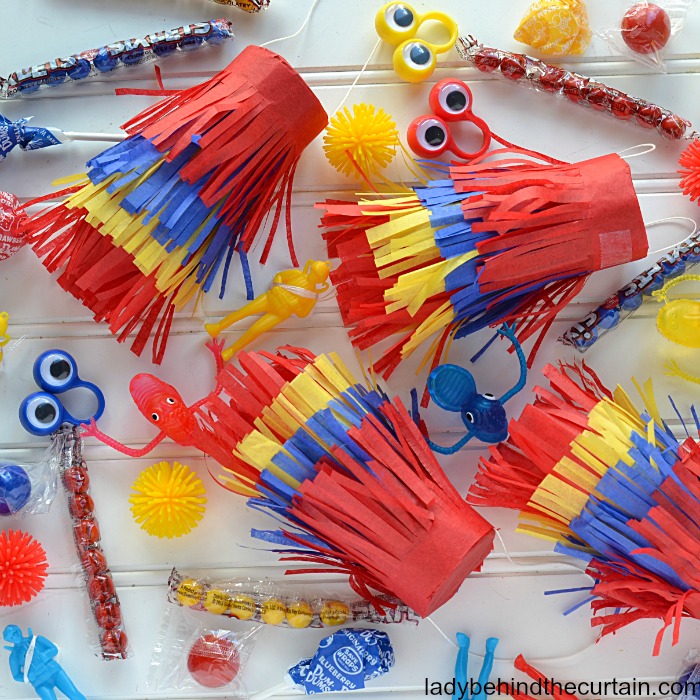
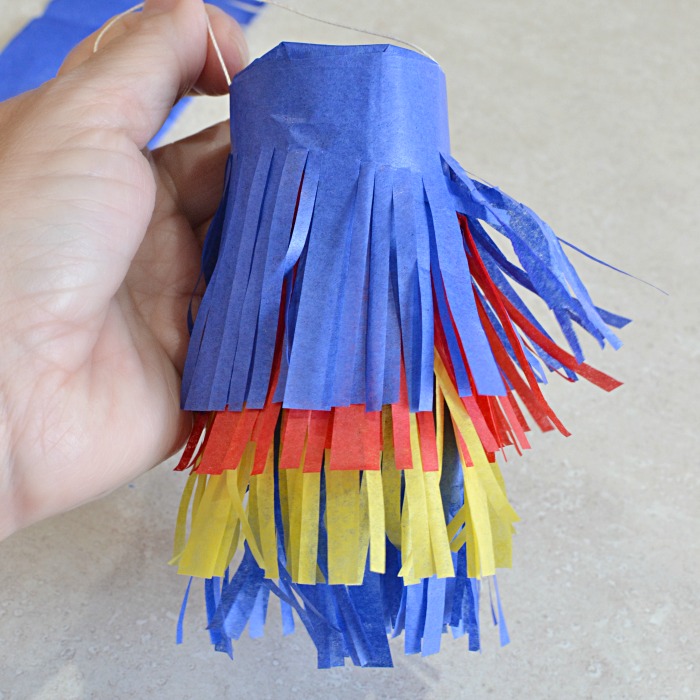
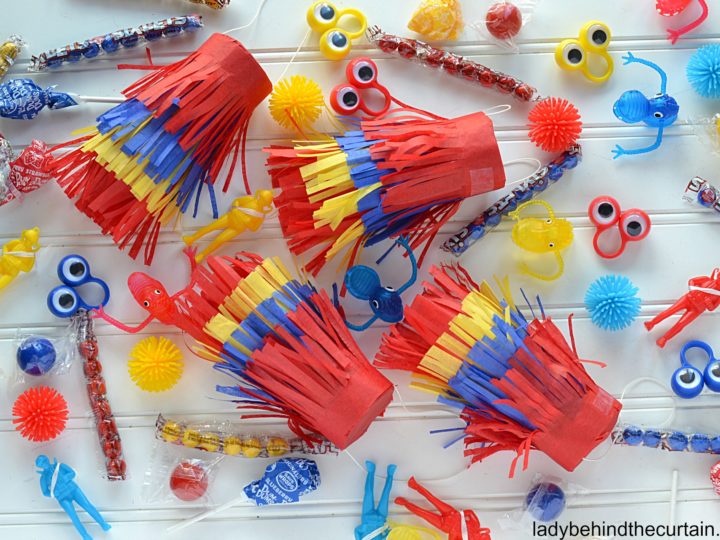
One reason these tiny favors stand out is their layered fringe. Those overlapping rows create movement, texture, and fullness that immediately catch the eye. Even before someone realizes it’s a piñata, they’re drawn to the colorful layers that make each one look handcrafted.

The secret isn’t using expensive materials or specialty crafting tools. Instead, it’s allowing each layer of fringe to slightly overlap the previous one. As the fringe naturally separates, it creates shadows and depth that give the piñata a much fuller appearance than a single layer ever could.
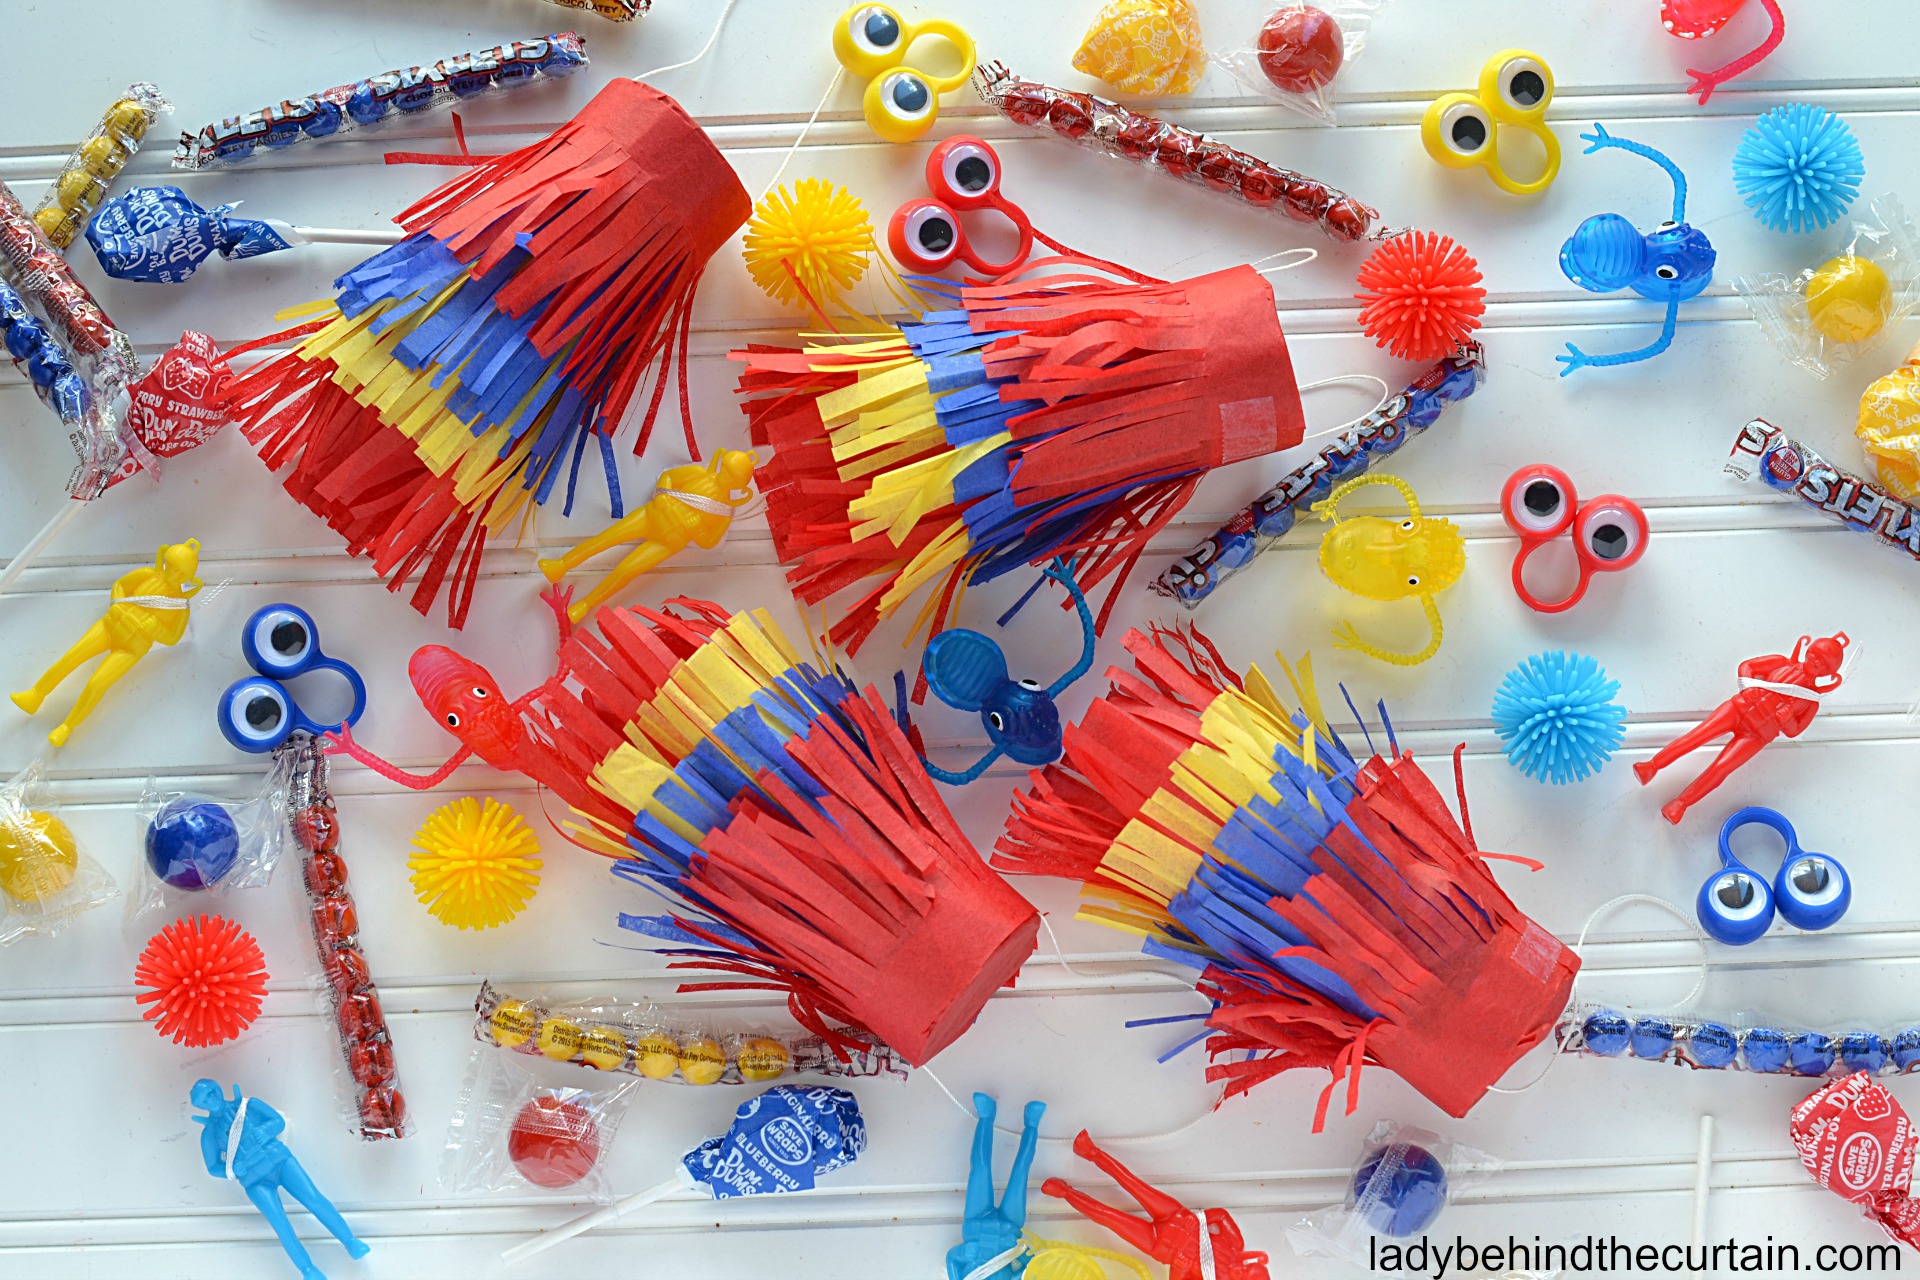
Color placement also makes a surprisingly big difference. Bright contrasting colors create a playful, energetic look that’s perfect for children’s birthdays, while softer coordinating shades instantly transform the same project into elegant favors for weddings, baby showers, or bridal brunches. Simply changing the colors allows you to create an entirely different style without changing the construction at all.
That’s one of my favorite things about projects like this. Once you learn the technique, you can recreate it for virtually any celebration throughout the year.
WOW! I NEVER KNEW THAT: Have you ever wondered why professional party decorators use tissue paper for so many decorations?
Although tissue paper feels delicate by itself, layering several rows together actually creates surprising durability. The overlapping fringe distributes stress across multiple layers instead of just one. That’s why full-size piñatas can hold so much candy while remaining lightweight enough to hang overhead.
The same principle works on these mini versions. The layered fringe helps protect the contents while giving the piñata its signature fluffy appearance. It’s a wonderful example of how something inexpensive can produce professional-looking results simply by using it the right way.
Choosing the Perfect Color Combination
One of the most enjoyable parts of making mini piñatas is deciding on the colors. The same project can look playful, elegant, spooky, or sophisticated depending entirely on your tissue paper choices.

Bright primary colors create the classic fiesta look that many people associate with traditional piñatas. These combinations are perfect for birthday parties, Cinco de Mayo celebrations, school festivals, and neighborhood block parties because they instantly communicate fun and excitement.
Pastel colors create a completely different personality. Soft pink, lavender, mint, and pale yellow work beautifully for spring birthdays, Easter celebrations, baby showers, and garden parties. They feel light, cheerful, and elegant while still maintaining the playful spirit that makes mini piñatas so charming.
For holidays, consider choosing colors that reflect the season. Orange, black, and purple create festive Halloween favors. Red and green instantly become Christmas party treats. Red, white, and blue are perfect for Fourth of July picnics, while metallic gold and silver add sparkle to New Year’s Eve celebrations.
Even adults appreciate receiving handmade party favors when the colors match the event’s theme. Coordinating the piñatas with your plates, napkins, table linens, or balloons helps tie the entire party together and makes your decorations feel intentional rather than random.
| Celebration | Color Ideas |
|---|---|
| Birthday Party | Bright primary colors or rainbow |
| Cinco de Mayo | Red, yellow, blue, green, and orange |
| Baby Shower | Soft pastels or classic pink and blue |
| Graduation | School colors |
| Halloween | Orange, black, purple, and lime green |
| Christmas | Red, green, gold, and white |
| Valentine’s Day | Pink, red, white, and gold |
| Fourth of July | Red, white, and blue |
BEHIND THE CURTAIN: Whenever I’m choosing colors for party decorations, I start with the dessert table instead of the party favors. The desserts naturally become the centerpiece of most celebrations, so matching the favors to those colors helps everything look coordinated without buying additional decorations.
What Should You Put Inside?

The fun doesn’t stop with the outside. Choosing what goes inside can make the favors even more memorable.
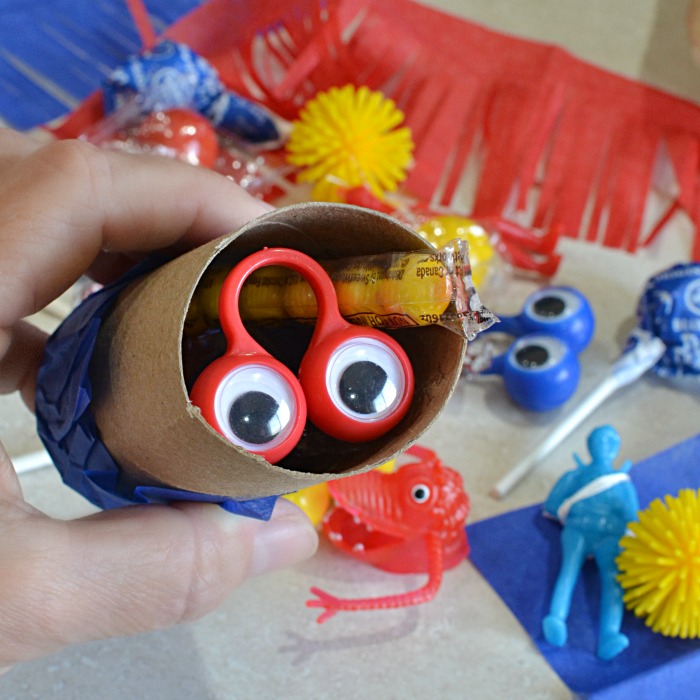
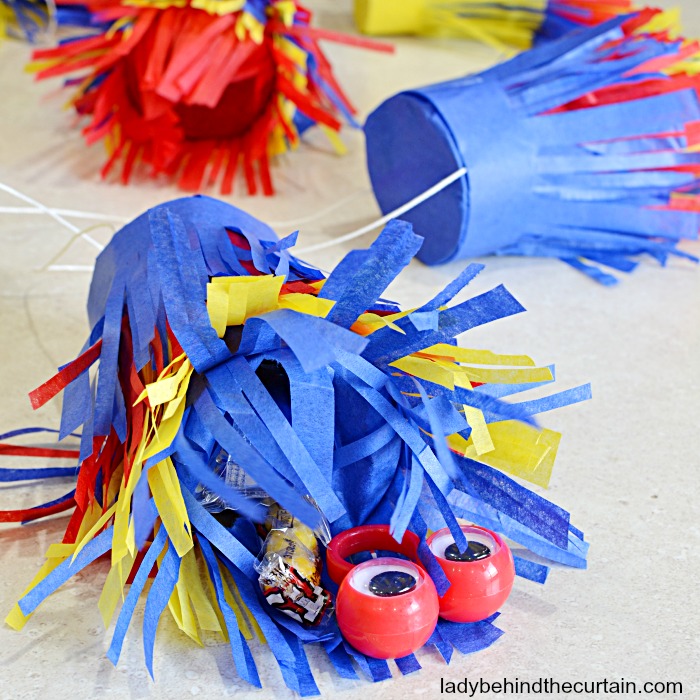
For younger children, classic wrapped candies mixed with a few inexpensive toys create plenty of excitement. Small bouncing balls, stickers, temporary tattoos, colorful erasers, tiny puzzles, and stretchy figures all fit beautifully inside and give children something to enjoy long after the candy is gone.
Older kids often appreciate items that feel a little more grown-up. Friendship bracelets, colorful pens, keychains, lip balm, miniature card games, or collectible figures can all be mixed with candy to create favors that feel thoughtful instead of predictable.
Adults enjoy surprises too. Gourmet chocolates, coffee shop gift cards, lottery tickets, tea bags, homemade candies, specialty caramels, or even handwritten notes of appreciation can turn these colorful favors into unforgettable place settings at bridal showers, retirement parties, and family reunions.
Instead of thinking about filling space, think about creating an experience. Combining a sweet treat with one unexpected surprise gives guests something they’ll remember long after the party is over.
| Guest Age | Filling Ideas |
|---|---|
| Toddlers | Soft wrapped candy, stickers, chunky crayons |
| School Age | Candy, small toys, temporary tattoos, bouncy balls |
| Teens | Chocolate, lip balm, keychains, friendship bracelets |
| Adults | Gourmet candy, tea bags, coffee gift cards, lottery tickets, cash for special occasions |
How Many Should You Make?
Planning ahead is one of the easiest ways to reduce party stress. Since these mini piñatas are also decorations, it’s usually worth making a few extra.
Unexpected guests happen. A child may want to take one home for a sibling who couldn’t attend, or one may accidentally become damaged during setup. Having several extras tucked away ensures you won’t be scrambling at the last minute.
If you’re using them as place settings, make one for every guest plus a handful of extras. If they’re decorating a dessert table, additional piñatas can fill empty spaces and make the display feel more abundant.
| Number of Guests | Piñatas to Make |
|---|---|
| 10 | 12 |
| 20 | 24 |
| 30 | 35 |
| 50 | 56 |
Those few extra favors provide peace of mind and often become wonderful little gifts for neighbors, grandchildren, or anyone who helped make the celebration special.
BEHIND THE CURTAIN: I almost always make more than I think I’ll need. Somehow there’s always one child who falls in love with an extra piñata sitting on the dessert table. Seeing their excitement is worth the few extra minutes it took to make another one.
Creative Ways to Display Mini Piñata Party Favors

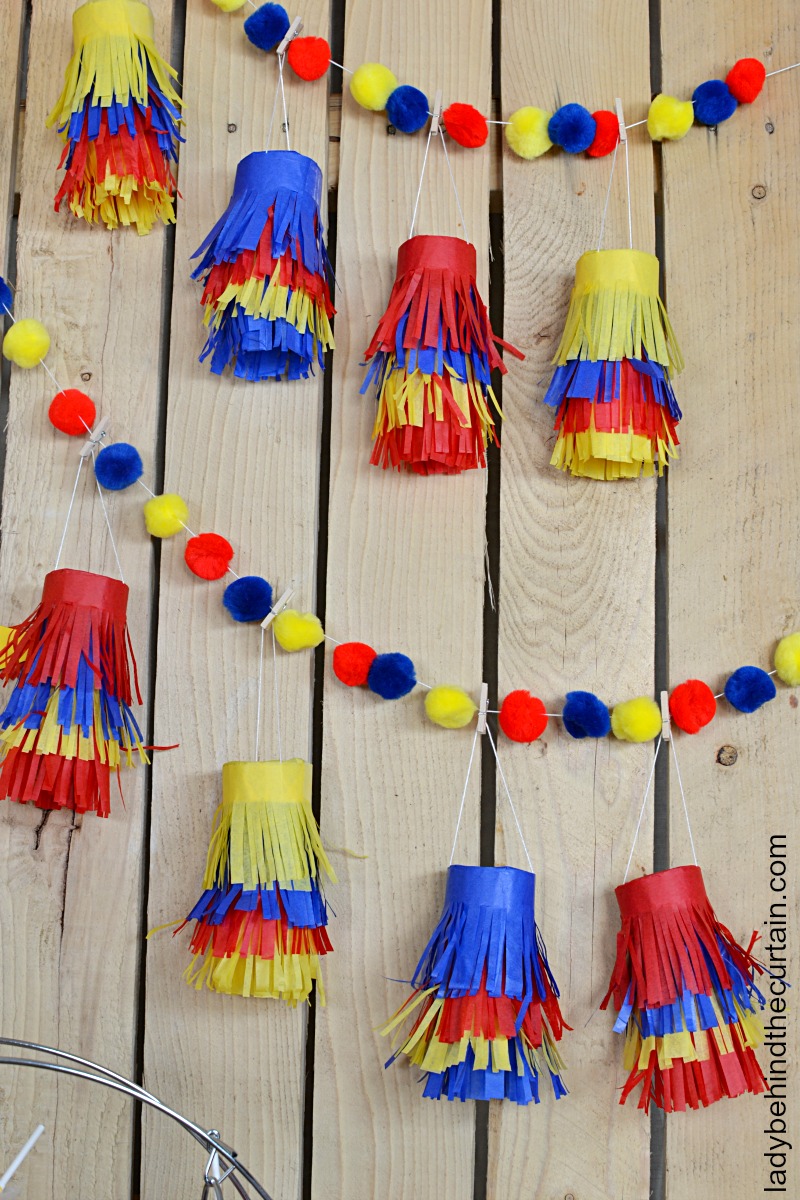
One of my favorite things about these mini piñatas is that they don’t have to wait until the end of the party to make an appearance. Because they’re so colorful, they become part of your decorations from the moment guests arrive. A thoughtful display can make them look like they came from a professional party planner, even though they’re made from simple supplies at home.
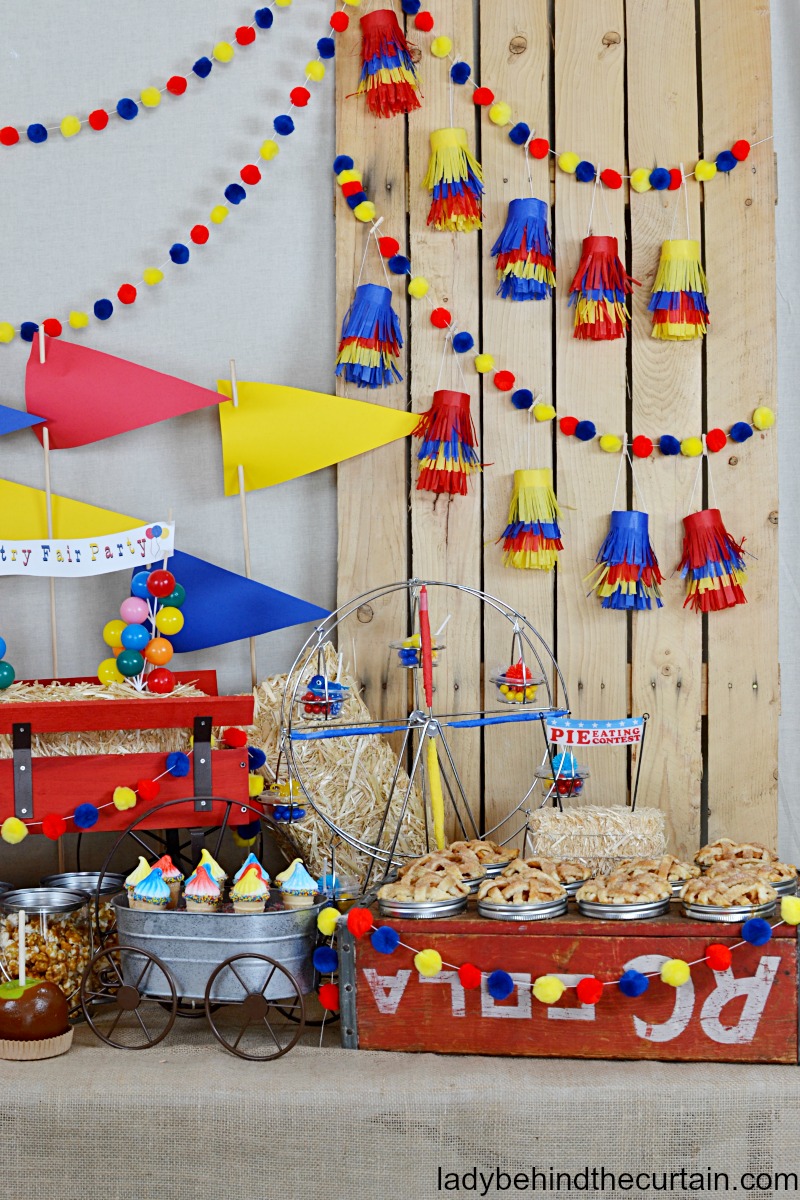
Using the crochet string handles to hang several mini piñatas side by side creates a festive banner that looks beautiful above a dessert table. Instead of serving as decorations for just a few hours, the piñatas become part of the celebration from the moment guests arrive until it’s time to head home. At the end of the party, each guest simply removes a piñata from the banner and takes home a handmade favor filled with sweet surprises. I love decorating with pieces that serve more than one purpose because nothing goes to waste. Instead of packing away decorations, you’re sending them home with the people who helped make the celebration so memorable.
For children’s birthday parties, try placing one at each seat around the table. Not only does it add a burst of color to every place setting, but it also gives children something fun to discover while everyone settles in before the meal or cake. It instantly makes each guest feel like they have a special surprise waiting just for them.
If you’re creating a dessert table, scatter mini piñatas among cake stands, cookie trays, and candy jars. Varying the heights of your desserts naturally draws the eye around the display, and the colorful fringe adds texture that keeps the table from feeling flat. They also photograph beautifully, making your party pictures even more vibrant.
For larger gatherings, consider filling a decorative basket, wooden crate, or colorful bowl with the finished piñatas. This creates a simple centerpiece that doubles as the party favor station. Guests can simply choose one on their way home, and the display remains full and festive throughout the celebration.
You can even incorporate them into balloon arrangements by tying the handles to balloon weights or hanging them from decorative branches placed inside tall vases. These unexpected displays add height to your decorations without requiring elaborate centerpieces.
Can You Make Mini Piñatas Ahead of Time?
If you’re planning a party, you already know that anything you can cross off your to-do list early is a gift to yourself. Fortunately, mini piñatas are one of those projects that can be completed well before the celebration.
Because the treats are tucked safely inside and the tissue paper isn’t edible, these favors can easily be made one to two weeks in advance. This allows you to work on them a little at a time instead of trying to finish everything the night before your party.
The biggest enemy of tissue paper isn’t time. It’s moisture. Humidity can soften the fringe and cause it to lose some of its fluffy appearance. Storing the finished piñatas in a cool, dry room helps them maintain their shape until party day.
If you’re transporting them to another location, avoid packing them tightly together. A shallow cardboard box works much better than a deep plastic tote because it prevents the tissue paper from becoming crushed under the weight of additional layers.
A little extra care during storage means they’ll look just as fresh on party day as they did when you finished making them.
BEHIND THE CURTAIN: When I’m making decorations for a large party, I like to finish projects like these several days before I start baking. It frees up my kitchen table for cookies and cakes, and I don’t have to worry about accidentally splattering frosting on colorful tissue paper.
Common Mistakes That Are Easy to Avoid
Like most simple crafts, mini piñatas are very forgiving. Even so, a few small details can make a noticeable difference in the finished project.
- The first is overfilling. It’s tempting to squeeze in one more piece of candy, but an overstuffed piñata can become difficult to close neatly. Leaving just a little breathing room keeps the ends smooth and the piñata looking balanced.
- Another common mistake is flattening the fringe while handling the project. Once each layer is attached, gently fluff it with your fingers before adding the next row. This creates the full, layered appearance that makes these favors look professionally made.
- Choosing too many colors can also make the finished piñata feel busy instead of festive. Three or four coordinating colors usually create a cleaner look than trying to use every color in the package. Limiting your palette also helps your party decorations feel more cohesive.
- Finally, remember that these are handmade party favors, not factory-produced decorations. Tiny variations in fringe length or color placement simply add to their charm. Those little differences are what make each piñata unique.
Turn Your Party Favors into Part of the Entertainment

Mini piñatas don’t have to be something guests simply carry home. They can become part of the celebration itself.
For children’s parties, consider letting everyone open their piñata after singing “Happy Birthday.” It gives every child a chance to enjoy the excitement without the chaos that sometimes comes with a traditional hanging piñata.
At family reunions, you can hide small clues inside each piñata for a scavenger hunt. Every guest opens one to reveal the next location, creating an activity that encourages everyone to participate together.
Hosting a baby shower? Fill each piñata with pink, blue, or neutral candies, then tuck one tiny baby-themed charm into only a few of them for special prizes. Bridal showers, retirement parties, and holiday gatherings can all include similar surprise elements that encourage conversation and laughter.
The more interactive your favors become, the more memorable your celebration will be.
A Piñata for Every Celebration
A simple change of colors is all it takes to transform these mini piñatas for almost any celebration. From birthdays and baby showers to holidays and graduations, the same basic design can be customized to match your party’s theme, making this a project you’ll find yourself creating again and again.
For sports-themed birthdays, choose the team’s colors and fill the piñatas with trading cards, whistles, or small sports-themed toys. Planning a princess party? Soft pinks, gold, and glittery tissue paper create elegant little favors fit for royalty. A construction-themed birthday becomes even more fun with yellow, black, and orange tissue paper paired with miniature construction vehicles.
Holiday celebrations offer endless possibilities too. Fill Halloween piñatas with wrapped candy and glow bracelets, Christmas versions with chocolate coins and candy canes, and Easter favorites with jelly beans and tiny plush chicks. Even graduation parties become more festive when the colors match the graduate’s school.
You can also personalize each piñata with a small gift tag tied to the handle. Adding each guest’s name transforms the party favor into both a decoration and a place card, eliminating the need for separate seating assignments.
Why This Version Is Worth Making
There are plenty of mini piñata tutorials available, but many rely on hot glue, cardboard templates, or specialty supplies that most people don’t already own. This version keeps the project approachable by using everyday materials while still producing a polished result.
The shortened tube creates a pleasing proportion that looks balanced once the fringe is added. Layering the tissue paper gives the piñata fullness without adding bulk, and the simple handle makes it easy to display from hooks, branches, or decorative stands.
Perhaps my favorite part is how easily these can be customized. Instead of learning a new craft for every holiday or celebration, you simply change the colors and fillings to suit the occasion. One technique becomes dozens of different party favors throughout the year.
That makes this more than just a fun afternoon craft. It’s a decorating idea you’ll find yourself coming back to again and again.
Step-by-Step Image Tutorial-How to Make Mini Piñatas

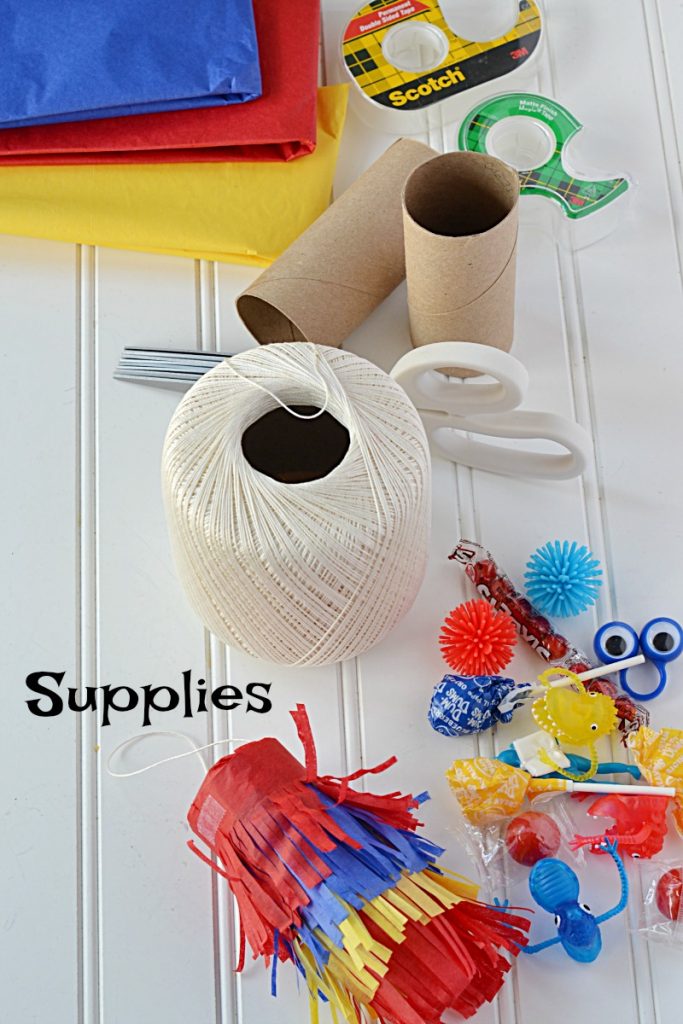
SUPPLIES AND TOOLS:
- toilet paper roll
- tissue paper
- double-stick tape
- regular tape
- cream or white crochet string
- small toys
- candy
- ruler
- regular scissors
- optional: fringe scissors


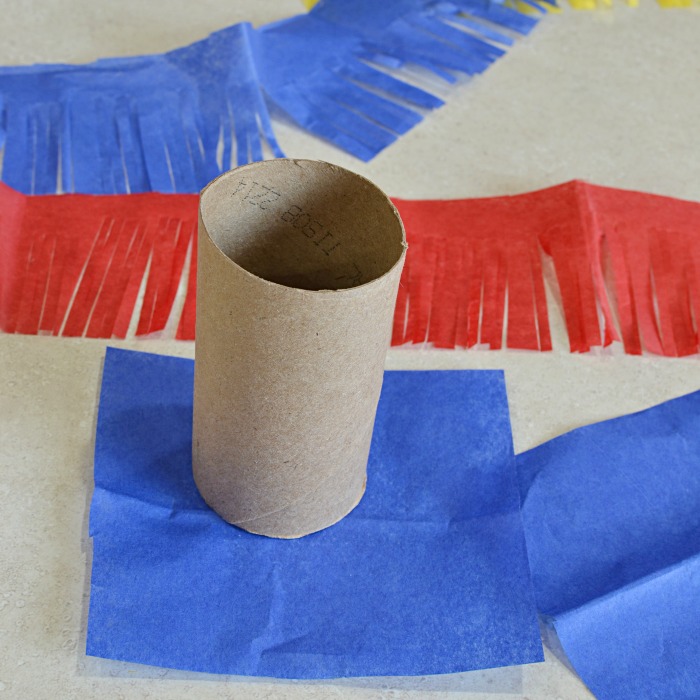
- Cut 1 inch off one end of a toilet paper roll.
- Cut two 4×4-inch pieces of tissue paper PER piñata (to cover the top and bottom of the toilet paper roll).


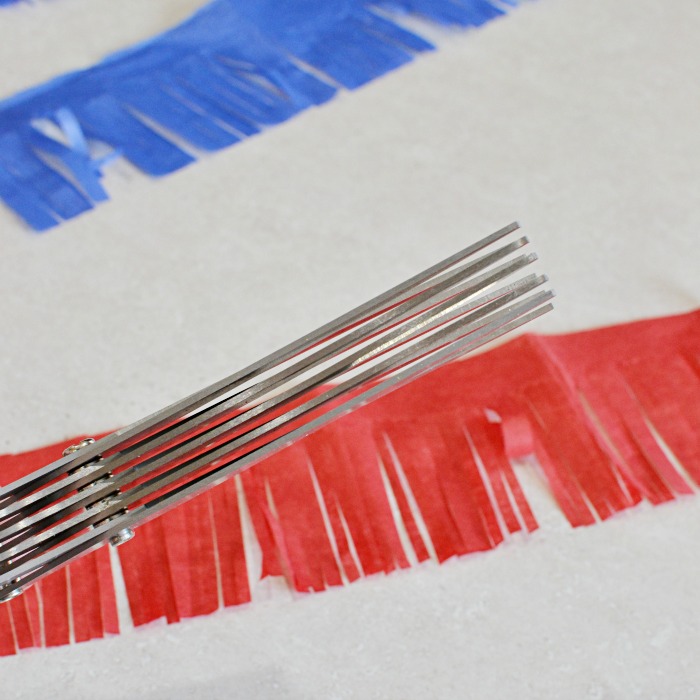
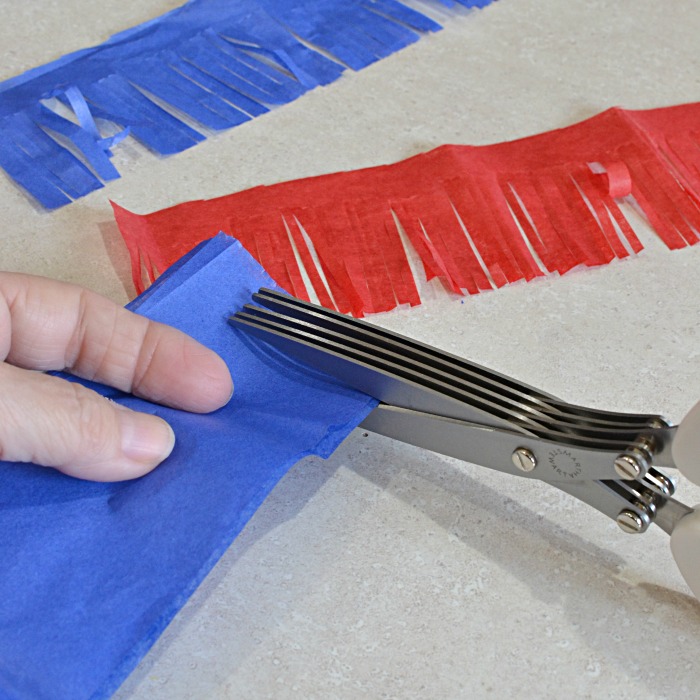
- FOR FRINGE SCISSORS: Cut 4 (10×2-inch) strips (color of your choice) tissue paper. Using the fringe scissors, make fringe. NOTE: I layered 3 strips of tissue on top of each other. DO NOT CUT ALL THE WAY THROUGH TO THE TOP. Make sure you leave room at the top to keep the fringe connected.
- FOR REGULAR SCISSORS: Cut the tissue paper as instructed for using fringe scissors. Use regular scissors to make fringe.
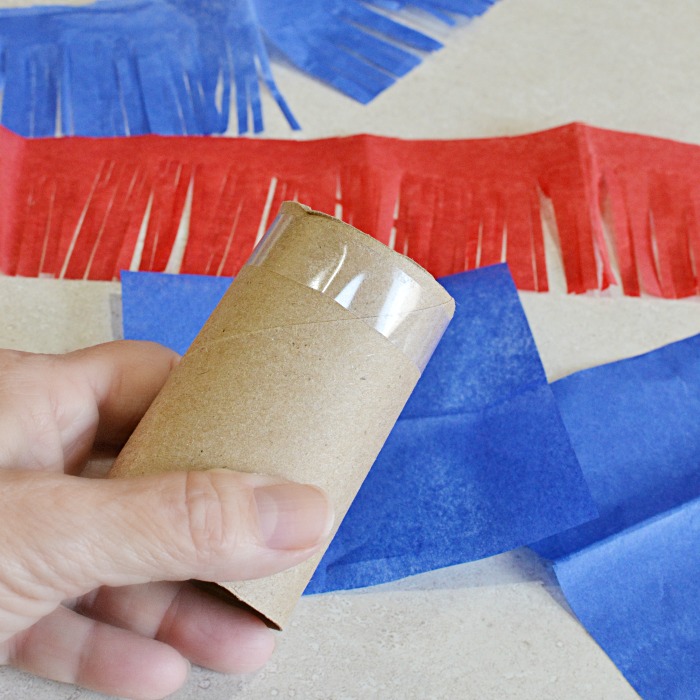
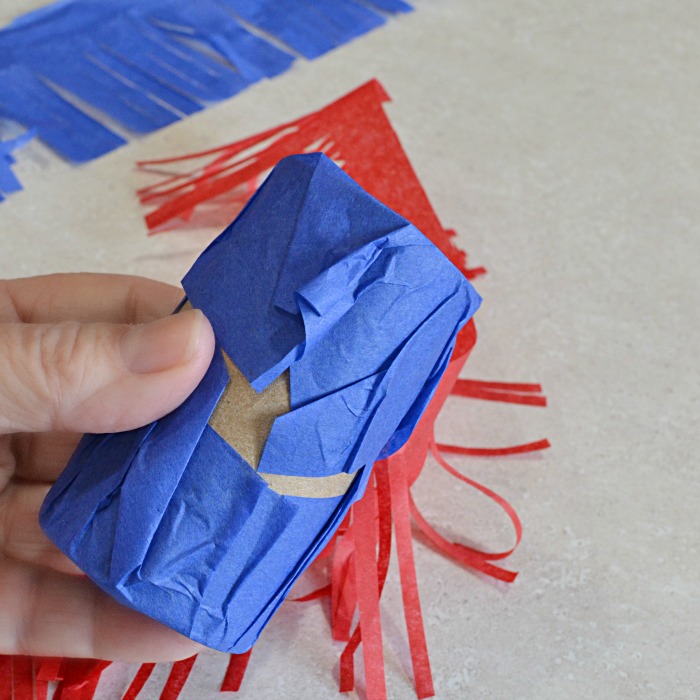
- Wrap a piece of double-stick tape around one end of the tube (about ½-inch down).
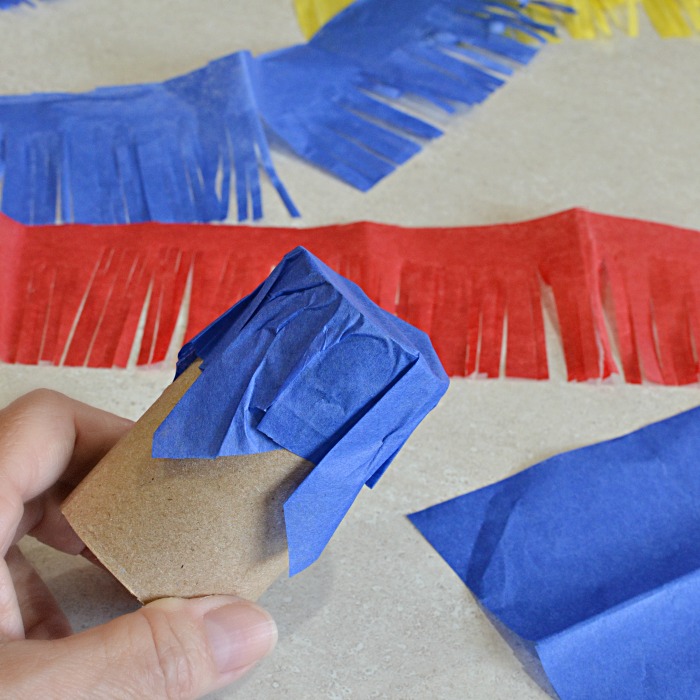
- Take one piece of the 4×4 piece of tissue, lay it on top of the tube (the end with the double-stick tape) and press down the side.
- Flip the tube over, fill with candy, toys, or money.
- Repeat with the 4×4 piece of tissue.


- FOR FRINGE SCISSORS: Cut 4 (10×2-inch) strips (color of your choice) tissue paper. Using the fringe scissors, make fringe. NOTE: I layered 3 strips of tissue on top of each other. DO NOT CUT ALL THE WAY THROUGH TO THE TOP. Make sure you leave room at the top to keep the fringe connected.
- FOR REGULAR SCISSORS: Cut the tissue paper as instructed for using fringe scissors. Use regular scissors to make fringe.
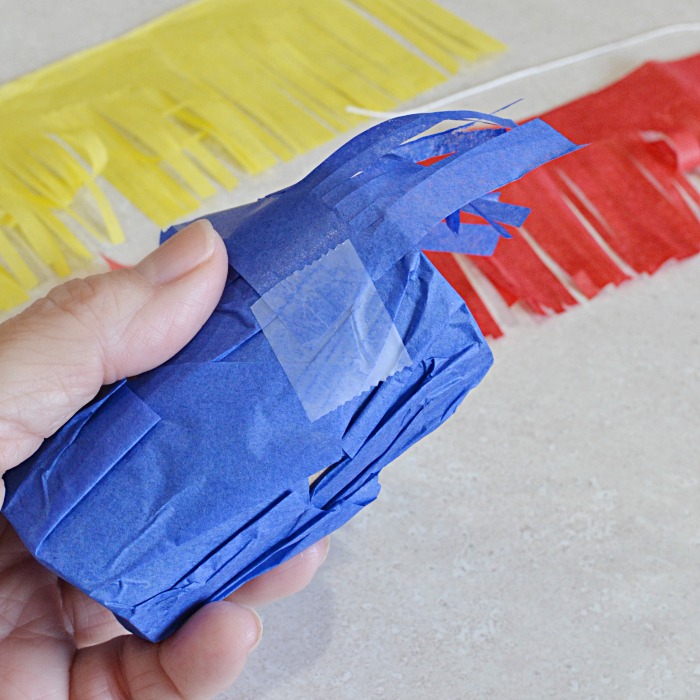
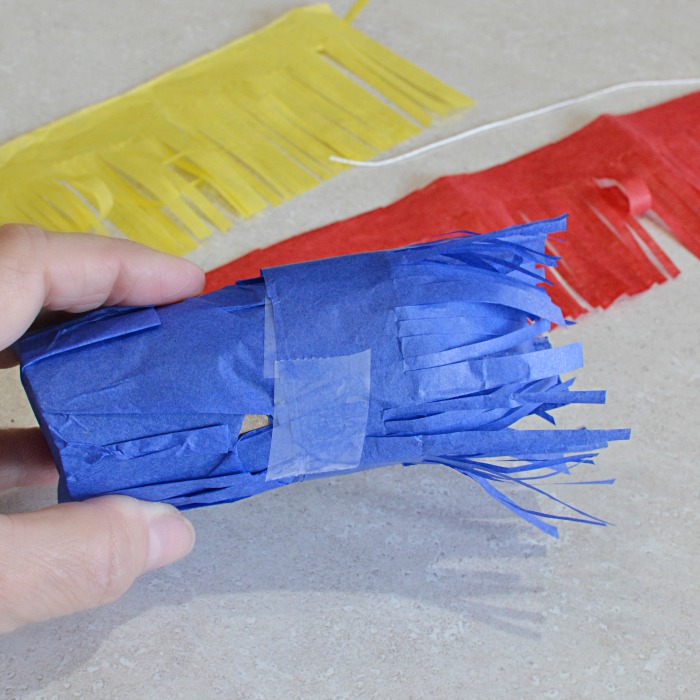
- Starting at the bottom, add a small piece of regular tape to one end of a strip of fringe-cut tissue (make sure the tissue hangs over the end some).
- Press to the tube, wrap around until all the tissue has been wrapped. Secure with another piece of regular tape.


- Cut one 8-inch long piece of crochet thread (per piñata).
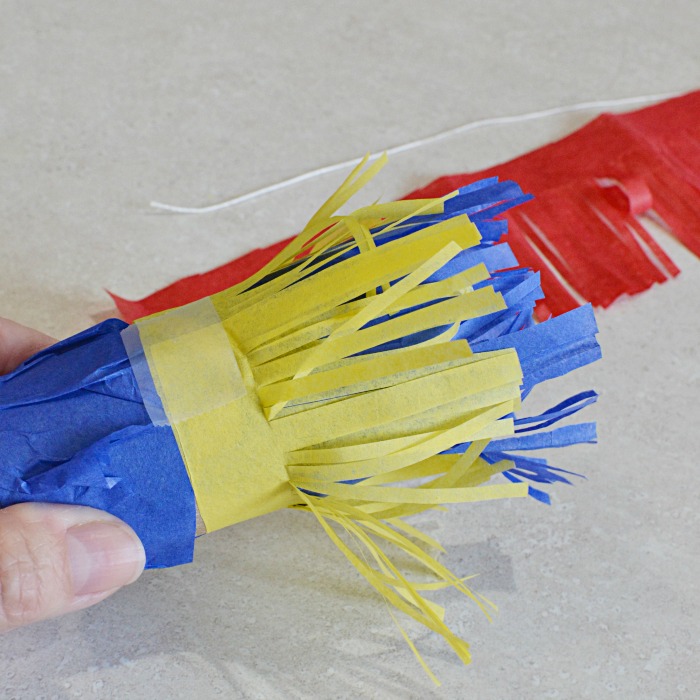
- Repeat with TWO more strips of fringe-cut tissue.
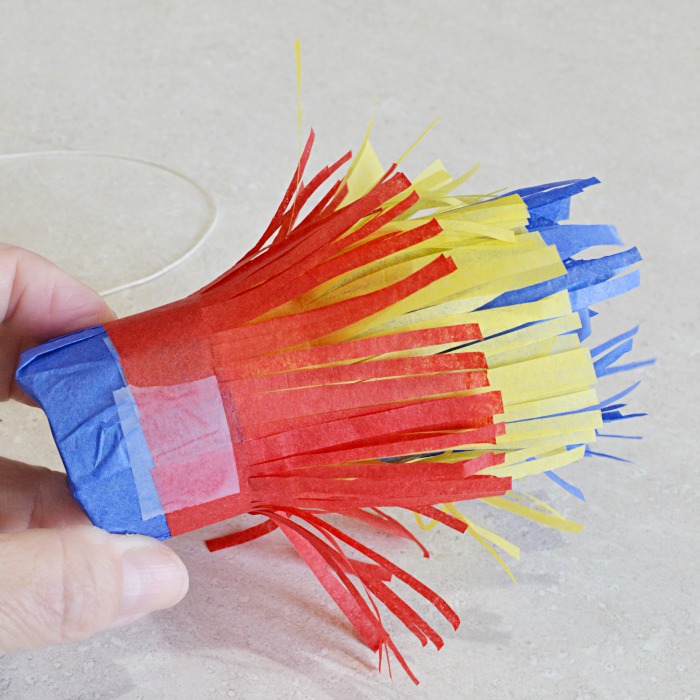
- BEFORE starting the last strip, add the crochet thread handle. Take a small piece of regular tape and press one end of the floss to adhere to it. Eyeball the center of the tube and press to the tube; bring the thread over to the opposite side, add another small piece of regular tape and press to the tube.
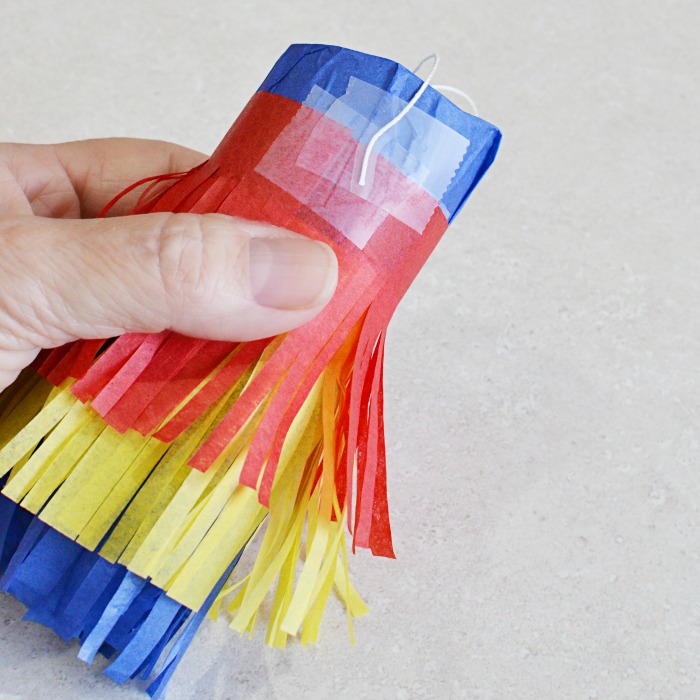
- Add the last row of fringe cut tissue (for a total of FOUR rows), making sure to keep the floss handle free and not caught under the tissue.


That’s it! You just created the cutest party item EVER! All the kids have to do is punch their fingers through the bottom to get their treats!
MORE BIRTHDAY PARTY FAVOR IDEAS


LATEST POSTS
Some of my favorite celebrations haven’t been the biggest or the most elaborate. They’ve been the ones filled with thoughtful little details that made people smile. That’s exactly why I love these mini piñata party favors. They aren’t just colorful decorations or containers for candy. They’re tiny surprises that invite everyone, young and old, to be part of the fun.
I hope this project inspires you to add a handmade touch to your next celebration. Whether you’re planning a birthday party for a grandchild, decorating for a holiday gathering, or simply looking for a creative way to thank your guests for coming, these little piñatas have a way of making people feel special.
If you make them, I’d love to hear how you personalized them. The colors you chose, the treats you tucked inside, or the smiles they brought to your guests are the kinds of stories that inspire all of us to keep creating and celebrating together.
Until next time, keep gathering the people you love, make every celebration a little sweeter, and never underestimate how much joy can come from something handmade.
Happy celebrating! Sheryl
PARTY PLANNING QUESTIONS ANSWERED
If you’re like me, a few questions probably popped into your head as you were reading through this project. Here are the answers to some of the most common questions that can help make your mini piñata party favors look their best and fit seamlessly into your next celebration.
- Can I use paper towel rolls instead of toilet paper rolls? Absolutely! Simply cut the paper towel rolls into shorter sections before decorating. They’re a great option when you need to make a large number of favors and have extra rolls on hand.
- How do I keep the tissue paper looking fresh until party day? Store the finished piñatas in a shallow cardboard box in a cool, dry room. Avoid stacking heavy decorations on top of them, as pressure can flatten the fringe and reduce the fluffy appearance.
- Can I personalize each mini piñata for my guests? Yes! Tie a small gift tag with each guest’s name to the handle, coordinate the colors with your party theme, or fill each piñata with treats chosen specifically for that person. They make wonderful place cards for seated celebrations.
- What other decorations pair well with mini piñatas? These colorful favors look beautiful alongside balloon garlands, tissue paper flowers, colorful banners, dessert tables, and festive centerpieces. Repeating the same colors throughout your decorations creates a polished, professionally styled party.
- Are mini piñatas only for children’s parties? Not at all. Simply changing the colors and fillings transforms them into charming favors for bridal showers, baby showers, graduations, retirement parties, holiday gatherings, and even wedding receptions. Adults enjoy discovering the surprise inside just as much as kids do.
How to Make Mini Piñata Party Favors
It’s a party decoration, party game and party favor all in one! These fun Mini Piñata Party Favors are easy to make and can be filled with candy, tiny toys or both!
Materials
- toilet paper roll
- tissue paper
- double stick tape
- regular tape
- cream or white crochet string
- small toys
- candy
Tools
- ruler
- regular scissors
- optional: fringe scissors
Instructions
- Cut 1 inch off one end of a toilet paper roll.
- Cut two 4×4-inch pieces of tissue paper PER piñata (to cover the top and bottom of the toilet paper roll).
- FOR FRINGE SCISSORS: Cut 4 (10×2-inch) strips (color of your choice) tissue paper. Using the fringe scissors, make fringe. NOTE: I layered 3 strips of tissue on top of each other. DO NOT CUT ALL THE WAY THROUGH TO THE TOP. Make sure you leave room at the top to keep the fringe connected.
- FOR REGULAR SCISSORS: Cut the tissue paper as instructed for using fringe scissors. Use regular scissors to make fringe.
- Cut one 8-inch long piece of crochet thread (per piñata).
- Wrap a piece of double-stick tape around one end of the tube (about ½-inch down).
- Take one piece of the 4×4 piece of tissue, lay it on top of the tube
(the end with the double-stick tape) and press down the side. - Flip the tube over, fill with candy, toys, or money.
- Repeat with the 4×4 piece of tissue.
- Starting at the bottom, add a small piece of regular tape to one end
of a strip of fringe-cut tissue (make sure the tissue hangs over the
end some). - Press to the tube, wrap around until all the tissue has been wrapped. Secure with another piece of regular tape.
- Repeat with TWO more strips of fringe cut tissue.
- BEFORE starting the last strip, add the crochet
thread handle. Take a small piece of regular tape and press one end of
the floss to adhere to it. Eyeball the center of the tube and press to
the tube; bring the thread over to the opposite side, add another small
piece of regular tape and press to the tube. - Add the last row of fringe cut tissue (for a total of FOUR rows), making sure to keep the floss handle free and not caught under the tissue.
- That’s it! You just created the cutest party item EVER! All the kids have to do is punch their fingers through the bottom to get their treats!
- REFER TO THE POST FOR STEP-BY-STEP TUTORIAL PICTURES


Some of my favorite celebrations haven’t been the biggest or the most elaborate. They’ve been the ones filled with thoughtful little details that made people smile. That’s exactly why I love these mini piñata party favors. They aren’t just colorful decorations or containers for candy. They’re tiny surprises that invite everyone, young and old, to be part of the fun.
Comments
Mini Toilet Paper Roll Piñata Party Favors — No Comments
HTML tags allowed in your comment: <a href="" title=""> <abbr title=""> <acronym title=""> <b> <blockquote cite=""> <cite> <code> <del datetime=""> <em> <i> <q cite=""> <s> <strike> <strong>