
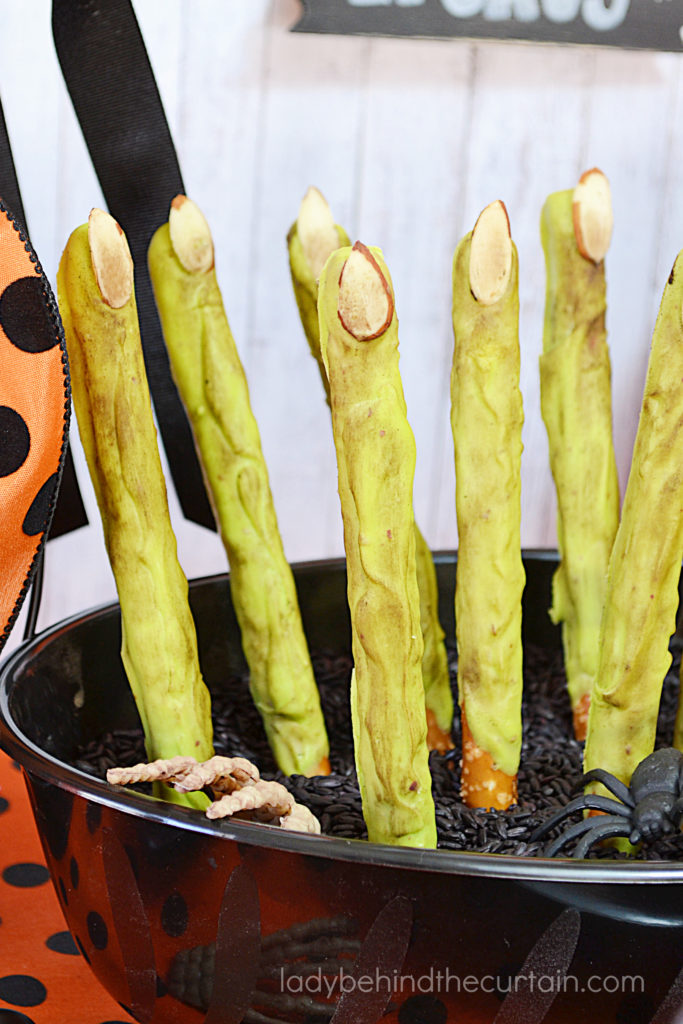
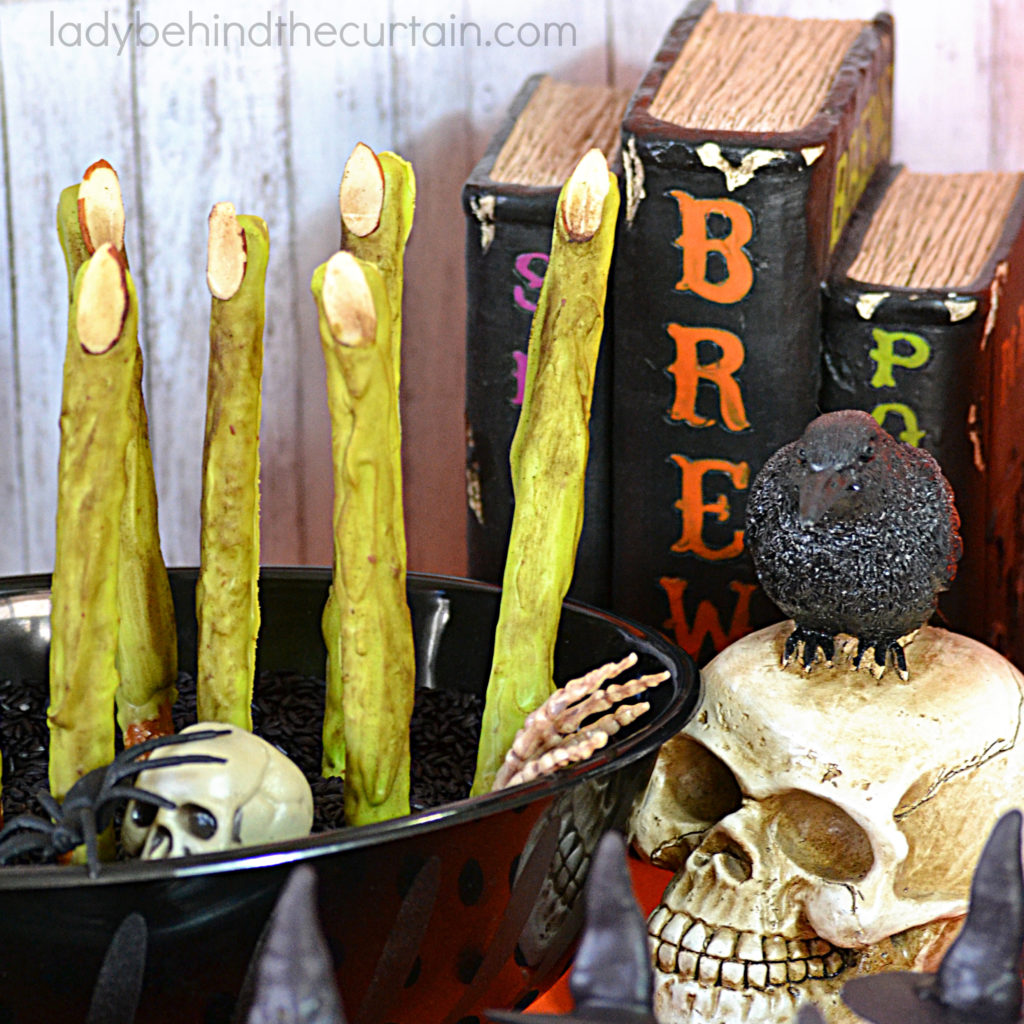
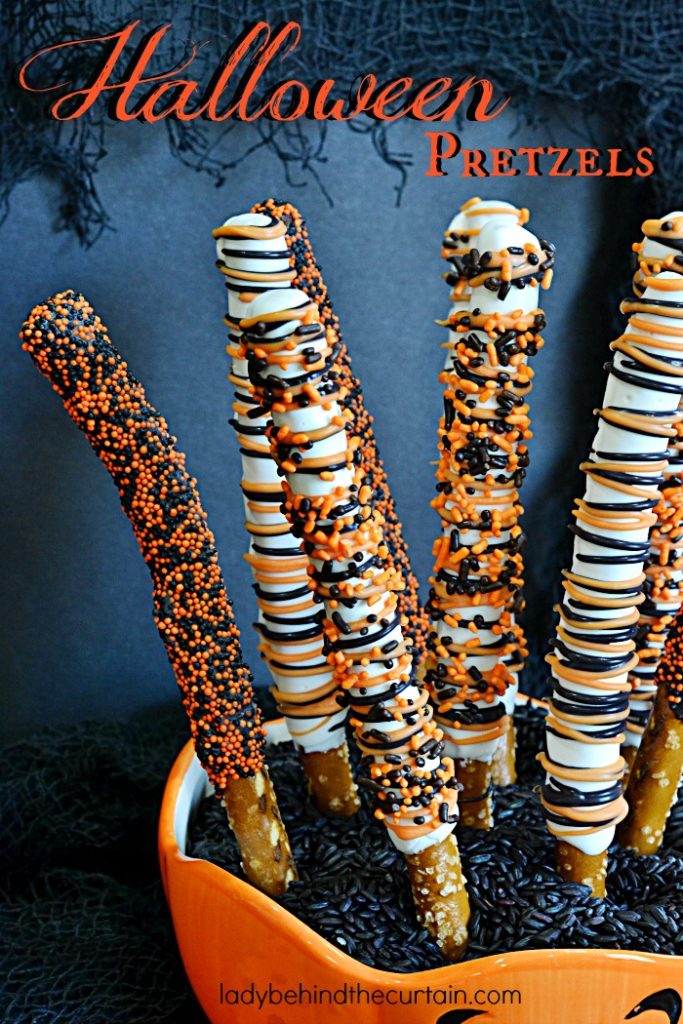
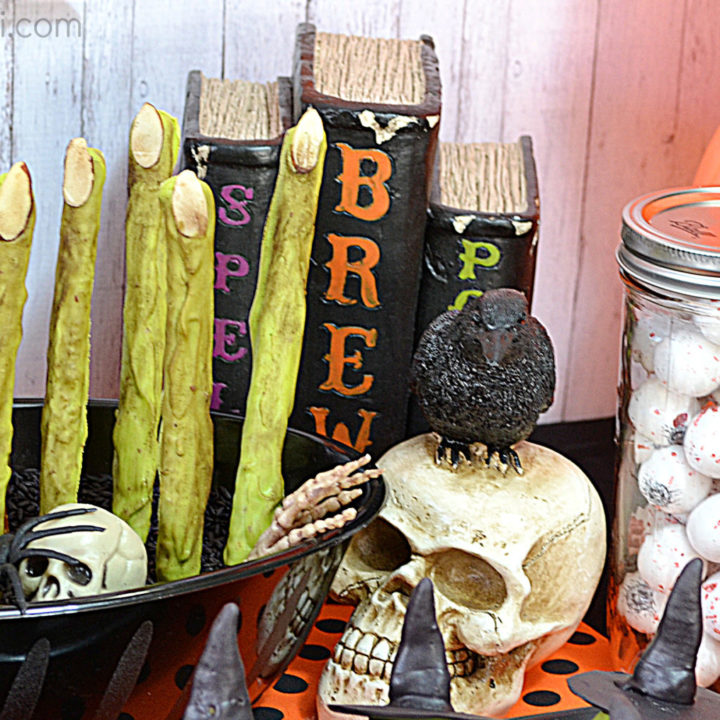
Wicked Witch Finger Halloween Pretzels
Wicked Witch Finger Halloween Party Pretzels: Create a fun and creepy Halloween Dessert Table starting with these amazing Halloween Decorated Pretzels. The finger pretzels are super easy to make, taste great and can go with many Halloween Party Themes. The sweet and salty flavors go perfectly together.
Wicked Witch Finger Halloween Pretzel Party Themes
- Even though these Halloween Party Pretzels are intended for a witch themed party, there are some other party themes for these fun decorated pretzels.
- Halloween (any theme)
- Zombie
- Monster (Halloween or Birthday)
- Wizard of Oz
For a Closer Look… Watch My Video—How to Decorate Pretzels
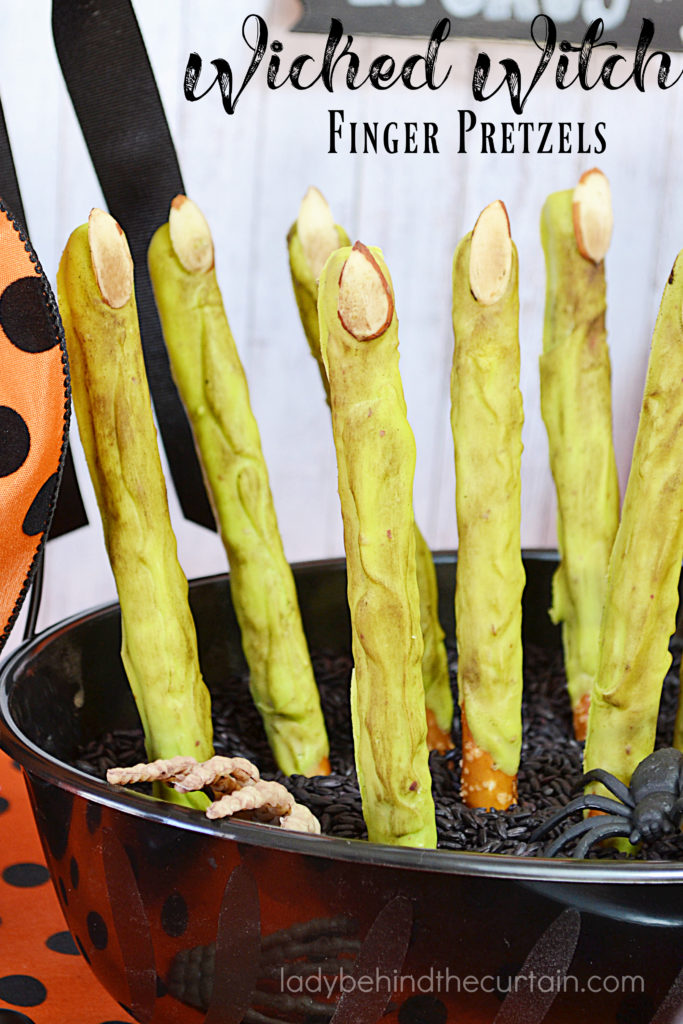
How to Make Wicked Witch Finger Halloween Pretzels
- INGREDIENTS (complete printable recipe below)
- pretzel rods
- lime green candy melts
- sliced almonds
- unsweetened cocoa powder
- DIRECTIONS
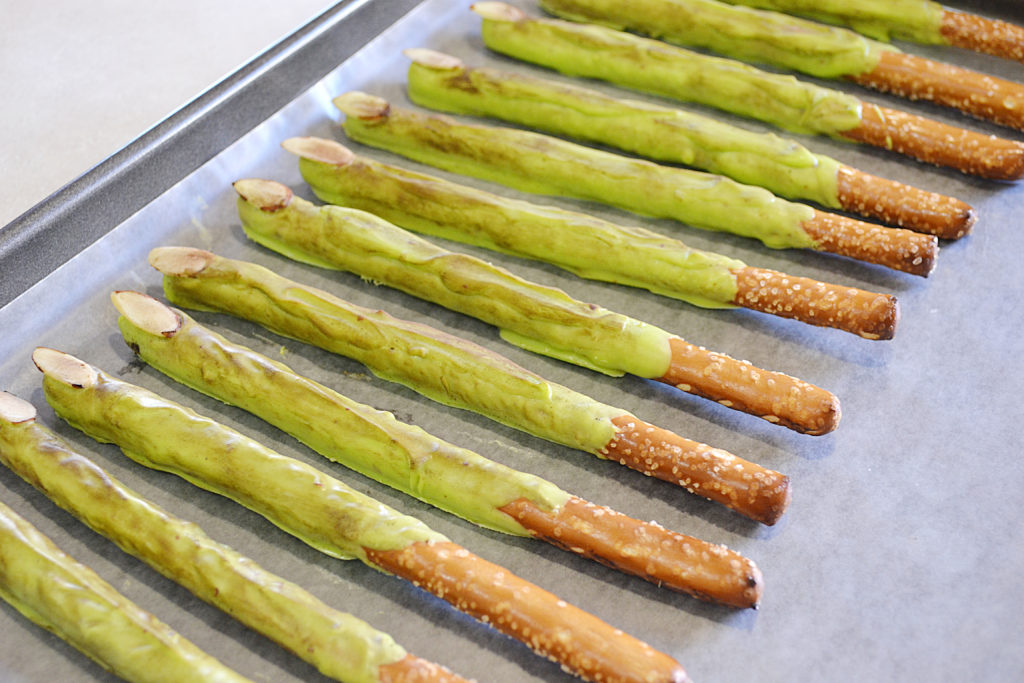
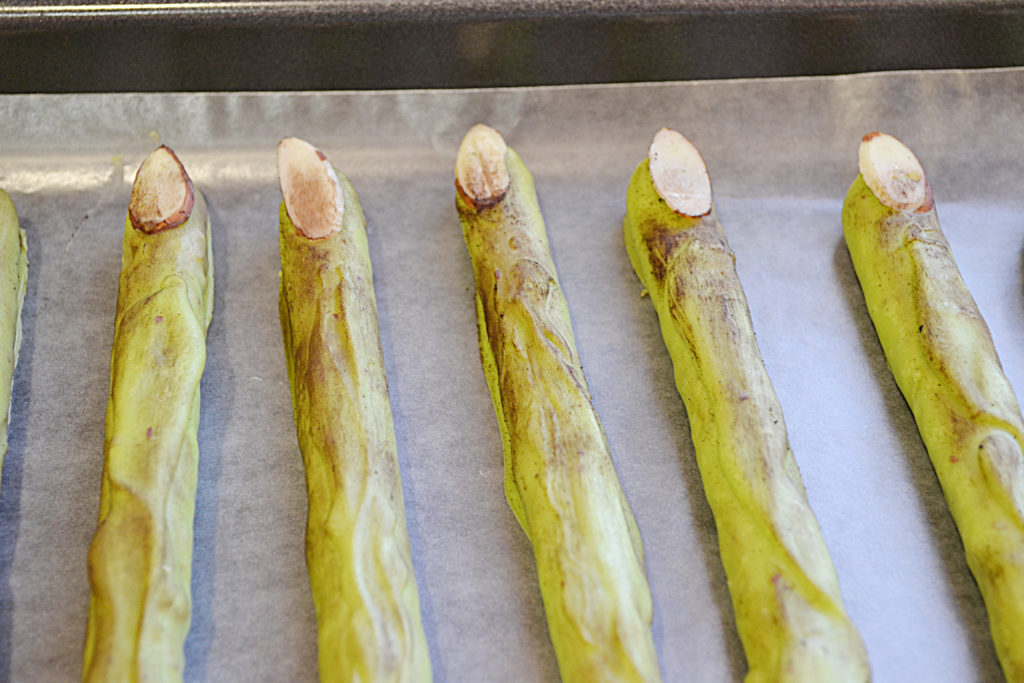
- Put a piece of parchment paper on a cookie sheet.
- Go through the sliced almonds to find the “perfect” fingernails and set aside.
- Pour candy in a microwave safe bowl or jar.
- Microwave 60 seconds at 100% , stir, microwave again in 30 second intervals at 60% until candy is melted and creamy.
- NOTE: If the candy is too thick…add 1 tablespoon of shortening to thin out the candy.
- Once the candy is melted and coating consistency, use a spoon and coat the pretzel rod with candy, tap on the edge of the bowl to get rid of any excess candy.
- Lay on prepared cookie sheet and add an almond.
- Place the finished pretzels in the refrigerator to harden.
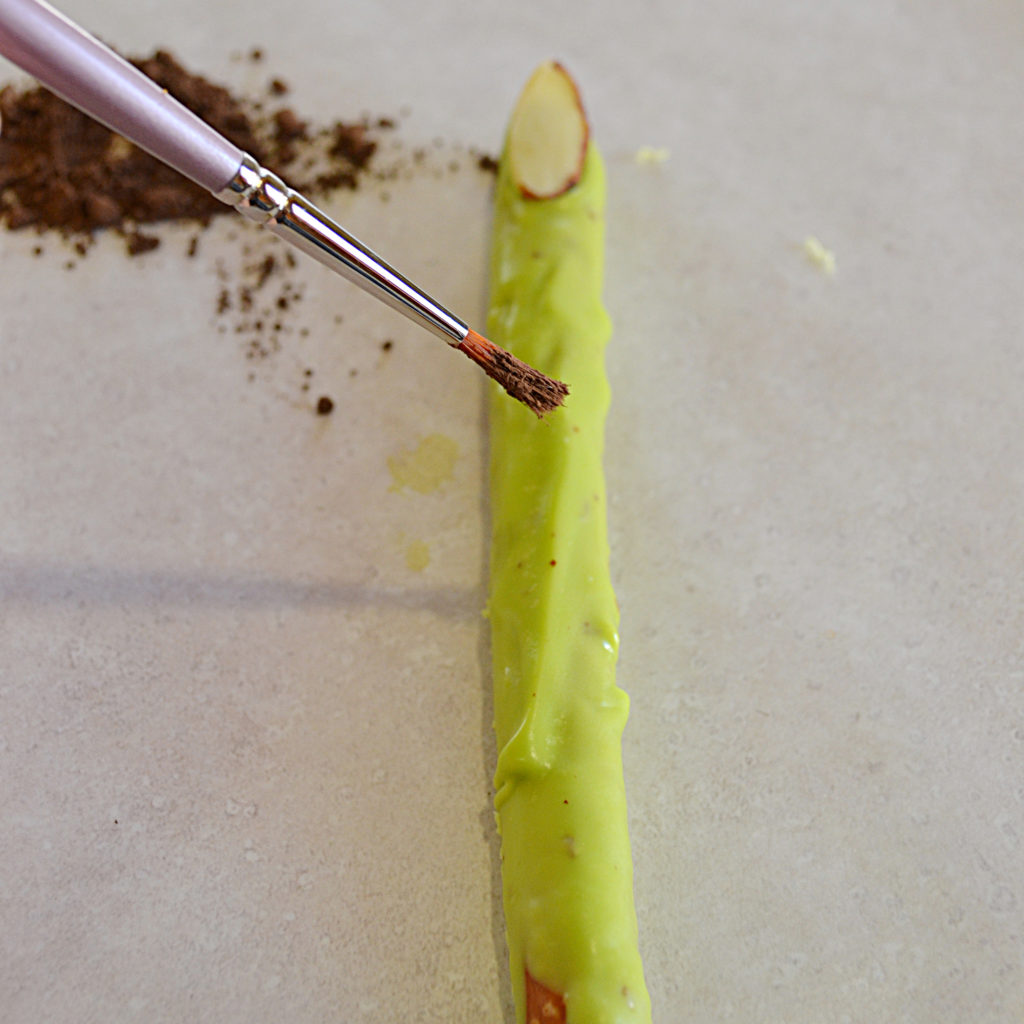
- Once candy has hardened, use a spoon and add a thick layer on the top in a squiggly line. Place back in the refrigerator to harden.
- When last layer of candy is hardened use a paint brush and dust on cocoa.
- Make sure you also add cocoa to the fingernails (almonds).
HOW EARLY CAN I DECORATE THE PRETZELS?
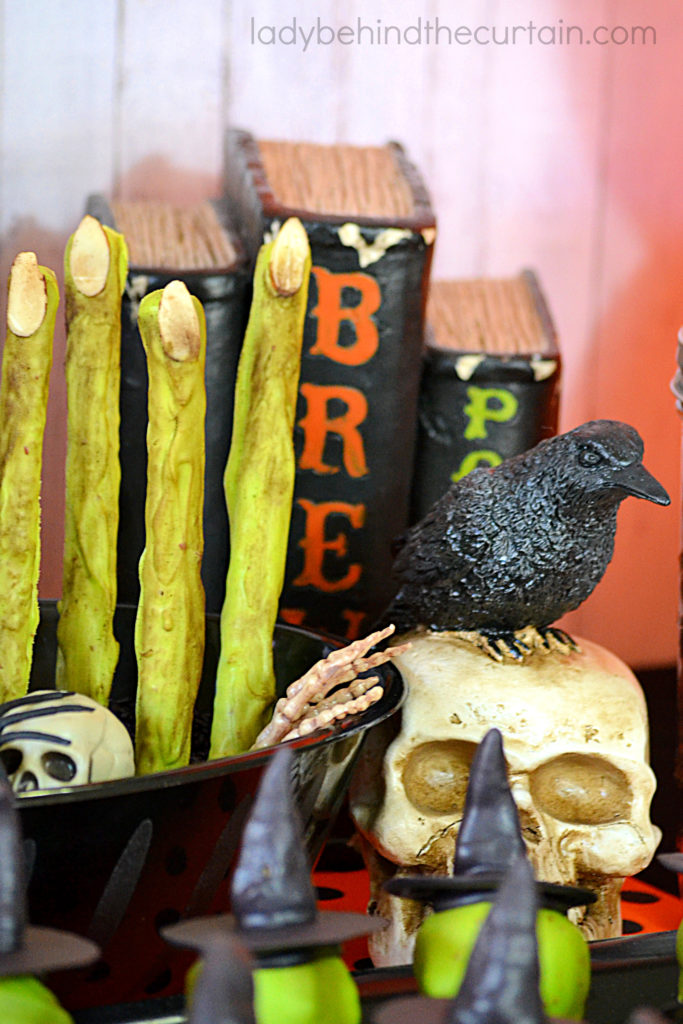
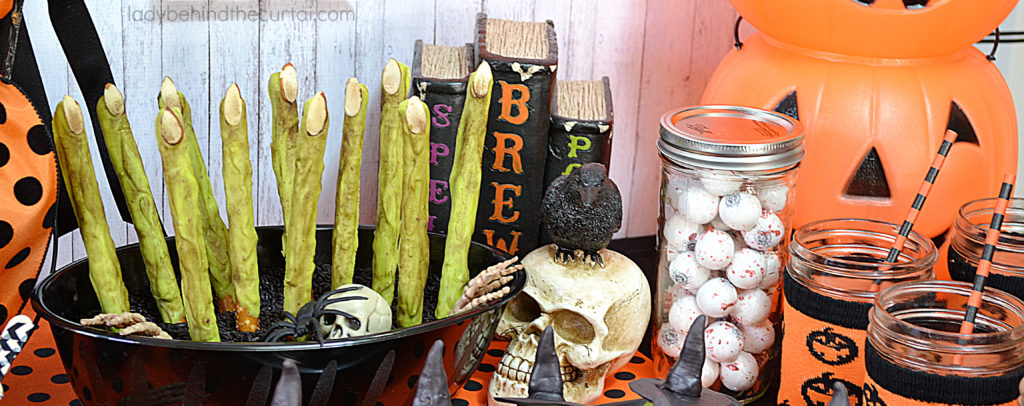
THE VERSATILITY OF THESE WICKED WITCH FINGER HALLOWEEN PRETZELS
- First, I’ll add the obvious and that is to simply put them in a jar and place them on the dessert table.
- Use a serrated knife and cut the pretzel rods the height of a cake, decorate pretzels and place them around the outside of a frosted layered cake. BAM!
- Hand out as party favors. You can purchase cellophane bags made specifically for pretzels. Add a thank you tag and you’re set!
- Create a centerpiece! Fill containers (like jars or buckets) with the decorated pretzels and line them down the center of a table. Perfect for a kids party!
DID YOU KNOW?
There is a whole category dedicated to decorated pretzels? CLICK HERE FOR OVER 30 IDEAS→DECORATED PRETZELS FOR ANY OCCASION
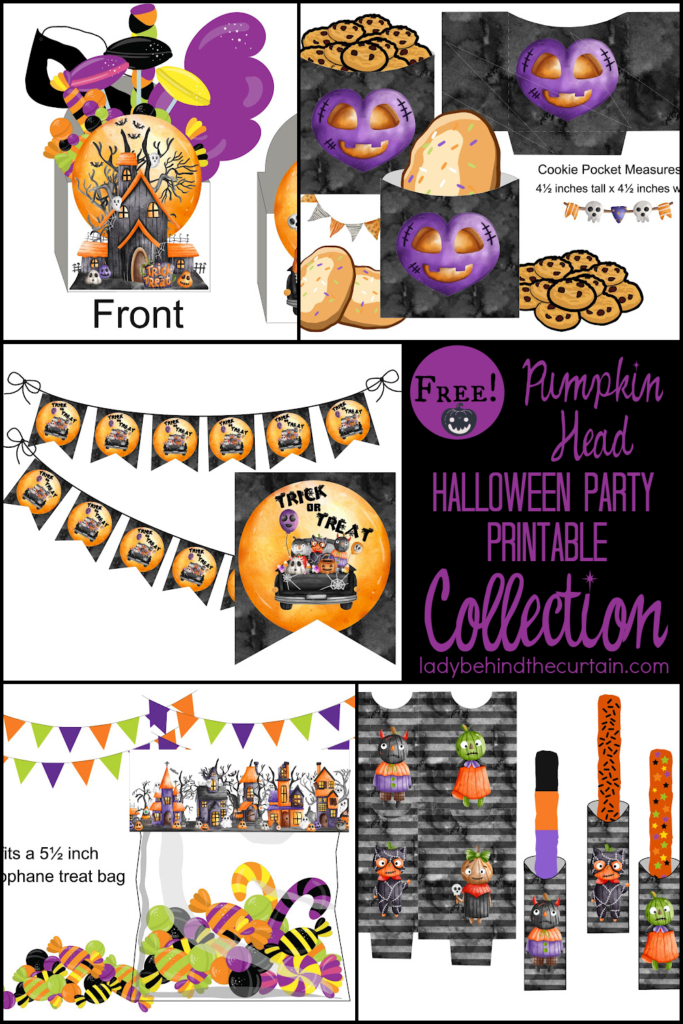
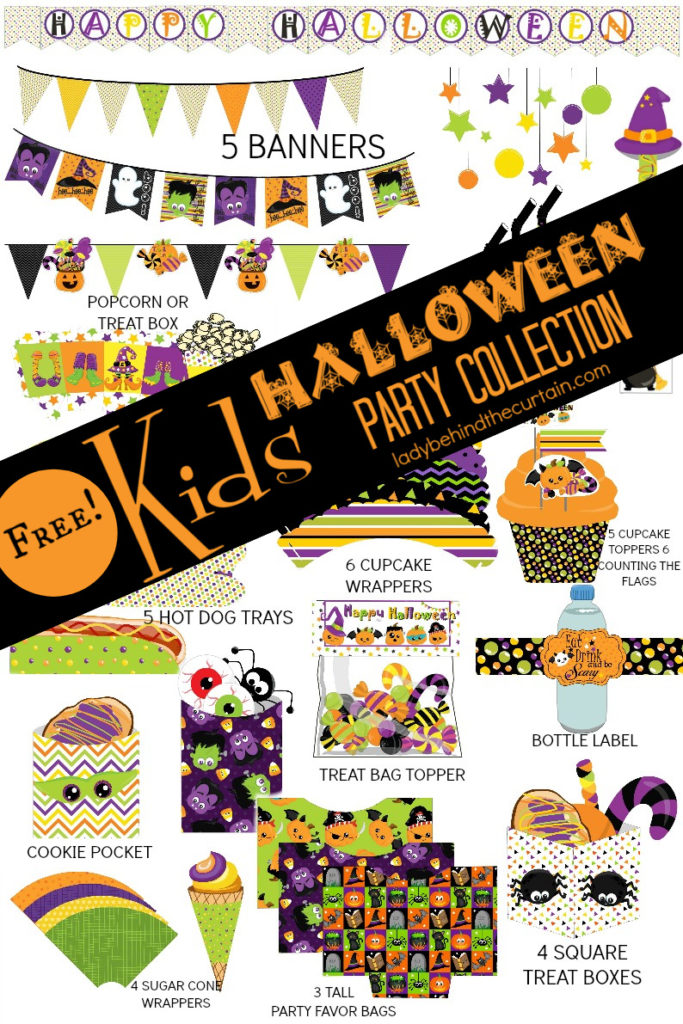
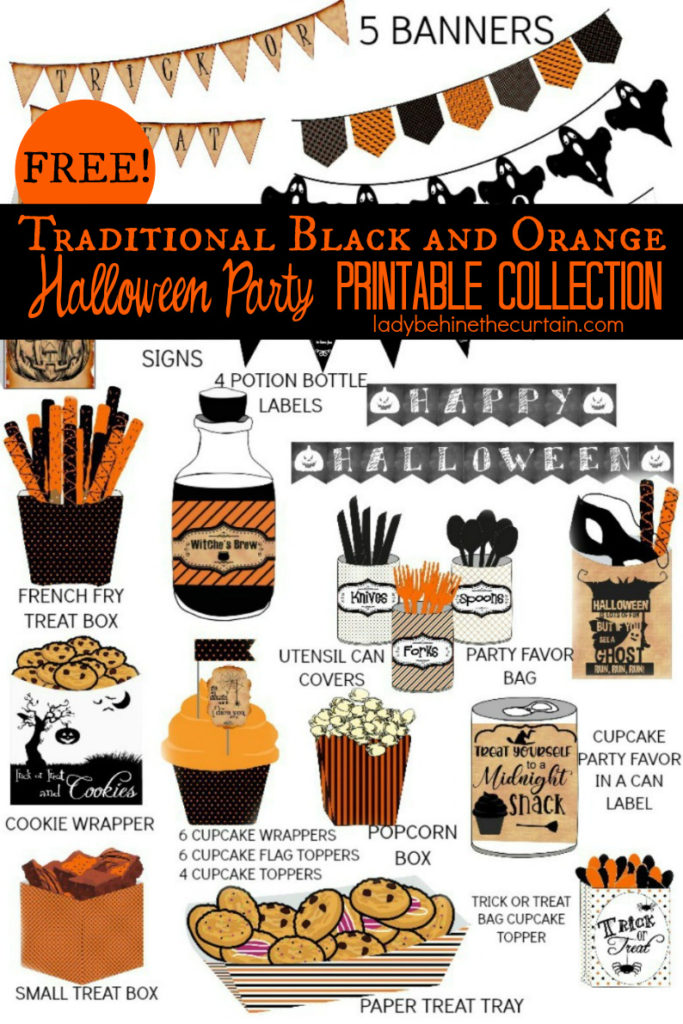
HALLOWEEN PARTY FREE PRINTABLE COLLECTIONS
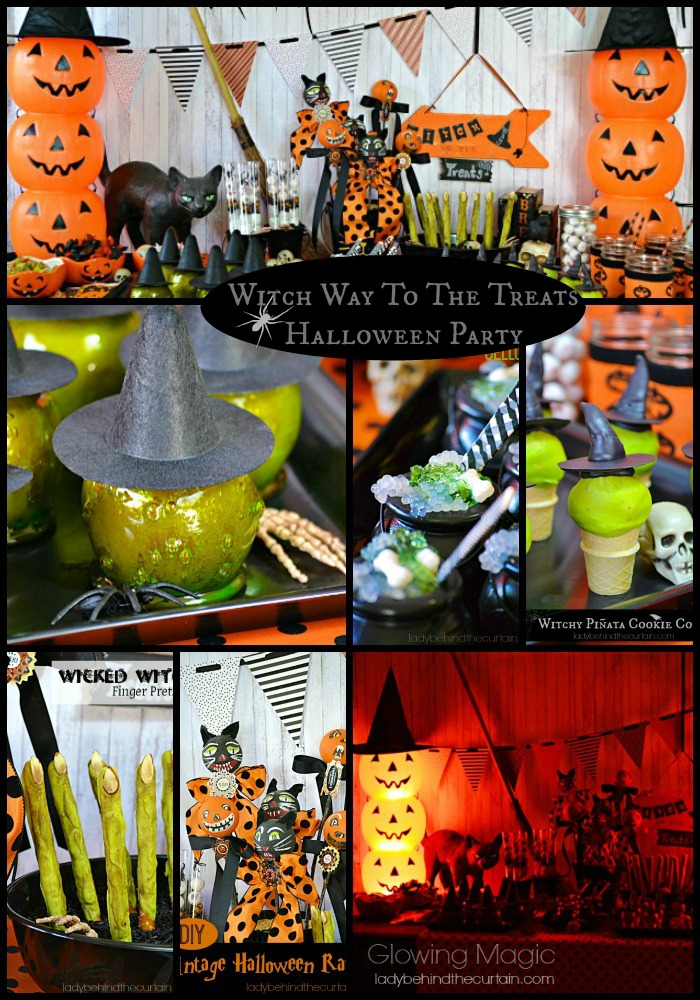
WITCH WAY TO THE TREATS HALLOWEEN PARTY
MORE DECORATED HALLOWEEN PRETZEL IDEAS


Wicked Witch Finger Halloween Pretzels
Yield:
ABOUT 20 PRETZEL RODS
Create a fun, delicious and creepy treat for your Halloween Party!
Ingredients
- 20 pretzel rods
- 1 (12 ounce) bag lime green candy melts ( I use Wilton)
- 20 sliced almonds
- cocoa powder, for brushing
- small paint brush
- optional: shortening
Instructions
- Put a piece of parchment paper on a cookie sheet.
- Go through the sliced almonds to find the "perfect" fingernails and set aside.
- Pour candy in a microwave safe bowl or jar.
- Microwave 60 seconds at 100%, stir, microwave again in 30 second intervals at 60% until candy is melted and creamy.
NOTE: If the candy is too thick...add 1 tablespoon of shortening to thin out the candy.
- Once the candy is melted and coating consistency, use a spoon and coat the pretzel rod with candy, tap on the edge of the bowl to get rid of any excess candy.
- Lay on prepared cookie sheet and add an almond.
- Place the finished pretzels in the refrigerator to harden.
- Once candy has hardened, use a spoon and add a thick layer on the top in a squiggly line. Place back in the refrigerator to harden.
- When last layer of candy is hardened use a paint brush and dust on cocoa.
NOTE: Make sure you also add cocoa to the fingernails (almonds).
NEVER MISS A POST

Those look almost real! Lol! Have a wicked week!
Linda
Thanks Linda, They are kind of fun. 🙂