
Orange Cream Mini Loaf Cakes

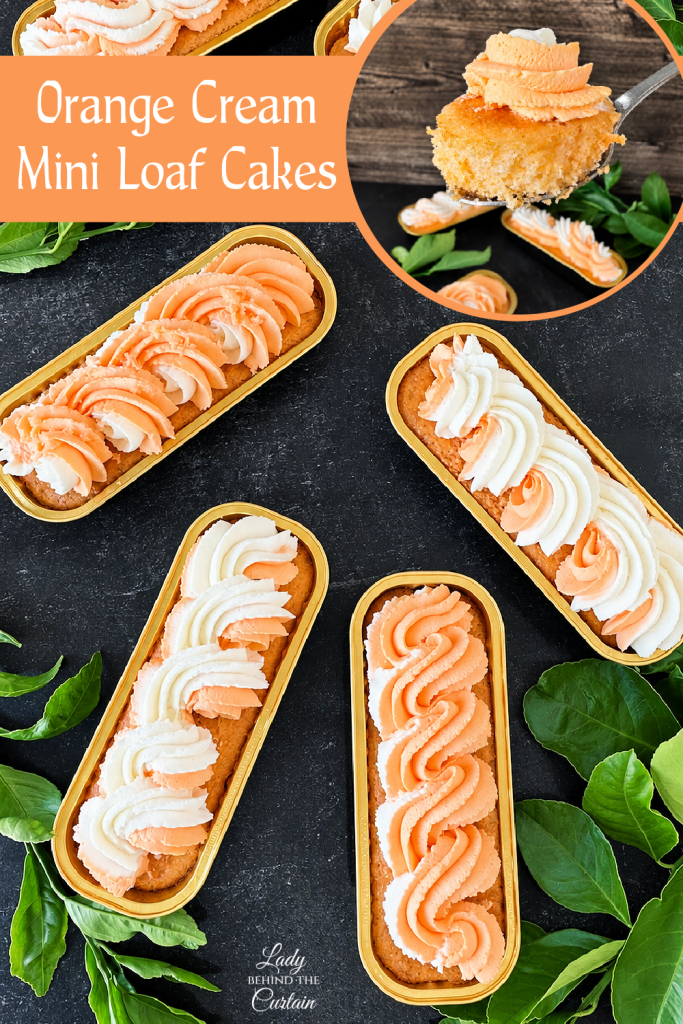
Bright orange cake topped with swirls of fluffy vanilla cream makes these Orange Cream Mini Loaf Cakes a fun way to turn the familiar orange-and-vanilla combination into an individual dessert. The cake starts with a vanilla cake mix and gets layers of orange flavor from orange gelatin, orange soda, and orange extract. A stabilized vanilla whipped cream frosting finishes each little loaf with soft orange-and-white swirls.
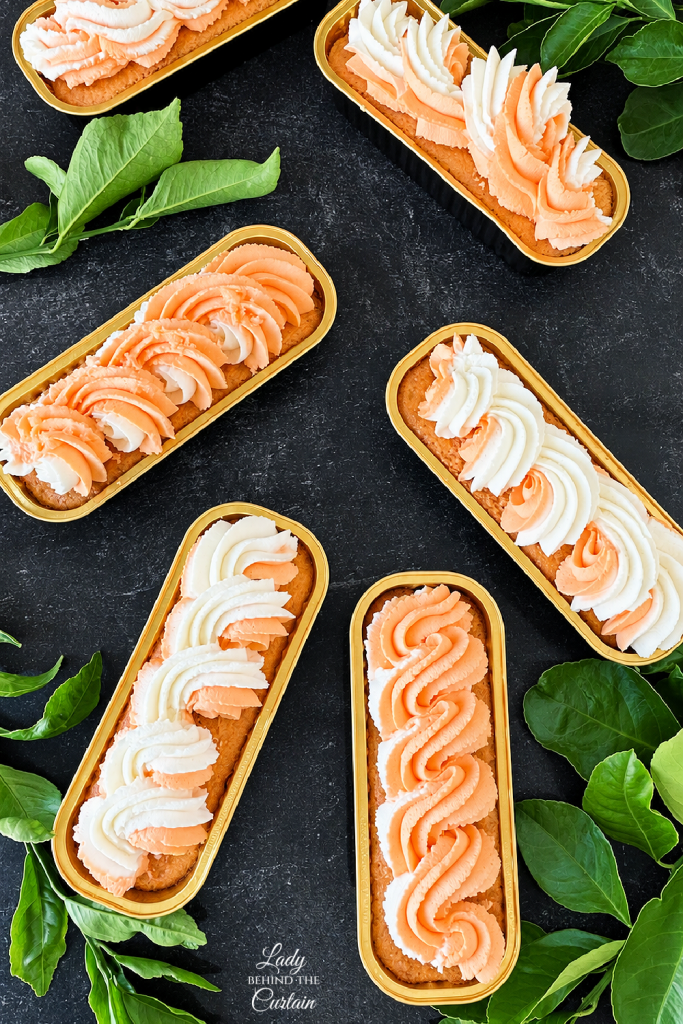
These mini cakes are also Recipe #11 of the Black Hollow Roadside Market. With their orange color, individual bakery-style presentation, and tall swirls of frosting, they fit right in among the homemade treats filling the shelves of this strange little roadside stand. They bring Halloween color to the market without needing to be themed or decorated as Halloween cakes.
There is more happening here than the pretty frosting, though. The batter gets an intentional 15-minute rest before baking, the whipped cream is stabilized so it can hold those beautiful piped ridges, and the completely decorated cakes can be made ahead and even frozen. Let’s take a closer look at the little details that make these mini loaves work.
Building Orange Cream Flavor Into Every Little Loaf
The orange flavor in these cakes doesn’t come from a single ingredient. Orange gelatin, orange soda, and orange extract are all added to the vanilla cake mix, giving the cake several orange elements before the frosting ever enters the picture.
The vanilla half of the orange cream combination comes from the topping. Instead of making the cake orange and then covering it with more orange-flavored frosting, the mini loaves are finished with stabilized vanilla whipped cream. That keeps the two main flavors distinct: orange in the cake and creamy vanilla on top.
Melted butter and sour cream are also part of the batter, along with the eggs. The finished dessert has a lot going on in a very small package, which is part of the appeal of baking it as a mini loaf rather than a large cake.
| The Orange Cream Lineup | Where It Appears |
|---|---|
| Vanilla | Cake base and whipped cream frosting |
| Orange gelatin | Cake batter |
| Orange soda | Cake batter |
| Orange extract | Cake batter |
| Orange color | Cake and half of the piped frosting |
| Creamy finish | Stabilized vanilla whipped cream |
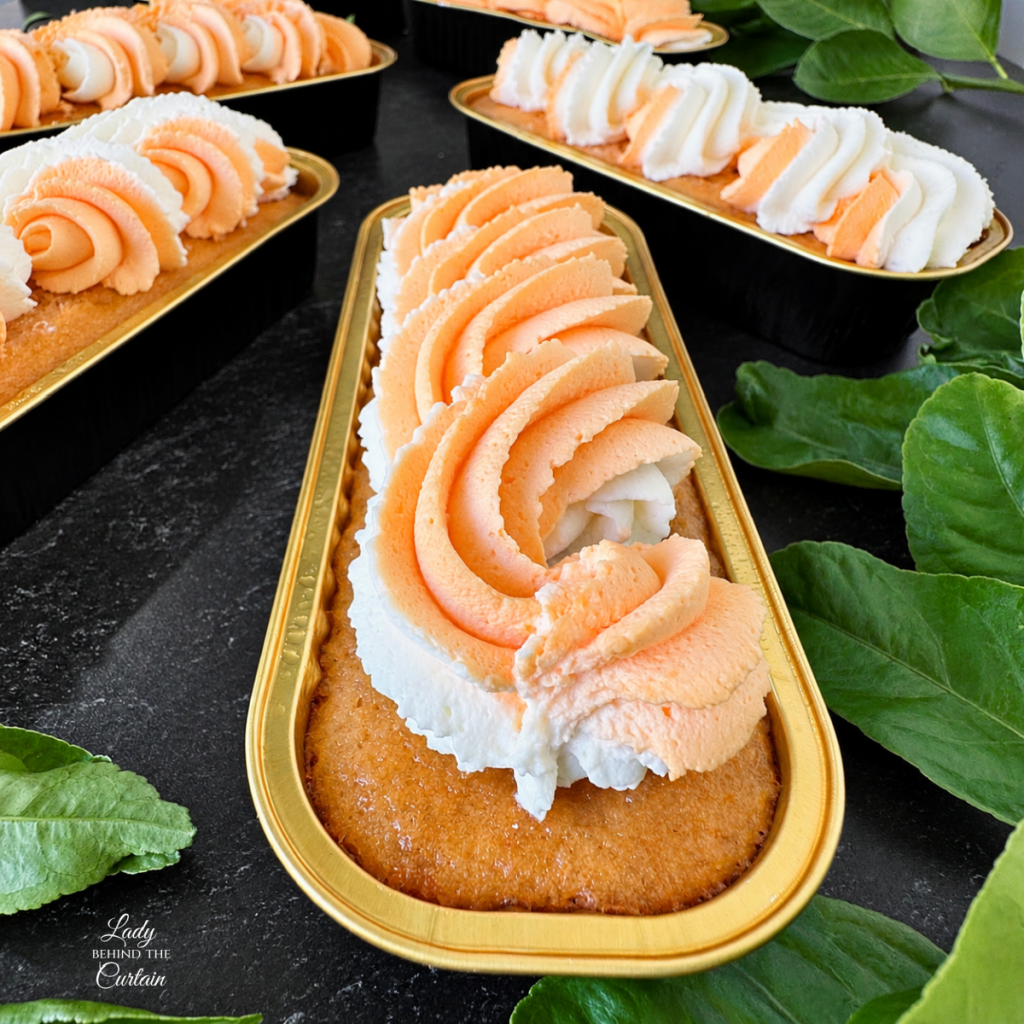
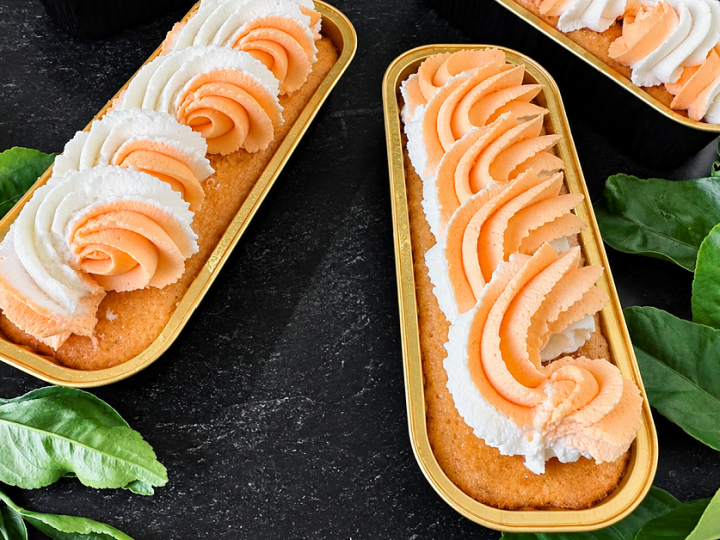
The orange-and-white frosting also provides a visual clue to the flavor before anyone takes a bite. Rather than covering the cake with a single solid color, the two-tone piping lets both sides of the orange cream theme show through.
What Happens When Cake Batter Rests for 15 Minutes
After the ingredients are combined, this batter gets an unusual extra step: it rests for 15 minutes before being portioned into the mini loaf pans. We usually think of cake batter as something that should go directly into the oven, so it’s worth understanding what can happen during that short wait.
Once flour comes into contact with liquid, it begins absorbing moisture. That process doesn’t suddenly stop when the mixer is turned off. During the 15-minute rest, the dry ingredients continue to hydrate as they remain in contact with the liquid ingredients in the batter.
The rest period does not mean the batter should be mixed longer. Mixing provides mechanical action that encourages gluten development once flour and liquid have been combined. That’s why the batter is mixed only until everything is combined and the instructions specifically warn against overmixing. The 15-minute rest occurs after mixing is complete.
Leavening is another reason the timing matters. Depending on the leavening system used in the cake mix, chemical reactions can begin after the dry ingredients are moistened. The orange soda also contributes to carbonation, and carbonation doesn’t last indefinitely in an open bowl. A planned 15-minute rest should therefore not be interpreted as meaning that leaving cake batter on the counter for an hour would be even better.
For these mini loaves, stick with the 15-minute rest used in the recipe rather than extending it. This is one of those times when understanding the science is helpful, but following the tested recipe is even more important.
Wow! I Never Knew That… Flour continues absorbing liquid after mixing stops. This ongoing hydration is one reason a batter may appear slightly different after sitting for several minutes. At the same time, leavening reactions may already be underway, so longer isn’t automatically better when it comes to resting cake batter.
Behind the Curtain Tip: Set a timer as soon as the batter begins resting. Fifteen minutes is long enough to prepare the next part of the recipe, but it’s also long enough to get distracted and forget exactly when the rest of the recipe started.
Small Pans Call for Careful Portioning
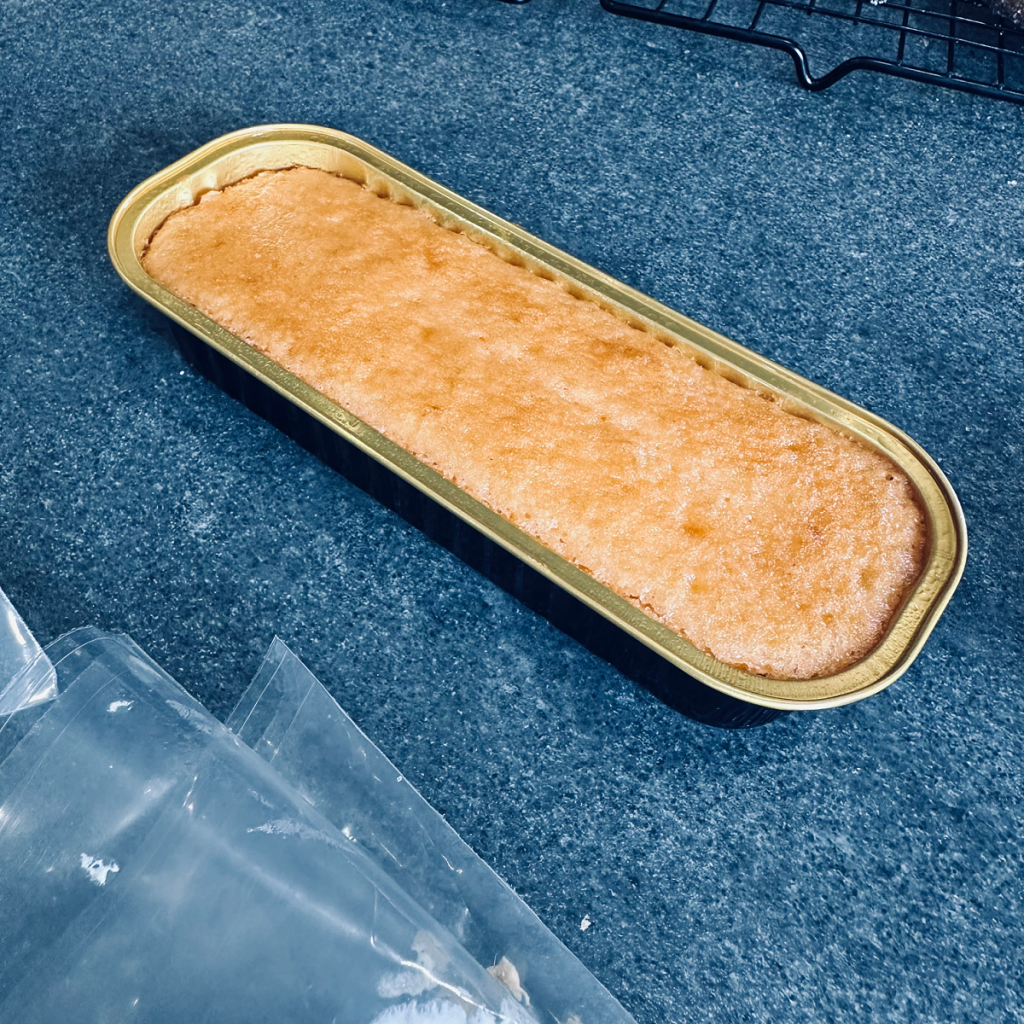
Mini loaf cakes have a different baking rhythm from a large loaf cake simply because there is much less batter in each pan. For this recipe, each prepared mini loaf pan receives ⅓ cup of batter.
Measuring that amount rather than estimating it by eye helps keep the cakes consistent. If one pan receives considerably more batter, it may not finish baking at the same time as the others. Equal portions also give the finished cakes a more uniform appearance when they’re lined up together.
These cakes were baked at 350°F for 14 minutes in a convection oven. That detail matters because readers using conventional electric or gas ovens may need to adjust the baking time. Rather than relying solely on 14 minutes, check the center with a wooden toothpick. When it comes out clean, the cake is done.
Mini Loaf Baking Guide
| Oven Temperature | 350°F |
| Batter Per Pan | ⅓ cup |
| Tested Baking Time | 14 minutes |
| Oven Used for Testing | Convection |
| Doneness Test | Wooden toothpick comes out clean |
Think of the 14 minutes as useful information about how the recipe performed in the oven where it was developed, not a guarantee that every oven will behave the same way. The toothpick gives you another piece of information specific to the cakes actually baking in front of you.
A Lighter Frosting With Enough Structure for Piping
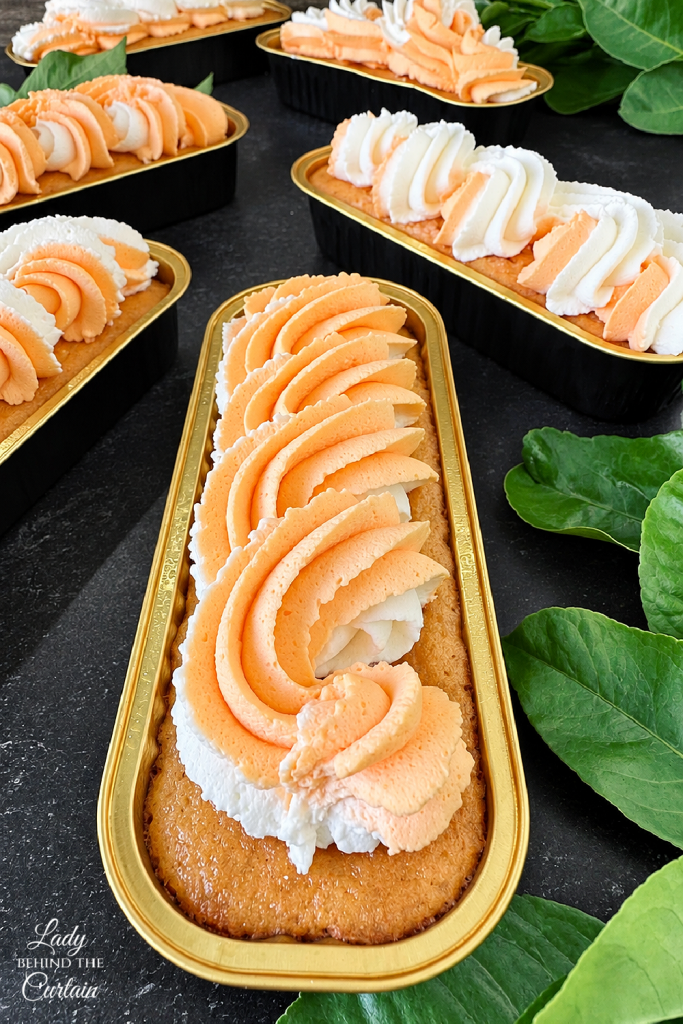
Instead of a traditional buttercream, these orange mini loaves are topped with stabilized vanilla whipped cream frosting. Heavy whipping cream, powdered sugar, vanilla pudding mix, and vanilla extract create a topping that is light and fluffy but can still be piped into substantial decorative swirls.
Temperature is important when whipping cream. Before starting, place the mixing bowl and whisk attachment in the freezer for 15 minutes, and keep the heavy whipping cream cold. Chilling the equipment helps keep the cream cold while it is being whipped.
The frosting begins on low speed until the mixture is lightly thickened. From there, the mixer speed is gradually increased until the cream reaches stiff peaks. That final consistency is particularly important here because the frosting isn’t simply being spooned onto the cakes. It needs sufficient structure to pass through a large closed-star piping tip while retaining the ridges of the finished design.
One of the most useful things about this frosting is that its structure was actually tested over time. I tested the whipped cream for three days, and it was just as light and fluffy as the day I made it. I’m sure it would have lasted longer, but we ate it!
That three-day test is particularly helpful when these cakes are being prepared for a party or dessert table. You aren’t relying on a guess about how the frosting might perform the next day. We know exactly how it performed during those three days.
The Secret Behind the Orange-and-White Swirls
The two-tone frosting gives these cakes their bakery-style finish, but the technique doesn’t require making two different frostings. Once the stabilized vanilla whipped cream has reached stiff peaks, it is divided into two batches. One remains white while the other is tinted with orange gel food coloring.
Gel coloring is very concentrated, so add only one drop at a time. You can always deepen the orange with another drop, but it’s much harder to correct frosting once you’ve made it darker than you intended.
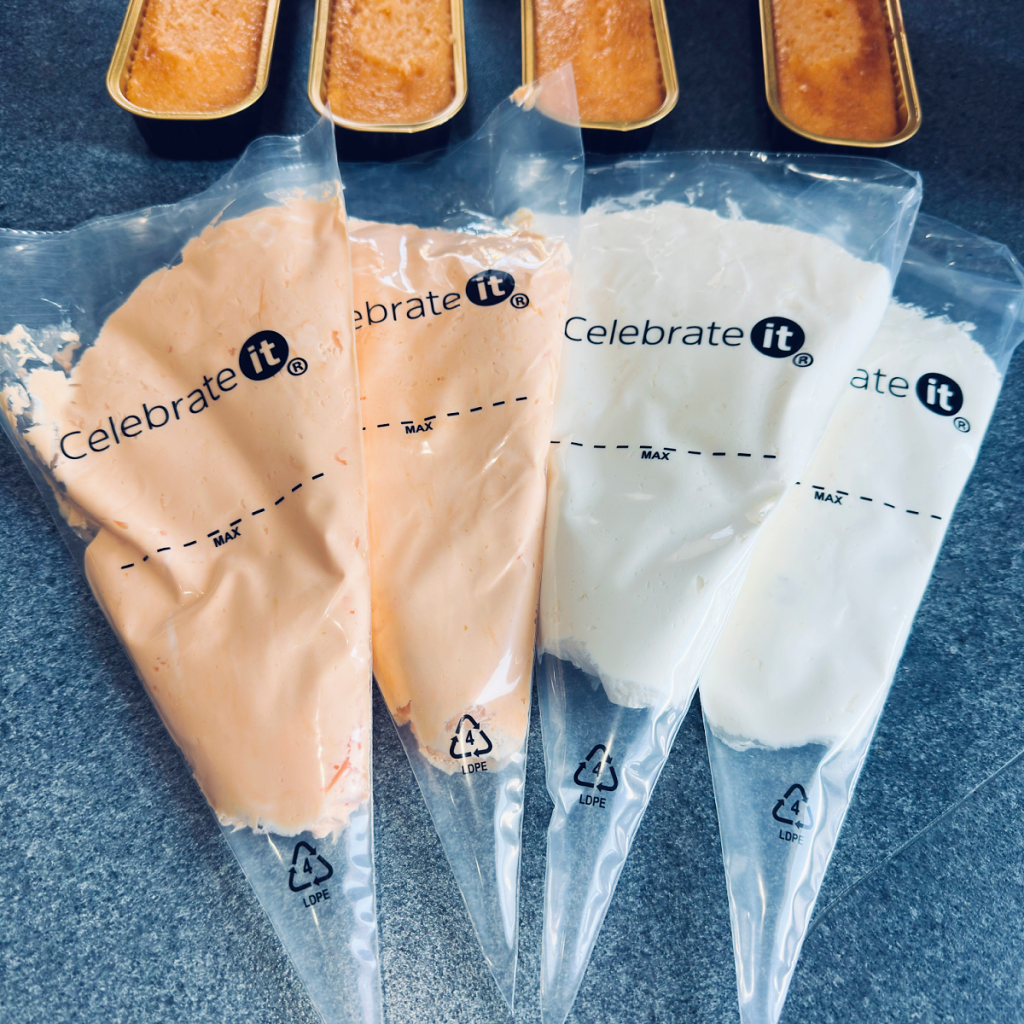
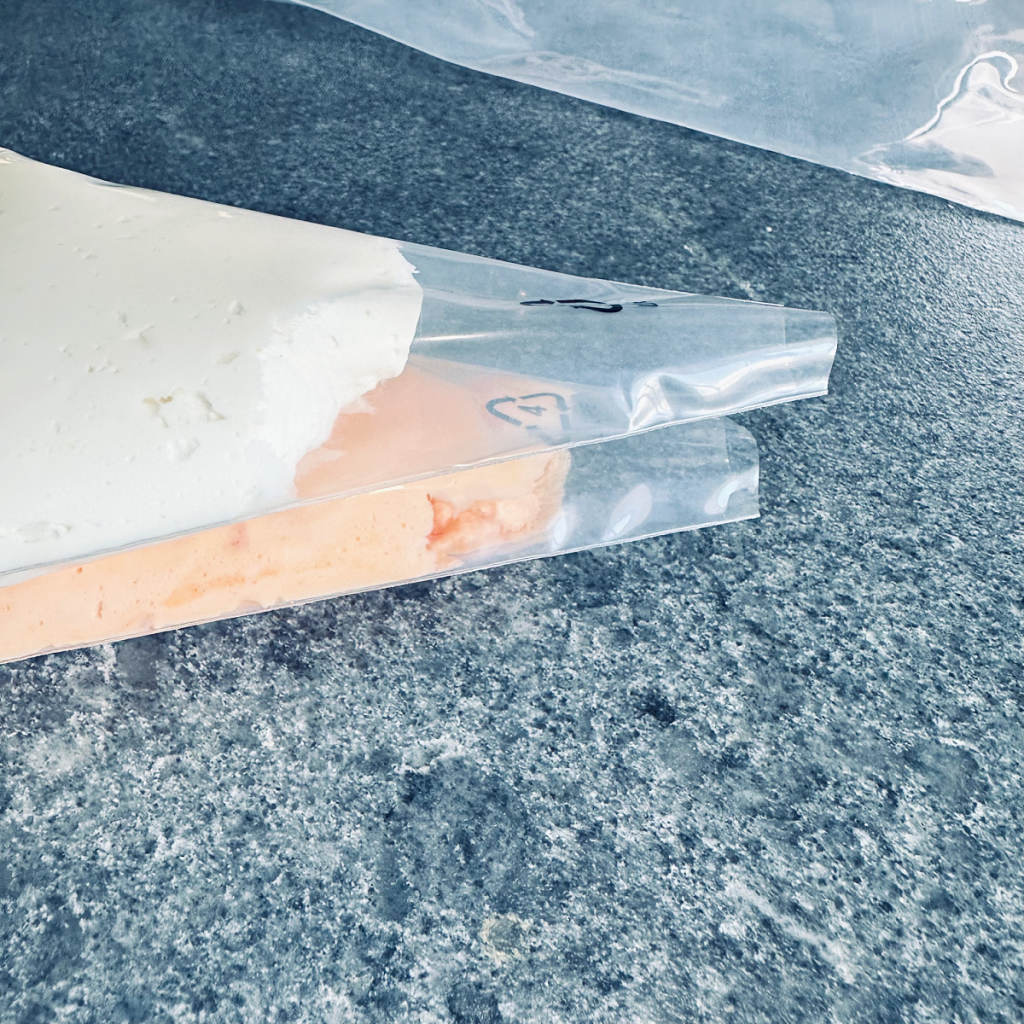
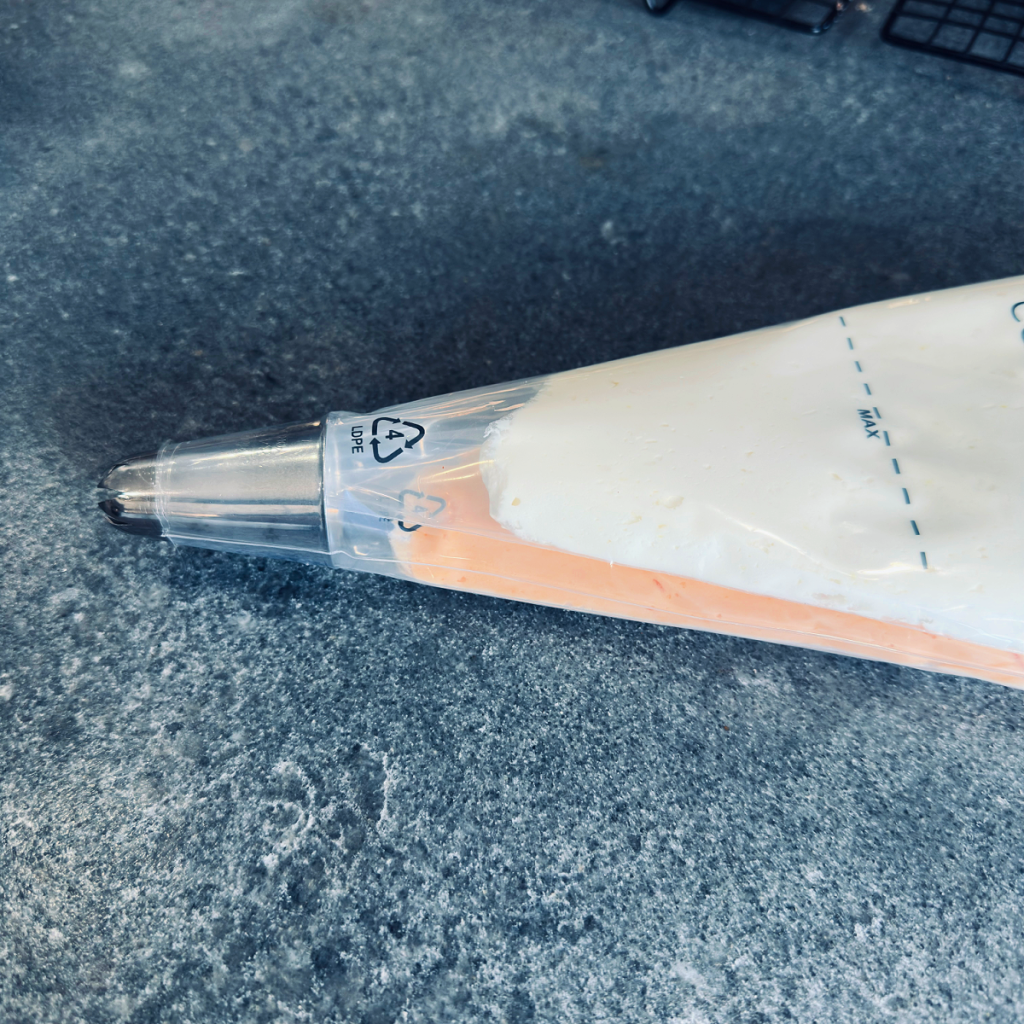
The real trick happens with the piping bags. The white frosting goes into one small piping bag and the orange frosting into another. A larger piping bag is fitted with a closed-star tip wide enough to accommodate both of the smaller bags. The ends of the small bags are snipped, and then the two bags are placed side by side inside the larger one.
For the cakes shown here, I used piping tip #847.
| Two-Tone Piping Setup | What to Use |
|---|---|
| White frosting | 1 small piping bag |
| Orange frosting | 1 small piping bag |
| Outer bag | 1 large piping bag |
| Decorating tip | #847 closed star |
| Before decorating | Squeeze until both colors appear |
Before moving to the first cake, squeeze the piping bag until both orange and white frosting are coming through the decorating tip. This prevents the beginning of the first loaf from receiving only one color.
The long top of a mini loaf is also a wonderful canvas for this decorating style. Rather than piling one rosette in the center, you can carry the frosting along the length of the cake and let the ridges from the large star tip become part of the presentation.
Behind the Curtain Tip: Don’t worry about making every orange-and-white swirl identical. Because the two colors come from separate bags, the balance will naturally shift slightly as you pipe. One section may show more orange and another more white, giving the finished cakes the variation you see in bakery displays.
A Bright Little Cake Arrives at Black Hollow
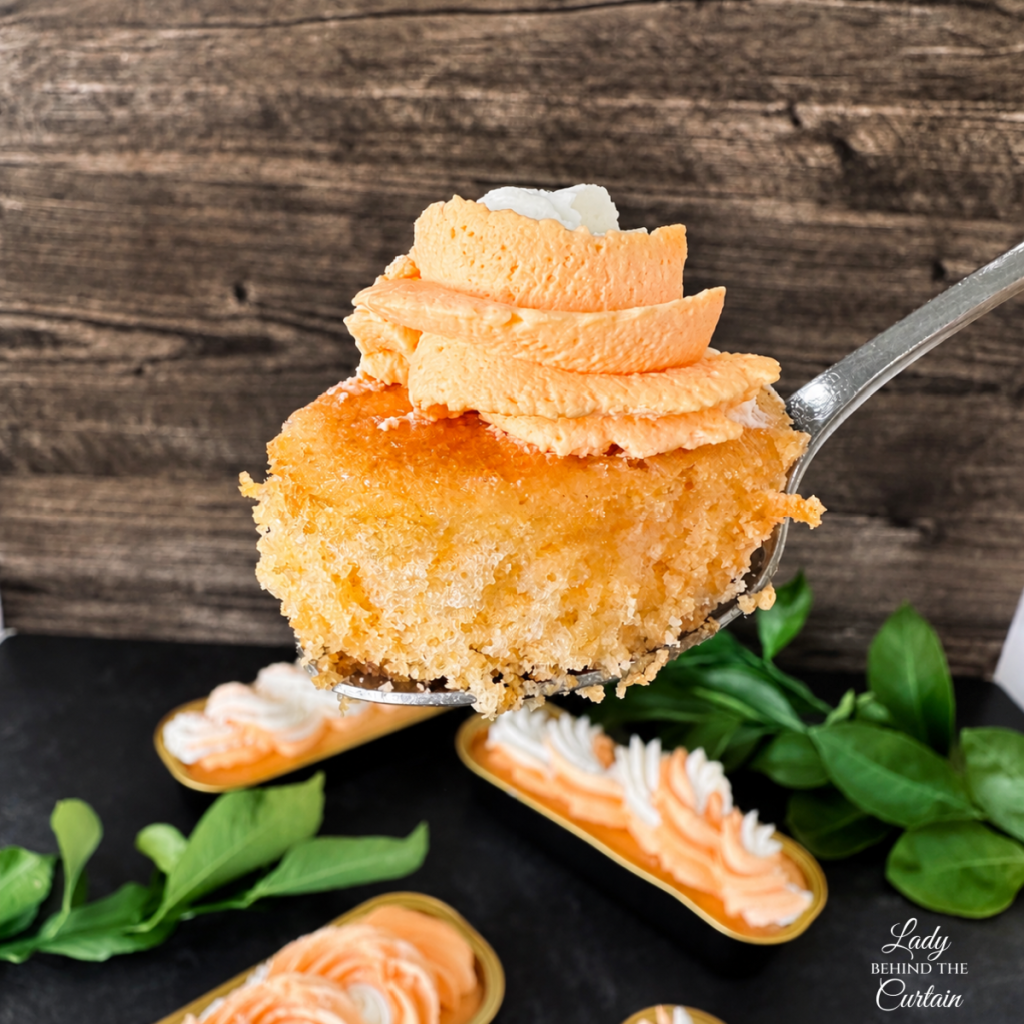
The shelves of the Black Hollow Roadside Market have been filling with homemade treats, pantry staples, and fall flavors, and these Orange Cream Mini Loaf Cakes are Recipe #11 in the series.
Their orange color makes them an easy fit for the Halloween market, but they don’t need ghosts, bats, spiders, or other decorations to belong there. The color provides the seasonal connection while the cakes themselves retain the look of something you might find in an old-fashioned bakery case.
The individual loaf containers add to that feeling. Each cake is already sitting in its own little pan, and once the orange-and-white frosting is piped across the top, it becomes a complete individual dessert ready for the market display.
That presentation also makes the cakes versatile beyond Black Hollow. Orange cream isn’t limited to Halloween, and nothing about the cake itself prevents it from appearing at a birthday, shower, summer party, or any occasion where individual desserts make serving easier.
From Black Hollow to Your Dessert Table
| For… | Try This |
|---|---|
| Halloween | Let the orange-and-white color become part of the dessert display |
| A Party | Arrange several loaves closely together for a bakery-case look |
| Individual Servings | Give each guest a complete mini loaf |
| Sharing | Add the plastic lid to protect the decorated cake |
| Making Ahead | Refrigerate covered until needed |
| Longer Storage | Freeze the decorated cakes in an airtight container |
Because each person receives a whole mini cake, there is no need to stop and cut a larger cake at serving time. The individual portions are established before the cakes ever enter the oven.
Make-Ahead Cakes With the Decorating Already Finished
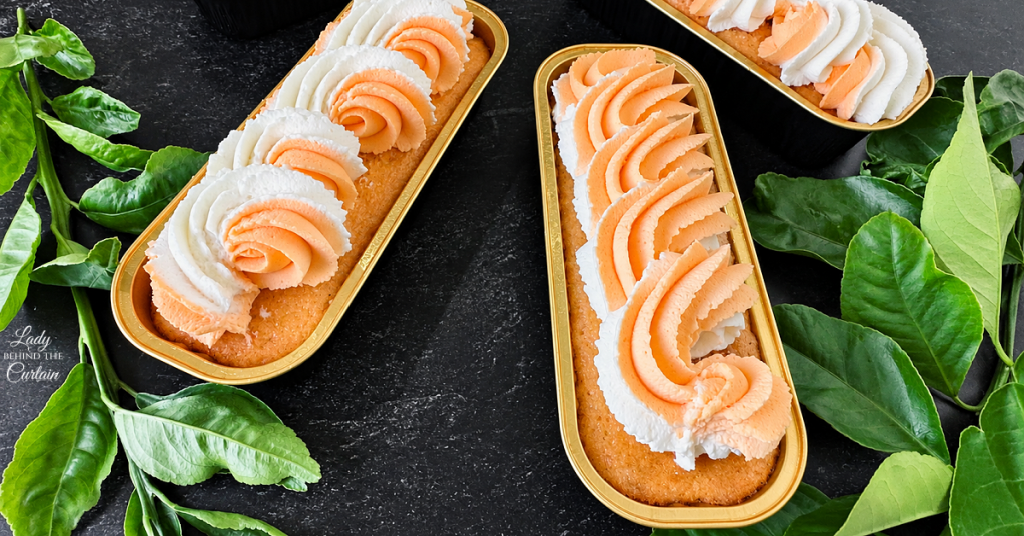
One of the best practical features of this dessert is that the finished cakes don’t have to be a last-minute project. Once decorated, the mini loaves can be stored covered in the refrigerator until ready to use.
The three-day frosting test gives you additional information for planning. During that test, the stabilized whipped cream remained just as light and fluffy as it was on the first day. That’s useful when deciding whether the frosting needs to be made immediately before serving.
For even longer make-ahead planning, these mini loaf cakes freeze beautifully once decorated. Put the plastic top on each finished loaf, then place the covered loaves in an airtight container.
Freezing them after decorating is particularly convenient because you aren’t simply moving unfinished cakes into the freezer and postponing the work. The orange-and-white swirls can already be piped, so the cakes go into storage looking like finished desserts.
A Simple Planning Timeline
Baking Day: Mix the batter, let it rest for 15 minutes, portion it, bake the mini loaves, and let them cool before decorating.
Decorating Time: Chill the bowl and whisk, prepare the stabilized whipped cream, divide and color the frosting, and pipe the orange-and-white swirls.
Short-Term Storage: Cover the finished mini loaves and keep them refrigerated until you’re ready to use them.
Longer-Term Storage: Put the plastic lids on the decorated loaves, then place them in an airtight container before freezing.
This kind of flexibility is especially helpful when the mini loaves are only one part of a larger dessert table. Getting an entire dessert finished ahead of time leaves fewer things competing for attention when it’s time to put everything together.
Why These Fun Mini Cakes are Worth Making
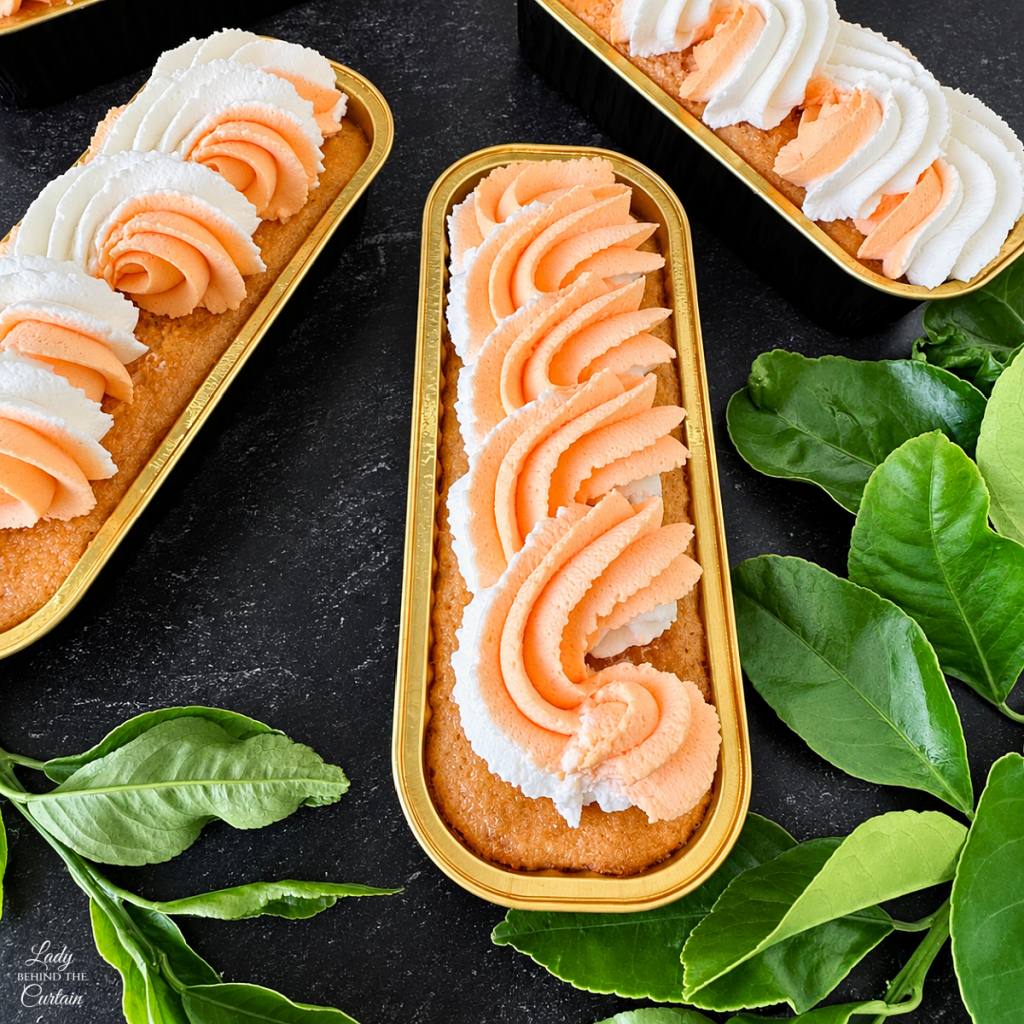
These Orange Cream Mini Loaf Cakes take a familiar orange-and-vanilla flavor combination and turn it into an individual bakery-style dessert. Instead of relying on a single ingredient for the orange flavor, the cake combines orange gelatin, orange soda, and orange extract with a vanilla cake base, while the stabilized whipped cream provides a creamy vanilla finish.
The recipe also has several practical advantages. The measured ⅓-cup portions make it easy to divide the batter among the mini pans; the stabilized frosting holds decorative piping; and my three-day test showed that the whipped cream remained light and fluffy throughout.
Then there is the make-ahead factor. The completely decorated cakes can be covered and refrigerated, and they can even be frozen with those orange-and-white swirls already in place. That means the part that makes the cakes look special doesn’t automatically have to be saved until the last minute.
For the Black Hollow Roadside Market, they add a bright splash of orange to the shelves while still looking like genuine little bakery treats. Recipe #11 is officially ready for the roadside stand.
Shop the Black Hollow Roadside Market
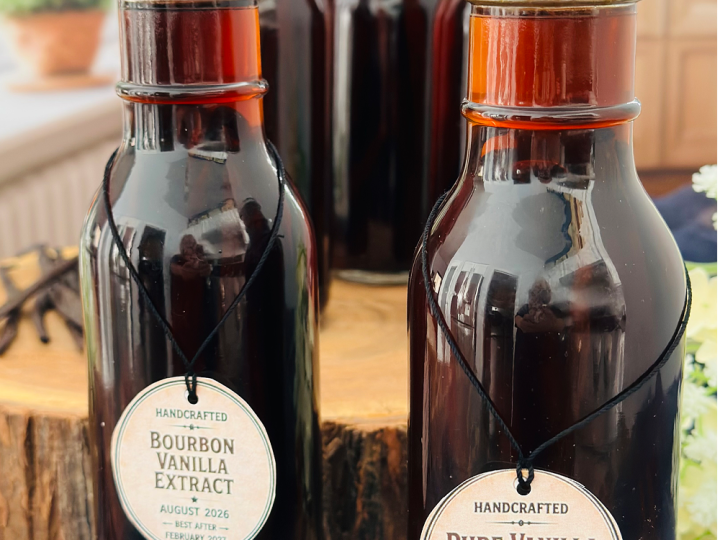
Welcome to the Black Hollow Roadside Market, a curious little roadside stand where the shelves are crowded, the lanterns are glowing, and there’s always something homemade waiting to be discovered. What began as a collection of fall flavors has turned into a market filled with jars of caramel and fruit toppings, handcrafted extracts, cozy spice blends, freshly baked treats, old-fashioned candies, and a few delightfully spooky surprises.
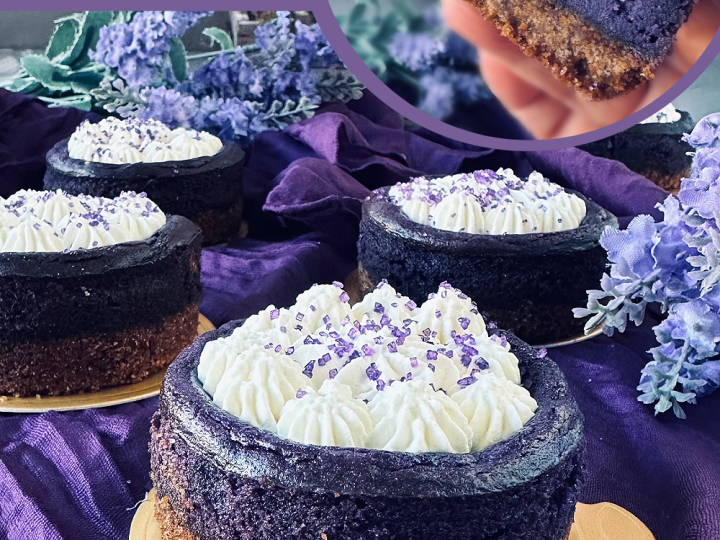
This page is your guide to everything on the shelves at Black Hollow. Each item you see in the market has its own recipe, from pantry staples like Apple Pie Spice and Pure Vanilla Extract to seasonal favorites like Apple Cider Caramel Sauce, Mini Ube Cheesecakes, Candy Corn Cookies, and all the other treats that have found their way to the stand.
Some recipes were created especially for Black Hollow, while others are longtime Lady Behind the Curtain favorites that were simply too good to leave behind. Together, they make up one wonderfully mismatched little roadside market filled with things that are homemade, baked, bottled, and made for sharing.
So wander through the shelves, peek inside the jars, and see what looks good. Every recipe from the Black Hollow Roadside Market is gathered below, and as new treats arrive at the stand, you’ll find them added here.
THE MARKET IS OPEN. COME SEE WHAT'S ON THE SHELVES.
Homemade Pumpkin Spice and Pumpkin Spice Caramel Coffee Creamers

I think one of the most fun things about these mini loaf cakes is watching the orange and white frosting come through the piping tip together. You never get exactly the same pattern twice, and that’s perfectly fine. Once all the finished cakes are lined up together, those slightly different swirls make the whole group even prettier.
I also appreciate a dessert that gives me options. I can decorate these ahead, keep them covered in the refrigerator, or put the finished cakes in the freezer. When I’m preparing several desserts or putting together a party table, having something completely finished ahead of time is always welcome.
And now these little orange cakes have another job to do. They’re heading onto the shelves of the Black Hollow Roadside Market as Recipe #11, bringing a little orange cream sweetness to our strange roadside stand.
I hope you have as much fun piping those orange-and-white swirls as you do sharing the finished cakes. Whether they end up on a Halloween table, at a party, or simply handed to someone who deserves their very own little cake, they’re meant to be enjoyed and shared.
Happy Baking!
Sheryl
LATEST POSTS
- The Complete Guide to Baking Scoops: Sizes, Uses, and Tips for Better Baking
- Coconut Pecan Christmas Wreath Cake Cookies
- Thanksgiving Stuffing Biscuits
- Cranberry Bliss Cheesecake Stuffed Cookies
- Easy Oven-Roasted Pecans
Orange Cream Mini Loaf Cakes
Ingredients
For the Mini Orange Soda Loaf Cakes:
- 1 (15.25 ounce) vanilla cake mix
- 1 (3 ounce) box orange jello mix
- ¾ cup orange soda
- ½ cup unsalted butter, melted
- ½ cup sour cream
- 3 large eggs
- 1 tablespoon orange extract
For the Stabilized Vanilla Whipped Cream Frosting:
- 2 cups heavy whipping cream, cold
- ½ cup powdered sugar
- 2 tablespoons vanilla pudding mix
- ½ teaspoon vanilla extract
- orange gel food coloring
Instructions
For the Orange Soda Mini Cakes:
- Preheat the oven to 350℉. Lightly spray the mini loaf pans with nonstick cooking spray.
- In a large mixing bowl, add the cake mix, orange-flavored Jell-O powder, orange soda, melted butter, sour cream, eggs, and orange extract. Mix until combined. Do not overmix. Let the batter rest for 15 minutes.
- Add ⅓ cup of the batter to each loaf pan.
- Bake for 14 minutes or until a wooden toothpick inserted into the center comes out clean. Note: The cakes were baked in a convection oven, so you may need to adjust the baking time for an electric or gas oven.
For the Stabilized Vanilla Whipped Cream Frosting:
- Before starting, place the mixing bowl and whisk attachment in the freezer for 15 minutes.
- Add the heavy cream, pudding mix, powdered sugar, and vanilla to the mixing bowl. Beat on low until lightly thickened.
- Continue mixing (working your way up to high speed) until the mixture reaches stiff peaks.
- Divide the frosting into two batches. Color one batch of frosting with the orange gel food coloring. Only a drop at a time; the coloring is very concentrated.
- Spoon the white frosting into one small piping bag and the orange frosting into another. Fit a large piping bag with a closed star tip wide enough to fit two piping bags, snip the ends of the small piping bags, and slide them into the large piping bag. Squeeze until both colors of frosting come out. NOTE: I used piping tip #847.
- Add a swirl of frosting along the top of the cake.
- Store covered in the refrigerator until ready to use.
- Good news! These mini loaf cakes freeze beautifully! Pop the plastic top on each decorated loaf, and place in an airtight container.
- NOTE: I tested the whipped cream's structure for three days, and it was just as light and fluffy as the day I made it. I'm sure it would have lasted longer, but we ate it!

A Few More Details Before You Start Baking
Mini loaf cakes and two-color whipped cream piping are a little different from making a standard layer cake, so a few practical questions may come up along the way. These answers cover details that haven’t already been addressed elsewhere in the article.
- Can I use liquid food coloring instead of orange gel coloring? The frosting for these cakes was made with orange gel food coloring. Gel is concentrated, which allows the color to be added drop by drop. Using liquid coloring would be a change from the version used for this recipe.
- Do I have to use piping tip #847? Tip #847 is the closed-star tip I used to create the design shown on these mini loaves. A different piping tip will create a different pattern, so use #847 to reproduce this particular look.
- Why am I getting only white or orange frosting when I first squeeze the piping bag? One of the two inner piping bags may reach the decorating tip before the other. Continue squeezing until both colors appear, then begin decorating the cake.
- Can I tint the whipped cream before it reaches stiff peaks? For this recipe, the stabilized whipped cream is first whipped to stiff peaks, then divided into two batches, with one portion colored orange. Following that order keeps you with the method used for these cakes.
- What if my cakes need longer than 14 minutes? The 14-minute baking time came from a convection oven. Electric and gas ovens may require different cooking times, so use the clean-toothpick test to determine when your cakes are finished.
- Can the mini loaves be frozen with the whipped cream already on top? Yes. These cakes freeze beautifully after decorating. Cover each loaf with its plastic top, then place the cakes in an airtight container before freezing.
- Do all of my orange-and-white swirls need to look alike? No. The two colors are fed separately through the same decorating tip, so some natural variation is expected. The frosting pattern can change slightly from one section of the cake to another without affecting the overall two-tone look.
Once you’ve set up the two-color piping for the first time, the decorating process becomes much easier to understand. The complicated-looking finish is really just one batch of frosting, two colors, and a clever way of loading the piping bag.
Comments
Orange Cream Mini Loaf Cakes — No Comments
HTML tags allowed in your comment: <a href="" title=""> <abbr title=""> <acronym title=""> <b> <blockquote cite=""> <cite> <code> <del datetime=""> <em> <i> <q cite=""> <s> <strike> <strong>