




Mason Jar Lid Cherry Pies: An Adorable Mini Dessert Everyone Will Reach For
Tiny desserts have a way of becoming the star of the dessert table. A tray filled with these Mason Jar Lid Cherry Pies invites guests to slow down for a second look before they ever take a bite. Their golden, flaky crusts and bright cherry filling make them almost irresistible, and their individual size means everyone gets their own little pie without the hassle of slicing and serving.
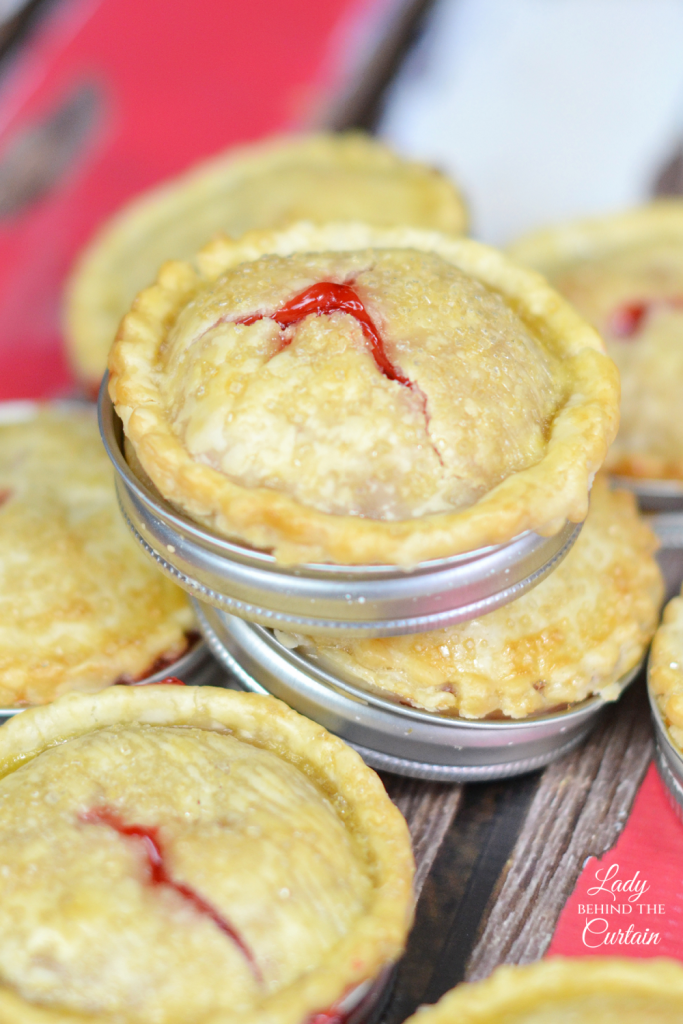
These semi-homemade mini pies are proof that impressive desserts don’t have to require hours in the kitchen. Refrigerated pie crust and canned cherry pie filling do most of the work, transforming a handful of simple ingredients into a dessert that’s charming enough for a bridal shower, festive enough for a holiday gathering, and practical enough for a bake sale or potluck. The result is a treat that looks homemade, travels well, and disappears quickly.
Cherry pie has remained an American favorite for generations, but serving a traditional pie isn’t always the easiest option. Large slices can be messy on a crowded dessert buffet, and guests often hesitate to commit to a full piece when several desserts are available. Mini pies solve that problem beautifully. Their petite size encourages everyone to sample a favorite flavor while leaving room to try another sweet treat.
Baking these pies in regular Mason jar lids gives them their signature look. The straight sides create the appearance of a classic bakery pie in miniature, complete with a flaky bottom crust, bubbling fruit filling, and beautifully browned top. They look far more polished than pies baked in muffin tins, yet they’re surprisingly simple to make.
By the time these little pies come out of the oven, you’ll have a dessert that looks as though it came from a neighborhood bakery, but only you’ll know just how easy it was to create.
The Charm of Baking with Mason Jar Lids
Regular Mason jar lids may seem like an unusual baking tool, but they create beautifully shaped miniature pies with very little effort. The metal rings provide sturdy support for the crust while baking, helping each pie keep its round shape and straight sides. Once baked and cooled, the pies slip out easily, revealing a dessert that looks like a tiny version of a traditional bakery pie.
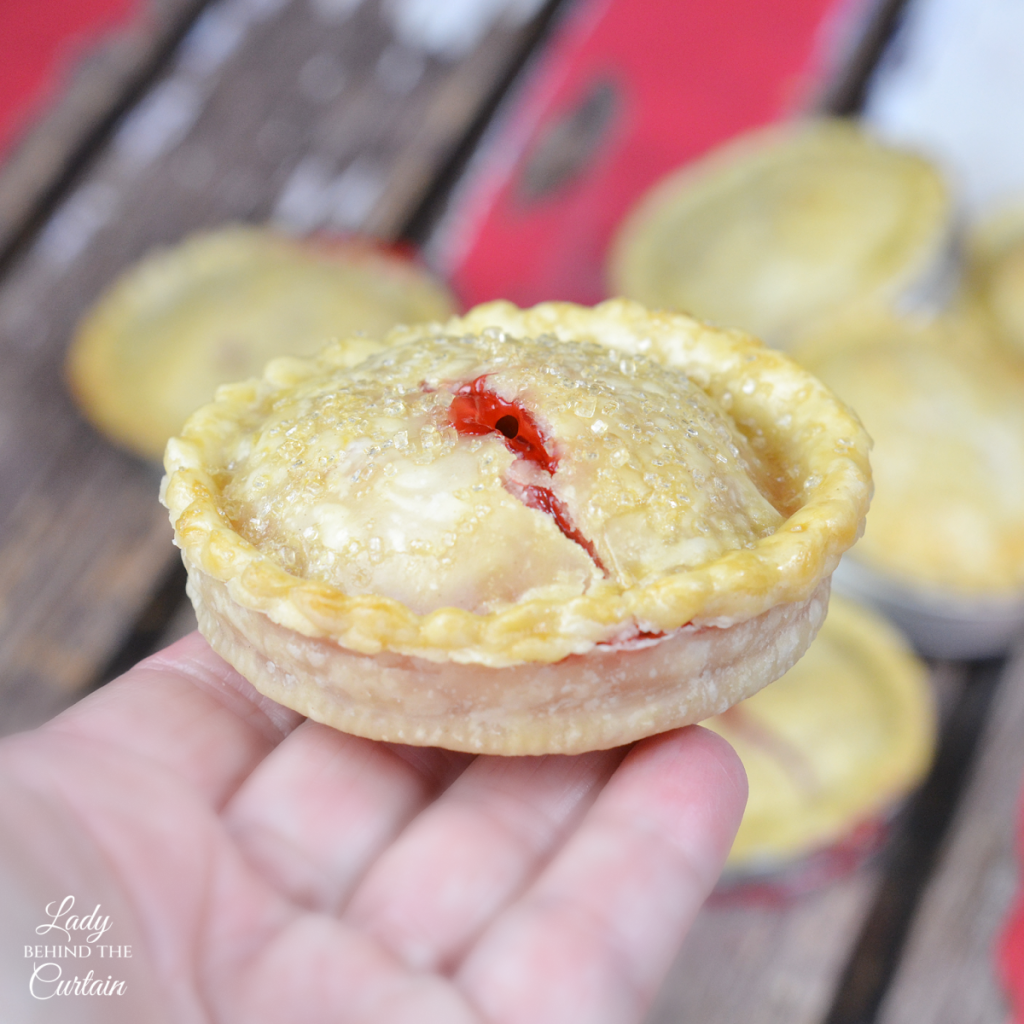
Flipping the flat insert so the crust rests against the smooth metal instead of the rubber seal is a small detail that makes a big difference. The crust releases more easily after baking, and the finished pies have clean, attractive edges. It is one of those little tricks that takes only a few seconds but helps produce a much prettier dessert.
Many home bakers already have Mason jar lids tucked away in a kitchen drawer or pantry. Giving them a second purpose is an inexpensive way to create individual desserts without buying specialty bakeware. Even if you need to purchase a box of lids, they can be washed and reused for future batches, making them a worthwhile addition to your baking supplies.
BEHIND THE CURTAIN: I keep a separate box of Mason jar lids just for baking. That way they’re always ready for mini pies, cookie cups, or other creative desserts, and I never have to borrow the lids from my canning jars.
A Semi-Homemade Shortcut You’ll Love
Homemade pie has a reputation for being time-consuming. Mixing dough, chilling it, rolling it out, trimming edges, and hoping the crust doesn’t shrink can turn pie baking into an all-day project. That’s exactly why this recipe is such a favorite.
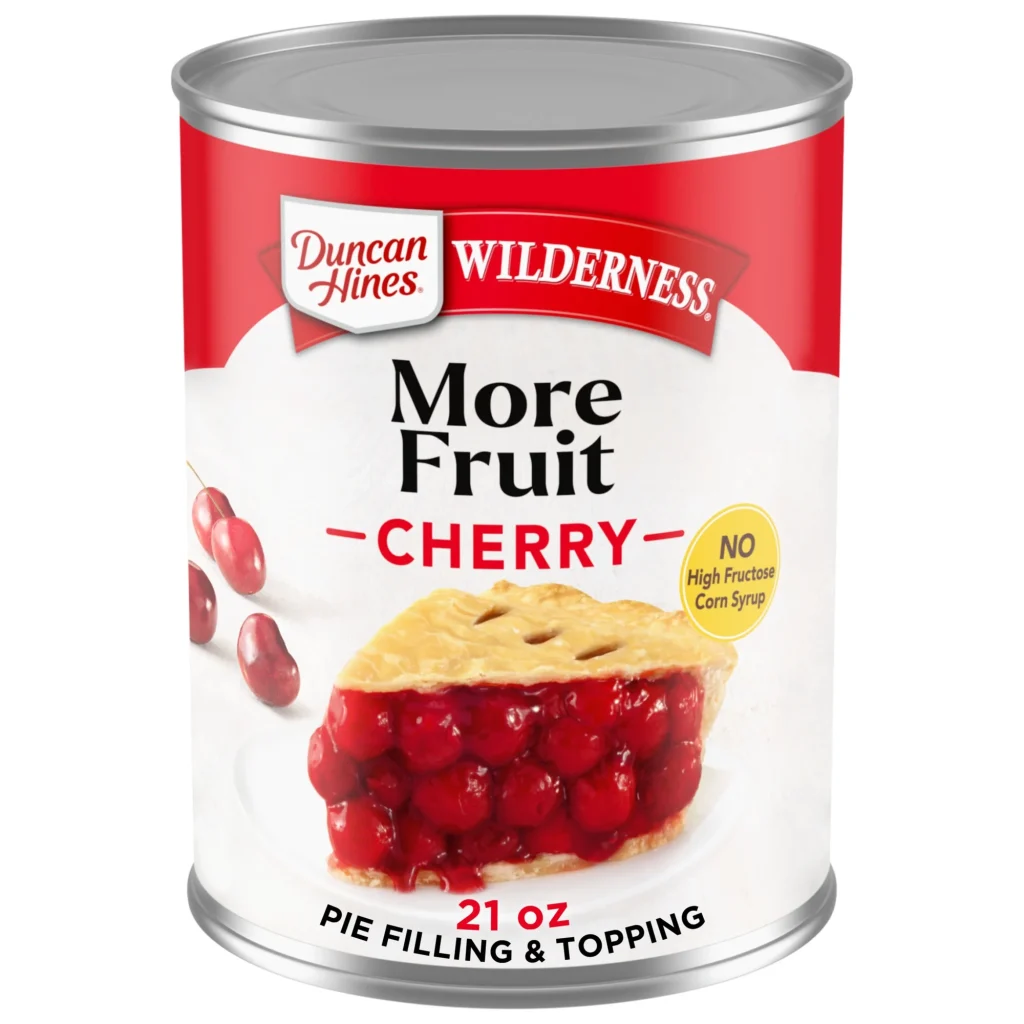
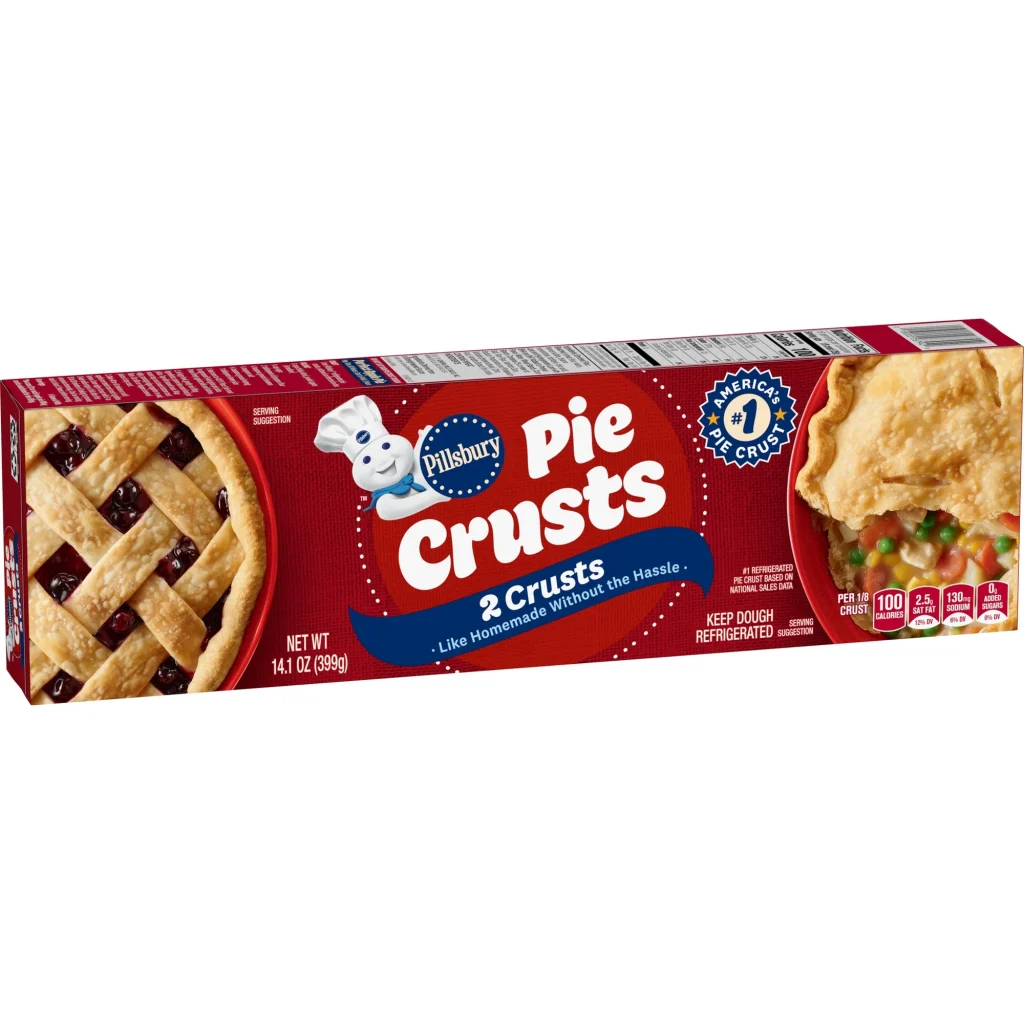
Using refrigerated pie crust dramatically reduces preparation time while still delivering that buttery, flaky texture everyone expects from pie. Pair it with quality canned cherry pie filling, and you’ve eliminated two of the biggest steps without sacrificing the finished dessert.
Semi-homemade recipes often get overlooked, but they’re one of the smartest ways to entertain. They allow you to create something beautiful while spending less time in the kitchen and more time with family and friends. The beauty isn’t that shortcuts exist. It’s choosing shortcuts that don’t compromise the final result.
Why Cherry Filling Works So Well
Cherry pie filling is one of the most reliable fruit fillings available because it’s already cooked to the ideal consistency. That means the filling thickens properly during baking instead of becoming watery inside the tiny pies.
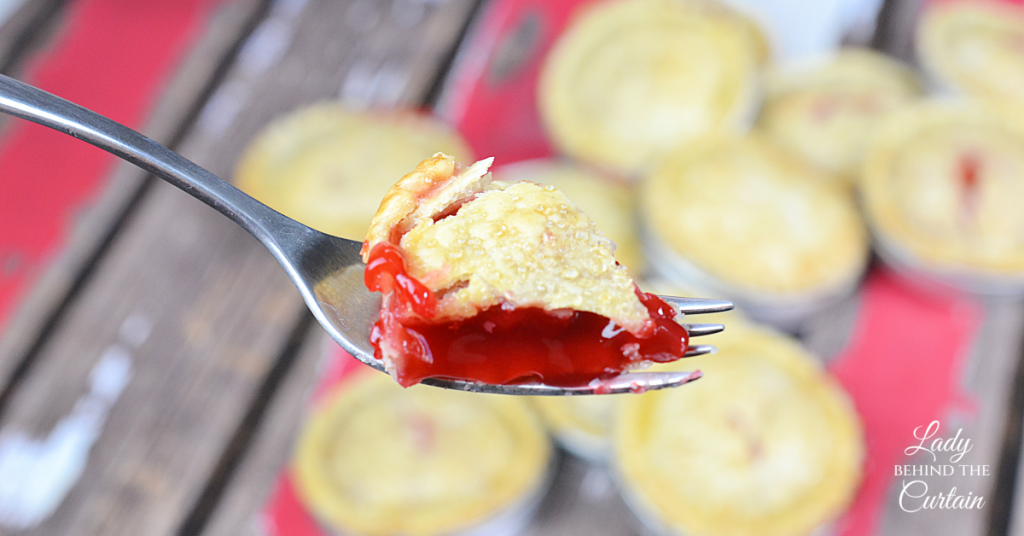
The bright ruby-red cherries also create a beautiful contrast against the golden crust. When one pie is cut open or when someone takes that first bite, the vibrant filling peeking through the flaky pastry instantly catches everyone’s attention.
There’s another practical advantage, too. Since the cherries are already suspended in a thickened sauce, the filling stays inside the pie rather than running across the plate. That’s especially important when serving handheld desserts at parties where guests may not even be sitting down.
The Perfect Mini Pie for Every Celebration
These little pies are surprisingly versatile because they’re easy to serve and don’t require slicing. That makes them ideal anytime you expect guests to be moving around rather than sitting for a formal dessert course.
Here are just a few occasions where they truly shine:
| Occasion | Why They Work So Well |
|---|---|
| Holiday dessert tables | Easy to sample alongside other desserts. |
| Baby or bridal showers | Elegant individual servings with no cutting required. |
| Birthday parties | Kid-friendly and less messy than traditional pie. |
| Backyard barbecues | Portable and easy to carry outdoors. |
| Bake sales | Eye-catching presentation encourages impulse purchases. |
| Potlucks | Guests can simply grab one and mingle. |
Because they’re individually portioned, you can also offer several different pie flavors on the same dessert table without asking guests to choose just one. Imagine cherry, apple, peach, and blueberry all displayed together in matching Mason jar lids. The colorful assortment instantly becomes part of your table décor as much as it is dessert.
Cherry Filling: Beautiful, Reliable, and Delicious
Cherry pie filling does much more than add sweetness. Its thick, glossy syrup helps the filling stay neatly inside each miniature pie while baking. That means fewer spills, less bubbling over the edges, and a cleaner finished dessert.
The cherries themselves create another advantage. Each pie contains several whole cherries, giving every bite a satisfying balance of flaky crust and juicy fruit. Since the filling is already thickened, the crust has a chance to bake completely before the filling becomes overly hot or watery.
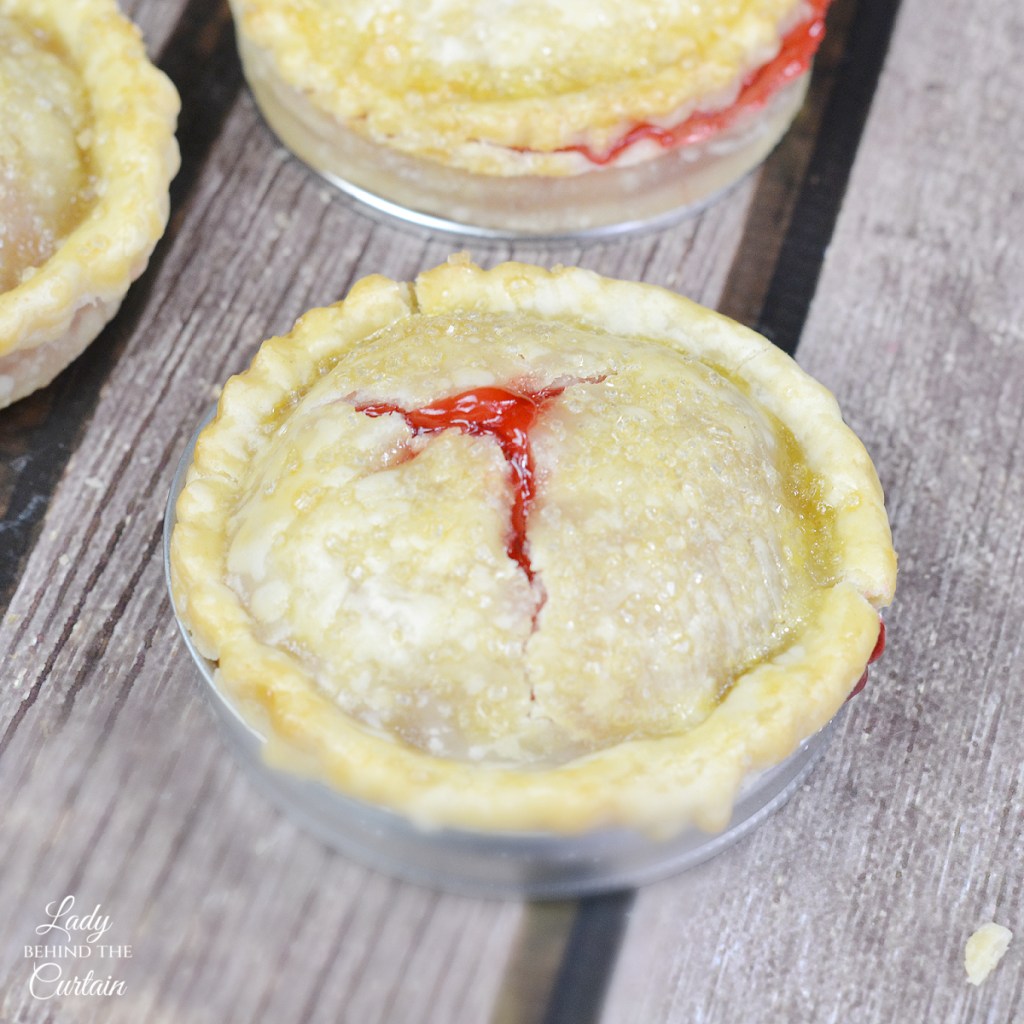
Color plays an important role, too. Deep red cherries peeking through the vents or around the edges create beautiful contrast against the golden crust. That vibrant combination catches people’s attention long before they discover how delicious the pies taste.
Fresh cherries certainly have their place during cherry season, but canned pie filling offers dependable results year-round. Seasonal baking becomes much easier when your favorite fruit pie isn’t limited to a few weeks each summer.
The Finishing Touch That Makes All the Difference
Golden pie crust is one of the first things people notice when a dessert reaches the table. A light coating of egg wash transforms refrigerated pie crust from pale to beautifully browned, giving these miniature pies the rich color associated with homemade bakery pastries.
Color is only part of the story. Egg wash also creates a slightly crisp surface that contrasts beautifully with the tender, flaky layers underneath. That delicate crispness makes the first bite even more satisfying.
WOW! I NEVER KNEW THAT: Steam is actually one of pie crust’s best friends. As the moisture inside the butter and dough heats during baking, it turns into steam and pushes apart the thin layers of pastry. Those tiny pockets of steam are what create the flaky texture everyone hopes for in a great pie crust. Handling the dough gently helps preserve those layers so they can do their job in the oven.
Decorative touches become even more striking after the egg wash is applied. A sprinkle of coarse sugar adds sparkle and a delicate crunch, while small cutouts made from leftover dough give each pie a handcrafted look that makes guests think you spent far more time in the kitchen than you actually did.
Make Mini Pies Ahead with Confidence
Preparing desserts ahead of time takes much of the stress out of entertaining. These miniature pies are an excellent choice because several steps can be completed before baking day.
Pie crust circles can be cut in advance and kept refrigerated until you’re ready to assemble the pies. Filling the crusts also comes together quickly, making assembly a simple task when guests are expected later in the day.
After baking, the pies keep their shape beautifully as they cool. Their small size allows them to cool much faster than a full-sized pie, making them ready to serve in far less time.
If you’re planning a holiday meal, consider baking the pies the day before. Once completely cooled, store them in an airtight container until serving time. A few minutes at room temperature brings the crust back to its best texture, while a quick warming in the oven creates that fresh-from-the-oven experience everyone loves.
BEHIND THE CURTAIN: Preparing dessert the day before a party gives me one less thing to think about. A relaxed host enjoys the celebration just as much as the guests.
Serving Ideas That Turn a Simple Dessert into Something Special
Cherry pie is delicious all on its own, but a few simple additions can make these miniature pies feel even more special.
A dollop of freshly whipped cream adds lightness without overpowering the fruit. Vanilla ice cream creates the classic pie-and-ice-cream combination, while a drizzle of warm chocolate sauce transforms the pies into an indulgent dessert worthy of a dinner party.
Fresh fruit also makes an attractive garnish. A few fresh cherries when they’re in season, a sprig of mint, or a light dusting of powdered sugar gives each pie a finished appearance without requiring extra work.
Building a miniature pie bar is another fun serving idea. Arrange the pies on a large platter and surround them with bowls of whipped cream, vanilla ice cream, toasted sliced almonds, chocolate shavings, caramel sauce, and fresh berries. Guests can personalize their own dessert while adding a little extra fun to the meal.
From Dessert Tables to Thoughtful Gifts
Few desserts are as versatile as these Mason Jar Lid Cherry Pies. Their individual size makes them easy to serve, transport, and package, allowing the same recipe to fit everything from an elegant bridal shower to a neighborhood bake sale. Instead of cutting slices and serving guests one at a time, simply arrange the pies on a platter and let everyone help themselves. Less time serving dessert means more time enjoying the people gathered around your table.
Holiday celebrations are a natural fit for these miniature pies, but they deserve a place at far more than Thanksgiving and Christmas. Their charming size makes them perfect for baby showers, bridal showers, birthday parties, afternoon tea, church suppers, family reunions, and neighborhood potlucks. Guests appreciate being able to enjoy a complete dessert without balancing a large slice of pie on a small paper plate.
| Occasion | Why These Mini Pies Shine |
|---|---|
| Holiday Gatherings | Easy to serve alongside other desserts. |
| Baby & Bridal Showers | Individual servings create an elegant presentation. |
| Birthday Parties | Kid-friendly portions with less mess. |
| Potlucks | Simple to transport and easy for guests to enjoy. |
| Bake Sales | Their unique appearance attracts attention and encourages impulse purchases. |
| Afternoon Tea | A charming addition to a dessert tray. |
Packaging these little pies is almost as enjoyable as baking them. Their sturdy shape fits neatly into bakery boxes, clear clamshell containers, or small treat boxes without worrying about crushed crusts or sliding pie slices. Clear packaging allows the golden crust and bright cherry filling to become part of the presentation, making the dessert look as special as it tastes.
A single pie tucked inside a decorative box makes a thoughtful thank-you gift for a neighbor, teacher, coworker, or friend. Several pies arranged in a window bakery box create a beautiful homemade gift that’s perfect for the holidays, a hostess gift, or a simple way to brighten someone’s day.
Bake sales are where these miniature pies really stand out. Most tables are filled with cookies, brownies, and cupcakes, so a tray of tiny cherry pies immediately catches shoppers’ attention. Attractive packaging, a simple label, and a ribbon or bakery twine give them a polished appearance that makes them look right at home in a specialty bakery.
BEHIND THE CURTAIN: I always look for desserts that can do double duty. These little pies are just as comfortable on a beautifully styled dessert table as they are tucked into a bakery box for gifting or displayed on a bake sale table. Recipes that work for more than one occasion quickly become favorites because they’re ready whenever there’s a reason to celebrate.
Creative Ways to Change It Up
A recipe that can be reinvented throughout the year quickly becomes a favorite. Changing the filling, adding a decorative pie crust, or finishing the pies with a simple garnish creates a completely different dessert without learning a new technique. That versatility makes these Mason Jar Lid Cherry Pies just as welcome at a summer picnic as they are on a holiday dessert table.
| Change It Up With… | Try This |
|---|---|
| Different Pie Fillings | Apple, blueberry, peach, strawberry, raspberry, blackberry, mixed berry, or lemon pie filling all work beautifully using the same baking method. |
| Seasonal Pie Crust Cutouts | Decorate the tops with leaves for fall, pumpkins for Halloween, snowflakes for Christmas, hearts for Valentine’s Day, flowers for spring, or stars for patriotic holidays. |
| Creative Top Crusts | Skip the solid top and create a lattice, woven strips, braided crust, or decorative cutout window that lets the colorful filling peek through. |
| Flavor Boosters | Add a splash of almond extract to cherry filling, vanilla to berry fillings, cinnamon to apple or peach, or a little citrus zest to brighten any fruit filling. |
| Bakery-Style Finishes | Sprinkle coarse sparkling sugar, cinnamon sugar, toasted sliced almonds, chopped pecans, or a light dusting of powdered sugar over the baked pies. |
| Dress Up Dessert Time | Serve warm with vanilla ice cream, whipped cream, caramel sauce, chocolate drizzle, toasted nuts, or fresh fruit for an elegant plated dessert. |
| Create a Mini Pie Bar | Bake several flavors and let guests customize their pies with whipped cream, ice cream, sauces, sprinkles, chopped nuts, and fresh berries. Perfect for birthday parties and family gatherings. |
| Holiday Dessert Trays | Mix several pie flavors on one platter for a colorful assortment. The variety encourages guests to sample more than one flavor and creates a beautiful presentation. |
| Gift Giving | Package one pie in a decorative treat box or several in a window bakery box tied with ribbon for a thoughtful homemade gift. |
| Bake Sale Display | Arrange the pies on different height cake stands or wooden risers instead of laying everything flat on the table. Their unique size and presentation naturally draw shoppers in. |
BEHIND THE CURTAIN: Recipes that can do more than one job always earn a permanent place in my recipe box. A single technique that works with different flavors, holidays, and occasions means you’ll never run out of new ways to serve these charming little pies.
HOW TO POP THE PIE OUT OF THE LID
You can serve the mini pies in the lids or remove them from the bottom of the lid. Hold the bottom of the pie with the lid and pull down the canning ring. Kind of like you would to release a tart from a tart pan.
HOW TO MAKE A LATTICE TOP


Cut strips for the lattice. Place strips in one direction over the top of the pie. Add more strips in the opposite direction. I like to lift every other strip for more of a lattice pattern (see above photo), but you can leave the strips sitting on top of the bottom layer. Brush with egg wash, sprinkle with the cinnamon sugar mixture, and bake. TIP: If using the solid top option, make sure to cut slits so the air can escape.
HOW TO MAKE MINI MASON JAR LID CHERRY PIES
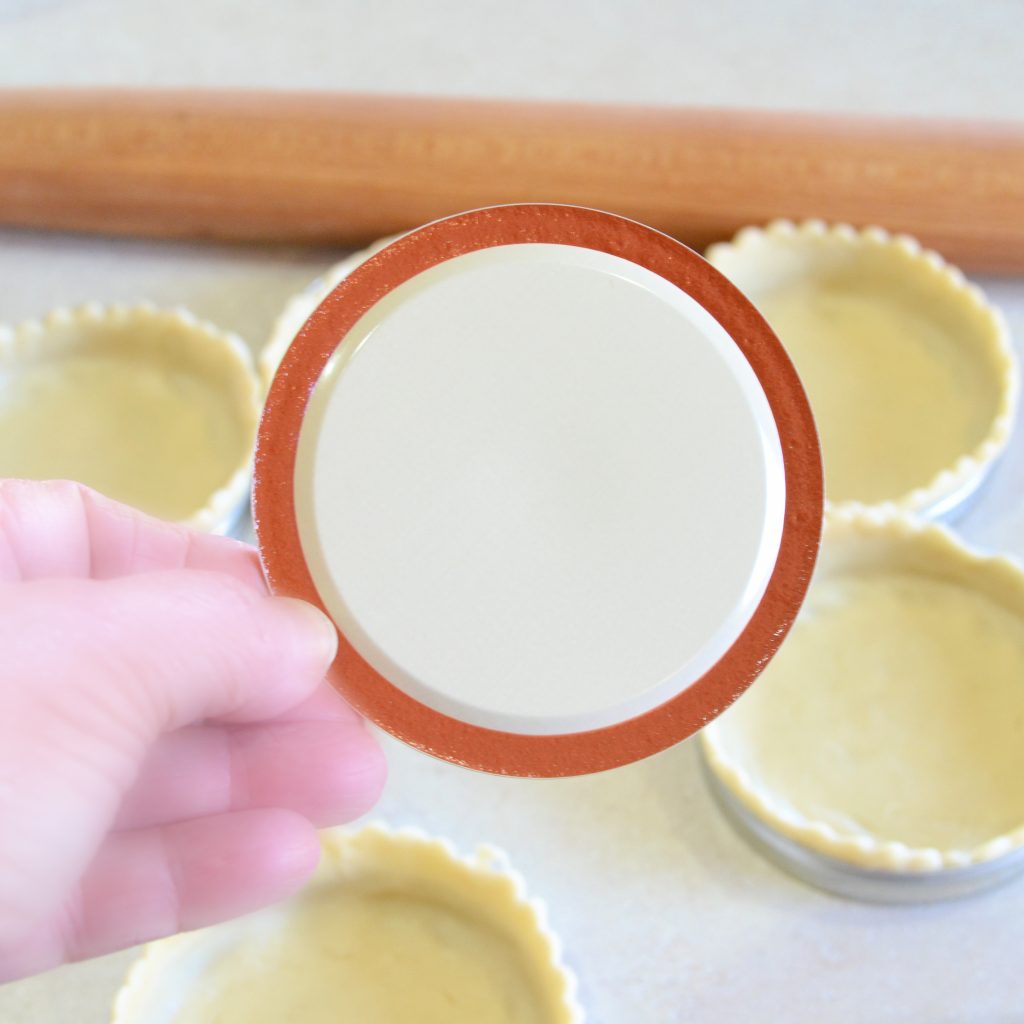
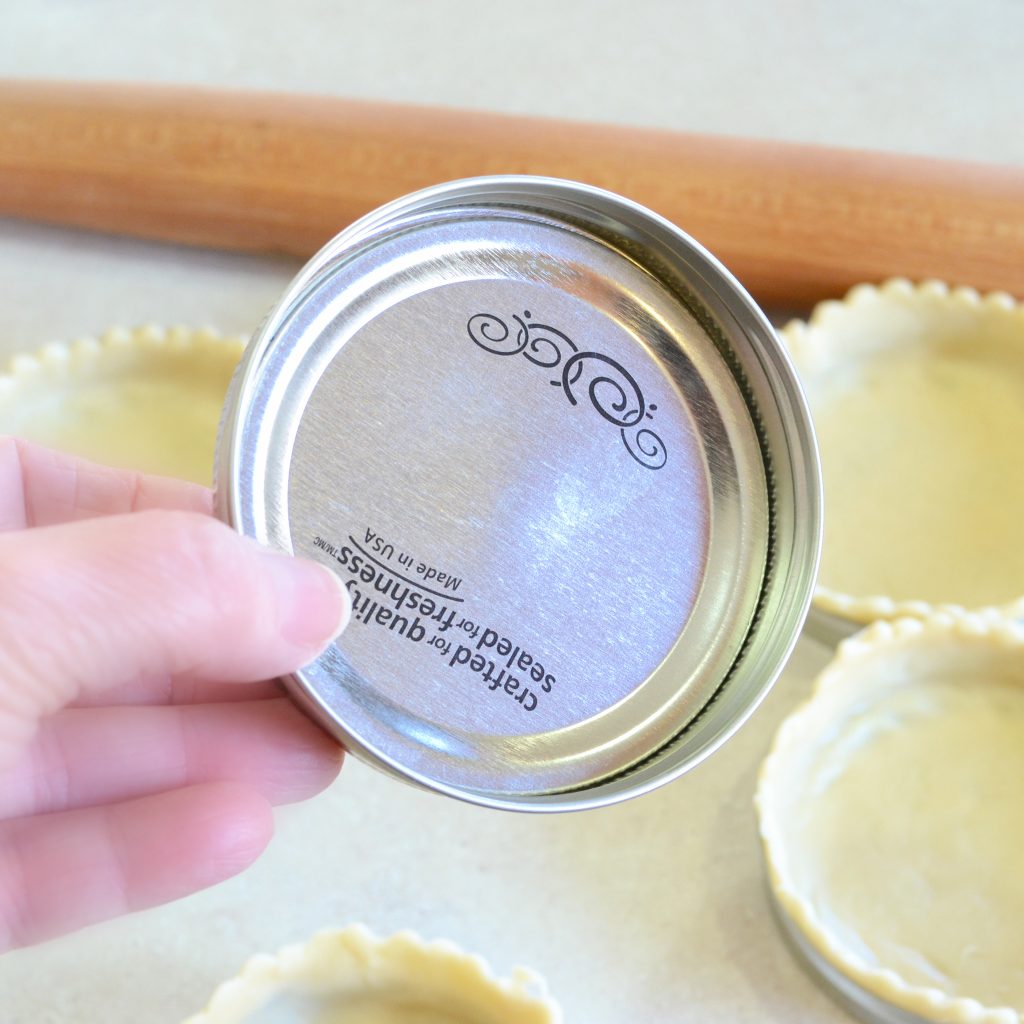
MAKE SURE THE RUBBER SIDE OF THE LID IS FLIPPED OVER BEFORE ADDING THE PIE CRUST.
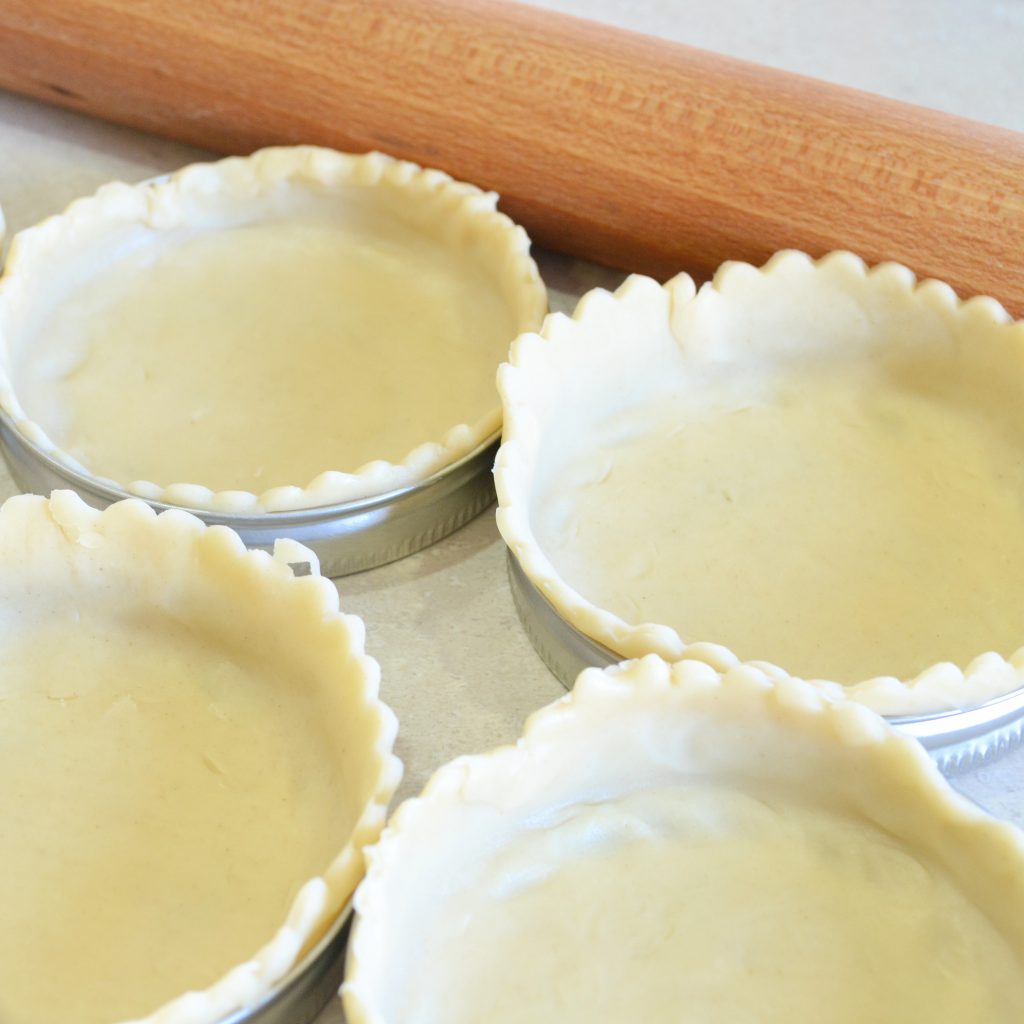
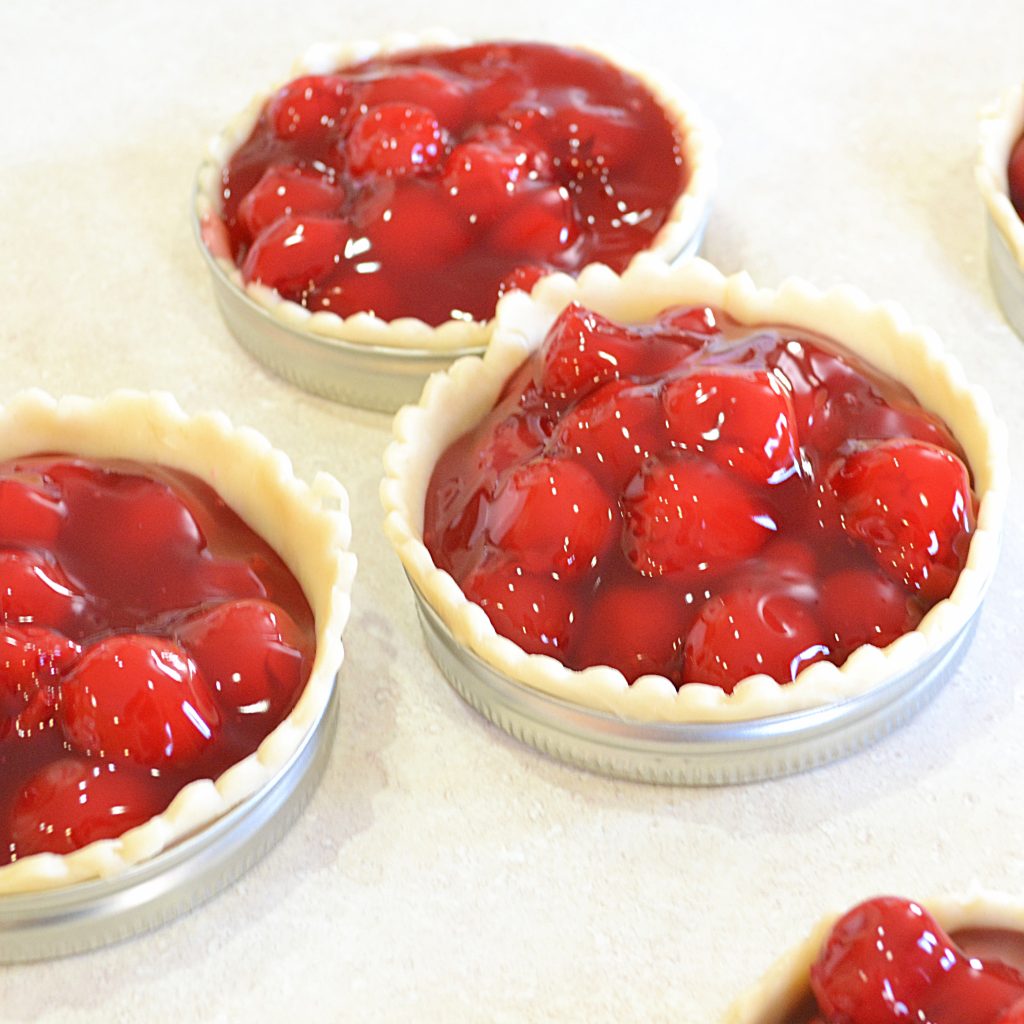
ADD THE DOUGH ROUND TO THE LID, PRESS UP THE SIDES, AND HIGHER THAN THE SIDES.
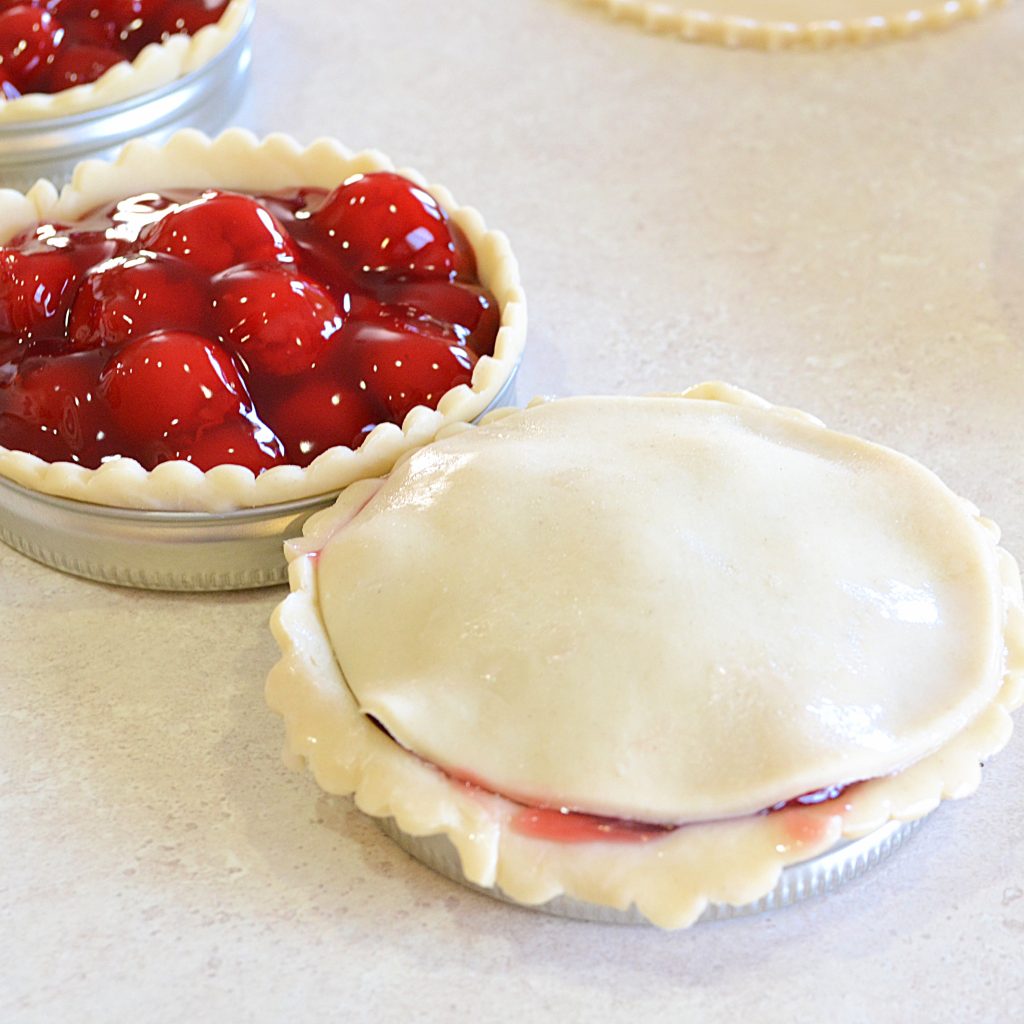
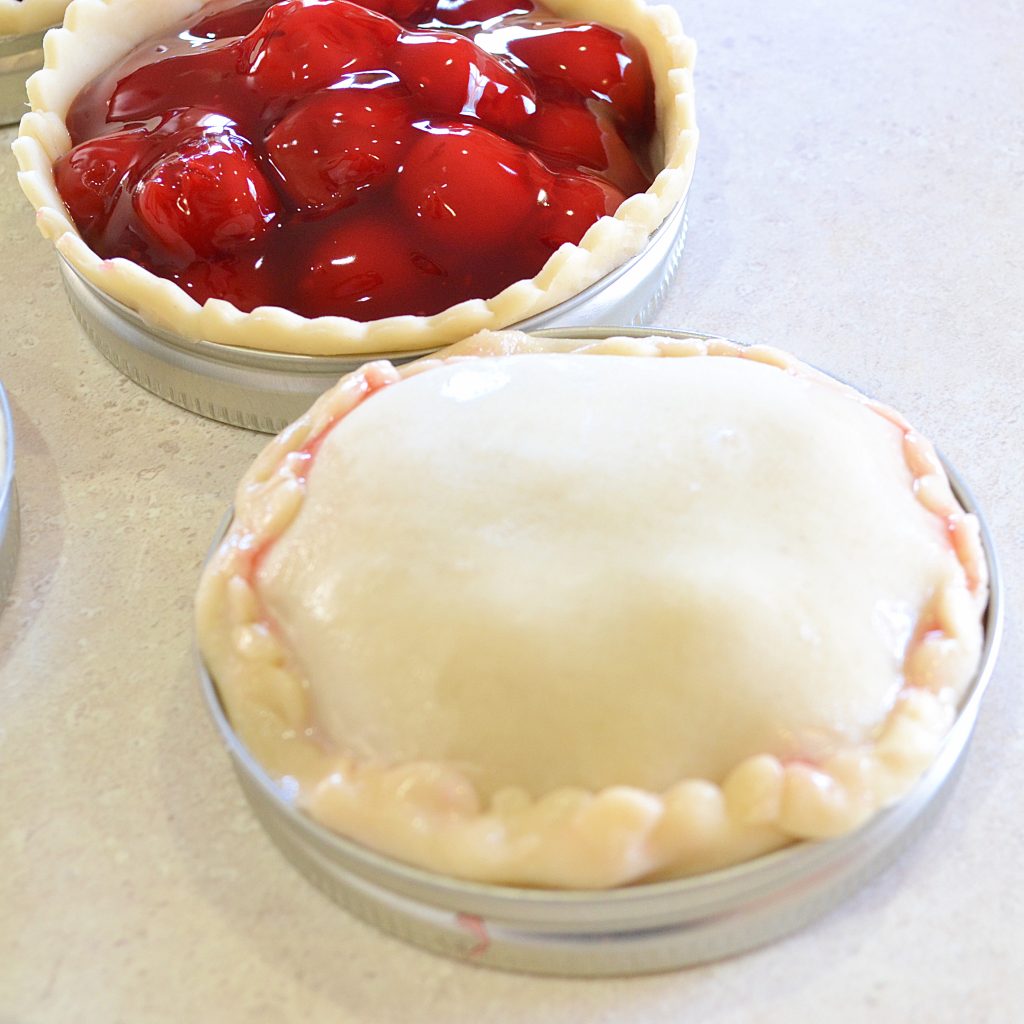
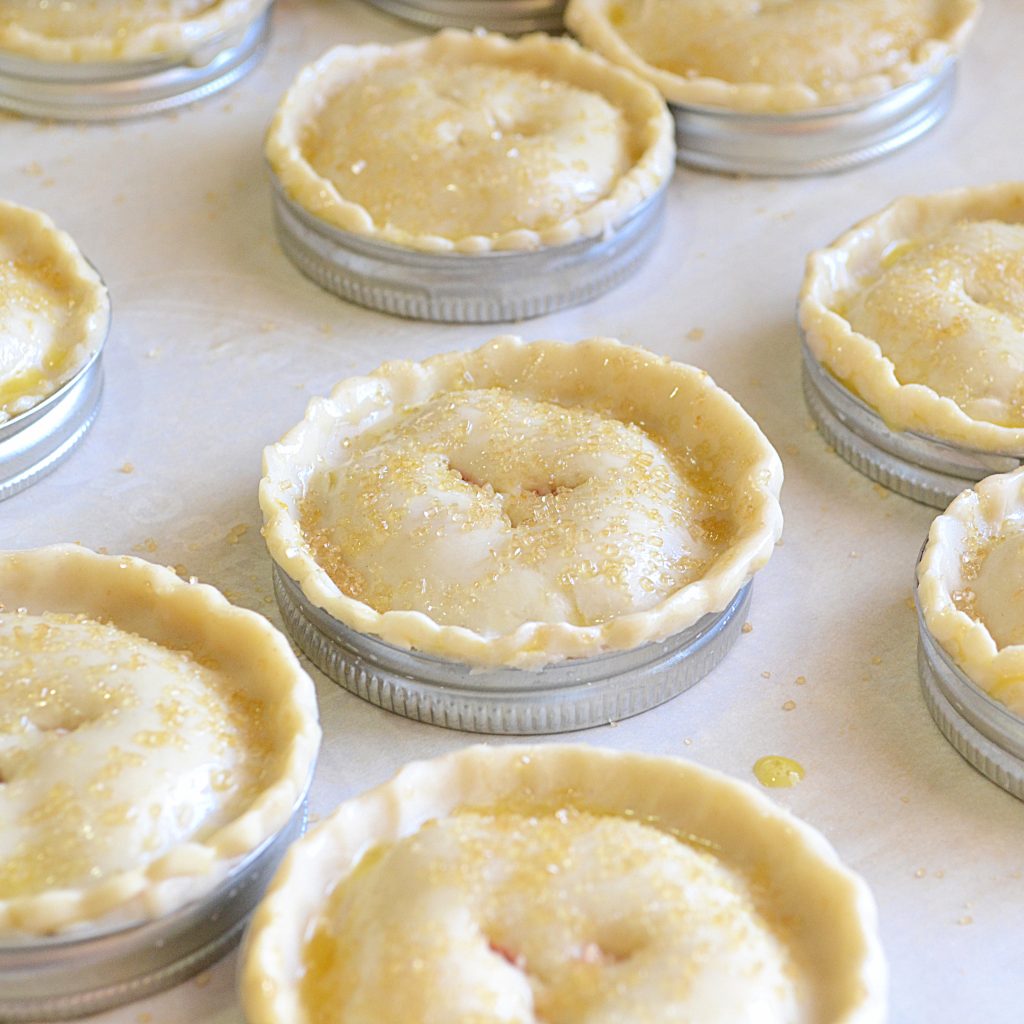
WET THE RIM OF THE LID WITH WATER (MAKE SURE THE DOUGH IS DRAPPED OVER THE TOP OF THE RIM), PLACE THE TOP PIECE OF THE DOUGH ROUND ON TOP, BRING THE BOTTOM DOUGH UP TO THE TOP PIECE OF DOUGH, AND PRESS TOGETHER. CRIMP, CUT SLITS INTO THE DOUGH, AND SPRINKLE WITH RAW SUGAR.
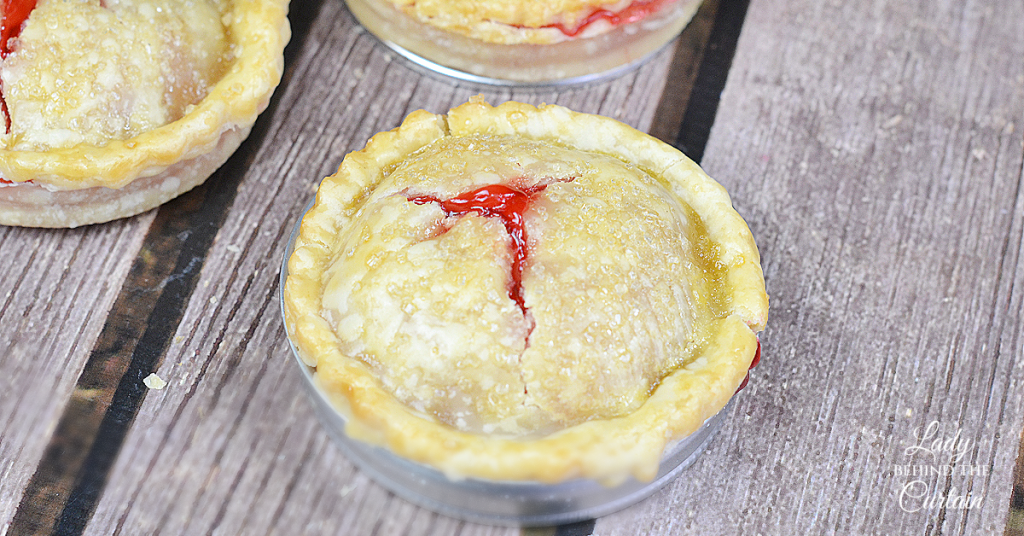
BAKE UNTIL CRISPY AND BUBBLELY.


MORE CHERRY PIE RECIPES


LATEST POSTS
A Letter from My Kitchen
Some recipes become favorites because they’re complicated and impressive. Others earn their place because they make entertaining easier while still bringing smiles to the table. These little Mason Jar Lid Cherry Pies definitely belong in the second category.
Food has always been my favorite way to welcome family and friends. A tray of miniature pies invites people to slow down, visit a little longer, and enjoy a homemade treat that was made with care. Moments like those are often remembered long after the last crumb has disappeared.
I hope these tiny pies find a place at your next gathering, whether you’re hosting a holiday dinner, filling a bake sale table, or simply surprising your family with dessert on an ordinary evening. Sometimes the smallest desserts create the biggest memories.
Happy baking,
Sheryl
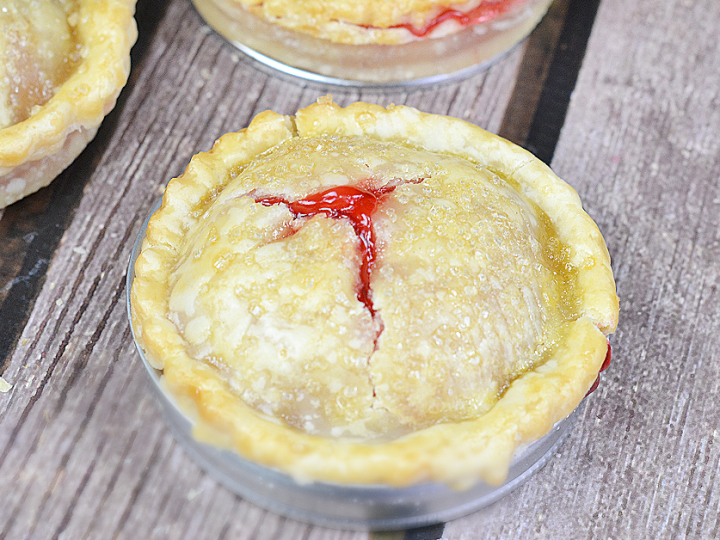
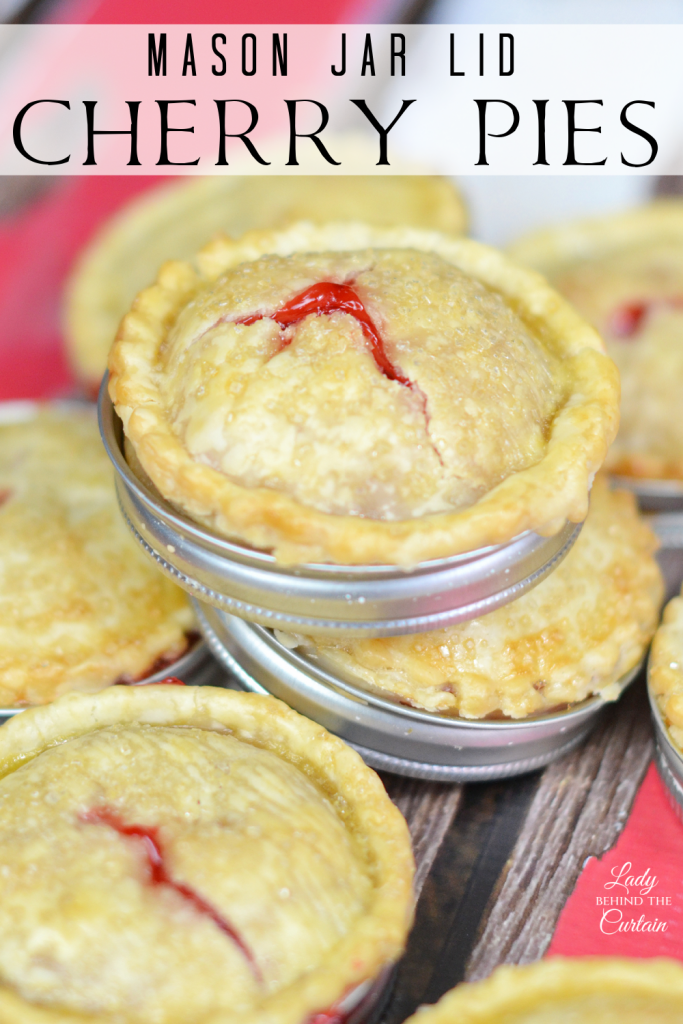
Mason Jar Lid Cherry Pies
Ingredients
- 8 to 9 regular size mason jar lids ( not wide mouth)
- 1 (21 ounce) can cherry pie filling
- 1 (14 ounce) box pie crust
- 1 egg
- 1 tablespoon water
Instructions
- Preheat oven to 375℉. Line a cookie sheet with parchment paper; set aside.
- IMPORTANT STEP: Flip the center insert of the lid so the pie crust sits on the side without the rubber seal.
- Unroll dough; use a 3¼ -inch circle cookie cutter. Cut 8 to 9 tops and 8 to 9 bottoms.
- Place a cut round of dough in the lid; press up the sides and slightly over the top.
- Spoon filling into the pie shell. NOTE: If you overfill the pies, they will burst open.
- Wet your fingertips with water and rub around the rim of the pie; place the pie top on, crimping the top to the bottom.
- Place pies on prepared cookie sheet.
- Whisk together the egg and water; brush on the top of the pie and sprinkle with the raw sugar.
- Cut air vents in the top of the pie.
- Bake for 25 minutes or until the filling is bubbling and the crust is golden brown. NOTE: This filling will fill more than the pie crust will make (about 14); save the filling for later (add to parfaits or over ice cream) or make more pies.
HOW TO POP THE PIE OUT OF THE LID
You can serve the mini pies in the lids or pop them out of the ring. Hold the bottom of the pie with the lid and pull down the ring. Kind of like you would to release a tart from a tart pan.
Frequently Asked Questions-MASON JAR LID CHERRY PIES
Mini desserts often raise different questions than full-sized pies, especially if this is your first time baking with Mason jar lids. Here are a few helpful tips to make sure your cherry pies turn out beautifully every time.
- Can I use homemade cherry pie filling? Absolutely! Homemade cherry pie filling works wonderfully as long as it has been cooked until thick. A filling that’s too thin may bubble over the edges during baking and make the crust soggy.
- Do I have to use cherry pie filling? Not at all. Apple, blueberry, peach, raspberry, strawberry, blackberry, and mixed berry pie fillings all bake beautifully using the same method. Changing the filling is an easy way to create a dessert that fits the season or complements the rest of your menu.
- Can I freeze Mason Jar Lid Cherry Pies? Yes. Allow the pies to cool completely before placing them in an airtight freezer container with parchment paper between the layers if stacking. Freeze for up to three months. Thaw overnight in the refrigerator, then warm them in a 300-degree oven for a few minutes to crisp the crust before serving.
- How do I store leftover mini pies? Store the cooled pies in an airtight container at room temperature for up to two days or in the refrigerator for up to four days. If refrigerated, a few minutes in a warm oven will help restore the flaky texture of the crust.
- Can I make these pies ahead for a party? Yes, and they’re an excellent make-ahead dessert. Bake them a day in advance, let them cool completely, and store them in an airtight container until you’re ready to serve. Preparing dessert ahead of time frees up valuable kitchen space on the day of your gathering.
- Do I have to bake them in Mason jar lids? Mason jar lids give these pies their signature shape, but you can use a muffin pan if needed. The finished pies will be slightly different in appearance, with more rounded sides instead of the classic straight-sided pie shape.
- Can children help make these mini pies? Definitely. Young bakers can help cut the pie crust, press the dough into the lids, spoon in the filling, and brush on the egg wash. It’s a fun recipe for introducing children to pie making because the smaller size is easier to work with than a traditional full-sized pie.
- What can I serve with these mini pies? Vanilla ice cream and freshly whipped cream are classic choices, but they’re also delicious with a drizzle of chocolate sauce, a sprinkle of toasted sliced almonds, or a dusting of powdered sugar. For parties, arrange the pies on a platter with a variety of toppings so guests can create their own favorite combination.
???? I just tried this but only from a quick visual on Pinterest and only AFTER making did I look at recipes to see how to take them out if the rings. That’s when I saw your instruction to bake with rubber seal down – mine was up ???? Will they not pop out now? Is the filling damaged because it baked against the seal?
Hi Ruth, The reason I instruct the rubber seal to be down is to protect the crust in case the rubber melts or gives it a weird taste. All I can say is try one and see what you think.
Are these darling pies easy to remove from the rings and lids? I can’t wait to try them.
Hi Estel, Yes, they are very easy. Enjoy!♥
This is the cutest idea! Planning a bridal shower and these will be perfect. The bride’s nickname is “Angel Pie.” How fitting?!?!
Oh….that sounds like a lot of fun Deeda!
I am going on a camping trip and I want to serve these for our dinner date with our friends two days into our Lake . Powell trip. If I made them, and baked them at home before we left, then froze them, would they be okay if we just kept them cool in the coolers?
That sounds amazing Jeny. Yes…they would be fine.
I just made these Mason lid cherry pies. DELICIOUS! I used the 2 pie crusts(in the 14.1 oz box and made 6 little pies. There was no way I could get 8 pies. Oh, just noticed I have wide mouth lids. I used a full 3 tblsp with wide mouth lids. Mine took 30 min. Sprinkled with powdered sugar before serving.
How should I store these overnight? Covered? I plan to freeze one just to try.
I certainly want to eat more than 1 pie!
Hi Kathleen, Store the Pies in an airtight container. If you don’t plan on all the pies being eaten in a couple of days I would store them in the refrigerator. These pies freeze beautifully. I leave them in the lids and place them in an airtight container to freeze.
I am going to try some key lime pie for the 4th of July BBQ.
That sounds yummy Vicki! 🙂
I can’t believe that i was going to the kitchen supply store for baking rings to make crumpets, English muffins and eggs when in my dishwasher are my canning lids! It never occurred to me to use the lids. What a genius you are, thanks so much. Now I can make the pies and bacon and egg muffins.
You’re Welcome Judy! That sounds like a good breakfast idea too!
That is a very nice ideal for pies & cakes for a party. I am going to make some of these soon. I am going to make me some pecan pies ones.
Yum….Pecan pies will be delicious!
How much pie filling do use if using the wide mouth jar lids? Do you cook them the same time. Thank you
I don’t know Kristi…I would guess about half of what you would get using the regular size lids.
Hi Sheryl,
These are perfect for my apple theme. I was wondering, do you think I would be able to use crescent dough instead of pie crust to save time? I have 1/2 day class and am trying to save time. Thanks, Michelle
Hi Michelle, Not sure how using crescent dough instead of store bought pie crust dough would save time?
I’m thinking of making pumpkin pie for our church’s Voting day bake sale…
I think that’s a great idea Laura. 🙂
We’re having a picnic, and I’m going to attempt these. Thanks.
What a fun picnic!
Great idea for bake sales!!
Oh….that would be super fun Nancy. 🙂
How long before baking should I set out the unbaked frozen pies? Do they need to be room temperature & completely thawed? Would it be better to thaw them in the refrigerator?i have never frozen unbaked pies only pie shells.
Thank You for your help.
Great idea , can’t wait to try them for my art club
Thanks Sharon
WooHoo! that’s awesome Sharon! 🙂
How long can an unbaked pie be frozen?
Hi Denise, I would say at least three to four weeks.
Is it better to freeze before or after baking the pies? How long can I freeze them? I’m making them for a baby shower & will be making about 60 pies, I don’t want to leave it to the last minute. If freezing before baking do I change the baking temperature or time?
Hi Denise, The choice is up to you. If you freeze the pies before you bake them then you will have a flakier crust. I would set them out to defrost before baking them. You might have to adjust the baking time a bit since they will be cold. Good Luck! 🙂
I think I’m going to try making key lime pies with this idea/
Hi Tammy, that sounds really good!
What a great idea. Going to take to work instead of my usual….cookies. Am do excited to try them. Thanks so much for sharing.
How exactly did you crimp these? I’m new to this, I apologize!
Hi Vivian, There are a couple of ways to crimp these little cuties. You can use your fingers like you would crimp a large size pie or use the end a a lollipop stick.
I will make these for Christmas using cranberry and apple!
Sounds delicious Sandra!
I’m excited about making these little gem pies. I would like to make these up and not bake them till day of the party so they are warm and tasty. Can I do that? Should I take them out of pie lid’s once frozen. Then place them in freezer. When ready to bake, put them back in lid and bake.
Hi Sheila, I would freeze them in the lids.
I just took a dozen of these (Apple) out of the oven. They look great and smell fantastic! Empty nesters here too. Can’t wait for hubby to come in from chores and try them! Thank you for sharing!
That’s awesome! They freeze beautifully too!
Do you need to spray lids so that the crust doesn’t stick?
Hi Arcue, No, I didn’t spray them. There’s enough fat in the pie crust dough that you don’t need to. I did when I made my Mason Jar Lid Black Forest Cakes but not the pies.
What size circle do you cut for the wide mouth lids?
Hi Anita, Use a cookie cutter a little larger then the lid or lay the lid on the dough, using the lid as a guide, draw a circle with a knife about 1/2-inch larger then the lid.
Hi Sheryl~ I love this idea! Have you made any other flavors? I am doing a party requesting pecan and peach and would love to try this…was wondering if you had a recipe for either of those for the equivalent of the lids? Thanks!
Hi Tina, Sorry I’ve only made them using cherry pie filling.
I had my 6 year old daughter make these today with a couple of her friends. They turned out great! We made them with apple pie filling instead. De-lish!!!
That is so cool Jennifer! Thanks for sharing! 🙂
Sheryl, Have you tried baking a cake this way ? I thought maybe Chicken pot pie ? I think this is a great idea for children to learn how to bake a small pie. THANKS FOR THIS GREAT IDEA…..MKA
Hi Marilyn, No ….only pie. What a great idea! I will totally try cake. 🙂
i want to make these as a baby shower favor, but i want to use the wide mouth lids… does the recipe measurements change?
Hi Kristen, Yes, the wide mouth lids are a lot larger then the regular. So you will need more pie crust dough and more filling.
what size cookie cutter do i need?
I saw this on FB and am really impressed. How do I get on your mailing list?
Here ya go Joyce! https://www.ladybehindthecurtain.com/contact/
Came to you by way of a FB link that took me to:
http://www.blessings.com/article/30833599/shes-lining-mason-jar-lids-with-dough-for-the-tastiest-reason-now-im-getting-supplies-today?param4=fni-ofe-ble¶m2=ofe-ble¶m1=cl-fb
I didn’t know you were aware they were using your images & not giving you full credit. Anyways – I’m very glad you marked your photos, because now I have to go browse all your other great ideas. Thank you for such a great blog!
Hi Barbara, Yes….I saw it. I notified Country Living…..no response and Blessings.com has no contact information. It really saddens me to see other people profit from my hard work. Thanks so much for looking out for me. 🙂
These look so fun and easy! Thank you for sharing! In reference to the blessings website, I don’t know if they recently changed it, but your website with link is under each photo. So they have given you credit… which is good! 🙂
Hi Lana, Yes, they gave me credit yet posted all MY pictures and the WHOLE recipe….which is NOT good. 🙁
Love this idea! Can’t wait to try it for Valentine’s dessert. It would be good also for mini-pot pies!
Great idea Pennie!
I am wondering if you could use “used” lids from jars that you have already canned food in. Since you use the top of the lid only is there a health danger in washing and reusing these lids? It seems to me that this would be a good way to recycle these lids.
I wouldn’t think so Christine as long as they have been cleaned in hot water. The only thing I would be worried about is if the insert was used on a jar that had something with a strong odor. Like salsa or spaghetti sauce (basically anything with garlic). Even though the rubber side is facing down I’m not sure that is enough to keep the odor from seeping into the pie dough.
These are adorable and perfect size for us empty nesters. These would also be great for Valentine’s Day which I’m going to make and freeze the rest for another day. My husband is going to love them! Thanks so much for sharing!
That’s awesome Joanna! Sounds like the perfect dessert for Valentine’s Day. 🙂
Hi. One question, your recipe says about 5 cherries in 3 Tbls of filling, but the pics show way more than that, are the pies in the pics using the bigger lids? 5 cherries doesn’t sound like enough for me, lol!!
Hi Judy, When I took the pictures I was using the wide mouth jar lids. The directions are for using the regular size jar lids (which are quite a bit smaller).
Of course using the canning lids are safe. They are specifically made to store food!! I would not reuse the rubber ringed part to can foods, however, once they have been baked in the oven. You can reuse them to bake your mini pies, and you can also purchase them individually in any canning section. Sheryl, do you bake them on a pie sheet for stability?
Sandra (Master Food Preserver, County Extension Office)
Hi Sandra, Yes I put the lids on a cookie sheet. 🙂
How do you know it is save to cook with canning jar lids and flats?
Hi Laurel, The jar lids are used for canning food which makes them not only heat safe but food safe too.
Can you make any kind of pies? Like Apple, pumpkin, pecan and cheese cake?
Sure Liza.
Thank you. We’re diabetic so smaller portions are needed. With small children around the smaller pies should be easier for them also. Can’t wait to try.
cant wait until I do this thank you big
pies are to big for one person
Hi!
Love this.?
Where can I purchase the lids.
I don’t need the jars just the lids.
Thank you again.
Adorable idea
I bought just the lids at Walmart but any store that has the jars will also have the lids separate.
Hi, I just love this idea and I can’t wait to try it. My question is, I would like to use the kids to make pie crust shells to use for lemon meringue or chocolate cream pielets. How long should I bake the unfilled crust and at what temperature? I probably use a few marble sized pie weights as well. Thank you
Hi Carol, I would start at 350° and watch them if it’s taking longer then you think it should you can adjust the heat to 375°. The baking time is up to you. Start at 20 minutes and go up from there.
These would be really great to make a head of time and freeze… we are empty nesters and sometimes a whole pie is too much… these hand pies would be perfect to take out of the freezer and pop in the oven…
Hi Lynie, We are empty nesters too and you’re right they are perfect.
Do you grease the inside of the lid before lining with pie crust? Thanks! Love this idea!
Hi Amber, No there’s no need since pie dough is mostly made with some kind of fat (butter or shortening).
Next Saturday is National Pie Day and we are on the hunt for the perfect pie. We may have found it with these! Thanks for a creative idea! Trina and Tina
Thank You!
These look really good, and easy. I question the lid placement too. You say to ‘flip the center insert of the lid’ Do you really cook the pie touching the rubber gasket side? Won’t the heat soften the rubber and stick to pie bottom? Also, do you spray/coat the screw lids/bottoms to prevent sticking? I look forward to giving these a try.
Hi Barb, When you take the lid off a jar the rubber side of the insert is visible. When I say flip it I mean to turn it so that the pie will not be touching the rubber side. 🙂
I’m also confused 🙂 in the instructions it says to place the pie crust so that it is sitting in the side that has the rubber seal? Can you please clarify again. So sorry! Can’t wait to try and want to make sure I don’t mess them up!
Hi Amy, Thanks for catching that. I corrected it to say…. add crust to the side of the lid *without* the rubber seal. Have a GREAT weekend! 🙂
This is the cutiest idea for snacks yet awsome
Thanks Diane!
Love this idea. I’m going to try this with pecan pies for Thanksgiving. Thanks for sharing
Great idea Ginny!
Love these! I’m going to make them for a ladies get together, but I’m wondering if I can use the colored lids? I have red ones, but wasn’t sure they could go in the oven. Thanks!
Hi Rebecca, The red lids you have are they a canning jar lid?
I’m making them for a festival this weekend and wondered if they would keep in the frig or should I freeze them?
Hi Shelia, Yes you can make them early and store them in the refrigerator. I would hold off baking them until the day before.
Thank you ?
Thank you for the info in your last e mail. Do you think that I could add candied jalapenos or regular jalapenos to this recipe. If so, how much would you suggest. Thanking you in advance, bonnie crim
Hi Bonnie, Sorry….I was out with my Granddaughters today enjoying our Fall Festival. To answer your question, I have never worked with candied jalapenos nor have I even tasted them so it’s kind of hard for me to give you any advice towards adding them to a pie. Sorry but I don’t want to give you the wrong advice. 🙂
Does using the metal lids make pie taste tinny?
Hi Carol, Not at all. Mason jar lids are made to help store food.
Great idea! Can you make and bake them then freeze them for an up coming event?
Hi Marilyn, Yes you can freeze these pies. To freeze I would take them out of the lid, place them on a cookie sheet lined with wax paper. Once they are frozen then transfer and stack them in a container with a lid. To defrost I would take them out of the container unless they are in a single layer.
Are they soggy once thawed? I’m considering making some for an upcoming wedding and would love to make ahead and freeze if they will hold up after thawing. Also, have you tried apple pies this way?
Hi Shari, Since this is such an important day I would highly recommend you doing a trial run to make sure these pies turn out the way you want them to. Just make a couple, freeze them for a couple of days and then thaw them to see if they are what you wanted them to be. I haven’t tried apple yet….I am planning of doing that soon since it’s apple season. 🙂
Looking to make these for the farmers market. If pop them out of the lid will they still hold up or would you recommend the stay in the lid? Thanks!
Hi Jen, For selling purposes I would leave them in the lids. If serving at a party I would take them out. They will stay together if handled but I’m not sure if they will at a farmers market.
I think that the pies would look super cute left in the lid with a ribbon tied around the edge of the lid.
These look awesome! I want to try them out! they are so cute!
I can’t even tell you how much I love this idea!! Love, love, LOVE IT!
This is such a clever and creative idea! Love them…I need to try making these!
These are the sweetest little pies, Sheryl!!
Dear Sheryl, how fun and easy. Love this…such a perfect size too. xo, Catherine
this is the most darling idea! I’m loving it! I can’t wait to make them! I’ll probably go crazy this fall!
Can you clarify what to do with the inside lid? Is the rubber side suppose to be up or down? Your picture shows the crust is sitting on the top side of the lid but your recipe instructions says the crust is sitting on top of the rubber seal.
Hi Beverly, If you watch the slide show the first slide is a picture of the top of mason jar lid insert, the next picture shows the way the lid is supposed to be with the rubber side up and the pie on top of it. I hope this clears up any confusion. 🙂
Actually, it shows it with the rubber side down, which I would think would be correct, as you wouldn’t want the rubber baking onto your pies.
Yes, Kathleen that is correct. 🙂
Do you have to grease the lids before putting pie crust in lid
Hi Karla, No…there’s enough fat in the crust to take of that. 😀
What a cute pie’s ..Kids are going to go crazy after seeing this.
Love this idea……can’t wait to make some blueberry pies. Thanks for sharing.
Sounds good. 🙂
these are so cute!
Great idea! I’m an avid canner and very health conscious. This will help to keep my serving sizes small and such a great way to recycle my canning lids!!
Thanks Louise, I think it makes eating cherry pie fun too!